
Old kitchen cabinets makeover refers to upgrading existing cabinetry with professional refinishing, refacing, or spray painting to achieve a like-new look without a full renovation. At our York location on 2710 St Clair Ave W, we help Toronto homeowners refresh doors, frames, and finishes with durable, low-mess methods that modernize quickly.
By Paint2decor INC • Last updated: 2026-06-14
Start Here: Quick Roadmap & TOC
Use this guide to plan a stress-free kitchen cabinet refresh. You’ll learn what a makeover includes, when to refinish vs reface, how pro spraying works, what affects timelines, and local tips for York and Toronto homes. Jump to the section you need, then book a no-obligation assessment.
Here’s how to use this complete guide fast.
- Get definitions: What a makeover is, and what it isn’t.
- Decide your path: Refinishing, refacing, or replacing.
- Follow the steps: Our proven, low-disruption workflow.
- Pick finishes: Color, sheen, and durability options.
- Plan logistics: Timeline, prep, ventilation, and curing.
- Local tips: What works best in York and metro Toronto.
- What Is an Old Kitchen Cabinets Makeover?
- Why It Matters for Value & Daily Living
- How a Professional Makeover Works (Step-by-Step)
- Refinish vs Reface vs Replace (Comparison)
- Finishes, Colors, and Sheens
- Best Practices We Use
- Tools & Resources
- Local Kitchen Considerations (York & Toronto)
- Case Studies & Before/After
- What Affects Your Project Investment
- FAQ
- Conclusion & Next Steps
- Related Articles in Our Kitchen Cluster
Quick Summary
A cabinet makeover updates the look and durability of existing boxes and doors through refinishing, refacing, or pro spraying. It shortens timelines, reduces disruption, and delivers a like-new finish. Choose refinishing for sound doors, refacing for style changes, and pro spraying for factory-smooth results.
For many Toronto kitchens, refinishing or refacing can modernize the space in days, not weeks. You keep your layout, avoid demolition, and gain a resilient, easy-to-clean finish that pairs with new hardware and lighting for a full-room refresh.
What Is an Old Kitchen Cabinets Makeover?
An old kitchen cabinets makeover is a targeted upgrade that preserves cabinet boxes and updates visible surfaces. Methods include refinishing (prep + spray paint), refacing (new doors + skins), and hardware/organizational add-ons. The result is a modern look without tearing out your kitchen.
When we say “makeover,” we mean strategic improvements that transform what you already own. You’ll retain solid cabinet boxes, correct wear, and apply high-performance finishes that resist stains and daily use.
- Refinishing: Clean, repair, sand, prime, and professionally spray doors and frames for a factory-smooth surface.
- Refacing: Replace doors/drawer fronts, apply matching veneer to frames, and update hardware for a new style profile.
- Enhancements: Add soft-close hinges, rollout trays, or organizers to elevate function with the new look.
In our experience, makeovers typically involve 8–12 coordinated steps and 2–4 on-site visits, depending on scope and curing needs. Many projects bundle lighting swaps, backsplash updates, and minor carpentry to complete the transformation efficiently.
Why a Makeover Matters for Resale and Everyday Living
Updating old cabinets improves daily use, visual appeal, and listing photos. It also aligns finishes with modern appliances and countertops. Because you keep existing boxes, a makeover accelerates timelines and keeps families cooking at home with minimal disruption.
Fresh, durable finishes help kitchens perform better in real life. Smooth doors wipe clean faster. Updated hardware eliminates wobbly pulls. A coordinated palette ties counters, flooring, and appliances together so the whole room feels intentional and new.
- Faster refresh: Many refinishing and refacing projects complete in days rather than weeks.
- Less disruption: No demolition, fewer trades, and a tidier jobsite help families maintain routines.
- Style impact: Color and sheen choices define mood—from bright and airy to warm and grounded.
- Sustainable choice: Reusing boxes reduces waste and supports a smaller project footprint.
Toronto buyers respond to updated kitchens, and homeowners enjoy immediate functional gains. If your boxes are sound, a makeover is one of the most effective ways to modernize without a full remodel.
How a Professional Makeover Works (Step-by-Step)
A pro makeover follows a defined sequence: assessment, labeling and removal, repairs, sanding and cleaning, priming, spray finishing, curing, reassembly, and final QA. This controlled workflow delivers a consistent, factory-smooth finish with predictable timelines.
Below is the streamlined Paint2decor INC process we use for York and metro Toronto projects.
- Assessment & planning: Confirm box integrity, note repairs, discuss colors and sheen, and align expectations.
- Protection & labeling: Mask floors, appliances, and counters; assign door/drawer labels for perfect reassembly.
- Removal & transport: Detach doors/drawers; move to a controlled environment for spraying.
- Repairs: Fill dings, tighten fasteners, square up doors; replace worn bumpers and adjust hinges.
- Prep sanding: Typical grits progress 120 → 180 → 220 for adhesion and surface leveling.
- Cleaning & deglossing: Remove residues; ensure a clean, bond-ready surface.
- Bonding primer: Apply specialty primers to block tannins and improve topcoat adhesion.
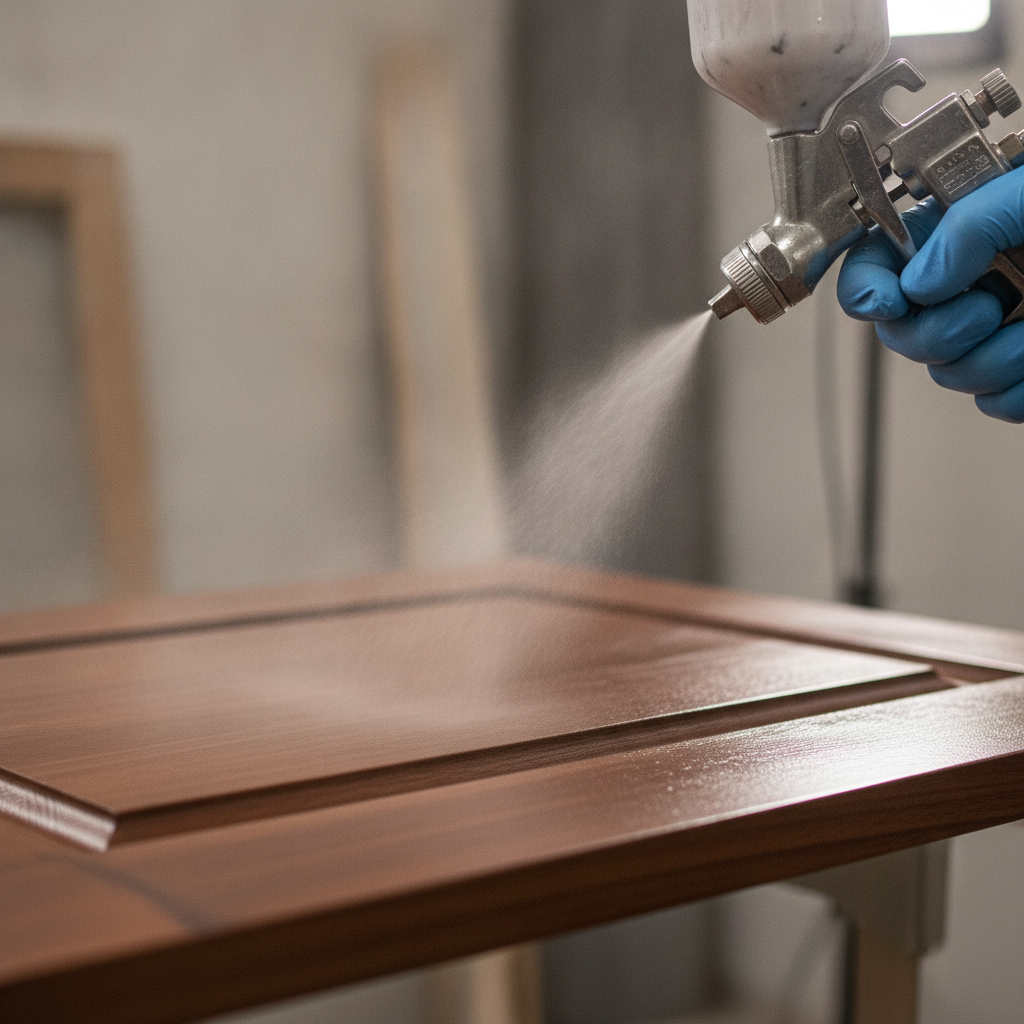
- Pro spray finishing: HVLP or air-assisted airless equipment lays down even, satin-smooth coats.
- Drying & curing: Initial dry may occur within hours; full cure typically requires additional days.
- Reassembly & QA: Reinstall precisely; align doors, set reveals, test soft-close, and polish hardware.
For a deeper dive into technique and results, see our kitchen cabinet refinishing in Toronto explainer, which expands on equipment, coating types, and site protections we use in occupied homes.
Refinishing vs Refacing vs Replacing (Comparison)
Choose refinishing when boxes are solid and you like your layout. Choose refacing for a style reset with new doors. Choose replacing only when boxes are failing or you’re changing the layout. Makeovers preserve boxes, speed timelines, and minimize disruption.
Here’s a side-by-side overview to clarify tradeoffs.
| Approach | Best When | Look & Style | Timeline | Notes |
|---|---|---|---|---|
| Refinishing | Boxes are sturdy; doors are in fair shape | Color change; keep current door style | Typically days, not weeks | Factory-smooth spray finish; durable topcoats |
| Refacing | Boxes are sturdy; want new door style/profile | New doors/drawer fronts + veneered frames | Short project window; scheduled install | Big style upgrade without demolition |
| Replacing | Boxes failing or layout changes required | Fully custom design | Extended timelines | Demolition, new trades, and permits as needed |
For guidance specific to your kitchen, review our cabinet refacing guide and our practical notes on kitchen cabinets makeover options—both expand on durability, scheduling, and finish quality.
Types of Finishes, Colors, and Sheens
The most popular cabinet finishes today are satin and matte, often in warm whites, soft grays, deep navy, or natural wood tones. Professional spray-applied enamel systems provide hardness, stain resistance, and easy cleaning for high-traffic kitchens.
Color does more than change appearance—it changes how the room feels and functions. Lighter tones reflect light and can make compact Toronto kitchens feel larger. Deeper colors add contrast, especially when paired with warm metal hardware or oak floors.
- Sheen: Satin is the sweet spot for durability and low glare; matte hides minor imperfections; semi-gloss amplifies light but shows more texture.
- Color families: Off-whites for timeless appeal; gray-greige for versatility; navy/green for statement islands; wood tones for warmth.
- Topcoats: Modern enamels deliver a hard, scrubbable shell that resists kitchen messes and everyday fingerprints.
Want a color change with technical rigor? Our Toronto refinishing guide breaks down adhesion science, primer chemistry, and why spray application outperforms brush-only results for uniform texture.
Best Practices We Use at Paint2decor INC
We follow a lab-tested workflow: meticulous prep, spray-only finishing for uniform texture, controlled curing, and final QA. Door/drawer labeling ensures perfect reassembly, while masking and ventilation protect your home’s air and surfaces.
Consistent results come from consistent methods. We standardize surface prep, track humidity and temperature, and time curing windows so doors harden fully before reinstallation. That’s how we hit crisp edges, correct reveals, and reliable door swings.
- Controlled environments: We spray in dedicated spaces to reduce dust and produce a factory-grade finish.
- Adhesion stack: Clean → sand (120/180/220) → degloss → bonding primer → enamel topcoats.
- Hardware upgrades: Soft-close hinges and ergonomic pulls often accompany the finish change for a full refresh.
- Quality checks: We inspect millwork lines, sheen uniformity, and door alignment before you sign off.
If you’re comparing approaches to redoing cabinets, our kitchen cabinet refinishing service page outlines our prep standards and how we protect active households during the process.
Tools & Resources Homeowners Should Know
Understanding the workflow and equipment helps you plan confidently. HVLP sprayers, bonding primers, and enamel topcoats produce smooth, durable results. Labeling systems, drying racks, and soft-close hardware complete the professional toolkit for consistent, high-quality outcomes.
Knowing what tools deliver a durable finish lets you ask sharper questions and recognize quality in proposals.
- HVLP sprayers: Fine atomization, excellent transfer efficiency, and smooth, even coats.
- Bonding primers: Critical for adhesion and stain blocking, especially over oak and maple.
- Enamel systems: Hard-wearing finishes designed for kitchens—resist stains and frequent cleaning.
- Shop aids: Drying racks, labeled bags for hardware, and dust extraction to maintain cleanliness.
For DIY background on steps and pitfalls, see guidance from Altima Kitchens & Closets discussing common painting sequences and surface prep considerations you’ll want any provider to respect.

Local Kitchen Considerations in York and Toronto
In York and the broader Toronto area, compact layouts, mixed light, and older oak or maple doors are common. Makeovers that combine satin whites or soft grays with hardware updates often deliver the biggest visual jump while keeping routines intact during the short project window.
Neighborhood rhythms matter. Busy households near transit and schools benefit from masked, well-ventilated work zones and precise scheduling. We often coordinate access windows and ensure cooking can resume quickly after reassembly.
We regularly serve homes around York and across the metro. If you’re close to the Toronto Public Library – Daniel G. Hill Branch or enjoy trails near Smythe Park, our crews plan access and protection around your day-to-day patterns so progress stays smooth.
Local considerations for York
- Plan drop cloth routes and masking so entrances remain usable during peak hours near Jane St at St Clair Ave West transit flows.
- Spring and fall offer steady temperatures that help coatings cure consistently; winter jobs need indoor climate control.
- Older Toronto homes may have varied door profiles; confirm hinge types and door counts during assessment to streamline reassembly.
For a structured walkthrough of our approach, explore the step-by-step in our kitchen cupboard refinishing explainer, which covers logistics unique to GTA homes.
Case Studies & Before/After Examples from the GTA
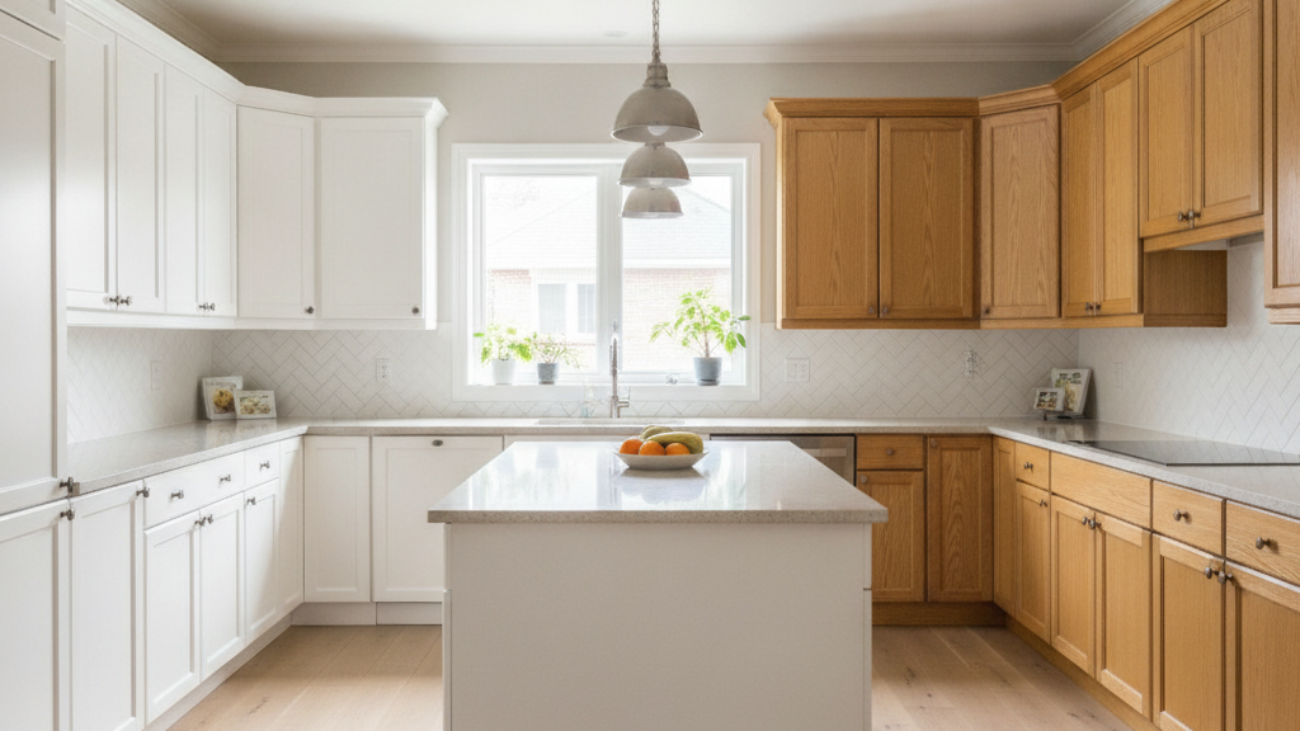
GTA kitchens see the biggest gains when sound boxes meet pro finishing. Classic oak shifts to satin white, raised panels read modern, and new pulls complete the look. Families keep the same layout yet feel like they’ve moved into a brand-new space.
Here are common scenarios we tackle, with outcomes that mirror what you can expect.
- York bungalow with oak doors: Sand, prime, and refinish to satin white; swap hardware; result is a brighter kitchen that pairs with existing floors.
- Midtown condo with maple slab fronts: Refinish to a warm greige; add soft-close hinges; improved acoustics and a calmer, contemporary vibe.
- West-end family home: Reface with Shaker doors and matching frames; new pulls; a strong style reset without layout changes.
Thinking about redoing cabinets across a whole kitchen? Our notes on updating oak cabinets show how grain management and primer choice shape the final look.
What Affects Your Project Investment (No Pricing)
Your investment depends on scope, door count, door style, needed repairs, and finish complexity. Refinishing tends to be the most streamlined, refacing adds new doors and veneer work, and replacing introduces demolition and extended trades coordination.
While we don’t publish prices, we do help you plan. These variables most often influence proposals and timelines.
- Scope & door count: Larger kitchens and detailed profiles add prep and finishing time.
- Existing condition: Repairs, grain management, and substrate type (oak vs maple vs MDF) affect prep steps.
- Finish system: Some colors need extra coats; specialty enamels require defined curing windows.
- Add-ons: New hardware, organizers, and soft-close features expand labor and parts planning.
For perspective on approach decisions, Altima Kitchens & Closets compare reface vs replace considerations—useful context when boxes are solid and layouts are staying put.
Step-by-Step Makeover Checklist You Can Follow
Map your makeover with a simple checklist: inspect boxes, choose method, select color and sheen, schedule protection and removal, approve a spray sample, plan curing windows, and review final QA. Checking these off keeps your project smooth and predictable.
- Inspect for water damage, loose boxes, or failing hinges.
- Choose refinishing, refacing, or replacement based on goals.
- Select color, sheen, and hardware; approve a sprayed sample board.
- Schedule masking, removal, and spray finishing.
- Plan light use of the kitchen during drying/curing windows.
- Confirm reassembly details: hinge types, door reveals, bumper pads.
- Complete QA walkthrough and note care instructions.
Prefer a guided process? Our cabinet refacing in Toronto page outlines coordination details we manage for you—from labeling to on-time reinstallation.
Frequently Asked Questions
Most kitchens with sound boxes qualify for a makeover. Expect a short project window, factory-smooth finishes, and minimal disruption. Choose refinishing for color change, refacing for style change, and replacement only when boxes or layout must change.
How do I know if my cabinets are good candidates?
If your cabinet boxes are sturdy, doors close properly, and there’s no major water damage, you’re likely a strong candidate for refinishing or refacing. We assess hinges, substrates, and repairs during a quick site visit to confirm the best path.
What’s the difference between refinishing and refacing?
Refinishing keeps your existing doors but changes the color and sheen with pro spray systems. Refacing replaces doors and drawer fronts and adds matching veneer to frames for a new style profile. Both preserve your layout and boxes.
How long does a professional cabinet makeover take?
Many projects wrap within days, depending on door count, repairs, and curing time. We plan work so you can still use parts of the kitchen and then resume normal use quickly after reassembly and a brief cure period.
Can I change hardware and add organizers during the makeover?
Yes. New pulls, soft-close hinges, and rollout trays pair well with finish updates. We confirm hole spacing, template placements, and organizer sizing during planning so installation is clean and precise.
Conclusion: Plan Your Makeover with Confidence
A cabinet makeover modernizes fast by reusing sound boxes and upgrading visible surfaces. Decide refinishing vs refacing based on door condition and style goals, plan for spray-applied durability, and schedule a focused, low-disruption project window.
- Key takeaways:
- Refinish for color change; reface for style change; replace only when necessary.
- Pro spray systems deliver the most uniform, durable cabinet finishes.
- Smart masking, labeling, and QA keep projects tidy and on time.
Next step: Ready to see options for your space? Explore our refinishing guide and then contact our York team to schedule a friendly in-home assessment.
Related Articles in Our Kitchen Cluster
Choosing between color-only updates and a full style reset? Our detailed kitchen cabinet refinishing in Toronto page explains adhesion, primers, and spray-applied enamel benefits for daily use.
Curious about Shaker vs slab doors and when to choose new fronts? Start with our cabinet refacing guide for York and metro Toronto homeowners comparing profiles.
Have classic oak or maple? See strategies in updating oak cabinets to manage grain telegraphing and reach a smooth, modern satin finish.
Prefer a quick overview first? Skim our kitchen cabinets makeover primer for timelines, durability notes, and coordination tips that keep families cooking during the project.
For door counts, sequence planning, and coordination basics, our kitchen cupboard refinishing explainer covers labeling, transport, and reassembly details.
Free makeover assessment: Book a quick call with our York team to review door condition, finish options, and a streamlined schedule that minimizes downtime.