
Restaining cupboards is the process of stripping, sanding, and applying new wood stain and protective topcoat to existing cabinet doors, drawers, and frames. It refreshes color and grain without full replacement. For York and Toronto homeowners near 2710 St Clair Ave W, it’s a practical way to modernize kitchens while retaining solid wood construction.
By Paint2decor INC • Last updated: 2026-06-16
Overview: Restaining cupboards in Toronto homes
Cupboard restaining revives real-wood kitchen cabinets by removing the old finish, evening out the surface, and applying a new stain plus a durable clear coat. In York and across Toronto, it’s ideal when doors are structurally sound and you want a richer tone or visible wood grain without replacing cabinets.
Restaining cupboards keeps your existing layout but updates the look. It’s especially effective on maple, oak, or birch doors where grain detail matters. Many Greater Toronto Area kitchens have 20–40 fronts; with a disciplined workflow, projects often finish within a single workweek, including curing windows for the topcoat.
At a glance
- Best for: Solid wood doors in good shape, owners who want natural wood character.
- Avoid if: Doors are thermofoil/laminate or water-damaged beyond repair.
- Typical timeline: 3–5 days, factoring drying between coats.
- Finish options: Oil- or water-based stains; matte to satin topcoats.
- Alternatives: cabinet refinishing, professional repainting, or spray refinishing.
Local considerations for York
- Winter humidity dips can dry wood; schedule restaining when indoor RH is stable to minimize grain raise before topcoating. A small humidifier helps near the finishing zone.
- Plan drop-off/pickup timing to avoid rush hours around Jane St at St Clair Ave West; it keeps door transport smooth and safe.
- If you’re testing colors, collect reference photos in natural light—late afternoon near Smythe Park resembles many York kitchens’ ambient tone.
What is cupboard restaining?
Cupboard restaining is a wood-finishing process that strips or sands away the existing finish and applies a new stain and protective clear coat to cabinet doors, drawers, and frames. It preserves your current layout while changing color depth, warmth, and grain visibility for a refreshed, natural-wood look.
In our experience across Toronto homes, restaining cupboards works best when the cabinet doors are solid wood and free of major water or structural damage. It’s different from painting: stain penetrates wood fibers, highlighting grain; paint sits on top, creating a uniform color block. If you want to keep the wood story visible, restaining is the right path.
- Surfaces included: Doors, drawer fronts, face frames, end panels, moldings.
- Surface prep: Cleaning, deglossing, targeted stripping, progressive sanding.
- Finish system: Stain (wipe or gel), then catalyzed clear coat for durability.
- Result: Color reset with durable protection and tactile wood feel.
For homeowners comparing options, see our kitchen cabinet refinishing guide for a broader look at repainting and respraying paths that complement or replace restaining when wood species or door style suggests a different approach.
Why restaining cupboards matters
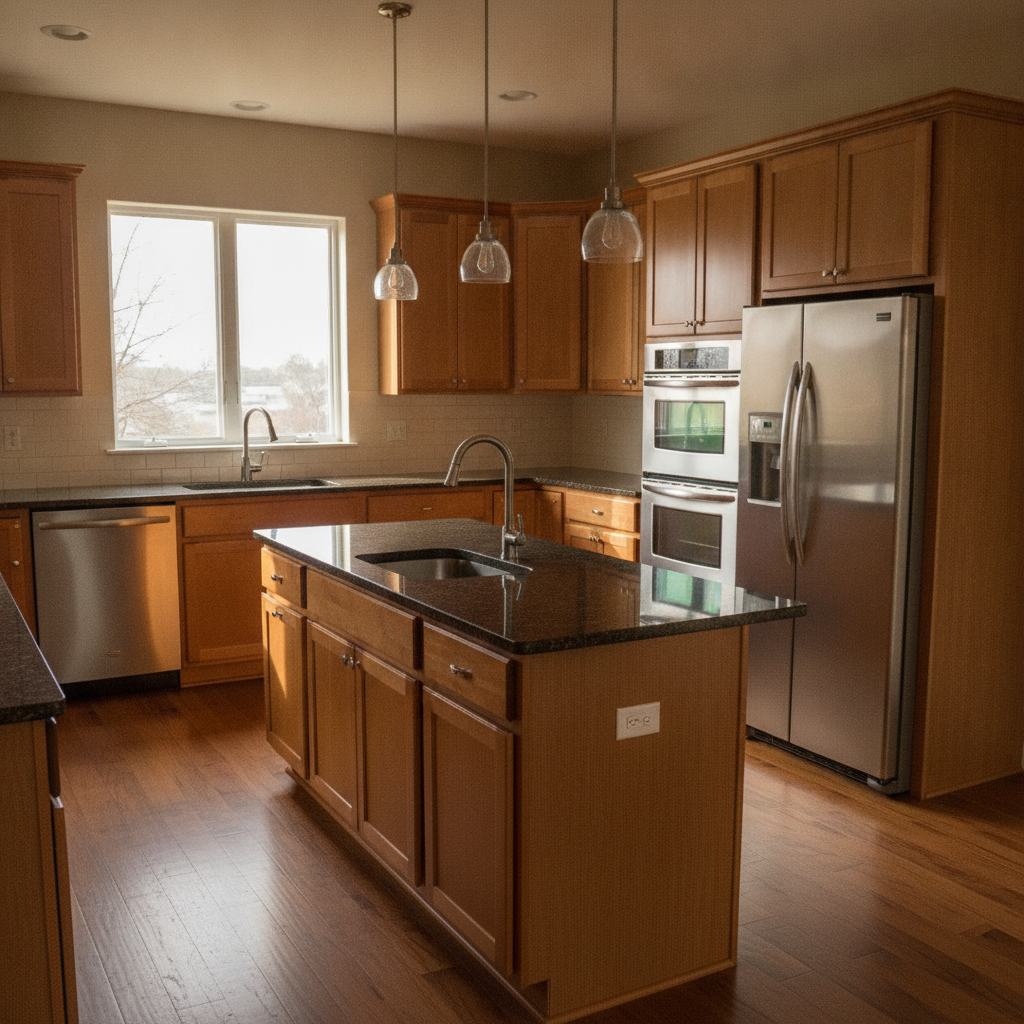
Restaining matters because it modernizes your kitchen’s look while preserving solid wood. It improves visual warmth, masks light wear, and pairs with new hardware for a fast transformation. For sturdy maple or oak doors, it delivers impact without demolition, material waste, or layout changes.
Here’s the thing: many Greater Toronto kitchens were installed 10–20 years ago with orange or honey tones. Taste has shifted toward richer walnut, coffee, or neutral mid-browns. Restaining cupboards lets you pivot to current tones while keeping the same footprint, saving disruption and extending the life of quality doors.
- Design impact: Darkening by even one tone family can visually ground the room, especially with stainless appliances.
- Durability: A catalyzed clear coat adds scratch and moisture resistance, helpful near sinks and dishwashers.
- Sustainability: Reusing doors avoids landfill and keeps construction waste low.
- Speed: With a shop-based finishing workflow, most doors cycle through prep, stain, and clear in 3–4 sessions.
Not sure if your wood is a candidate? Our team often tests a discreet back panel first. If blotching appears on species like birch, we adapt with a conditioner or recommend a painted finish to maintain quality standards.
How restaining cupboards works: step-by-step
The process removes doors and hardware, performs deep cleaning and sanding, tests stain on samples, applies stain in controlled passes, and seals with a durable clear coat. Each coat dries fully before the next, ensuring even color, strong adhesion, and a long-lasting finish.
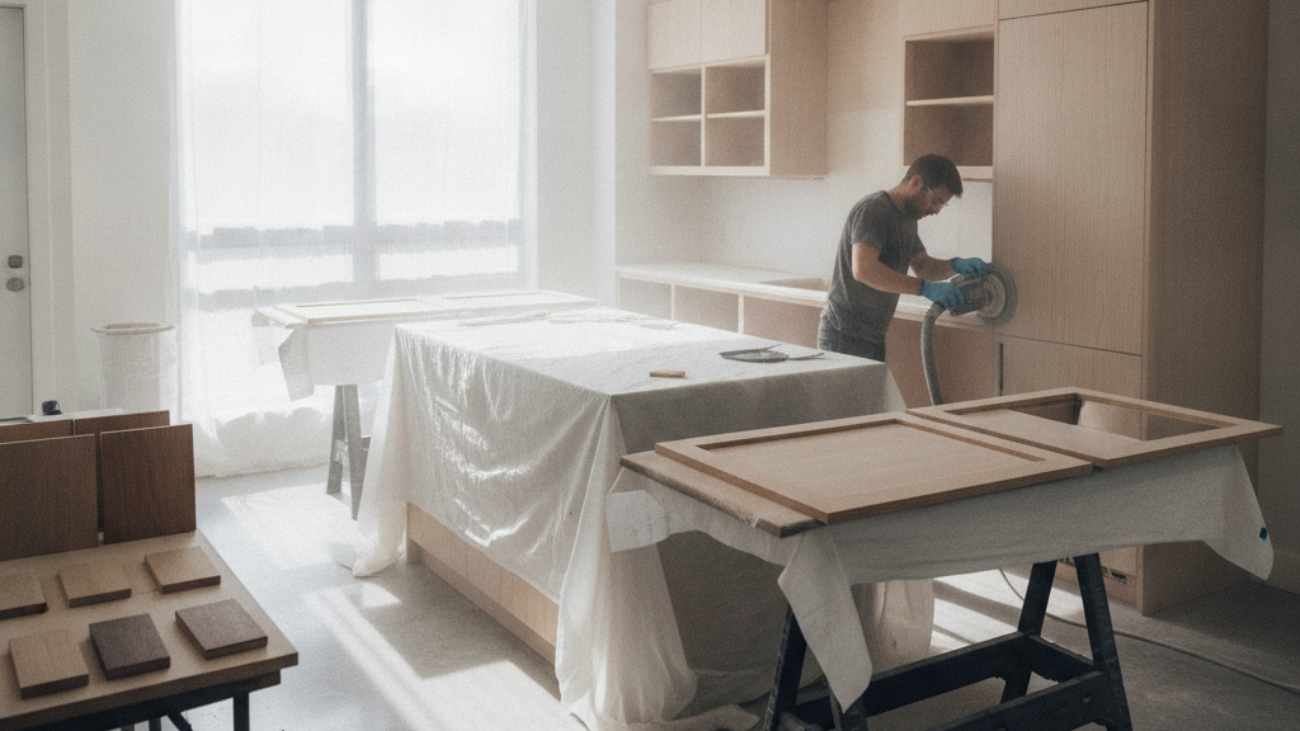
Prep and protection
- Document and label: Photograph each cabinet run and label doors/drawers for precise reassembly.
- Hardware removal: Bag and tag hinges, pulls, and screws.
- Degrease: Kitchens accumulate oils; thorough degreasing prevents adhesion failure.
- Masking: Protect interiors, counters, and floors with clean sheeting and tape lines.
Sanding and repair
- Progressive grits: Typical sequence 120 → 150 → 180 (finish to 220 on hard maple profiles).
- Profile work: Hand-sand beveled edges and inside rails/stiles to avoid flat-spotting.
- Repairs: Fill dings, clamp loose joints, and spot-sand water rings.
- Tack and inspect: Vacuum, tack cloth, and spotlight check under raking light.
Color selection and samples
- Species-aware testing: Maple absorbs differently than oak; always sample on your wood.
- Lighting check: Review samples in morning, midday, and evening light; color shifts 5–10% with Kelvin changes.
- Topcoat sheen: Choose matte for low glare or satin for subtle reflectance that resists fingerprints.
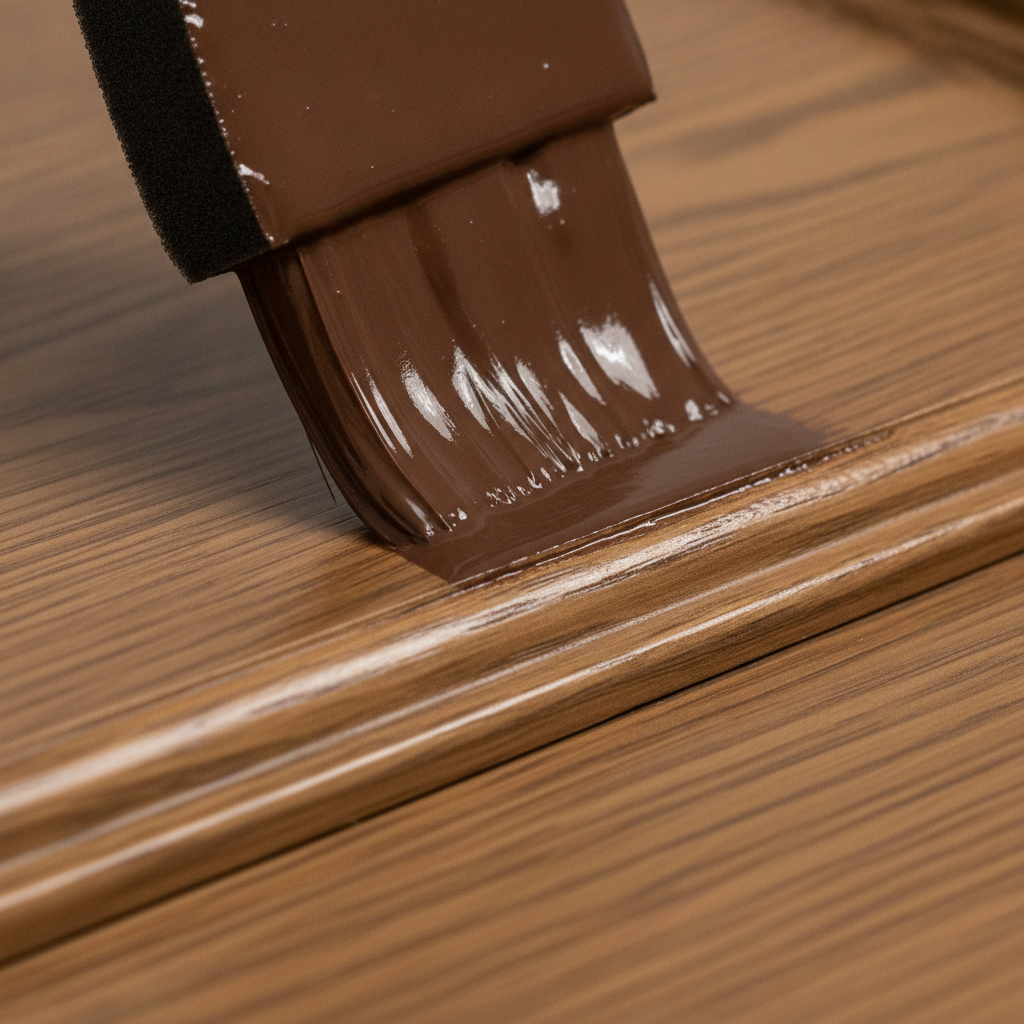
Stain application
- Consistency: Stir stains thoroughly; never shake (air bubbles telegraph into the film).
- Method: Apply with pad or brush, then wipe off with lint-free cloth in 1–3 minutes for even tone.
- Open time: Most stains level best at 60–70°F with moderate humidity; adjust working time accordingly.
- Multiple passes: Build depth gradually; two light coats beat one heavy coat.
Clear coat and cure
- Seal: Lock in color with a catalyzed clear suitable for kitchens.
- Film build: Two to three coats with light scuff-sanding (320 grit) between coats promotes clarity.
- Drying windows: Plan 6–12 hours between coats depending on product system and airflow.
- Reassembly: Use touch-safe cure windows before rehanging; full hardness typically follows within several days.
For a professional finish with spray-grade smoothness, many Toronto homeowners opt for cabinet respraying. It pairs well with stained frames when you want hybrid looks, such as stained island and painted perimeter.
Methods, materials, and stain types
You can restain cupboards with oil-based wiping stains, water-based dyes, or gel stains, each interacting with wood differently. Gel stains reduce blotching on tight-grained species like maple, while water-based systems offer faster recoat times and lower odor. Choose a compatible clear coat to lock in color.
We match the system to the wood and the way your kitchen is used. For high-traffic family hubs, a catalyzed waterborne clear balances toughness and low odor. For deep espresso or walnut tones, a gel stain often delivers consistent coverage on maple rails and profiles without lap marks.
- Oil-based wiping stain: Long open time, rich tone; needs adequate ventilation.
- Water-based stain/dye: Faster recoat (often within hours), easier cleanup, lower odor.
- Gel stain: Thicker body that minimizes blotch; ideal for uneven absorbency.
- Clear coat options: Waterborne 2K polyurethane, conversion varnish, or high-solids acrylics.
Looking for a paint-like uniform finish instead? Our kitchen cabinet refinishing service and cupboard refinishing overview explain when spraying a pigmented coating beats stain.
Restaining vs painting vs refacing
Restaining preserves wood grain and suits solid doors in good shape. Painting covers grain for a uniform color and excels on mixed materials. Refacing replaces doors and adds new veneer to frames for a style reset. Your choice hinges on door condition, desired look, and timeline.
Homeowners often weigh aesthetics, durability, and speed. If your doors are structurally sound but stylistically dated, restaining or painting wins on turnaround. If the door profile itself feels outdated, refacing provides a new style with modern shaker or slab fronts while keeping the cabinet boxes.
| Approach | Best when | Look & feel | Typical timeline | Notes |
|---|---|---|---|---|
| Restaining | Solid wood, good condition | Visible grain, warm tone | 3–5 days | Highlights real wood; needs careful prep |
| Painting/Spraying | Mixed materials or uneven grain | Uniform color, modern sheens | 3–6 days | Pairs well with new hardware |
| Refacing | Old door style, boxes sound | Brand-new doors/veneers | About a week | Style reset without full remodel |
Explore style-forward options in our cabinet renovation guide and deep dive on kitchen cabinet refinishing in Toronto to see which path fits your space and timeline.
Best practices and quality checks
Achieve professional results by controlling dust, sanding progressively, testing stain on the actual wood, and allowing full dry times between coats. Finish with a kitchen-grade clear coat and reassemble with careful hardware alignment to prevent wear and door sag.
- Dust control: Use vac-assisted sanding and tack cloth; dust nibs telegraph in clear coats.
- Edge discipline: Avoid over-sanding edges that can burn through stain and appear light.
- Grain direction: Always wipe off stain with the grain to prevent swirl shadows.
- Adhesion testing: A light crosshatch test on a hidden area confirms film integrity before mass production.
- Hinge alignment: Record hinge settings on removal; fine-tune on rehang to maintain reveals within 1–2 mm.
For extra reading on cabinet repaint process ideas, see this third-party overview of how to paint kitchen cabinets. While painting differs from staining, many prep standards overlap: clean surface, precise sanding, dust control, and careful reassembly.
Tools and resources
Successful restaining needs the right abrasives, applicators, and protective gear. Use progressive sanding grits, foam or pad applicators for stain, lint-free wipes, and a kitchen-grade clear coat system. Good lighting, labeled bags for hardware, and racking for drying accelerate clean, consistent results.
- Abrasives: 120–220 grit sheets and pads; 320 grit for intercoat scuffing.
- Applicators: Foam brushes, stain pads, lint-free cloths.
- Protection: Nitrile gloves, respirator appropriate to finish system, eye protection.
- Environment: Sturdy stands, drying racks, bright raking light.
- Documentation: Door labels, run-order photos, and hinge setting notes.
If you’d like a pro shop to handle finishing conditions, our team manages doors in a controlled environment and coordinates on-site frame work as part of our refinishing service.
Case examples from York and Toronto
In York and across Toronto, we see three common restaining scenarios: light-to-medium tone updates on maple, warming up ash or birch with gel stain, and partial refreshes where an island goes darker than perimeter runs. Each approach modernizes the space without changing the layout.
- Maple shade shift: A York homeowner moved from yellowed maple to a balanced medium brown; we sampled three gel stains before locking in tone.
- Two-tone upgrade: In West Toronto, perimeter doors stayed natural, while the island gained a walnut depth for contrast with quartz tops.
- Repair + refresh: Drawer fronts near a sink showed light water marks; localized repair, stain blend, and clear brought uniformity back.
For homeowners exploring a full-color reset instead of stain, our spray refinishing service shows how a pristine sprayed finish pairs with modern hardware and lighting for a cohesive update.
Maintenance and longevity
Keep restained cupboards looking new by cleaning with non-abrasive, pH-neutral cleaners, addressing splashes promptly, and avoiding prolonged steam exposure. A quality clear coat provides daily protection; light maintenance preserves sheen and clarity for years.
- Cleaning: Microfiber cloth and mild cleaner—avoid harsh solvents.
- Moisture control: Use range hoods when boiling; wipe dishwasher steam lines.
- Hardware care: Periodically tighten handles and adjust hinges to keep reveals even.
- Touch-ups: Keep a labeled sample board; minor nicks on edges can be blended with matching stain markers.
For general cabinetry care ideas from another perspective, browse this piece on maintaining your kitchen cabinets. It reinforces gentle cleaning and steady humidity—best practices we also follow in the GTA.
When not to restain
Skip restaining if doors are laminate/thermofoil, heavily water-damaged, or structurally compromised. If the profile style feels outdated or you want a paint-smooth, grain-free look, choose professional repainting or refacing instead for a reliable, long-term result.
- Laminate or thermofoil: These surfaces don’t absorb stain; opt for paint-grade solutions.
- Severe swelling or delamination: Prioritize repair or door replacement.
- Style mismatch: If you dislike the panel profile, refacing is the cleanest reset.
Not sure which route is best? Compare our refinishing in Toronto and spray options to align finish, durability, and timeline with how your family actually uses the kitchen.
DIY vs. professional restaining
DIY can work for small projects if you have ventilation, time, and patience. Professional shops deliver faster turnaround, dust control, and spray-quality clears that stand up to heavy use. Evaluate your tools, space, and schedule before choosing.
- DIY scope: A bathroom vanity or a small bank of doors is manageable for many homeowners.
- Pro scope: Kitchens with 25–40 fronts benefit from shop-grade racking and curing.
- Learning curve: Expect several hours of prep and test pieces to dial color and wipe timing.
If you want a walkthrough of a paint-centric path to understand prep parallels, this third-party guide to painting kitchen cabinets outlines similar sequencing even though the finish materials differ from stain systems.
Frequently asked questions about restaining cupboards
Homeowners ask about eligibility, timelines, odor, and whether stain hides damage. Below are quick answers to the most common questions we hear in York and across Toronto, distilled from hundreds of cabinet refinishing and respraying projects.
Can you restain cupboards if they’re already stained and sealed?
Yes—provided the doors are solid wood and in good condition. We clean, degloss, and sand to create a fresh mechanical bond, then apply the new stain and a compatible clear coat. We always sample on your actual wood to confirm color and absorption before full production.
How long does cupboard restaining take from start to finish?
Most kitchens with 20–40 fronts take about 3–5 days, including dry times between stain and clear coats. Doors are finished in a controlled setting, and frames are handled on-site. Reassembly follows once the finish reaches a safe handling cure window.
Will stain cover scratches and water marks?
Minor surface scratches often blend after sanding and staining, but deeper gouges and water swelling need targeted repair first. We fill, sand, and spot-test so the final color reads even across rails, stiles, and panels before topcoating.
Is restaining a good idea for laminate or thermofoil doors?
No. These materials don’t absorb stain. If you prefer a solid-color look, professional spraying with a cabinet-grade coating is the more durable choice. If the style feels dated, consider refacing with new doors and matching veneers.
Conclusion and next steps
If your cabinets are solid wood and the layout works, restaining cupboards is a fast, sustainable way to transform your kitchen. Confirm wood species and condition, sample two to three tones, and plan a disciplined finishing sequence for durable, beautiful results.
- Key takeaways:
- Restaining preserves wood grain and warmth.
- Prep quality drives finish quality—don’t rush sanding or dust control.
- Gel stains tame blotching on tight-grained species like maple.
- Clear coat choice determines day-to-day durability.
- Light CTA: Explore our refinishing service overview and cupboard refinishing guide, then bookmark our Toronto refinishing guide to plan your update.
Thinking through color, sheen, and wood species is easier with a pro. If you’re in York or the broader Toronto area, we’re ready to help you choose between restaining, repainting, and refacing so your kitchen matches how you live—now and years from now.