
Kitchen cabinet refinishing is the professional restoration and spray-painting of your existing cabinet doors and boxes to deliver a factory-smooth finish without replacement. At Paint2decor INC in York (2710 St Clair Ave W), this service modernizes kitchens fast, limits disruption, and keeps quality wood in use—ideal for Toronto-area homes seeking a refreshed look.
By Paint2decor INC • Last updated: May 24, 2026
Overview and Table of Contents
This complete guide explains what kitchen cabinet refinishing is, why it matters for Toronto homes, and exactly how the process works—from prep and priming to HVLP spray application and reinstallation. Use the checklists, tables, and examples to choose the right approach and plan a smooth, durable makeover.
Here’s what you’ll find below, designed for quick scanning and confident decision-making.
- What kitchen cabinet refinishing includes—and what it doesn’t
- Why refinishing matters for York and greater Toronto homes
- Step-by-step process with quality checkpoints
- Methods, coatings, and finish options that last
- Best practices and maintenance tips
- Tools we trust on GTA projects
- Local case snapshots and before/after insights
- FAQ and a simple next-steps checklist
What Is Kitchen Cabinet Refinishing?
Kitchen cabinet refinishing is restoring and repainting existing cabinet doors, drawer fronts, and boxes with professional primers and spray finishes. The goal is a factory-smooth result without replacing cabinetry. It preserves layout and structure while updating color, sheen, and hardware for a fresh, modern kitchen.
Refinishing focuses on renewing surfaces while keeping your cabinet boxes and doors. It differs from refacing (which swaps doors and applies new skins) and replacement (which changes boxes, layout, and often counters and floors).
What stays and what changes
- Stays: Cabinet boxes, shelves, door/drawer cores, layout.
- Changes: Color and topcoat system, door/drawer hardware, optional soft-close hinges, minor repairs and caulking.
Done right, a refinished kitchen looks like it rolled out of a spray booth—clean edges, consistent sheen, and durable, easy-clean surfaces. Typical professional systems involve an adhesion primer and 1–2 spray topcoats applied with HVLP equipment for uniform coverage.
Comparing options? Our cabinet refacing guide explains when changing door style makes more sense, while professional cabinet painting dives into spray vs. brush/roller results.
Why Kitchen Cabinet Refinishing Matters in Toronto
Refinishing fits Toronto living: shorter timelines, less demolition, and a big visual impact. For York homes, it refreshes oak, maple, or MDF cabinets quickly while reducing material waste. You keep the layout you like and gain a durable sprayed finish that stands up to daily cooking and cleaning.
In our experience across the GTA, refinishing is often the fastest path to a “new kitchen” feel without a full renovation. Many projects complete in under two weeks including on- and off-site work, with the kitchen operational most days.
- Less disruption: Limited demolition and a tidy, staged workflow mean fewer days out of routine.
- Lower waste: Reuse of boxes and doors keeps solid wood in service longer and diverts materials from landfill.
- Local fit: Performs well on common Toronto cabinet species like oak, maple, and MDF; high-traffic urban kitchens benefit from pro-grade topcoats.
Refinishing also pairs nicely with selective upgrades—like modern pulls, under-cabinet lighting, or a new backsplash—to elevate the whole space without changing the footprint. For homeowners debating options, see our cabinet respraying guide for technique details and durability insights.
Local considerations for York
- Plan drop-off and reinstallation around neighborhood traffic near Jane St at St Clair Ave West to keep the project timeline smooth.
- Toronto’s humidity swings affect dry and cure times; allow a full week of gentle use after final coats for the best long-term performance.
- If you use nearby parks like Magwood Park for weekend gatherings, coordinate install days midweek to keep your kitchen available for meal prep.
How Kitchen Cabinet Refinishing Works (Step-by-Step)
A proven refinishing workflow protects your home, removes oils and gloss, repairs flaws, and applies pro primers and HVLP-sprayed topcoats. Doors cure off-site; boxes are masked and sprayed on-site. The project ends with precise reinstallation, hardware alignment, and a care guide for long-term durability.
Below is the practical, quality-controlled sequence we follow on Toronto projects.
- Protect and label on-site. Floors, counters, and appliances are masked and sealed; each door/drawer is labeled for perfect reassembly.
- Remove doors and transport to the spray studio. This allows controlled airflow, dust management, and even temperature during spraying and curing.
- Deep clean and degloss. Degreasers lift cooking residues; sanding scuffs the surface to boost primer adhesion, especially on high-touch edges and rails.
- Repairs and caulk. We fill dings, tighten fasteners, and close micro-gaps at stiles and crown so the final finish looks seamless.
- Adhesion primer. Bonding primers grip slick factory finishes and tannin-prone woods; they set the stage for uniform color and sheen.
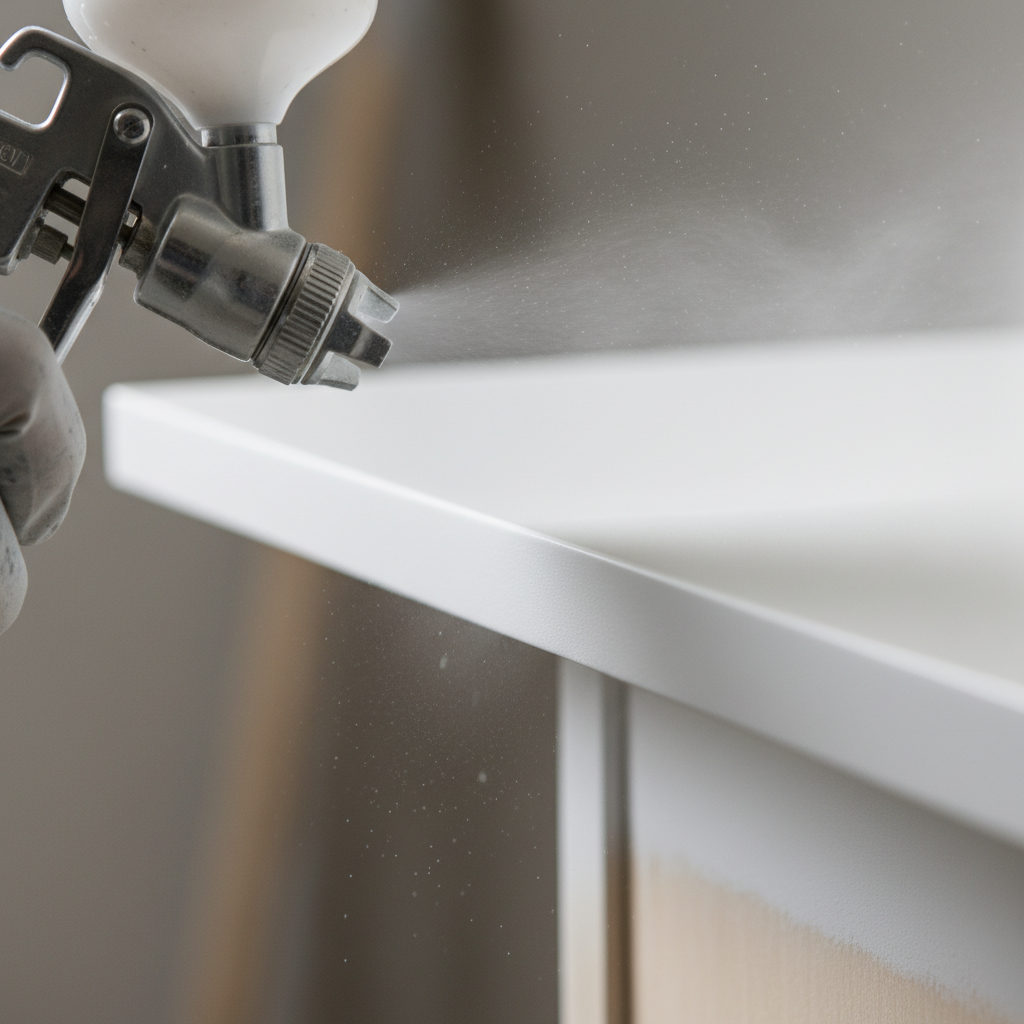
- HVLP spray coats. HVLP (high-volume, low-pressure) systems atomize coatings into a fine, even mist for a factory look on panels and profiles.
- Cure and quality checks. Doors rest on drying racks; we inspect sheen consistency, edge coverage, and back-of-door touchpoints.
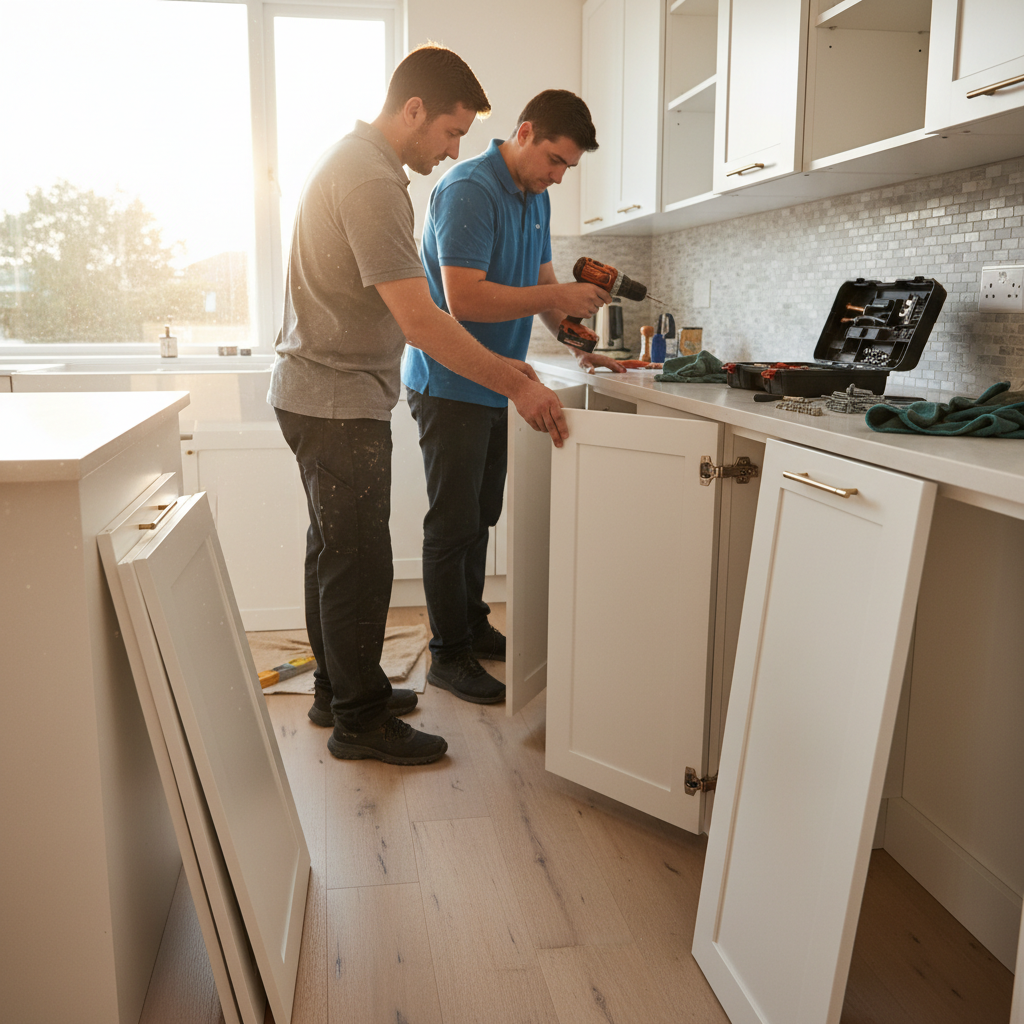
- Reinstall and align. Soft-close hinges, handle placement, and door reveals are adjusted for even gaps and satisfying close action.
- Final walkthrough and care guide. We review curing windows, cleaning tips, and simple do’s and don’ts for the first week.
Professional detail matters: adhesion, dust control, and steady spray technique are what separate a long-lasting refinish from a weekend paint job. If you’re weighing alternatives, our resurfacing vs. refacing comparison offers more context.
Methods, Coatings, and Finish Options
The most reliable refinishing systems pair a bonding primer with pro-grade sprayed topcoats in satin or semi-gloss. HVLP sprayers deliver the smoothest look. Popular Toronto palettes include warm whites, greige, and deep navy or green accents for islands or lowers.
Our GTA projects commonly use spray-applied systems engineered for kitchen wear—resistant to moisture, fingerprints, and routine cleaning.
Application methods
- HVLP spray: The standard for a factory-like finish and even film build on profiles and edges.
- Brush/roller hybrid: Acceptable for boxes in tight spaces; we still prefer a sprayed door face for uniform sheen.
- On-site vs. off-site: Boxes are masked and addressed on-site; doors and drawers cure best in a controlled studio.
Finish and color choices
- Sheen: Satin minimizes fingerprints yet reflects light pleasantly; semi-gloss suits high-scrub zones.
- Color trends: Whites and soft neutrals for upper cabinets; richer colors on islands or base runs to anchor the space.
- Hardware pairings: Brushed brass warms whites; matte black sharpens contemporary palettes.
Considering a different door style entirely? Explore when new doors make sense in our kitchen cabinet refacing overview.
Refinishing vs. Refacing vs. Replacement
Refinishing renews your existing doors and boxes with spray-applied coatings. Refacing swaps door styles and adds new skins to boxes. Replacement rebuilds the entire cabinet system. Choose based on cabinet condition, layout goals, and whether you want a style change or a full reconfiguration.
| Path | What changes | Project scope | Good when… |
|---|---|---|---|
| Refinishing | Color, sheen, hardware | Surface renewal | You like the layout and door style; boxes are sound |
| Refacing | Door style + box skins | Moderate change | You want a new door profile but keep layout |
| Replacement | Everything | Major renovation | You’re changing layout, boxes, and often counters |
For deeper detail on door-style changes and veneers, see our refacing contractors guide. For surface-only updates, continue below for best practices that protect your investment.
Best Practices for a Durable Finish
Longevity comes from meticulous prep, clean spray technique, and patient curing. Mask thoroughly, repair and sand correctly, use a bonding primer, and allow a full cure window before heavy use. Add soft-close hardware and felt bumpers to reduce impact on freshly finished edges.
Prep and protection
- Mask thoroughly: Edge seal plastic and paper to floors, counters, and appliances; keep dust out of returns.
- Degloss and sand: Focus on handles, edges, and door rails where oils accumulate; consistent scratch patterns help primer bite uniformly.
- Repair first: Fill dings and caulk micro-gaps so the final sheen reads clean and uninterrupted.
Application and curing
- Prime to bond: Use an adhesion primer compatible with the topcoat system for a locked-in base.
- Even spray passes: Maintain steady distance and overlap to avoid sags and dry spray; inspect edges and profiles between coats.
- Respect the cure: Light use in the first week; install bumpers and avoid harsh cleaners until full cure.
Small add-ons improve daily performance. Soft-close hinges smooth close forces, reducing edge wear. New pulls spread hand traffic over fresh surfaces. Interested in updating older oak? We break down grain-management strategies in our oak cabinets guide.
Tools and Resources We Trust
Successful refinishing blends pro-grade tools and disciplined workflow: HVLP sprayers for smooth films, HEPA extraction for dust control, and high-adhesion primers compatible with durable topcoats. Simple homeowner resources—like non-abrasive cleaners—help protect the finish long after install.
- HVLP spray systems: For controlled atomization and uniform film build.
- HEPA dust extraction: Keeps the jobsite cleaner and reduces nibs in the finish.
- Professional masking: Tape, paper, and plastic create crisp lines and protect adjacent surfaces.
- Adhesion primers: Purpose-built for slick, factory finishes and stain-prone woods.
- Topcoat families: Durable, kitchen-tough coatings designed for frequent cleaning.
- Home care kit: Microfiber cloths and non-abrasive cleaners for routine wipe-downs.
Want a broader makeover checklist? Our kitchen cabinets makeover overview outlines smart companion upgrades like lighting and backsplash planning.
Case Snapshots: York and Toronto
Toronto projects benefit from consistent prep, studio spraying, and tidy on-site work. In York, we routinely transform oak and maple kitchens to satin whites or greige, add soft-close hardware, and complete reinstallation with precise alignment. The result is a cohesive, light, and modern space without changing the layout.
- York—oak to satin white: Classic raised-panel doors cleaned, sanded, and sprayed; grain minimized for a smoother read and brighter, bigger-feeling kitchen.
- Toronto condo—maple shaker to greige: Compact kitchen updated with light-neutral lowers and crisp white uppers to amplify daylight in a smaller footprint.
- Midtown bath—vanity refresh: Vanity doors sprayed semi-gloss for higher moisture resistance; new pulls and soft-close hinges improve daily use.
Curious what on-site prep looks like? Our Toronto preparation checklist walks through how we protect floors, appliances, and vents before any spraying begins.
Expert Tips for Maintenance and Care
Protect your finish by cleaning with non-abrasive, pH-neutral products and microfiber cloths. Avoid harsh scrubbing for the first week. Install felt bumpers, lift rather than drag countertop appliances, and use new pulls to keep hands off fresh door surfaces.
- First week: Gentle use; avoid tape or suction hooks on freshly finished panels.
- Routine cleaning: Damp microfiber with mild soap; dry promptly to keep the sheen even.
- Annual touch-ups: Address small nicks early; new pulls or bumpers can extend finish life in busy kitchens.
Thinking about DIY? This practical how-to painting overview outlines common steps. For a factory-smooth look and measured durability, pro HVLP spraying and controlled curing still win in most kitchens.
Kitchen Cabinet Refinishing in York and Toronto
For York and greater Toronto homeowners, kitchen cabinet refinishing delivers a showroom look without a full remodel. Paint2decor INC combines on-site protection with off-site spray work for clean results and quick turnarounds—ideal for busy city schedules and varied Toronto cabinet materials.
Our team focuses on GTA homes every day. That local experience matters—access planning, building policies, and weather-driven cure windows all affect timelines and outcomes. When you’re ready, we’ll align the scope with your space, schedule, and style goals.
Free visual assessment: Share a few photos and your timeline. We’ll confirm if refinishing or refacing is the better path and outline next steps—no obligation.
FAQs: Kitchen Cabinet Refinishing
Get quick answers to common questions about timelines, durability, style changes, colors, and care. These concise FAQs help you plan confidently and avoid common pitfalls before, during, and after your refinishing project.
How long does kitchen cabinet refinishing take?
Most kitchens wrap in well under two weeks, including pickup, studio spraying, on-site box work, and reinstallation. Your kitchen stays usable most days. Timelines depend on door count, repairs, and humidity during curing.
Is the finish durable around sinks and cooktops?
Yes—pro-grade systems are engineered for frequent cleaning and routine moisture. Key is proper prep, an adhesion primer, and full cure time before heavy use. Use gentle cleaners and install felt bumpers to protect edges.
Can I change the door style while refinishing?
Refinishing keeps your current doors. If you want a new profile, pair refinishing of boxes with new doors via refacing. For background on door choices, see this overview of standard vs. custom doors.
Which colors age best in Toronto homes?
Warm whites, soft grays, and greige remain steady favorites. Many homeowners add depth with a darker island or base run. Finish in satin for lower fingerprint visibility or semi-gloss for higher cleanability.
What if my cabinets are structurally tired?
If boxes are worn or you want a different layout, refacing or replacement may suit you better. This comparison on refacing vs. replacing summarizes tradeoffs. We’ll advise honestly after seeing your space.
Key Takeaways and Next Steps
Refinishing delivers the look of a new kitchen without rebuilding it. The best outcomes come from precise prep, pro HVLP spraying, and patient curing. Share photos for a free assessment and we’ll confirm whether refinishing or refacing is the right move for your goals.
- Keep your layout; update color, sheen, and hardware for a dramatic change.
- Pro workflow: protect, repair, prime, spray, cure, reinstall, align.
- Match sheen to lifestyle; satin balances appearance and cleanability.
- Combine refinishing with small upgrades for outsized impact.
Ready to explore options? We’ll help you weigh refinishing against refacing and highlight timeline and durability considerations based on your kitchen. When you’re set, we’ll coordinate scheduling around your household routine.
P.S. Planning a bigger change? Our overview of spray techniques and the refacing guide offer deeper dives before you decide.
{
“@context”: “https://schema.org”,
“@type”: “Article”,
“headline”: “Kitchen Cabinets: Save Money & Refresh Your Home in 2026”,
“description”: “A complete guide to kitchen cabinet refinishing for York and Toronto homeowners: what it is, how it works, finish options, best practices, tools, examples, and FAQs.”,
“author”: {
“@type”: “Person”,
“name”: “Paint2decor INC”,
“url”: “https://paint2decor.com/blogs”,
“jobTitle”: “Cabinetry Refinishing Specialists”,
“knowsAbout”: [
“kitchen cabinet refinishing”,
“cabinet refacing”,
“cabinet spray painting”,
“kitchen cabinet painting”,
“bathroom cabinet refinishing”
]
},
“publisher”: {
“@type”: “Organization”,
“name”: “Paint2decor INC”,
“url”: “https://paint2decor.com/blogs”,
“logo”: {
“@type”: “ImageObject”,
“url”: “https://paint2decor.com/wp-content/uploads/2022/03/website-1.png”,
“width”: 512,
“height”: 512
}
},
“datePublished”: “2026-05-24T08:00:00-04:00”,
“dateModified”: “2026-05-24T08:00:00-04:00”,
“mainEntityOfPage”: “https://paint2decor.com/blogs”,
“keywords”: [“kitchen cabinet refinishing”,”cabinet refacing”,”Toronto cabinet painting”,”cabinet respraying”,”York”],
“speakable”: {
“@type”: “SpeakableSpecification”,
“cssSelector”: [“.featured-snippet-answer”, “.faq-answer”]
},
“image”: [
{
“@type”: “ImageObject”,
“url”: “https://res.cloudinary.com/dmboo1nu1/image/upload/v1779588633/ai-images/zp3dteu5cgwfe2blxwru.png”,
“width”: 1200,
“height”: 630,
“caption”: “Wide view of a modern Toronto kitchen during professional cabinet refinishing with masking and HVLP setup”
},
{
“@type”: “ImageObject”,
“url”: “https://res.cloudinary.com/dmboo1nu1/image/upload/v1779588634/ai-images/xxjn2zkqlrlv2k4qgtk3.png”,
“width”: 1200,
“height”: 800,
“caption”: “Close-up of HVLP spraying a cabinet door edge for a factory-smooth satin finish”
},
{
“@type”: “ImageObject”,
“url”: “https://res.cloudinary.com/dmboo1nu1/image/upload/v1779588634/ai-images/mkkyhpmphpzf0xotkun8.png”,
“width”: 1200,
“height”: 800,
“caption”: “Installer reattaching freshly refinished cabinet doors with soft-close hinges in a Toronto kitchen”
}
]
}
{
“@context”: “https://schema.org”,
“@type”: “ProfilePage”,
“mainEntity”: {
“@type”: “Person”,
“name”: “Paint2decor INC”,
“description”: “GTA-focused cabinetry refinishing and refacing specialists providing professional spray finishes for kitchens and bathrooms.”,
“url”: “https://paint2decor.com/blogs”,
“knowsAbout”: [“kitchen cabinet refinishing”,”cabinet refacing”,”cabinet spray painting”],
“sameAs”: []
}
}
{
“@context”: “https://schema.org”,
“@type”: “FAQPage”,
“mainEntity”: [
{
“@type”: “Question”,
“name”: “How long does kitchen cabinet refinishing take?”,
“acceptedAnswer”: {
“@type”: “Answer”,
“text”: “Most kitchens wrap in well under two weeks, including pickup, studio spraying, on-site box work, and reinstallation. Your kitchen stays usable most days. Timelines depend on door count, repairs, and humidity during curing.”
}
},
{
“@type”: “Question”,
“name”: “Is the finish durable around sinks and cooktops?”,
“acceptedAnswer”: {
“@type”: “Answer”,
“text”: “Yes—pro-grade systems are engineered for frequent cleaning and routine moisture. Key is proper prep, an adhesion primer, and full cure time before heavy use. Use gentle cleaners and install felt bumpers to protect edges.”
}
},
{
“@type”: “Question”,
“name”: “Can I change the door style while refinishing?”,
“acceptedAnswer”: {
“@type”: “Answer”,
“text”: “Refinishing keeps your current doors. If you want a new profile, pair refinishing of boxes with new doors via refacing. For background on door choices, see this overview of standard vs. custom doors.”
}
},
{
“@type”: “Question”,
“name”: “Which colors age best in Toronto homes?”,
“acceptedAnswer”: {
“@type”: “Answer”,
“text”: “Warm whites, soft grays, and greige remain steady favorites. Many homeowners add depth with a darker island or base run. Finish in satin for lower fingerprint visibility or semi-gloss for higher cleanability.”
}
},
{
“@type”: “Question”,
“name”: “What if my cabinets are structurally tired?”,
“acceptedAnswer”: {
“@type”: “Answer”,
“text”: “If boxes are worn or you want a different layout, refacing or replacement may suit you better. We’ll advise honestly after seeing your space and goals.”
}
}
]
}