

Repainting kitchen cabinets is the process of cleaning, sanding, priming, and finishing existing doors and boxes to achieve a factory-like finish without replacing them. For York homeowners, it’s a fast, low-disruption way to modernize style in days, not weeks. It preserves your layout, reduces waste, and delivers a durable, like-new look.
By Paint2decor INC • Last updated: 2026-06-29
Quick Summary
Repainting cabinets modernizes a kitchen by renewing the existing boxes and doors with pro surface prep, bonding primer, and durable enamel. Expect a 10-step workflow, 2–3 coats, and a 7–30 day full cure. It’s ideal when your cabinet boxes are sound and you want a fresh color without a full renovation.
Use this complete guide to plan, execute, and maintain a pro-quality finish in a typical home kitchen. You’ll learn:
- What repainting includes—and how it differs from refinishing, refacing, and replacing
- Prerequisites and quick tests to confirm your cabinets are repaint-ready
- Step-by-step process with timelines, curing windows, and QA checks
- Spraying versus brushing trade-offs and when to choose each
- Troubleshooting tips for peeling, orange peel, fisheyes, and brush marks
- When repainting isn’t enough—and how refinishing options or refacing step in
At a glance (TOC)
- What is repainting kitchen cabinets?
- Why repainting matters
- Prerequisites and readiness checks
- Step-by-step process
- Spraying vs brushing
- Materials and tools
- Best practices
- Troubleshooting
- Repaint vs reface vs replace
- York case examples
- FAQ
- Key takeaways
What is repainting kitchen cabinets?
Repainting kitchen cabinets renews existing cabinet boxes and doors with deep cleaning, scuff-sanding, bonding primer, and a durable finish coat. It keeps your layout intact, avoids demolition, and can finish in under a week in many homes. The result mimics a factory look when surface prep and curing are done correctly.
At Paint2decor INC, we focus on the specific needs of Toronto and GTA homes—hard-used kitchens, maple or oak doors, and busy family schedules. Repainting keeps what works and elevates color, sheen, and feel.
- Scope: Clean, degloss, repair dings, prime, and recoat doors/frames.
- Finish types: Waterborne cabinet enamels in satin or semi-gloss for durability.
- Timeline: Doors off-site 2–5 days; boxes on-site 1–2 days; full cure 7–30 days.
- Covers: Typical kitchen has 20–45 doors and 5–15 drawers; plan labeling.
If wood grain or damage is heavy, consider our deeper cabinet refinishing guide or new faces via refacing.
Why repainting matters for your kitchen
Repainting matters because color drives perception of space, light, and cleanliness. A fresh cabinet finish changes how a kitchen feels without altering walls or plumbing. It reduces landfill waste, preserves good carpentry, and can be completed with minimal family downtime compared with replacement.
Homeowners weigh options: repaint, refinish, reface, or replace. Here’s why repainting is often first choice:
- High impact, minimal disruption: Kitchen remains functional; doors travel off-site; boxes finish quickly.
- Style flexibility: Neutrals, two-tone, or bold accents; satin often hides minor texture better than high gloss.
- Durability gains: Modern waterborne enamels crosslink as they cure, reaching peak hardness in 7–30 days.
- Sustainability: Reuse boxes; avoid demolition; fewer materials to haul or recycle.
When is repainting not enough? If you want new door styles or need layout changes, refacing or replacement may fit better. Our kitchen makeover overview explains the spectrum.
Prerequisites and readiness checks
Confirm your cabinets are repaint-ready by checking structure, surface type, contamination, and ventilation. Boxes should be solid, doors warp-free, and surfaces free of silicone or wax. Plan for 50–65°F minimum room temperature and under 60% relative humidity for predictable dry and cure windows.
Readiness checklist
- Box integrity: Tight joints, no water damage, hinges secure; repair before paint.
- Surface type: Solid wood, wood veneer, MDF, or laminate with correct primer selection.
- Contamination: Degrease thoroughly; kitchens accumulate oils above ranges and pulls.
- Ventilation: Cross-breeze or filtered fan; keep dust away during drying.
- Labeling plan: Number doors and hinges; bag hardware; photo each cabinet interior.
- Schedule buffer: 24 hours between coats recommended; full cure period 1–4 weeks.
Local considerations for York
- Plan drop-off/pick-up windows around neighborhood traffic near Jane St at St Clair Ave West buses and deliveries; a smoother curbside exchange keeps projects on schedule.
- Humidity can swing after storms rolling through Smythe Park; monitor interior RH and run a dehumidifier to keep it under 60% during cure.
- For quiet reading time during on-site work, families often step out to the Toronto Public Library – Daniel G. Hill Branch a few blocks away.
Step-by-step: repainting kitchen cabinets
A proven 10-step workflow delivers consistent, durable results: label, remove, degrease, sand, vacuum, mask, prime, sand again, finish coats, and reassemble. Each step controls adhesion and texture. Plan 2–3 coats with 24-hour intervals and maintain dust-free spaces for pro-level results.
- Label and remove hardware: Number doors/drawers; bag hinges and screws. Typical kitchens have 100–200 fasteners—keep sets together.
- Degrease: Use a kitchen-safe degreaser; dwell 5–10 minutes on heavy oils. Rinse with clean water to remove residue.
- Scuff-sand: 120–150 grit first pass; 180–220 grit for finish prep. Goal is deglossing, not wood removal.
- Dust control: Vacuum with HEPA and tack cloth. Dust particles over 50 microns show as nibs in enamel.
- Mask and isolate: Plastic off interiors, appliances, and floors. Maintain negative air if spraying in place.
- Bonding primer: Apply adhesion primer matched to substrate (wood, MDF, laminate). Dry 1–3 hours per label before sanding.
- Primer sand: 220–320 grit to knock down raised grain and minor texture. Wipe clean.
- First color coat: Thin, even pass. Wet film 3–5 mils; target complete coverage at 2–3 coats.
- Second color coat: Inspect for orange peel or sags; correct between coats. Maintain 50–90°F.
- Reassembly and cure: Rehang after dry-to-touch and handle-safe windows; avoid aggressive cleaning for 7–30 days while film crosslinks.
Want a printable checklist? Our companion article on repainting kitchen cupboards summarizes these actions for quick planning.
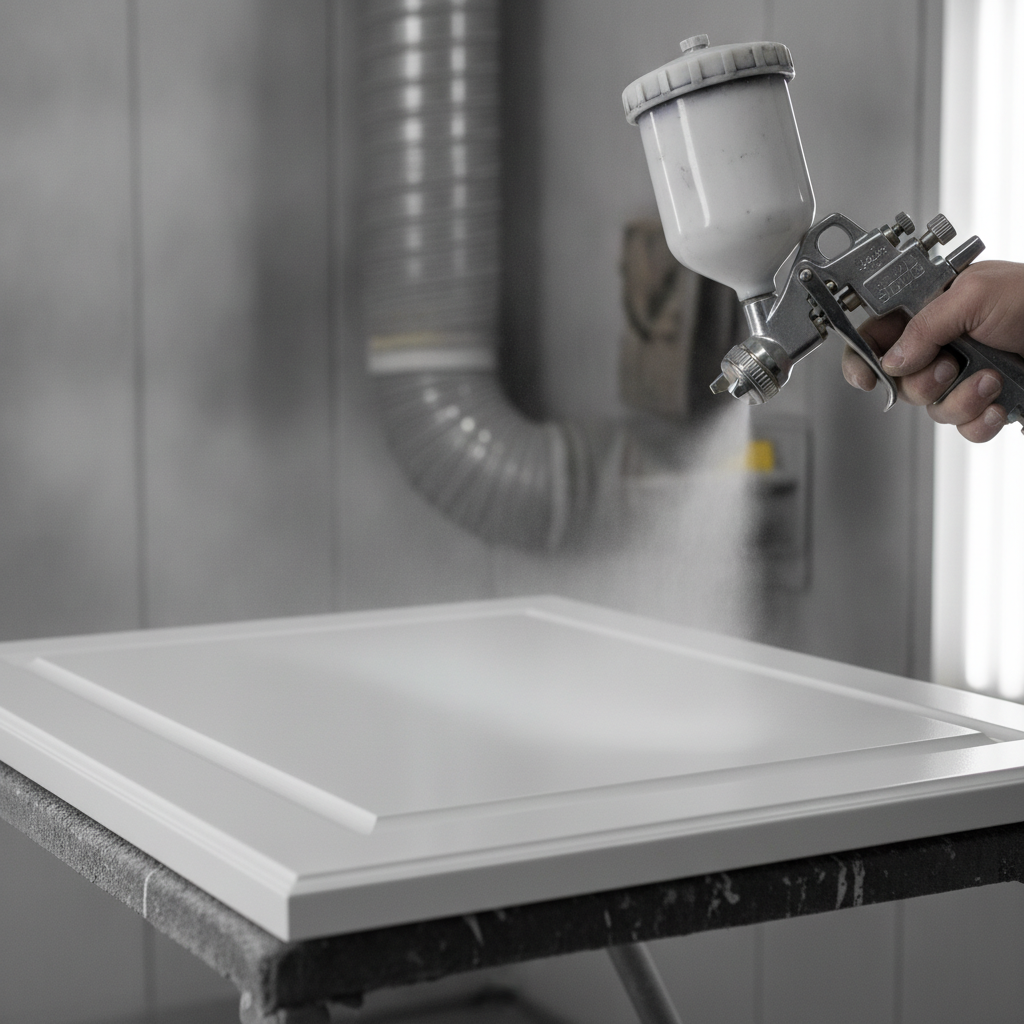
Methods: spraying vs brushing and rolling
Spraying produces the most uniform, factory-like finish and excels on Shaker rails and panel profiles. Brushing and rolling can work in tight spaces or for quick touch-ups. The best approach often blends both: spray doors off-site, brush/roll boxes on-site with high-quality tools.
In our experience across GTA projects, hybrid methods balance quality, speed, and logistics:
- Spray (HVLP/airless fine-finish): Smoothest texture; efficient on batches of 20–60 doors.
- Brush/roll: Great for frames and interiors; pair a fine-bristle brush with a 4–6 inch microfiber roller.
- Tip/nozzle choices: Fine-finish setups (1.3–1.5 mm HVLP, or 210–312 tips) help control overspray.
- Sheen management: Satin hides minor substrate texture; semi-gloss adds pop but reveals flaws.
When you want a seamless, spray-booth look, explore our cabinet respraying guide for process details and results.
Materials and tools that deliver pro results
Professional outcomes rely on the right chemistry and tools: a bonding primer for your substrate, cabinet-grade waterborne enamel, clean spray/brush gear, and accurate surface prep supplies. Use grit steps (120/180/220), degreasers, and HEPA dust control to reduce defects and improve adhesion.
Core materials
- Degreaser + rinse: Removes oils so primer bonds uniformly.
- Adhesion primer: Formulated for wood, MDF, and laminates; blocks minor staining.
- Cabinet enamel: Waterborne alkyd or acrylic enamel; two to three coats for durability.
- Filler/putty: For dings and hardware holes; sandable and paint-ready.
Application tools
- HVLP or fine-finish sprayer: Consistent atomization and thin passes.
- Brushes/rollers: Fine synthetic bristles and 1/4–3/8 inch microfiber rollers reduce texture.
- Abrasives: 120, 150, 180, 220, and 320 grit for staged smoothing.
- Protection: Masking film, rosin paper, and zipper walls to isolate spaces.
If you’re considering upgrades beyond paint—new color plus subtle grain fill—our cabinet refinishing guide covers options.
Best practices and pro tips
Control contamination, texture, and cure. Degrease first, then scuff-sand to create micro-tooth for primer. Apply multiple thin coats, keep RH under 60%, and avoid heavy handling for 7–30 days post-finish. Label everything, and photograph hinges before removal to speed reassembly.
- Thin coats win: Several 3–5 mil passes beat one heavy coat; fewer sags, better leveling.
- Temperature: Aim 68–75°F for even flow; colder air slows leveling and can trap texture.
- Dust discipline: Vacuum, tack, and pause airflow during spraying to minimize nibs.
- Hardware plan: Switching to pulls? Fill old holes and redrill with a template for consistency.
- Two-tone layouts: Dark base + light uppers visually stretch space by 1–2 perceived feet.
- Test door: Always paint one door first; confirm sheen and color in your actual lighting.
Troubleshooting common paint problems
Most cabinet paint issues trace to surface contamination, inadequate scuffing, heavy coats, or rushing cure time. Fix defects by identifying the root cause, correcting prep, and spot-sanding before recoating. Keep temperature and humidity in range to stabilize flow and leveling.
Common defects and fixes
- Peeling/flaking: Cause—oil/grease or glossy substrate. Fix—degrease, sand to a uniform dull, apply bonding primer, recoat.
- Orange peel: Cause—thick coats or high viscosity. Fix—reduce material viscosity per TDS, light 320-grit sand, re-spray thin.
- Brush marks: Cause—overbrushing or fast-drying surface. Fix—use conditioner if approved, switch to microfiber roller, lighter load.
- Fisheyes/craters: Cause—silicone/contaminants. Fix—deep clean with solvent-compatible cleaner, seal with appropriate primer.
- Blocking (sticking): Cause—premature stacking or closing. Fix—extend dry times; add wax paper spacers during reassembly.
When defects persist or substrate damage is extensive, our kitchen cupboard refinishing service addresses grain fill, repairs, and specialty finishes beyond repainting.
Repaint vs reface vs replace
Choose repainting when your boxes are solid and you want a color update. Choose refacing when you want new door styles or veneers. Choose replacement when layout, function, or structural issues demand a rebuild. Matching the method to your goals protects time and results.
| Approach | Best when… | What changes | Typical timeline |
|---|---|---|---|
| Repaint | Boxes are sound; you want a fresh color and sheen | Finish only (color/feel) | 3–7 days on average + 7–30 days cure |
| Refinish | Texture or grain needs correction; minor repairs desired | Finish + repair/grain work | 4–10 days + cure |
| Reface | You want a new door style or veneer but keep layout | New doors/veneers + finish | 1–2 weeks (varies) |
| Replace | Layout, storage, or structure must change | All-new cabinetry | Multiple weeks (construction) |
Exploring spray-specific finishes? See our cabinet respraying guide for fine-finish detail.
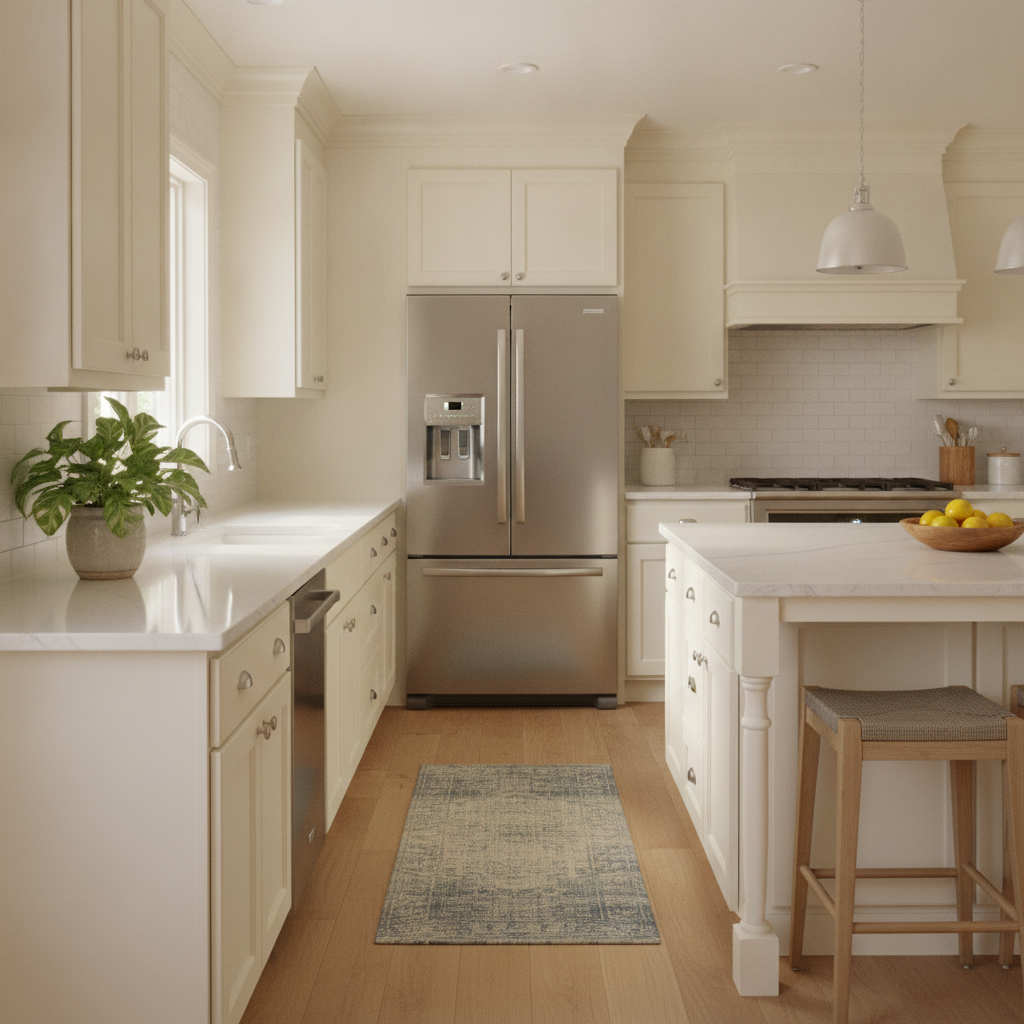
Case examples from York kitchens
York kitchens benefit from repainting when doors are structurally sound but dated. We routinely transform 25–40 door kitchens in under a week of site time. Two-tone layouts, warm whites, and soft grays remain popular, with satin sheens balancing elegance and day-to-day touch-ups.
- Shaker in warm white: 32 doors, satin enamel; hybrid method—sprayed doors off-site, rolled frames on-site; reassembled in 48 hours post-final coat.
- Maple grain soften: 28 doors; light grain fill on center panels; satin topcoat for subtle texture control.
- Two-tone refresh: 40 doors; lowers in deep gray, uppers in off-white; new brass pulls templated for perfect alignment.
Curious how repainting compares to a larger transformation? Our painting cabinets walkthrough breaks down the on-site sequence and house prep.
Frequently Asked Questions
These are the questions York homeowners ask most about repainting kitchen cabinets. Each answer is concise and focused on actionable guidance you can use right away, from cure times to cleaning and durability expectations.
How long before I can use the kitchen normally?
Most homeowners resume light use within 24–48 hours after the final coat. Avoid aggressive cleaning and heavy stacking for 7–30 days while the enamel reaches full hardness. Soft-close hinges and felt bumpers reduce early scuffs.
Will paint stick to laminate cabinets?
Yes—when prepped correctly. Degrease thoroughly, scuff-sand to degloss, and use a bonding primer rated for laminates. Apply 2–3 thin color coats, allowing proper dry times. A test door confirms adhesion in your home’s conditions.
What sheen is best for kitchen cabinets?
Satin is the most forgiving and popular because it hides minor texture and cleans easily. Semi-gloss offers more reflectivity and a sharper look but shows defects. Match sheen to your lighting, color, and substrate condition.
How do I keep the finish looking new?
Use mild soap and a soft cloth; avoid harsh abrasives. Add felt bumpers, wipe spills quickly, and clean high-touch areas weekly. After the 7–30 day cure, the finish resists routine cleaning and everyday wear better.
Key takeaways and next steps
Repainting kitchen cabinets works when boxes are sturdy and you want a fast style update. Success comes from obsessive prep, thin coats, and controlled cure conditions. If you’re unsure about substrate or finish type, start with a test door and evaluate adhesion and sheen in real light.
- Plan: Confirm structure, label hardware, control dust and humidity.
- Execute: Degrease, scuff, prime, sand, and apply 2–3 thin color coats.
- Validate: Inspect between coats, address defects immediately, allow a 7–30 day cure.
- Explore options: When paint alone isn’t enough, consider refinishing or respraying for elevated finishes.
Want pro results without the mess?
Our York-based team at Paint2decor INC specializes in cabinetry repainting, refinishing, and respraying for GTA homes. Start with our step-by-step painting cabinets guide, then reach out to plan your timeline.
For additional perspectives on planning and maintenance techniques, see this practical how-to painting cabinets overview, a breakdown of factors that influence cabinet repainting decisions, and simple cabinet makeover fixes that complement a repaint.