
Painting kitchen cabinets is the process of cleaning, sanding, priming, and coating cabinet surfaces to change color and refresh durability. Done right, it delivers a dramatic, long-lasting update without replacing boxes. For York homeowners, professional methods like HVLP spraying produce a smooth, factory-like finish that stands up to daily cooking and cleaning.
By Paint2decor INC — GTA Cabinetry Refinishing Specialists
Last updated: June 27, 2026
At a Glance
Painting kitchen cabinets transforms worn doors and frames with surface prep, bonding primer, and durable topcoats. Expect 5–7 workdays, 18–25 doors, and 6–8 hours of cure-to-recoat cycles. For a factory look, control dust, keep humidity under 60%, and spray doors horizontally while boxes are masked in place.
This complete guide is designed for homeowners comparing DIY steps with professional help. We combine Paint2decor INC’s GTA experience with clear checklists, local tips for York homes, and troubleshooting. You’ll learn what the process is, why it matters, how it works, what tools to use, and when to call a cabinet refinishing specialist.
- What painting kitchen cabinets really involves
- Prerequisites and planning that save days later
- Step-by-step workflow with timing, grits, and dry times
- Spraying vs rolling, primers, and enamel options
- Pro best practices for a factory-level finish
- Tools and resources you actually need
- Common problems and how to fix them fast
For tailored help across the GTA, see our kitchen cabinet painting service or explore our refinishing guide for Toronto kitchens to compare approaches.
What Is Painting Kitchen Cabinets?
Painting kitchen cabinets is a refinishing method that upgrades cabinet color and sheen by degreasing, sanding, priming, and applying durable coatings to doors, drawer fronts, and frames. The goal is a bonded, smooth finish that resists fingerprints, food splatter, and cleaning—without replacing cabinet boxes.
In plain terms, we renew sound cabinet boxes and doors by building a new coating system from the substrate up. Typical kitchens have 18–25 doors and 6–10 drawer fronts. Surfaces include solid wood, veneer, thermofoil, and laminate; each needs specific prep to ensure adhesion and block stains or tannin bleed-through.
Professionally, we separate two work zones. Doors and drawers are labeled, removed, and finished flat for maximum smoothness. Boxes are masked in place to protect walls, floors, and appliances. Durable waterborne enamels with hardeners cure faster than legacy oils, deliver low odor, and hit a sweet spot of hardness and flexibility.
When a York homeowner calls Paint2decor INC, we evaluate door style, previous coatings, and environmental factors (humidity, temperature, ventilation). That assessment guides primer selection (bonding vs shellac), sanding grits (often 120–220), and whether an HVLP spray finish or a high-density foam roller makes most sense for the home.
For background reading on the DIY perspective, you can review this third‑party how to paint kitchen cabinets overview. It aligns with our emphasis on surface preparation and labeling.
Why Painting Kitchen Cabinets Matters for York Homes
Painting kitchen cabinets matters because it modernizes the room you use most while keeping layouts, utilities, and cabinet boxes intact. It minimizes disruption, avoids weeks of demolition, and typically finishes in under 7 workdays, while improving light reflectance, resale appeal, and daily cleanability.
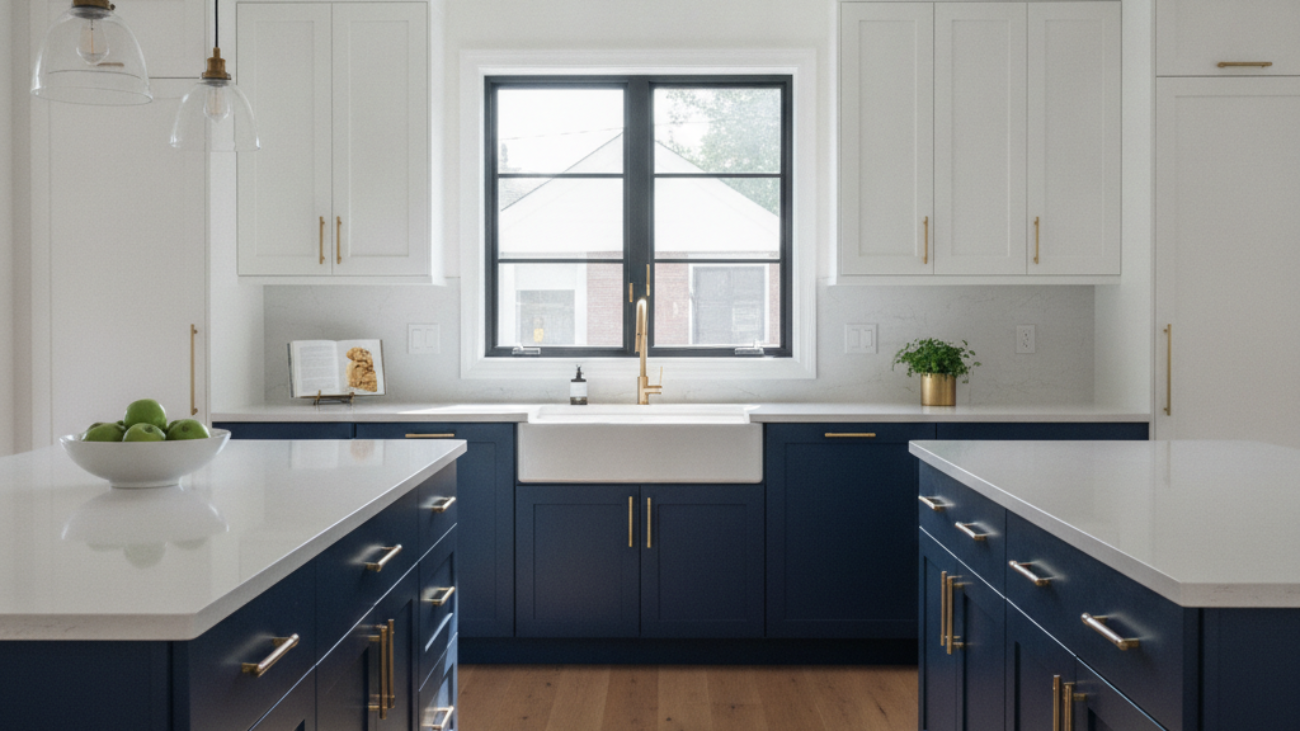
Kitchens anchor family routines. A color change—like two-tone uppers and lowers—can brighten prep zones and make small spaces feel bigger. Smooth, closed-pore finishes wipe clean in seconds, reducing the time you spend on upkeep. A typical coating stack includes 1 bonding primer and 2–3 enamel coats for durability.
York homes span everything from mid-century layouts to contemporary condos. Many have tight footprints, integrated valances, and tricky corners near range hoods. Keeping the existing footprint while upgrading finish avoids tile, plumbing, and countertop disruption. That’s a practical win for busy households.
We also see seasonal swings in Southern Ontario. Summer humidity can push indoor relative humidity over 60%, while winter can drop into the 30–40% range. Managing those conditions—dehumidifiers in summer, maintaining 65–75°F indoor temps year-round—supports better adhesion and consistent leveling during cure cycles.
If you’re weighing options, compare this path with our cabinet respraying service for a finer atomized finish, or explore kitchen cupboard refinishing when you want stain repairs or sheen changes beyond paint.
Prerequisites and Planning
Successful cabinet painting starts with inspection, labeling, degreasing, and a dust‑controlled plan. Confirm material type, fix loose hinges, number every door, and pre-stage drying racks. Aim for 120–150 minutes of prep per 10 doors, then schedule primer and enamel coats in 6–8 hour windows for consistent results.
A quick readiness checklist:
- Material check: Solid wood vs veneer vs laminate vs thermofoil.
- Hardware condition: Hinges, soft-close mechanisms, handles/knobs.
- Degreasing: Use a TSP substitute; rinse until water beads stop.
- Masking: Floors, appliances, backsplash, interior boxes.
- Labeling: Number doors top hinge side; bag screws per cabinet.
- Ventilation: Negative-air setup or openable window with fan.
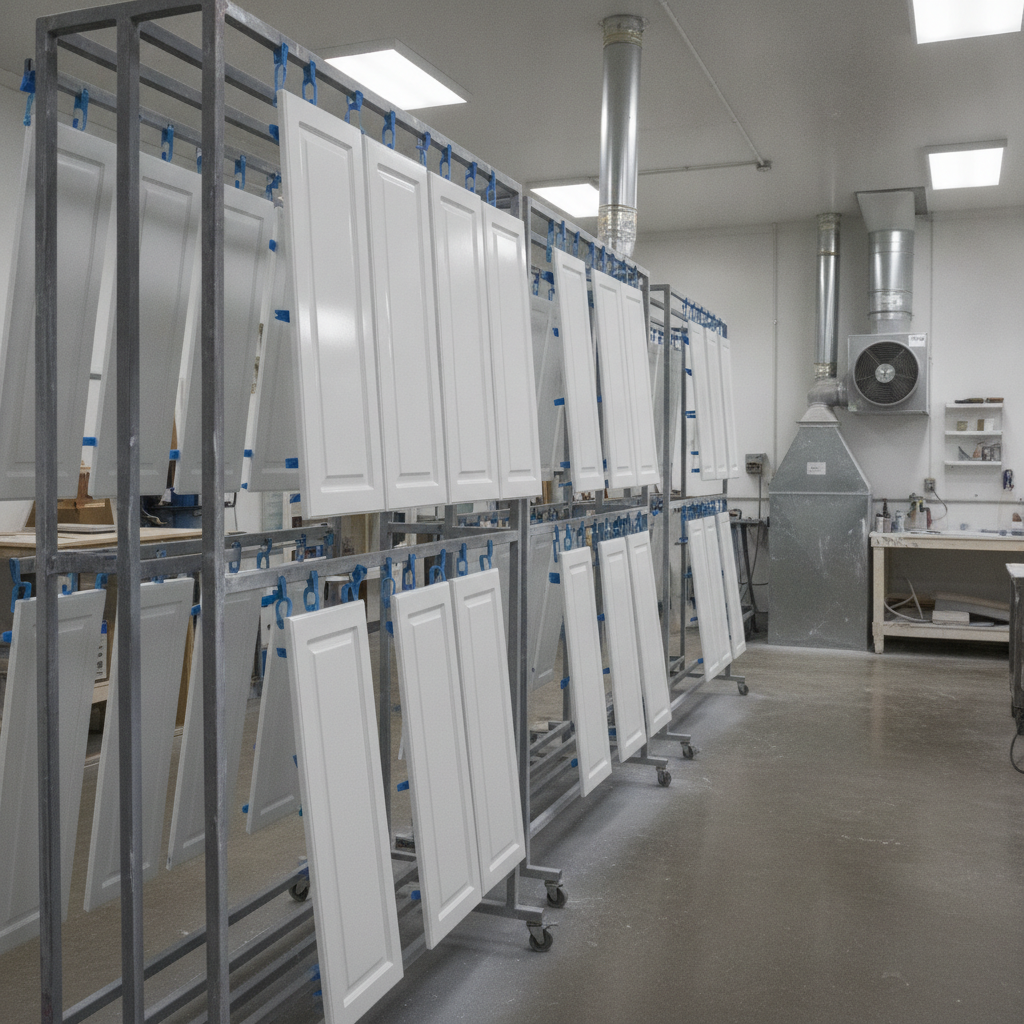
- Drying space: Racks with spacers; 2–3 linear feet per door.
Target environmental controls help finishes flow and cure. Keep temperatures in the 65–75°F range and relative humidity under 60%. Plan for two sanding passes (120, then 220 grit). For glossy thermofoil, a deglosser pass plus scuff sanding increases bond strength before primer.
Local considerations for York
- Set up a dust‑free staging zone before a weekend family visit or market day near Magwood Park; this avoids traffic through your work area.
- Summer humidity spikes—aim for dehumidification and longer open times between coats, especially if kitchen windows face afternoon sun.
- If you have limited garage space, ask Paint2decor INC about off-site spraying. We routinely transport doors and keep boxes protected at home.
When planning timelines, remember that most enamels reach “handle dry” in a few hours, but need 7–14 days to reach a harder cure. That means you can reinstall doors after 48–72 hours but should treat edges gently for the first two weeks.
How the Process Works: Step-by-Step
The process flows from remove, clean, and sand to prime, fill, sand again, and apply 2–3 enamel coats. Doors are finished flat for smoothness, boxes are masked and sprayed or rolled. Labeling, dust control, and cure windows (6–8 hours) keep quality consistent from start to finish.
- Document and label (30–45 min): Photograph reveals and hinges; tape numbers under hinge cups.
- Remove doors/drawers (30–60 min): Bag screws per opening; stack doors vertically on edge protectors.
- Degrease thoroughly (45–90 min): Heavy cook zones (over the range) may need 2–3 passes.
- Sand initial pass (60–90 min): 120 grit to de-gloss; 150 for veneers to avoid burn-through.
- Dust and tack (15–20 min): Vacuum HEPA + tack cloth. Clean air equals cleaner coats.
- Spot repairs (20–40 min): Wood filler or putty on nicks; caulk seams sparingly.
- Prime (30–60 min + 1–2 hr dry): Bonding primer for laminate/thermofoil; shellac for knotty woods.
- Sand between coats (20–30 min): 220 grit scuff; avoid edge burn-through.
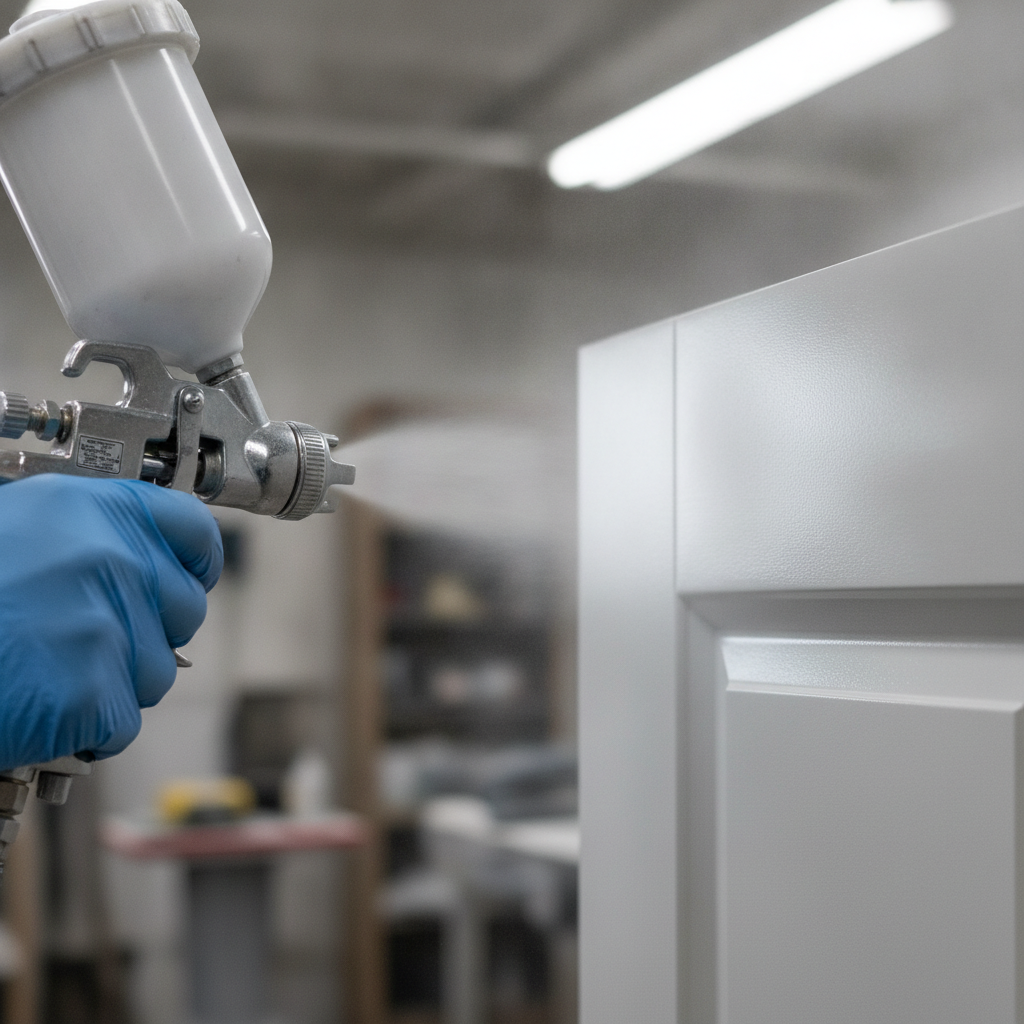
- First enamel coat (20–40 min): HVLP at 6–8 inches, 50% overlap; roller users: light pressure, tip off.
- Second enamel coat (20–40 min): Flip doors after 6–8 hours; repeat overlap pattern.
- Optional third coat (20–40 min): For high-wear kitchens or ultra-smooth satin.
- Reassembly (60–120 min): Set door gaps at ~3/32 inch; adjust soft-close dampers.
| Step | Target metric | Pro tip |
|---|---|---|
| Sanding | 120 → 220 grit | Round edges lightly to prevent chips later. |
| HVLP distance | 6–8 inches | Keep 50% overlap for even mil build. |
| Humidity | < 60% RH | Use a portable dehumidifier on humid days. |
| Coats | 1 primer + 2–3 enamel | Light coats reduce sags and orange peel. |
If you prefer a done‑for‑you approach, our complete cabinet painting guide explains how our team handles staging, masking, and HVLP atomization for a consistent, factory-level result across the GTA.
Types, Methods, and Approaches
Cabinet coatings succeed when primers match substrates and application methods control texture. Pair bonding or shellac primers with waterborne enamel topcoats. Choose HVLP spraying for the smoothest finish, or combine brush-and-roller on frames with sprayed doors for efficiency.
Primers
- Bonding acrylic primer: Ideal for laminate, thermofoil, and previous glossy finishes.
- Shellac-based primer: Blocks tannins and stains on oak, pine, or previously knotty doors.
- Stain-blocking waterborne: Lower odor option that still resists bleed-through in many cases.
Topcoats
- Waterborne alkyd enamel (satin/semi-gloss): Levels well, cures hard, and cleans easily.
- Acrylic urethane enamel: Fast-cure with scuff resistance; excellent for busy kitchens.
- Lacquer systems (pro shops): Ultra-smooth; best with spray booths and robust ventilation.
Application methods
- HVLP spraying: Crisp atomization at 6–8 inches yields a nearly poreless surface.
- Brush and foam roller: Accessible for boxes; tip off lightly to minimize texture.
- Hybrid: Spray removable parts off-site; roll frames in place to limit household downtime.
If you’re comparing finishes, browse our cabinet respraying service for pro‑shop results or consider cupboard refinishing when you want to retain wood grain with a toned look.
For a third‑party process overview that echoes these choices, see this cabinet painting process overview. It reinforces the importance of substrate‑appropriate primers and environmental control.
Best Practices for a Factory-Level Finish
The best results come from clean substrates, consistent film build, and patient cure times. Control dust with HEPA vacuums, spray doors horizontally, maintain 65–75°F and < 60% RH, and give enamel 7–14 days before heavy use. Small habits compound into “factory” outcomes.
- Edge discipline: Always break sharp edges with a quick sanding pass; coatings chip at corners first.
- Mil build consistency: Two medium coats beat one heavy coat; watch wet-edge sheen for evenness.
- Lighting: Cross‑light your spray table to spot holidays and sags within 2–3 minutes.
- Dust control: Vacuum, tack, and wait 10–15 minutes after stirring dust settles before spraying.
- Hardware strategy: Consider new pulls at 3 or 5 inches center‑to‑center; fill and re‑drill before primer.
- Blocking prevention: Use spacers on drying racks; avoid stacking doors face‑to‑face for 24–48 hours.
- Final cure window: Gentle use for 7–14 days; full hardness often continues to develop for 21–30 days.
Want a deeper comparison of finish paths? Our Toronto refinishing guide outlines when to paint, reface, or respray—so you pick the right path before you lift a sander.
Tools and Resources
You don’t need a full shop to succeed. A quality sander, HEPA vacuum, bonding primer, enamel, foam rollers or HVLP sprayer, and labeled bags for hardware cover 90% of projects. Drying racks, a dehumidifier, and bright work lights raise results from good to great.
Core tools
- Random-orbit sander with 120 and 220 grit discs
- HEPA vacuum and tack cloths
- Quality brush (2–2.5 inch) and 4–6 inch high-density foam rollers
- HVLP sprayer with 1.3–1.5 mm needle/nozzle (optional but ideal)
- Drying racks with soft spacers and painters pyramids
- Low-odor TSP substitute degreaser, clean water, microfiber cloths
Materials
- Bonding primer (laminate/thermofoil) or shellac primer (tannin-heavy woods)
- Waterborne alkyd or acrylic urethane enamel (satin or semi-gloss)
- Wood filler/putty, paintable caulk (sparingly), stir sticks, strainers
- Masking film, painter’s tape (use fresh tape every 24 hours), rosin paper
Helpful references
- General mistake‑avoidance tips: avoid common painting mistakes
- DIY perspective: step-by-step cabinet painting
- Process snapshot: painting process overview
Prefer a handled-for-you upgrade? Explore our cabinet painting service and let an award‑recognized GTA team manage prep through reassembly.
Troubleshooting and Quality Control
Most cabinet paint issues trace back to prep, environment, or film thickness. Fix by improving cleaning and sanding, lowering humidity, thinning within manufacturer limits, and sanding/buffing defects. Small course corrections—within 24 hours—prevent rework later.
- Fisheyes (pinholes): Caused by silicone or oil contamination. Solution: deep degrease, wipe with denatured alcohol, spot prime with shellac.
- Orange peel (texture): Usually heavy coats or low atomization. Solution: reduce mil build, adjust HVLP fluid/air, light 320 grit denib, recoat.
- Sags/drips: Excess material or spraying too close. Solution: let set 20–30 minutes, shave ridge with sharp blade, 320 sand, recoat light.
- Blocking (sticking): Doors stacked or rehung too soon. Solution: add spacers, extend cure to 48–72 hours before rehang.
- Bleed-through: Tannins from oak/pine. Solution: spot prime with shellac; two thin coats beat one heavy pass.
- Adhesion failure: Glossy substrate or missed degrease. Solution: scuff to 220, switch to bonding primer, recoat.
- Brush marks/roller stipple: Work in smaller sections, maintain a wet edge, tip off lightly within 2–3 minutes.
Quality assurance helps. Check sheen and coverage at 18–24 inches under raking light. Track doors with a checklist (18–25 lines typically). If a defect appears on coat one, solve it before stacking subsequent coats—pro finishers treat each layer like it will be the final.
Case Studies and Real Examples
Across the GTA, we see repeatable wins: two‑tone kitchens, brightened condos, and classic maple refreshes. Typical projects span 5–7 workdays, 1 primer + 2 enamel coats, and 48–72 hours before rehang. Small layout tweaks—new pulls or soft‑close hinges—elevate the final result.
- York two‑tone refresh: 22 doors, 8 drawers; uppers in soft white, lowers in deep navy. We sprayed doors off‑site, rolled frames in place. Rehung at 60 hours; final cure guidance: 14 days gentle use.
- Condo brightening near Magwood Park: 16 doors; glossy laminate boxes. Bonding primer + acrylic urethane enamel; dehumidifier kept RH at ~50%. Stovetop zone took 3 degrease passes.
- Classic maple makeover: Grain‑filling select panels to reduce telegraphing, then satin enamel. New 5‑inch pulls required hole fills and re‑drills before primer.
- Family‑ready satin: Client wanted easy‑wipe surfaces before hosting. We scheduled coats in 6–8 hour windows, with cross‑lighting to inspect for sags in the first 2–3 minutes.
Curious which path fits your cabinets? Our refinishing guide contrasts painting with refacing and respraying, so you can pick the right route for your space and timeline.
Frequently Asked Questions
These quick answers cover sanding, cure times, spraying vs rolling, and material compatibility. They’re designed for fast reference as you plan your cabinet painting project at home or with a pro refinishing team.
Do I have to sand cabinets before painting?
Yes. A thorough scuff sand with 120–150 grit removes gloss and improves primer adhesion. On laminate or thermofoil, combine a deglosser and bonding primer. On tannin‑rich woods, follow sanding with a shellac primer to prevent bleed‑through.
Is spraying better than brushing for cabinets?
Spraying produces the smoothest, most uniform finish—especially on flat doors. However, a brush-and-roller method works well for boxes if you use thin coats and tip off lightly. Many pros spray doors horizontally and roll frames in place for efficiency.
How long before I can use my kitchen normally?
Most projects wrap in 5–7 workdays. Doors can often be rehung after 48–72 hours, but treat edges gently for 7–14 days as enamel cures to higher hardness. Avoid stacking or heavy cleaning during this initial cure window.
Can you paint laminate or thermofoil cabinets?
Yes, with the right prep. Degrease thoroughly, scuff sand, and use a bonding primer formulated for slick substrates. Give coats longer open time and ensure humidity stays under 60% to help adhesion and leveling.
What sheen is best for kitchen cabinets?
Satin and semi‑gloss are most popular. Satin hides minor texture while remaining easy to clean; semi‑gloss reflects more light and is extremely wipeable. Match sheen to your lighting and how much surface telegraphing you want to see.
Key Takeaways
Great cabinet painting depends on prep, compatible primers/topcoats, controlled humidity, and patient cure windows. Doors finished flat and boxes masked in place deliver the most consistent results, whether you spray or use brush‑and‑roller techniques.
- Prep drives outcomes: degrease, sand 120 → 220, and spot‑prime smartly.
- Environment matters: 65–75°F, < 60% RH, and dust control.
- Two medium enamel coats beat one heavy coat for leveling.
- Plan 5–7 workdays; rehang at 48–72 hours; gentle use 7–14 days.
- Pro help accelerates quality, especially for HVLP spraying.
Conclusion and Next Steps
Painting kitchen cabinets can refresh your space fast when you follow a disciplined process. If you want a factory-smooth finish with tight timelines, partnering with a York-based specialist ensures consistent prep, application, and cure across every door and frame.
Here’s the simplest path forward:
- Decide on sheen and color families (satin is flexible for busy kitchens).
- Audit materials: wood, veneer, laminate, or thermofoil.
- Choose your application method: HVLP spray vs brush‑and‑roller.
- Schedule around a 5–7 workday window and plan for a 7–14 day gentle‑use cure.
If you’d like help, our GTA team at Paint2decor INC handles everything from off‑site door spraying to careful reassembly. Explore kitchen cabinet painting services or request guidance via our kitchen repaint insights. Ready to move now? Book a friendly discovery call in York.