
Cabinet painting price refers to the non-number factors that shape a professional estimate—scope, condition, prep, method, and finish quality. At 2710 St Clair Ave W in York, Paint2decor INC helps Toronto homeowners plan smarter projects by clarifying these drivers so you get durable, show-home results without paying for work you don’t need.
By Masoud Kakar • Last updated: 2026-05-16
Above-Fold Section
The fastest way to tame cabinet painting price is to define scope, prep level, and finish early. Decide which doors, boxes, and trims are included; confirm repairs; and choose a spray-grade system. Clear choices reduce change orders, accelerate timelines, and protect finish durability.
Here’s the promise of this guide: you’ll learn what truly moves your cabinet painting price up or down—without any numbers—so you can control outcomes, not just invoices. We’ll use Paint2decor INC’s GTA-tested process to keep your project predictable and beautiful.
- Understand what pros evaluate before quoting (and why it matters).
- Pick the right method (spray booth vs. on-site brush/roll) for your home.
- Match primers, topcoats, and sheens to your cabinet material and lifestyle.
- Avoid timeline traps that add risk to finish quality.
- Use a simple worksheet to define scope clearly before requesting quotes.
Quick Summary
Cabinet painting price is shaped by five levers: scope, material/condition, prep intensity, application method, and coating system. Align those levers with your goals—durability, look, timeline—and you’ll keep quality high while preventing surprises.
- Scope: Count doors/drawers, panels, gables, crown, toe-kicks, island, and any built-ins.
- Material: Oak, maple, MDF, thermofoil, laminate, or previously painted surfaces each need tailored prep.
- Prep: Cleaning, deglossing, sanding, repairs, caulking, and masking control adhesion and final feel.
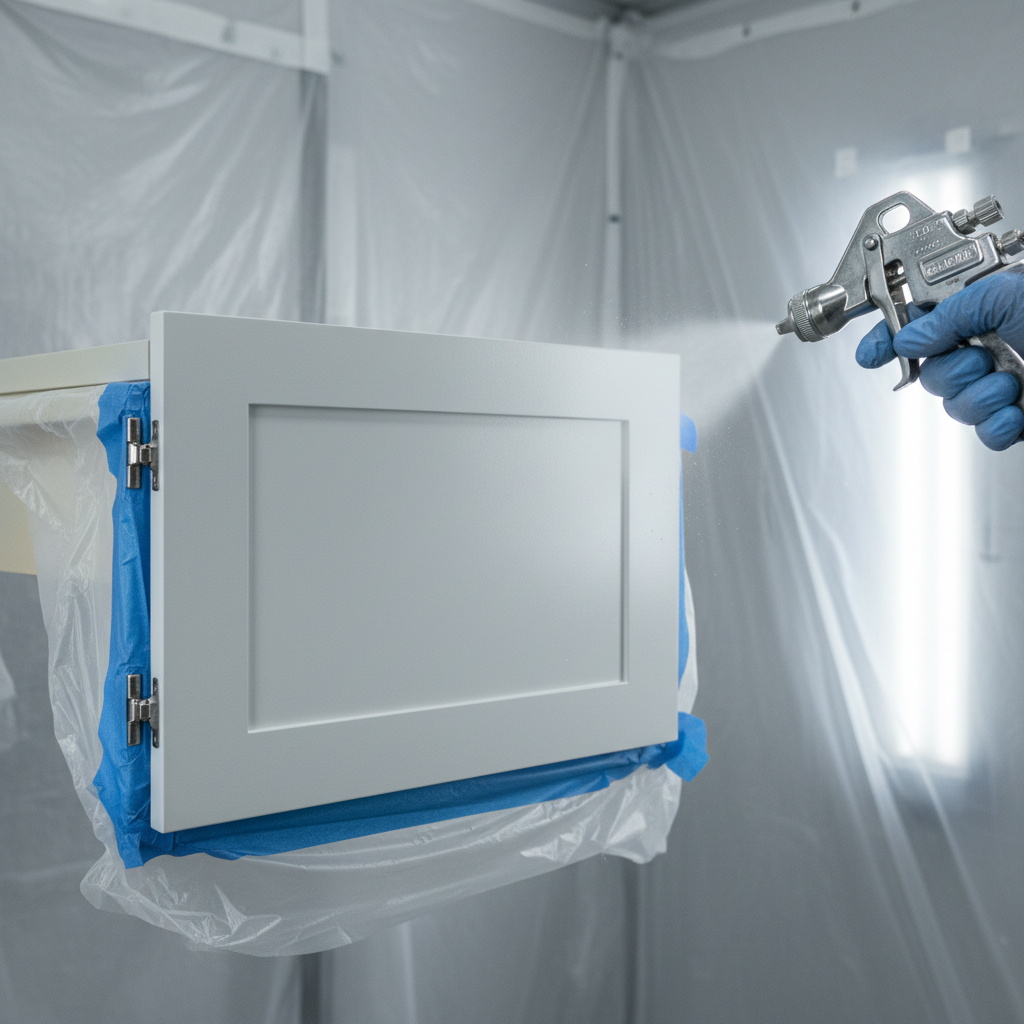
- Method: HVLP spray delivers factory-smooth results; brush/roll can work in low-visibility zones.
- Coating: Bonding primer + cabinet-grade topcoat (satin/semi) for stain/grease resistance.
Local considerations for York
- Schedule door pickup and return to avoid rush-hour near Jane St at St Clair Ave West; predictable logistics help finishes cure undisturbed.
- Winter in Toronto is dry; plan humidity control so freshly painted doors don’t shrink at joints. Summer requires dust control with open windows.
- If you live near Smythe Park, ask about on-site ventilation and masking strategies; they keep overspray contained and protect adjacent rooms.
What Is “Cabinet Painting Price”?
Cabinet painting price is the total of labor, materials, logistics, and risk controls required to deliver a durable, factory-smooth finish. It’s not a single number—it’s an outcome of scope, condition, method, and coating choices matched to your kitchen’s realities.
When homeowners ask about cabinet painting price, they’re usually trying to predict value: how to get a high-end look, fast turnaround, and a finish that resists stains and chipping. In our experience across Toronto kitchens, clarity on the five levers above reliably produces the best balance of beauty, durability, and timeline.
- Labor: Skilled prep and application time, including careful masking and dust control.
- Materials: Degreasers, sandpapers, fillers, bonding primers, topcoats, strainers, and abrasives.
- Logistics: Door removal, labeling, transport to spray shop, secure drying, and reinstallation.
- Risk controls: Ventilation, filtration, temperature/humidity management, and cure-time protection.
Why Cabinet Painting Price Matters
Understanding price drivers lets you prioritize what you see and touch daily—door faces and hardware feel—while trimming low-impact extras. That’s how Toronto homeowners upgrade kitchens without demolition, downtime, or design regret.
Price clarity prevents scope creep and misaligned expectations. It also guards finish performance. For example, skipping a bonding primer on maple can invite peeling at door edges—high-traffic contact points. We focus spend where it pays off: adhesion, smoothness, and protective topcoats.
- Design impact: Most kitchens have more than twenty door/drawer faces; faces dominate the perceived result.
- Daily wear: Handles, trash pull-outs, sink base doors, and the island need extra attention.
- Resale signals: Straight lines, dust-free finishes, and consistent sheen communicate “well-kept home.”
- Downtime: A well-sequenced 5–10 day workflow minimizes kitchen disruption while coatings cure properly.
How Cabinet Painting Works (and How Pros Build Estimates)
Pros build cabinet painting estimates by mapping your scope, inspecting substrates, selecting prep and coating systems, and confirming logistics. A clear, stepwise workflow reduces risk, sets timelines, and anchors every line item to a visible deliverable.
Below is the sequence we use at Paint2decor INC for most Toronto projects. Each step is tied to a specific, inspectable result. This keeps both quality and communication high.
- Assessment and labeling: Count, label, and photo-document doors/drawers; note damage and previous coatings.
- On-site protection: Mask floors, counters, backsplash, and appliances; set up filtration and containment.
- Degrease and sand: Remove kitchen oils; scuff sand for mechanical bond; address glossy edges.
- Repairs: Fill dings, caulk seams, tighten loose hinges; light carpentry if required.
- Prime: Apply bonding or stain-blocking primer suited to oak, maple, MDF, or laminate.
- Finish coats: Spray cabinet-grade enamel or polyurethane-acrylic; target a smooth satin/semi sheen.
- Cure and reassemble: Allow controlled dry and cure; reinstall hardware and soft-close upgrades if requested.
- Final QA: Inspect lines, sheen uniformity, touch points, and door alignment; handover care guide.
| Estimate Component | What You See/Feel | Risk Managed |
|---|---|---|
| Masking & containment | Clean edges, dust-free counters | Overspray, dust, odor migration |
| Degreasing & sanding | Silky door edges, uniform touch | Adhesion failure, orange peel |
| Bonding primer | Even color base, no bleed-through | Peeling, tannin stains |
| HVLP spray application | Factory-smooth faces and rails | Brush marks, lap lines |
| Controlled cure | Hard, stain-resistant finish | Print-through, chipping |
For an in-depth look at pro sequencing, see our Toronto-specific kitchen cabinet spraying overview. If you’re comparing finish systems, this cabinet paint guide explains primers, resins, and sheen choices in plain language.
Types/Methods That Influence Your Price
Application method and setting drive finish quality and schedule. Spray-booth finishing on removable doors yields the most uniform look, while on-site brush/roll can suit interiors or low-visibility areas. Match the method to where eyes—and hands—land first.
Method comparison (where each shines)
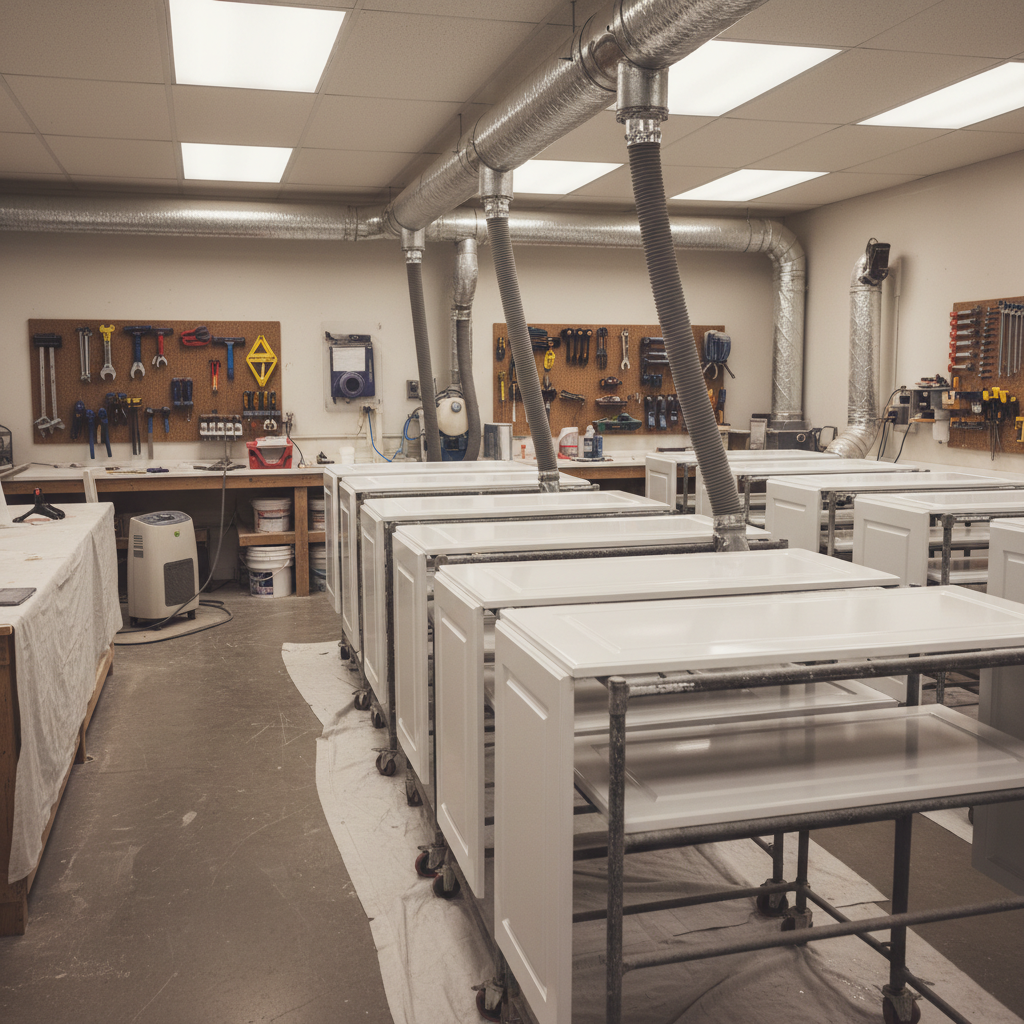
- Booth-sprayed doors/drawers: Factory-like smoothness; predictable dust control; excellent for faces and rails.
- On-site sprayed boxes: Consistent look with doors; requires professional containment and filtration.
- Brush/roll interiors: Practical for cabinet interiors or pantry shelving where texture is less visible.
- Refinishing vs. refacing: Refinishing reuses structure; refacing replaces doors/skins. Each changes the scope and workflow.
Substrate specifics (prep and coating matchups)
- Oak: Grain telegraphing minimized with grain filler and high-build primer.
- Maple: Dense, smooth; needs bond-focused primer to anchor enamel.
- MDF: Edge sealing is critical; avoid moisture exposure during cure.
- Thermofoil/laminate: Testing/bonding systems required; not all foils accept coatings.
If you want a practical walkthrough of spraying vs. rolling, our cabinet painting in Toronto page lays out options with photos and before/after examples relevant to GTA homes.
Best Practices to Control Your Cabinet Painting Price
Control price by controlling variables: define scope in writing, remove avoidable risks, and choose coatings that match how your kitchen is used. Small planning moves yield big downstream savings and better results.
- Map the scope: List doors, drawers, panels, crown, toe-kicks, island, and any glass or open shelving.
- Prioritize touch points: Elevate sink base, trash pull-out, and island faces for added durability.
- Approve a sample: A sprayed sample door locks sheen, color, and texture before full production.
- Lock the environment: Target 60–70°F and controlled humidity during application and cure.
- Stage hardware: Decide on pulls/knobs early so hole-filling or drilling happens once.
- Plan family logistics: Create a temporary coffee/snack zone to avoid cabinet traffic during cure.
We’ve condensed years of Toronto project lessons into our kitchen cabinet painting guide. If you’re refreshing oak, this updating oak cabinets article shows how grain management transforms the final look.
Want a shop-grade finish without the stress? Request a quick assessment from our York team—no pressure, just clear options tailored to your cabinets and timeline.
Tools/Resources Homeowners Actually Use
Great results come from great prep. Use degreasers, proper abrasives, and cabinet-grade coatings—and lean on pro resources to clarify choices. The right tools reduce redo risk and keep schedules on track.
- Prep kit: Citrus degreaser, Scotch-Brite, 120–220 grit papers, tack cloths, wood filler, and painter’s caulk.
- Masking: Low-tack tape, masking paper/plastic, zip walls, and floor protection.
- Application: HVLP or airless with fine-finish tips; high-density foam rollers for interiors.
- Coatings: Bonding primer + cabinet enamel or hybrid urethane-acrylic topcoat.
- Knowledge base: Our cabinet painting tools guide and best paint picks tailored to Toronto homes.
Local Pricing Drivers in York and the Toronto Metro
In York and across the Toronto metro, logistics and building types influence cabinet painting price. High-rise access, elevator bookings, and condo rules shape timelines, while detached homes emphasize dust control and cure management. Matching plan to property keeps results predictable.
We regularly coordinate with condo boards for elevator windows and protection rules. In single-family homes near York’s busy corridors, we stage equipment and ventilation to minimize disruption. Either way, a clear calendar—pickup, spray, cure, and reinstall—anchors the whole project.
- Access planning: Elevators, parking windows, and loading zones can compress daily production time.
- Seasonality: Spring/summer bookings move fast; lock dates early if you have vacation windows.
- Finish samples: Toronto’s natural light varies by season; approve color and sheen under your lighting.
If you want an outside perspective on steps and considerations, this concise third-party overview of painting cabinets outlines common process checkpoints you’ll see in professional quotes.
Case Studies: What Drives Outcomes in Real Toronto Homes
Real projects show how scope, method, and coating choices translate into visible results. These snapshots highlight the levers we adjusted to hit each homeowner’s goals without overcomplicating the job.
York bungalow near Smythe Park
The homeowner wanted to modernize honey oak without losing warmth. We filled grain on door faces, sprayed a satin enamel in a warm white, and left interiors rolled. The island received extra coats for durability at the family seating zone. The result felt brighter and easier to clean.
Downtown Toronto condo kitchen
Access and odor control were key. We scheduled door removal around elevator windows, sprayed in our shop, and used on-site filtration for box frames. A bonding primer anchored to smooth maple; the final satin sheen matched the building’s contemporary aesthetic.
North York family kitchen refresh
Busy traffic around the sink base and trash pull-out drove our priorities. We specified a cabinet-grade hybrid enamel and reinforced edge adhesion with thorough deglossing. Hardware was upgraded to soft-close—small touches that improved daily feel without expanding scope.
For more scenario planning, our refinishing considerations page explains when repainting, refinishing, or refacing makes the most sense for GTA homes.
How to Evaluate a Quote (Without Focusing on Numbers)
Judge quotes by clarity, not digits. Look for a line-by-line scope, identified coating system, surface prep steps, masking plan, and cure schedule. When each line maps to a visible deliverable, surprises disappear.
- Scope clarity: Exact count of doors/drawers, panels, moldings, and island surfaces.
- Prep detail: Degreasing, sanding grits, caulk/filler plan, and edge management.
- Coating stack: Primer name/type and topcoat resin/sheens called out.
- Application method: Where spraying occurs (shop vs. on-site) and how containment works.
- Cure window: Recoat times and when doors are safe to touch or rehang.
- Warranty language: What’s covered, response time, and how touch-ups are handled.
For a deeper dive into professional considerations, see this third-party note on factors pros consider when repainting cabinets. Use it as a checklist while reviewing proposals.
Common Pitfalls That Quietly Increase Your Price
Hidden variables—like undisclosed repairs, last-minute color changes, or poor site prep—inflate complexity. Lock them early. A clean, staged jobsite with approved samples shortens timelines and protects the finish.
- Skipping sample approval: Leads to repaints when natural light reveals surprises.
- Underestimating repairs: Loose hinges, swollen MDF edges, and caulk gaps need attention.
- Color indecision: Changing late triggers remasking, re-priming, and scheduling shifts.
- DIY prep issues: Residual silicone or cooking oil resists coatings; thorough degreasing matters.
- Touching too soon: Handles before full cure can imprint finishes; wait for the green-light window.
If you want to explore hands-on steps safely, this independent how-to overview outlines the baseline process most pros follow—use it to understand where quality is won.
FAQ: Cabinet Painting Price and Process
These quick answers address the most common questions Toronto homeowners ask about cabinet painting price, timelines, and finish options—without mentioning dollars. Use them to plan with confidence.
What should be included in a professional cabinet painting quote?
Expect a line-by-line scope, coating system, prep steps, application method, protection plan, and cure schedule. Clear inclusions—like door count, panels, and moldings—reduce change orders and help you compare proposals fairly.
How long does a typical cabinet painting project take?
Most projects run about one to two weeks door-to-door, including door removal, shop spraying, controlled cure, and reinstallation. Complex repairs, grain filling, or condo logistics can extend timelines. A clear calendar prevents delays.
Can all cabinet materials be painted?
Solid wood, maple, oak, and MDF typically accept coatings with the right primer and prep. Some thermofoil and laminate surfaces require specialized bonding systems or may be better suited to refacing. Testing and expert evaluation are key.
What finish is best for kitchen cabinets?
Satin or semi-gloss cabinet-grade enamels balance cleanability with refined look. They resist stains and handle frequent cleaning around sinks, stoves, and high-touch areas better than flat finishes.
How do I keep my newly painted cabinets looking new?
Avoid harsh cleaners for the first month while coatings reach full hardness. Use soft cloths and mild soap, and install felt bumpers. Address drips and splashes quickly to prevent staining at seams and edges.
Key Takeaways
Price control equals variable control. Define scope, match method to visibility, prioritize adhesion and cure, and approve a sample door before production. These moves protect timelines, finishes, and peace of mind.
- Scope and substrate drive effort; write them down first.
- Spray where eyes land; brush/roll where texture won’t show.
- Bonding primer + cabinet enamel is a proven combo in Toronto homes.
- Environment control and cure windows matter as much as product labels.
Conclusion and Next Steps
If you align scope, prep, method, and coatings to your kitchen’s realities, your cabinet painting price becomes predictable—and your finish lasts. The best quotes make these levers explicit so you can choose with confidence.
Ready to see how this applies to your home? Explore our professional painting considerations for Toronto kitchens or jump straight to our cabinet repainting overview. When you’re set, our York team will map your scope, sample your finish, and schedule a smooth, low-stress transformation.