
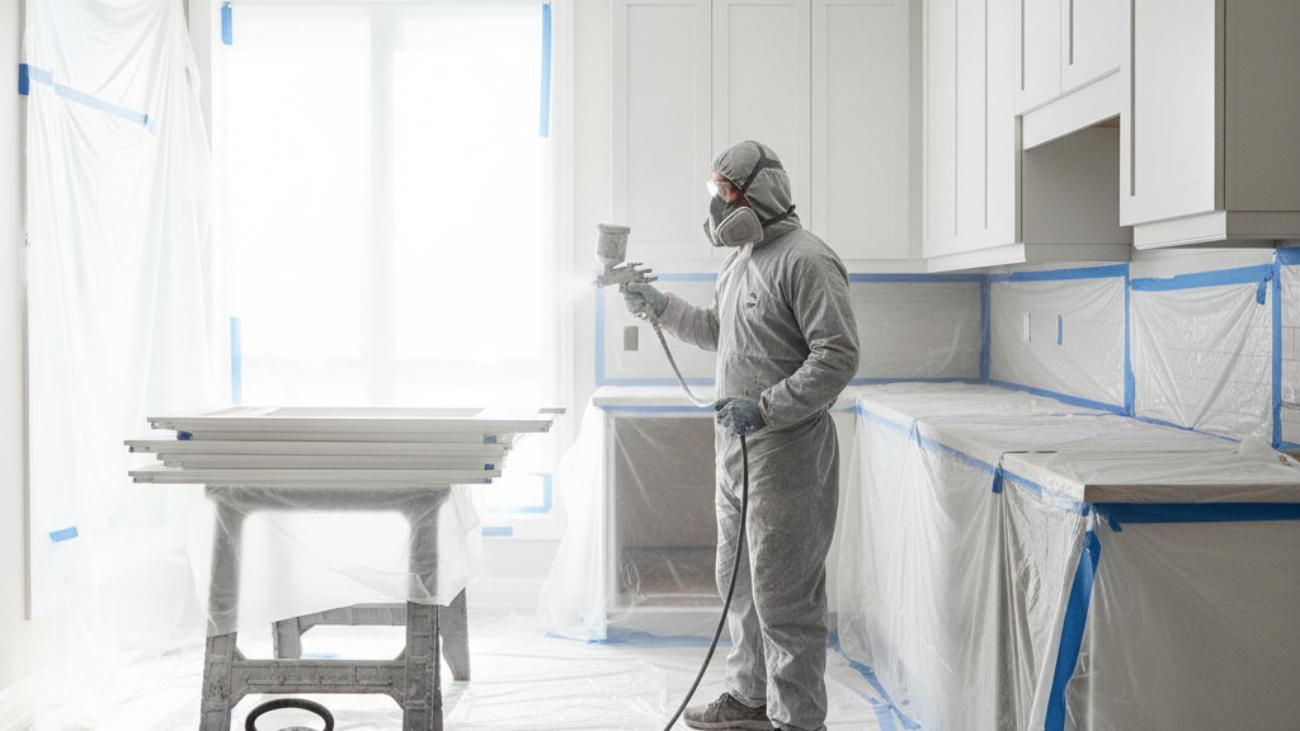
Kitchen cabinet respraying is the professional spray-finishing of existing doors, drawer fronts, and frames to deliver a factory-grade look without replacing boxes. In York at 2710 St Clair Ave W, our Paint2decor INC team resprays kitchens for Toronto and GTA homeowners seeking a faster, cleaner makeover with durable coatings and controlled spray systems.
By Masoud Kakar — Paint2decor INC
Last updated: 2026-05-13
Overview and Table of Contents
This guide explains kitchen cabinet respraying from end to end: what it is, why it matters, prerequisites, step-by-step workflow, best practices, troubleshooting, and how it compares to brushing, refinishing, and refacing. Use it to plan a smooth, low-disruption upgrade for your Toronto-area home.
Here’s how to use this complete guide quickly.
- What it is: Clear definition with core benefits.
- Why it works: Durability, speed, and design flexibility.
- Before you start: Prerequisites, scope, and safety.
- How it’s done: 10-step process our York team follows.
- Pro tips: Finish systems, spray settings, curing.
- Troubleshooting: Fix runs, orange peel, fisheyes.
- Compare options: Respray vs brush/roll vs refacing.
- Real examples: York and Toronto case summaries.
Quick Summary
Cabinet respraying renews sound cabinets by scuffing, priming, and spray-finishing doors and frames with pro coatings. Expect 2–3 coats, controlled airflow, and 7–14 days for full cure. It’s faster and cleaner than replacement, while delivering a smooth, consistent look across maple, oak, MDF, and thermofoil-compatible parts.
- Typical parts count: Many GTA kitchens have 20–40 doors/drawer fronts.
- Surface prep: Degreasing + 180–220 grit scuff-sand improves adhesion.
- Coat schedule: Bonding primer, then two color coats; third coat for deep hues.
- Cure window: Tack-free in 30–60 minutes; handle in 12–24 hours; full cure 7–14 days.
- Disruption: Most kitchens remain functional throughout the project.
Local considerations for York
- Plan door pickup/drop-off to avoid rush near Jane St at St Clair Ave West; morning windows reduce delays.
- Humidity swings in spring and fall around York affect dry times; build in 10–20% buffer for curing.
- For in-home masking near the Toronto Public Library – Daniel G. Hill Branch area, confirm ventilation routes before setup.
What Is Kitchen Cabinet Respraying?
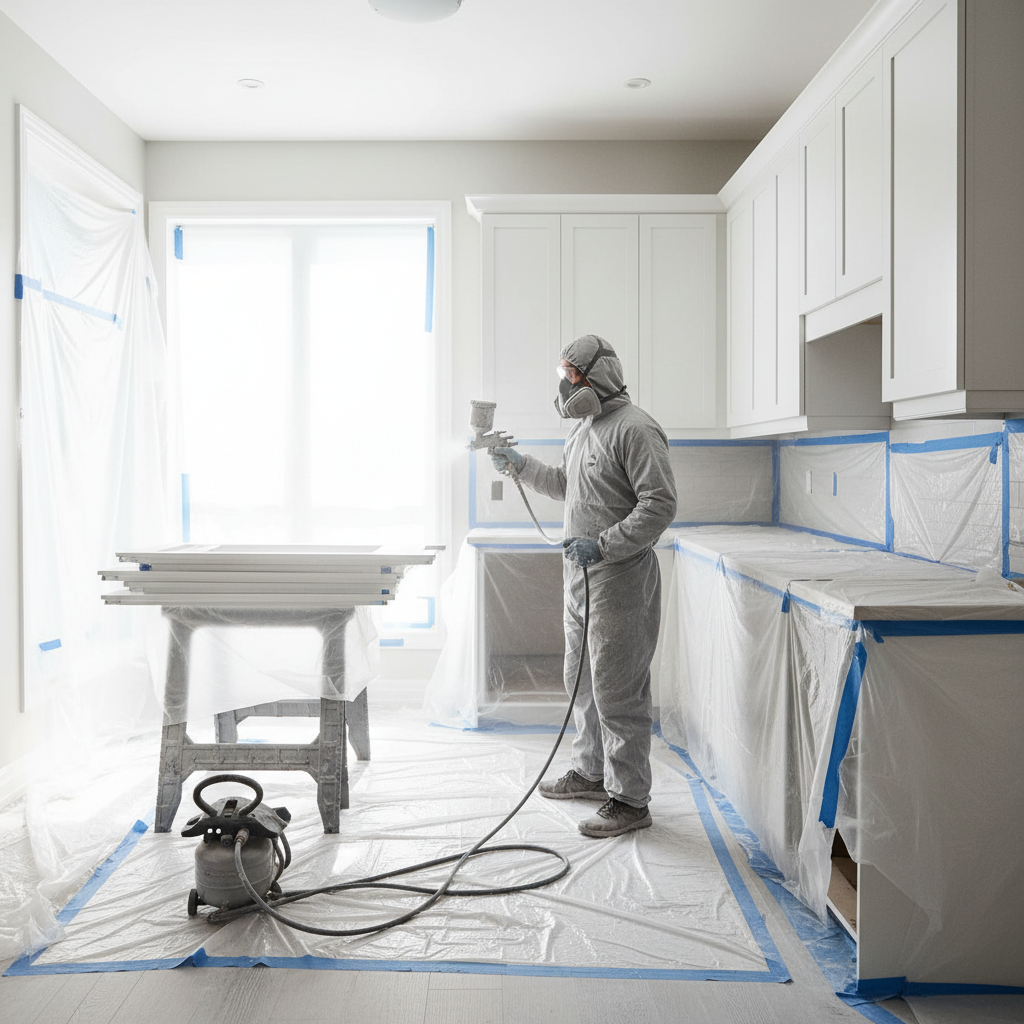
Kitchen cabinet respraying is the pro process of removing doors, prepping surfaces, and spraying high-performance coatings for a factory-like finish. In York and across Toronto, it upgrades kitchens in days, not weeks, while keeping existing cabinet boxes in place.
Respraying targets sound substrates—solid wood, MDF, and many veneers—through cleaning, sanding, priming, and finishing with an HVLP or air-assisted sprayer. The goal is a uniform, durable film that looks like new cabinetry.
- Where it’s done: Frames sprayed on-site; doors/drawers sprayed in a controlled booth.
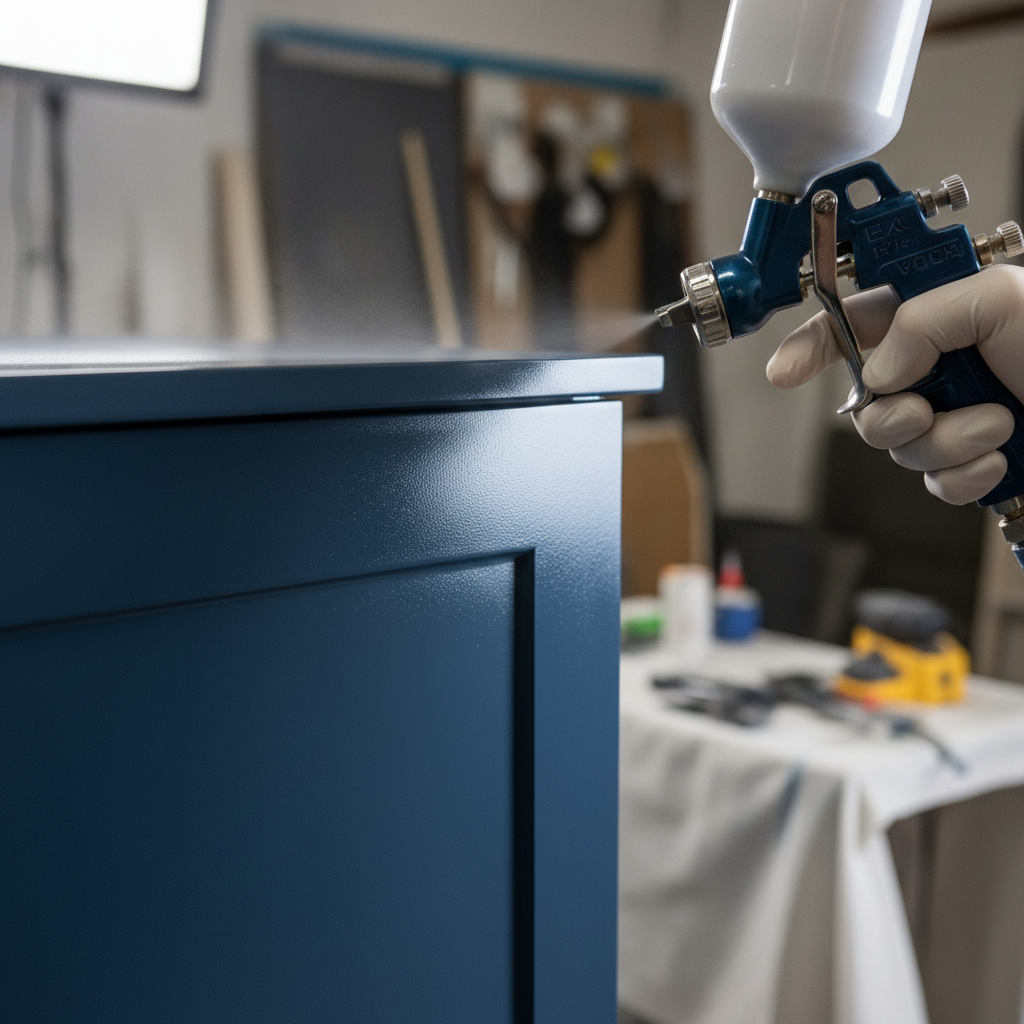
- Equipment: HVLP guns with 1.3–1.5 mm tips deliver fine atomization and minimal overspray.
- Film build: Many systems target 3–5 mil total dry film for durability and scrub resistance.
- Color/Sheen: Popular in Toronto: soft white, creamy off-white, greige, navy, and satin/matte sheens.
When cabinets are structurally compromised or layouts need big changes, we redirect homeowners to refacing or new boxes. Otherwise, respraying maximizes what you already own.
Why Cabinet Respraying Matters for GTA Homes
Respraying matters because it delivers a like-new look, quick turnaround, and design flexibility without replacing cabinet boxes. It reduces waste, limits disruption to a few days, and supports color updates that align with Toronto design trends.
Homeowners value less disruption: most projects allow cooking access while frames are masked and doors are off-site. Two to three spray coats create consistent texture and color across oak, maple, and MDF. Many kitchens finish within 4–7 working days, with final reassembly on day 5–8 depending on complexity.
- Sustainability win: Reusing boxes can divert hundreds of pounds of material from landfill.
- Speed: Many door sets dry to handle in 12–24 hours; full cure stabilizes in 7–14 days.
- Design agility: Deep colors (navy/black/evergreen) pair well with satin; whites often shine in matte/satin.
- Hardware refresh: Many Toronto homeowners add new pulls/hinges during reassembly—measurable visual lift in under an hour per bank.
For kitchens with solid bones, respraying creates dramatic before/after results—without layout demo, stone removal, or appliance downtime.
Prerequisites and Readiness Checks
Successful cabinet respraying starts with clean, sound surfaces, accessible work areas, and a plan for ventilation. Confirm cabinet material, degrease thoroughly, and schedule masking paths. Minor repairs happen before primer; major damage shifts to refacing or replacement.
Before we book your York or Toronto project, we run a structured readiness review.
Readiness checklist
- Material ID: Solid wood and MDF spray well; peeling thermofoil needs special handling.
- Grease removal: Kitchens accumulate oils—full-strength degreaser improves adhesion rates significantly.
- Moisture check: Sink/ dishwasher bases should be dry; moisture causes primer adhesion issues.
- Repair scope: Fill chips/gouges with a two-part filler; typical cure is 15–30 minutes before sanding.
- Ventilation route: Window/door venting planned in advance; airflow targets 400–800 CFM during on-site spraying.
- Access: Clear counters and floors around banks; 3–4 feet of working space speeds masking by 20–30%.
When respraying is not ideal
- Severe water damage: Swollen MDF or rotted bottoms call for new panels or cabinet refacing.
- Layout changes: If you’re moving appliances or resizing boxes, consider a refacing path or new cabinetry.
- Heavily contaminated grease: Extreme buildup warrants deeper restoration steps before coatings.
Step-by-Step Respraying Process
Our York-based team follows a disciplined, 10-step spray workflow: document, label, remove, degrease, sand, repair, prime, finish-coat, cure, and reassemble. Each step protects adhesion, levels texture, and delivers a consistent, factory-like result.
- Assess and document: Count doors/drawers (often 20–40), photograph hinges and reveals, and map any repairs.
- Label and remove: Number every piece; bag hardware. Accurate labeling cuts reassembly time by 30–50%.
- Degrease: Clean with a strong kitchen-safe degreaser; rinse thoroughly to avoid residue.
- Scuff-sand: Sand frames and doors with 180–220 grit until uniformly dull; vacuum and tack-cloth.
- Repair: Fill dings; sand flush. Hairline cracks may get a flexible filler to prevent telegraphing.
- Mask and tent: Plastic sheeting isolates the kitchen; zippers create 24–36-inch entries; floors covered.
- Prime: Bonding primer equalizes porosity; sand lightly with 320–400 grit to knock down nibs.
- Finish coats: Spray two color coats at the recommended mil build; third coat for deep hues or heavy-grain oak.
- Cure and handle: Doors reach dust-free in 30–60 minutes; handle in 12–24 hours; install after sufficient cure.
- Reassemble and adjust: Align reveals to 2–3 mm; install new hardware if selected; final QC pass.
Most projects complete in a work week. Complex kitchens—pantries, islands with panels, or glass-fronts—add a day or two for detailing.
Types, Methods, and Approaches
Pro respraying combines the right spray system, coating chemistry, and shop setup. HVLP guns minimize overspray, waterborne and catalyzed finishes add durability, and controlled booths keep dust out while doors cure evenly on racks.
Spray systems
- HVLP turbine/compressor: 1.3–1.5 mm tips, 18–24 inches from surface, steady overlap for even film.
- Air-assisted airless: Efficient for shops with high throughput; fine atomization with less bounce-back.
Coatings and primers
- Bonding primers: Improve adhesion on factory finishes; sandable in 30–60 minutes under optimal conditions.
- Waterborne urethanes/alkyds: Low odor, hard-wearing; many reach service hardness within 7–10 days.
- Catalyzed systems: Two-component chemistry for superior stain/chemical resistance; follow pot-life strictly.
Booth vs on-site finishing
- On-site frames: Masking and negative-air venting manage overspray; daily cleanup keeps dust low.
- Shop doors: Dedicated racks allow 8–12 doors per bay; balanced airflow reduces orange peel risk.
In our experience across Toronto, pairing a sandable bonding primer with a durable waterborne topcoat gives a beautiful satin finish that resists fingerprints and cleans easily.
Best Practices for a Factory Finish
The best results come from meticulous prep, controlled spray technique, and patient curing. Degrease thoroughly, scuff uniformly, set gun pressure and fan pattern, and let coatings reach handling strength before reassembly.
- Surface prep: Two passes of degreasing increase adhesion reliability; change rags frequently.
- Sand progression: 180–220 grit for scuff; 320–400 between coats to level nibs.
- Spray parameters: Keep a consistent 6–8 inch gun-to-surface distance; 50% overlap per pass.
- Environmental control: Target 65–75°F and 40–60% RH; higher humidity slows coalescence.
- Edge-first strategy: Spray edges before faces to avoid sags; watch lower rails and stiles.
- Flash times: Respect 20–40 minute recoat windows to avoid trapped solvents/moisture.
We also log gun settings and viscosity for each project. Reproducible parameters lead to consistent texture from door one to door forty.
Tools and Resources You’ll See Us Use
Expect pro-grade sprayers, sanding systems, and curing racks. We pair HVLP guns with fine filters, HEPA vacuums for dust, adjustable drying racks for 20–40 doors, and accurate moisture and temperature meters to keep conditions in the sweet spot.
- Sprayers: HVLP with 3-stage+ turbines or compressor-driven guns; fine mesh cup filters reduce spitting.
- Abrasives: 180–400 grit packs; interface pads help conform to molded profiles.
- Masking: Static-resistant sheeting, low-tack tapes; fresh blades improve clean lines.
- Safety: Respirators with appropriate cartridges; nitrile gloves; eye protection; hearing protection when needed.
- Monitoring: Hygrometers and IR thermometers; maintaining 65–75°F and 40–60% RH prevents dryness defects.
If you want a deeper DIY perspective on brushing and rolling techniques, this overview of painting steps offers a helpful contrast to pro spraying—see how to paint kitchen cabinets for an alternate approach.
Troubleshooting Common Issues
Most spray defects trace back to prep, environment, or technique. Address orange peel with thinner or pressure tweaks, fix runs by leveling and respraying, and stop fisheyes by deep degreasing and filtering your finish.
Orange peel (bumpy texture)
- Root causes: Viscosity too high, fan too narrow, or air pressure too low.
- Fix: Lightly sand with 600 grit; adjust viscosity or pressure; widen fan; respray a leveling coat.
Runs and sags
- Root causes: Too close, too slow, or overbuilt film on lower rails/panels.
- Fix: Let partially cure, shave with a sharp razor, feather-sand 600–800 grit, respray light passes.
Fisheyes (craters)
- Root causes: Silicone/grease contamination or oil aerosol.
- Fix: Aggressive degreasing; replace contaminated rags; use a compatible additive if approved.
Adhesion failure (peeling)
- Root causes: Inadequate scuff-sanding, skipping primer, or recoating too soon.
- Fix: Sand back to sound film; reprime with bonding primer; observe recoat windows.
We document adjustments on-site so the final coat sequence stays consistent across every door, drawer, and face frame.
Respraying vs. Other Options
Choose respraying when your boxes are sound and you want a fast, uniform color change. Pick refacing when doors are outdated or damaged, and brushing/rolling if DIY is your priority. Full replacement fits layouts needing structural change.
| Option | What It Involves | Timeline | Best For | Notes |
|---|---|---|---|---|
| Respraying | Scuff, prime, spray 2–3 coats on existing doors/frames | ~4–7 work days | Sound boxes, color change | Factory-like texture; minimal disruption |
| Brush/Roll Painting | Manual coating with brushes/rollers | ~5–10 days | DIY path | More brush marks; slower cure |
| Refacing | New doors/drawer fronts + veneer skins | ~1–2 weeks | Style change, damage | Pairs well with new hardware |
| Replacement | Remove boxes; install new cabinetry | Several weeks | Layout redesign | Highest disruption; permits may apply |
If you’re weighing a door and veneer update, our cabinet refacing overview and refacing guide break down styles and timelines for Toronto homes.
Case Studies and Examples
Across York and Toronto, we’ve resprayed kitchens ranging from compact condos to large family homes. These mini case notes show timelines, materials, and the small choices—hardware, sheen, edge detail—that drive standout results.
York bungalow refresh (M6N)
- Scope: 26 doors/drawers, maple shaker, added crown touch-ups.
- Finish: Bonding primer + satin waterborne urethane; two color coats.
- Timeline: Five working days; reassembly on day 6 with new pulls.
- Result: Noticeably brighter room; easy-clean finish for a busy kitchen.
Toronto mid-rise condo
- Scope: 18 pieces, MDF slab doors; tight site access.
- Finish: Matte greige; edges sprayed first to prevent sags.
- Timeline: Four working days; quiet hours observed for neighbors.
- Result: Uniform, modern texture; zero brush marks.
Family home near Smythe Park
- Scope: 34 pieces, open-grain oak filled selectively on island.
- Finish: Deep navy satin with a third coat for depth.
- Timeline: Seven working days including grain management.
- Result: Statement island; updated pulls aligned to 96 mm centers.
Want to see what’s possible with your doors and frames? Explore our kitchen cabinet respraying service and learn how our York spray team manages prep, coating, and reassembly.

Scheduling and Home Prep
Good scheduling protects your routine. We remove doors early, keep frames masked for 2–4 days, and coordinate drop-off/reinstall windows so your kitchen stays usable. Clear counters, empty drawers to 50%, and plan pet access before masking begins.
- Access windows: Morning door pickup reduces traffic delays; reinstall often lands by day 5–8.
- Protection: Appliances and floors covered; zipper doors maintain household flow.
- Hardware choices: Decide pulls/knobs before reinstall; drilling templates ensure consistency.
- Ventilation path: Window vent kits and filters control airflow without drafts.
A 10–20% buffer for weather keeps timelines realistic during humid Toronto weeks.
Care and Maintenance After Respraying
After respraying, treat doors gently for the first week. Wipe with non-abrasive cloths, avoid harsh chemicals, and let the coating reach full cure. Most finishes achieve service hardness between days 7 and 14 under typical indoor conditions.
- Early days: Avoid stacking heavy items against freshly coated doors for 5–7 days.
- Cleaning: Use mild soap and water; no abrasive pads or ammonia-based cleaners.
- Touch-ups: Keep a small amount of finish for tiny nicks; micro-brushes help with corners.
- Hardware: Recheck hinge screws after one week; wood movement can loosen fasteners.
With simple care, pro spray finishes maintain their look for years of daily cooking and cleaning.
Frequently Asked Questions
Here are concise answers to common respraying questions we hear from Toronto homeowners. Each response focuses on process, durability, and day-to-day impact—so you can plan with confidence.
How long does cabinet respraying take?
Most kitchens wrap within 4–7 working days. Doors and drawers are removed early, frames are masked for 2–4 days, and reassembly typically lands by day 5–8 based on part count and complexity.
Will spray finishes hold up to daily use?
Yes. Pro-grade primers and waterborne/catalyzed topcoats form a hard, washable film. Most systems reach handling strength within 24 hours and service hardness within 7–14 days when room conditions are controlled.
Can you spray oak without heavy grain showing?
You can minimize grain telegraphing with a sandable primer, selective grain filler on prominent panels, and a third color coat. Many clients like a light grain reveal; others prefer a smoother, filled look—both are achievable.
Do I need to empty all cabinets?
Usually not. Clearing counters and reducing drawer contents by about half is enough. We mask interiors and maintain zipper-door access so most kitchens remain usable during the project.
What if my doors are damaged or I want a new style?
That’s when refacing shines. We keep your boxes, install new doors/drawer fronts, and apply matching veneer. Explore our refacing options to update profiles and edge details while keeping your layout.
Where to Start (and a Helpful Next Step)
Start by confirming materials, part counts, and color targets. Then review our process and schedule a quick assessment. A short call aligns timelines, site access, and sheen choices so your project moves smoothly from prep to reassembly.
Thinking about a kitchen refresh in York or anywhere in Toronto? Review our respraying service page, then connect with our York spray team to plan your color, sheen, and timeline.
Additional Resources and References
For deeper background, compare DIY painting approaches, cabinet part terminology, and planning checklists. These references complement our pro workflow and help you make confident decisions about finishes and timelines.
For a DIY contrast, see this step overview: how to paint kitchen cabinets. If you want cabinet part definitions and planning context, browse this concise cabinetry guide. For a look at decision factors around repainting, skim these repainting considerations.
Key Takeaways
Cabinet respraying delivers a factory-like upgrade fast, keeps kitchens usable, and offers broad color and sheen flexibility. With solid prep, controlled spraying, and patient curing, Toronto homes get durable, uniform finishes that look new for years.
- Plan ventilation, access, and degreasing up front to protect adhesion.
- Use bonding primer and 2–3 finish coats; respect flash and cure windows.
- Address defects methodically—sand, adjust settings, and respray light passes.
- Choose respraying for sound boxes; refacing or replacement for layout/style changes.
- Confirm hardware, sheen, and reassembly targets before day one.
Ready to see what a pro spray finish can do for your kitchen? Our York-based team serves Toronto and the GTA with disciplined prep, clean booths, and meticulous reassembly.