
Toronto kitchen cabinet refinishing mistakes are the preventable errors that cause peeling paint, rough textures, drips, and premature wear on cabinet finishes. In York, we see most issues come from rushed prep, the wrong primers, and spraying in poor conditions. Avoiding these mistakes leads to a smoother finish, stronger adhesion, and longer-lasting results.
By Paint2decor INC — GTA Cabinetry Refinishing Specialists • Last updated: 2026-07-01
Summary
Homeowners in Toronto most often battle adhesion failure, orange peel, brush marks, and chipping after cabinet refinishing. The root causes are poor cleaning, skipping sand/scuff steps, wrong primer, and uncontrolled humidity or temperature. A disciplined, pro-grade process fixes this: thorough degreasing, mechanical scuffing, bonding primer, controlled spray, and proper cure time.
Here’s what you’ll learn in this complete guide tailored to Toronto homes and York kitchens:
- What kitchen cabinet refinishing is and why mistakes cut finish life short
- How pro refinishing works, step-by-step, with checkpoints and tolerances
- The 12 most common Toronto errors and how to avoid each one
- Best practices, tools, and a printable checklist for homeowners
- Local considerations for York kitchens and nearby microclimates
- When to refinish vs. reface, and how Paint2decor INC supports both
What is kitchen cabinet refinishing?
Kitchen cabinet refinishing is the professional process of restoring existing cabinet boxes and doors by cleaning, scuff-sanding, priming, and applying durable coatings. It preserves layout and structure while renewing color and protection. Unlike refacing, refinishing keeps your original doors and boxes, typically with spray-applied finishes.
Refinishing matters because it extends the life of solid cabinet frames and quality hardwood doors. It avoids the waste of full replacement while giving you a new finish system. For many Toronto homes, this is the smartest balance of impact, speed, and disruption control.
To explore fundamentals and finishes in more depth, see our kitchen cabinet refinishing guide covering surface prep, primers, and spray options for GTA homes.
Why mistakes matter (durability, safety, and resale)
Refinishing mistakes shorten finish life, drive callbacks, and create safety risks like poor ventilation during spraying. They also harm resale value by making a kitchen look tired before its time. Preventing errors preserves adhesion, smoothness, and sheen consistency—key factors buyers and inspectors notice.
Here’s why getting it right pays off in and around York:
- Adhesion is everything. In our experience, over half of premature failures we assess trace back to inadequate cleaning and scuffing before primer.
- Finish quality shows up in photos. Real estate listings amplify texture issues (like orange peel) under bright light and wide-angle lenses.
- Indoor air quality counts. Proper masking, ventilation, and VOC awareness reduce odor and overspray drift inside multi-family buildings.
When a Toronto kitchen has good bones, a correct refinishing system can make doors and boxes look factory-new. Conversely, one or two basic errors can reduce a fresh finish to chips and rub-throughs within months.
The 12 most common Toronto kitchen cabinet refinishing mistakes
The most common Toronto refinishing mistakes are poor degreasing, skipping scuff-sanding, using the wrong primer, spraying in high humidity, mis-tinting whites, heavy coats, inadequate dry times, weak masking, poor hardware labeling, ignoring repairs, not cleaning dust, and reinstallation rush. Each has a simple fix.
1) Incomplete degreasing and residue removal
- Kitchen aerosols and cooking oils embed into cabinet films. If not fully removed, primers can’t bite.
- Action: Use a dedicated degreaser and rinse cycle. Change rags frequently; fresh solution prevents re-depositing oils.
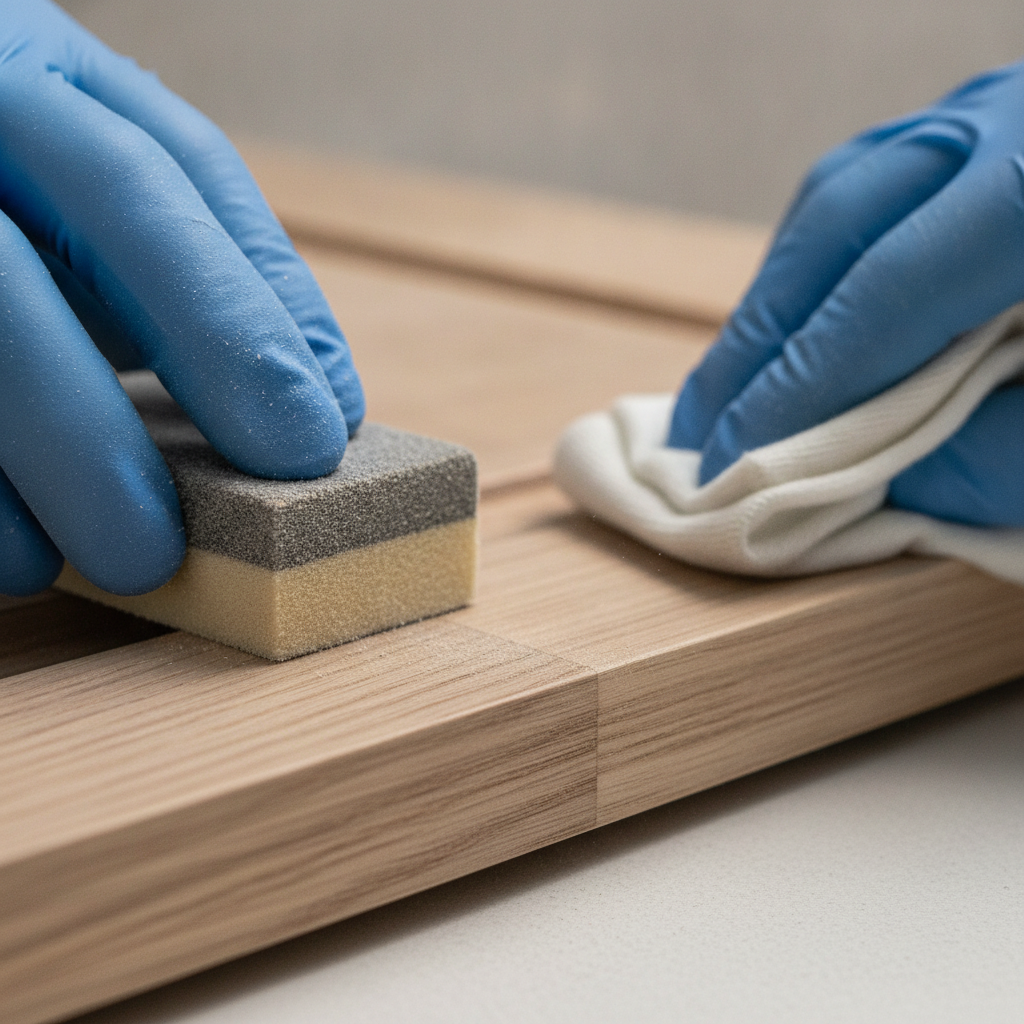
2) Skipping or underdoing scuff-sanding
- Glossy, factory-cured doors need a mechanical tooth for primer. No tooth, no hold.
- Action: Uniform scuff with appropriate grits, then tack-cloth clean before primers.
3) Wrong primer (no bonding or stain-blocking)
- General-purpose primers struggle on catalyzed finishes or tannin-rich woods.
- Action: Choose bonding or stain-blocking primers matched to substrate and finish system.
4) Spraying in poor conditions
- High humidity or low temps slow cure and cause texture issues like orange peel and sags.
- Action: Control temperature and humidity; log readings before and during spraying.
5) Overloading coats
- Heavy passes create sags, solvent trap, and weak films.
- Action: Apply multiple light coats with measured flash times.
6) Mis-tinting whites and neutrals
- Cool vs. warm undertones shift under LEDs; mismatches show against trim and walls.
- Action: Sample boards under your actual lighting and daylight before full spray.
7) Dust control misses
- Fine dust telegraphs through glossy films and ruins sheen uniformity.
- Action: Stage a clean zone, use air scrubbers, and wipe surfaces between coats.
8) Hardware labeling and mapping errors
- Unlabeled hinges and doors cause reinstallation delays and misaligned doors.
- Action: Number, map, and bag hardware by cabinet run; take reference photos.
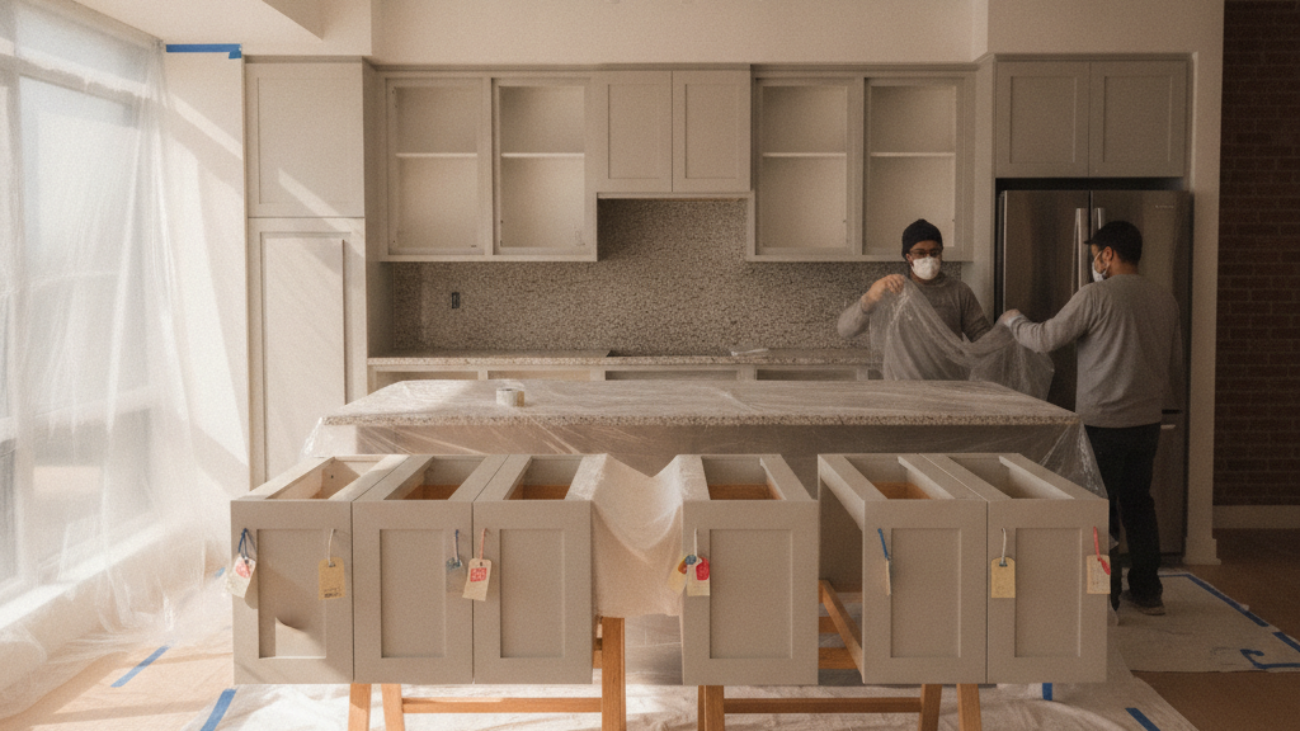
9) Masking shortcuts
- Light switch plates, appliances, and floors need full protection to avoid overspray specks.
- Action: Plastic containment, edge taping, and zipper doors protect adjacent areas.
10) Ignoring substrate repairs
- Dents, cracks, and loose joints telegraph through the finish and fail early.
- Action: Fill, clamp, and sand repairs before primer for a flat, quiet surface.
11) Rushing cure and reassembly
- Soft films mar during hinge setting; fingerprints and imprints become permanent.
- Action: Respect cure windows and use soft blocks and pads during rehang.
12) Using the wrong application method
- Some doors look best sprayed; others are fine brushed. For most Toronto kitchens, controlled spray delivers the most consistent sheen.
- Action: Match the method to wood species, profile, and target finish.
If you’re weighing alternative routes like new doors and fronts, our kitchen cupboard refinishing guide outlines scenarios where refinishing shines—and where refacing may be smarter.
How professional refinishing works (step-by-step)
The professional process follows a fixed sequence: document and label; degrease; remove doors and hardware; scuff-sand; dust removal; bonding/stain-blocking primer; sand and inspect; spray topcoats in controlled conditions; cure; reassemble with adjustments. Each checkpoint controls adhesion, smoothness, and sheen.
- Assess and document. Photograph runs, label doors, and note repairs. Create a simple map of bases, uppers, and pantry units.
- Degrease thoroughly. Fresh pads and rinse cycles matter. In our experience, more than half of adhesion issues begin here.
- Remove doors and hardware. Bag and tag hinges/handles; reduce handling marks with gloves.
- Scuff-sand and repair. Uniform tooth; fill dents; tighten loose joints; feather sand filled areas.
- Dust management. Vacuum, tack cloth, and air scrubber pass; spotless surfaces pay off in the topcoat.
- Prime to the substrate. Bonding or stain-blocking primers depending on wood species and prior finish.
- Sand and inspect again. Flatness and profile clarity ensure a factory-level look after color.
- Spray topcoats. Light, even passes with measured flash and cure windows; match sheen to design intent.
- Controlled cure. Respect environmental controls and time; don’t rush rehang.
- Reinstall and adjust. Align doors, set reveals, and verify soft-close function where applicable.
For a deeper dive into our approach, skim our cabinet refinishing guide and our cabinet respraying service overview for spray specifics used in Toronto homes.
Types, methods, and when to choose refinishing vs. refacing
Refinishing renews existing doors and boxes; refacing replaces door/drawer fronts and adds veneer skins to boxes. Spraying yields the most even sheen; brushing or rolling can work for select profiles. Choose refinishing for solid frames and good doors; choose refacing when doors are damaged or stylistically outdated.
Refinishing: best when the bones are good
Refinishing makes sense when cabinet frames are sturdy and doors are hardwood or quality MDF. It’s ideal for color changes and sheen updates without altering layout. Many York homeowners use refinishing to modernize oak or maple while retaining solid carpentry.
Refacing: best for a style reset
Refacing swaps doors/drawers and skins box faces. It’s the right call when profiles are dated or doors are beyond repair. If you’re on the fence, our team can assess during a consultation and outline a refinishing vs. refacing roadmap that aligns with your goals.
Curious about spray-only transformations? Our kitchen respraying guide shows how controlled spray environments deliver uniform, durable films across GTA kitchens.
Best practices Toronto homeowners can rely on
Win with disciplined prep, substrate-matched primers, controlled spray environments, and patient cure times. Add good labeling, dust control, and color sampling under your actual lighting. These habits prevent 90% of Toronto’s common refinishing failures and produce a consistent, factory-level finish.
- Clean like the finish depends on it—because it does. Degrease > rinse > dry before any sanding.
- Scuff uniformly with the right grits; glossy films need mechanical tooth to hold new coatings.
- Prime to the problem: bonding primer for slick finishes; stain-blocker for tannins/knots.
- Control conditions: log temp and humidity; target stable ranges during spray and cure.
- Spray light, even passes: avoid heavy coats to reduce sags and solvent trap.
- Sample colors in situ under your kitchen’s daytime and evening lighting.
- Label everything and photograph hinge positions to speed a clean rehang.
If you’d like our team to handle the process end-to-end, this playbook is exactly what we deliver in our professional refinishing service for Toronto homeowners.
Tools and resources (homeowner checklist)
A reliable kit includes degreaser and rinse pails, sanding blocks and papers, HEPA vacuum, tack cloths, high-adhesion primer, HVLP spray setup or pro brushes, masking plastics and tapes, and humidity/temperature meters. A one-page labeling checklist prevents rehang headaches.
Core tools
- Degreaser, clean-water rinse pail, and fresh microfiber cloths
- Sanding blocks/papers, detail pads for profiles
- HEPA vac and air scrubber (for dust control)
- Tack cloths, lint-free wipes, and nitrile gloves
- Bonding or stain-blocking primer matched to substrate
- HVLP spray gun and tips, or pro-grade brushes/rollers
- Masking plastics, zipper doors, edge tapes, floor protection
- Thermo-hygrometer to log temperature and humidity
Labeling checklist (save this)
- Assign a number to each door and drawer front; note its location on a simple map.
- Bag and tag hardware by run; write the matching number on painter’s tape.
- Photograph hinge positions and overlay notes for quick reassembly.
For a process overview from a broader renovation lens, Altima Kitchens’ process overview offers additional perspective on prep and paint flows.
How local conditions in York affect cabinet refinishing
York kitchens often sit in mid- or high-rise buildings with variable HVAC and humidity swings. Stable spray and cure conditions, containment, and careful scheduling around building operations are crucial. Sampling colors under your actual lighting helps avoid undertone surprises after installation.
Local considerations for York
- Plan containment so nearby spaces—like study areas at the Toronto Public Library – Daniel G. Hill Branch—aren’t affected by odor or dust during daytime hours.
- Seasonality matters: spring and fall bring humidity swings. Log readings and adjust flash times to prevent orange peel.
- In multi-unit buildings near Smythe Park, coordinate elevator bookings for door transport, and schedule quiet hours for spraying equipment setup.
DIY vs. pro: realistic outcomes and risks
DIY can work on small, forgiving projects with brush-friendly profiles. For most Toronto kitchens, pros deliver better adhesion, texture, and sheen uniformity thanks to dust control, bonding primers, and controlled spray. If you value durability and speed, a professional workflow is the safer path.
| Factor | DIY Approach | Professional Approach |
|---|---|---|
| Prep discipline | Varies; easy to under-clean and under-sand | Documented degrease + scuff standards |
| Primer selection | General-purpose often chosen | Substrate-matched bonding or stain-blocker |
| Application | Brush/roller; risk of marks | Controlled HVLP spray; even sheen |
| Environment | Open rooms; dust risk | Containment and air scrubbing |
| Finish longevity | Inconsistent; touch-ups likely | Durable film with proper cure |
If you’re comparing pathways, our overview of kitchen respraying outlines when a spray-driven approach pays off versus hand application on certain door profiles.
Want a pro assessment? Paint2decor INC specializes in cabinetry refinishing and refacing across Toronto and the GTA. We’ll evaluate your doors, map a refinishing or refacing plan, and manage the process end-to-end with clean containment.
Explore our refinishing approach or review our spray process details.
Mini case studies: recent York and Toronto examples
Two fast examples show how disciplined prep, substrate-matched primers, and controlled spray prevent failures. In both, addressing root causes—residue, loose joints, and humidity swings—delivered factory-level finishes that stayed smooth and chip-resistant through daily use.
York condo: yellowed maple to bright satin white
Challenge: Residue-heavy doors over a stove island kept rejecting paint. Our assessment found incomplete degreasing from a previous DIY attempt.
- Fix: Degrease-rinse cycles until wipes stayed clean; uniform scuff; bonding primer matched to catalyzed finish; two light topcoats.
- Outcome: Consistent satin sheen and tight adhesion. Months later, high-touch doors around the island remained chip-resistant.
Toronto semi-detached: oak grain management
Challenge: Client wanted a smoother look while keeping existing oak doors. Grain telegraphed through earlier repaint.
- Fix: Grain-filling on select panels; primer-sand-primer stack; controlled HVLP passes; extended cure before rehang.
- Outcome: Noticeably flatter faces and uniform color under LED lighting; family reported easy wipe-down with no early rub-through.
If your doors are too far gone for refinishing, consider a style reset with refacing. For context on door styles and choices, this cabinet door overview compares standard and custom options.
Color trends, undertones, and lighting checks
Undertones shift under LEDs and daylight, so sample boards in your kitchen before committing. Whites with green or blue casts look cooler at night, warmer by day. Testing next to trim and countertops prevents surprises and keeps your new finish consistent from morning to evening.
- Make sample boards at your target sheen; view at breakfast and dinner hours.
- Compare against trim paint and backsplash; undertones should complement, not compete.
- Document the exact mix and product line for future touch-ups.
For a broader mistakes list from a renovation lens, Altima Kitchens’ mistakes roundup highlights planning pitfalls that often ripple into finish work.
Fast glossary and troubleshooting
Most finish problems trace back to surface prep or environment. Orange peel equals heavy coats or cool temps; fisheyes signal contamination; blocking means soft films or stacked doors too soon. Diagnose by tracing each symptom to prep, product, or conditions—and correct the root cause, not the symptom.
Glossary
- Adhesion: The grip between substrate and coating; the #1 success factor.
- Blocking: Sticking surfaces due to incomplete cure.
- Fisheyes: Craters from surface contaminants like oil or silicone.
- Orange peel: Bumpy texture from heavy coats or poor atomization.
Quick fixes
- Fisheyes: Stop, clean, and re-prime; don’t bury contamination under more paint.
- Orange peel: Adjust tip size and material flow; increase flash time; spray lighter passes.
- Blocking: Increase cure time, airflow, and temperature; avoid stacking doors too soon.

Frequently Asked Questions
Toronto homeowners ask about durability, grain visibility, refinishing vs. refacing, and the ideal conditions for spraying. The bottom line: success comes from thorough prep, substrate-appropriate primers, controlled humidity and temperature, patient cures, and careful reinstallation with labeled hardware.
What’s the biggest cause of cabinet paint peeling?
Peeling usually starts with contamination left on the surface. Grease, aerosol residue, or furniture polish can block primer from bonding. Thorough degreasing, rinsing, and uniform scuff-sanding create the mechanical tooth that modern primers need for a lasting grip.
Can you hide oak grain when refinishing?
You can minimize it with grain filler and a prime–sand–prime approach, but full erasure is difficult without replacing doors. We often fill high-visibility panels and accept a light, natural grain on others for a balanced, durable result.
When is refacing better than refinishing?
Choose refacing when doors are structurally damaged, the style is dated beyond repair, or you want a new profile. Refinishing wins when frames and doors are sound and you want a color or sheen update without altering layout.
What humidity and temperature are best for spraying?
Aim for stable, moderate humidity and a comfortable room temperature. Fluctuations make orange peel and sags more likely, and they can slow cure times. We log conditions and adjust technique to keep films smooth and consistent.
Key takeaways
Most failures trace back to prep, primers, or conditions. Clean thoroughly, scuff uniformly, match primers to substrates, spray light coats in stable conditions, and let films cure before reassembly. When in doubt, a professional process protects your investment.
- Prep, primers, and environment decide success.
- Light, even spray passes prevent sags and orange peel.
- Labeling and careful reassembly keep doors aligned and blemish-free.
- Sample colors under your kitchen’s real lighting before committing.
- Pros deliver consistency, speed, and cleaner containment when stakes are high.
Next steps
If your cabinets have good bones, refinishing can look factory-new with the right process. If doors are damaged or you want a profile change, consider refacing. Start with an assessment that maps the fastest path to a durable, uniform finish.
Explore how we approach Toronto projects in our refinishing guide for GTA homes, or learn when a spray-centric process fits in the kitchen respraying guide. Prefer a hands-off experience? Our professional refinishing service handles prep, spray, cure, and careful rehang.
Ready to get started? Book a friendly discovery chat in York and we’ll assess doors, substrates, and ideal finish systems for your space.