
Spraying cabinets is the controlled application of primer and paint with a spray system to produce a smooth, factory-like finish. For York and Toronto homeowners near 2710 St Clair Ave W, it delivers consistent coverage on doors and boxes, faster turnarounds, and durable coatings. When done professionally, it refreshes kitchens and bathrooms without a full renovation.
By Masoud Kakar — Paint2decor INC
Last updated: 2026-06-17
At a Glance: Summary
Cabinet spraying replaces brush marks with an even, professional finish using HVLP or airless systems. Expect surface prep, priming, and 2–3 topcoats, with drying stages between. It suits sound cabinet boxes and doors, reduces disruption, and delivers a long-lasting result when paired with proper prep and curing.
Here’s a quick overview of how this complete guide will help you plan and evaluate spraying cabinets for your home in the Toronto area.
- Understand what cabinet spraying is and where it shines.
- See prerequisites to confirm your cabinets are good candidates.
- Compare HVLP vs. airless and on-site vs. in-booth approaches.
- Follow a precise, step-by-step process from prep to cure.
- Troubleshoot common issues like orange peel or fisheyes.
- Use tools, checklists, and maintenance tips that extend finish life.
What Is Cabinet Spraying?
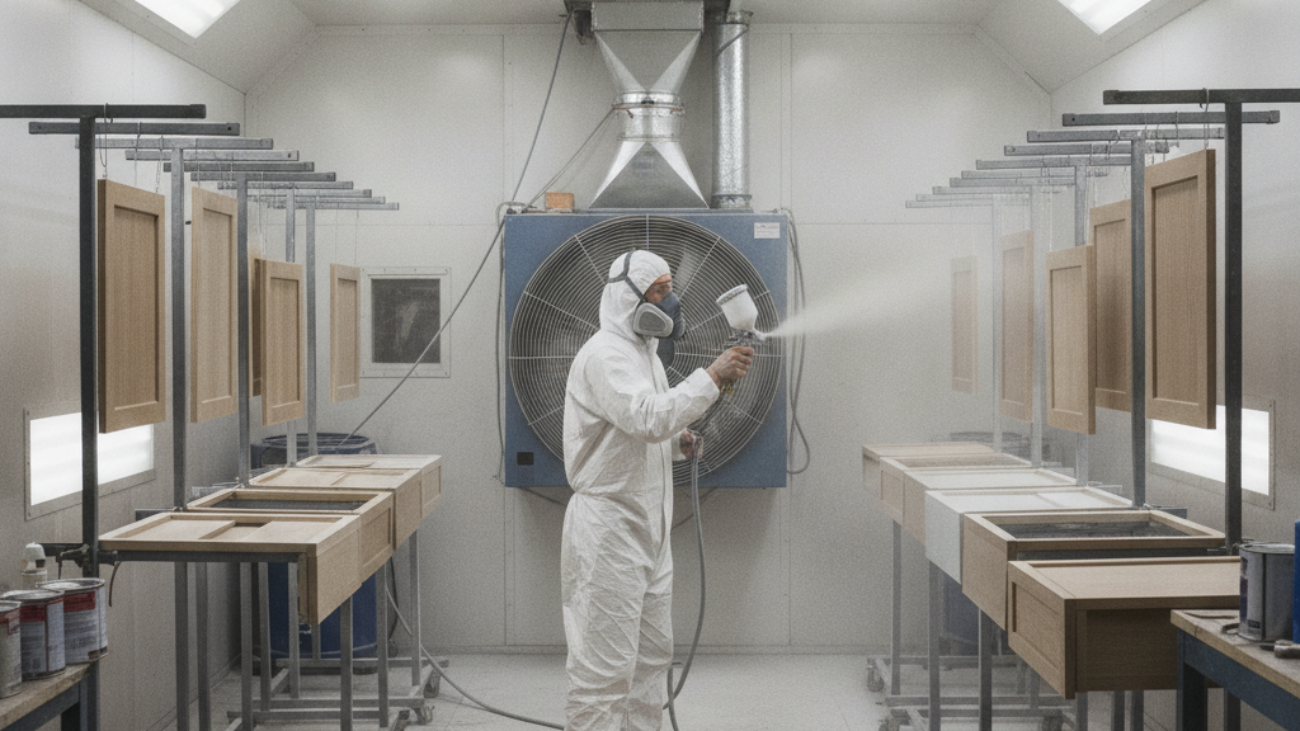
Cabinet spraying is a refinishing method that atomizes coatings into a fine mist for ultra-smooth coverage on doors, drawer fronts, and cabinet boxes. It eliminates brush strokes, speeds up production, and creates a durable finish when combined with proper cleaning, sanding, priming, and controlled drying or curing.
In plain terms, spraying replaces hand brushing with a calibrated spray gun and controlled air or fluid pressure. The goal is a consistent film build and uniform sheen across every door and panel.
- Where it applies: Kitchen and bathroom cabinet doors, drawer fronts, panels, gables, and exposed face frames.
- Finish profile: Factory-like smoothness, reduced texture, and consistent sheen.
- Workflow: Degrease → sand → fill → prime → sand → topcoat (2–3) → cure.
- Common systems: HVLP (high-volume, low-pressure) turbine/compressor setups; airless sprayers for certain primers/topcoats.
If you’re comparing refinishing approaches, see how spraying complements our kitchen cabinet refinishing guide for Toronto homes. We tailor the approach to material, condition, and the look you want.
Why Cabinet Spraying Matters for York and Toronto Homes
For York and greater Toronto kitchens, cabinet spraying delivers fast transformations with minimal disruption. It suits solid cabinet boxes, handles seasonal humidity swings, and pairs with in-booth or on-site workflows. The result is a modern, resilient finish aligned with local home styles and renovation timelines.
Cabinet styles across the GTA range from classic maple to modern slab. Spraying adapts to both. It’s efficient in compact city kitchens and durable for busy family zones.
- Less downtime: Doors are labeled, removed, and sprayed in controlled conditions while boxes are carefully masked on-site.
- Season-ready: Toronto humidity can push dry times. Controlled airflow, temperature, and dehumidification keep timelines on track.
- Material versatility: From oak grain to thermofoil repairs, technique shifts by substrate and desired texture.
Local considerations for York
- Plan staging and access around Jane St at St Clair Ave West busier hours to streamline door pickup/drop-off.
- Winter and humid-summer schedules affect cure. Build in extra ventilation and airflow from late December through August.
- If you work from home, coordinate masking and ventilation so the kitchen remains usable between spray sessions.
Many homeowners also explore cabinet respraying service options to match timelines with family routines and holidays.
How Cabinet Spraying Works (Process Overview)
Cabinet spraying works by cleaning and sanding surfaces, applying an adhesion primer, then spraying 2–3 topcoats with calibrated passes and flash times. Consistent film build, dust control, and proper cure produce the signature smooth, durable finish.
While every kitchen is unique, the performance hinges on disciplined prep and controlled application. Small technique shifts can greatly affect sheen and texture.
- Intake and labeling: Photograph, label, and map doors, hinges, and hardware. Organize racks for 10–20 doors per run.
- Degrease and clean: Use a dedicated degreaser to remove oils in 2–3 passes; rinse and dry thoroughly.
- Scuff-sand: 120–150 grit for raw wood; 180–220 grit on factory finishes. Target uniform dulling.
- Repairs and filling: Address chips, dings, and grain. Spot prime repairs.
- Adhesion primer: Spray a bonding primer; allow 30–60 minutes between coats depending on the product and conditions.
- Primer sand: 320–400 grit to level fibers; remove dust with clean air and tack cloths.
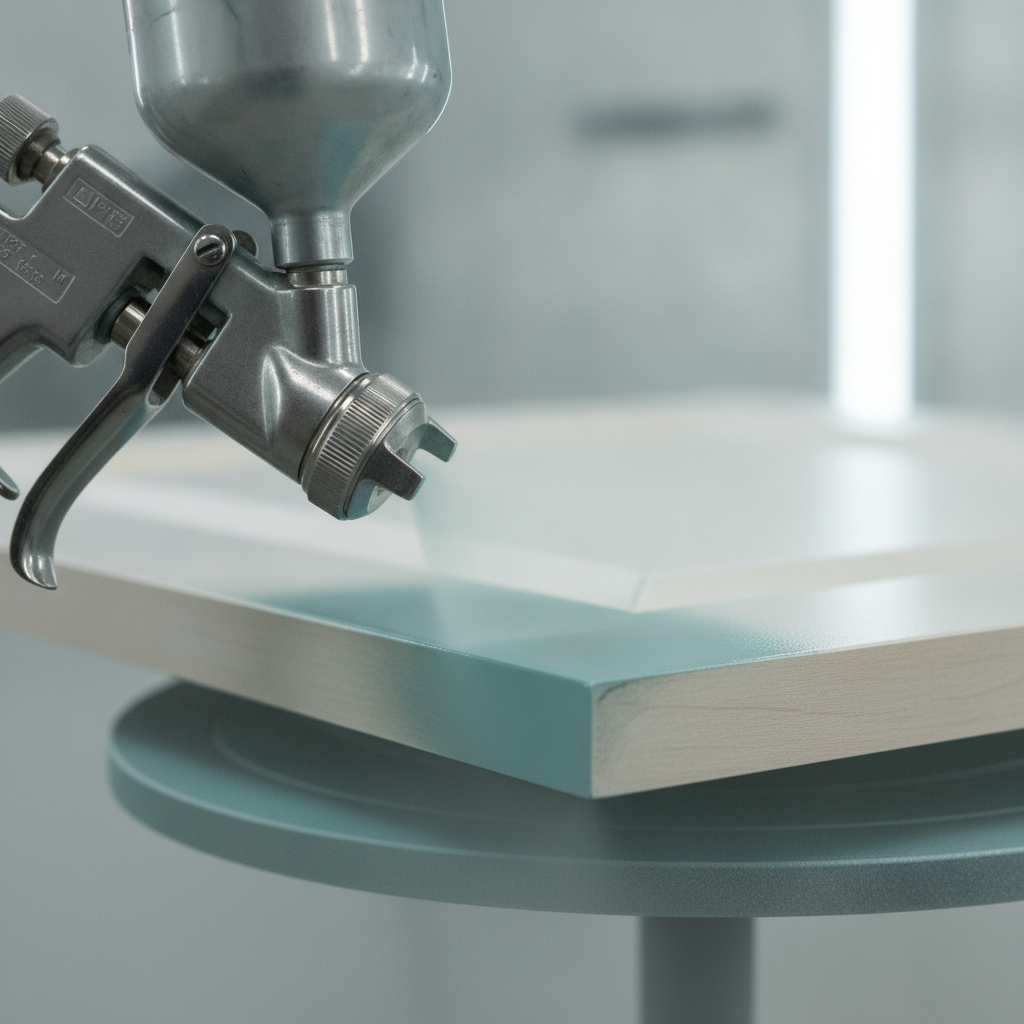
- Topcoats: Two to three coats at 2–4 mils wet film thickness. Maintain 6–8 inches gun distance.
- Cure: Initial set in hours; full hardness may take several days. Avoid heavy use during early cure.
For a deeper dive into the application mechanics, our professional cabinet painting guide explains film build, crosshatch patterns, and how we calibrate guns for different coatings.
Prerequisites: Is Your Kitchen a Good Candidate?
Good candidates for cabinet spraying have structurally sound boxes, minimal water damage, and compatible door materials. Doors and frames must accept sanding and primer, and the space should allow masking, ventilation, and safe staging for curing parts.
Before you commit, validate the condition and compatibility of your cabinetry. This avoids surprises mid-project and sets realistic expectations for texture and longevity.
- Structure: Solid boxes, secure face frames, and tight joints. Loose hinges or sagging shelves should be fixed first.
- Substrates: Maple, oak, birch, MDF, and many laminates respond well with the right primers.
- Problem areas: Around sinks and dishwashers, check for swelling or delamination. Stabilize or replace as needed.
- Ventilation: On-site spraying requires negative air and filtration to control overspray and odor.
- Sheen goals: High-gloss highlights low spots. Satin and matte hide minor texture better.
If you’re unsure, a quick consultation on our kitchen cabinet spraying Toronto page can confirm fit and suggest alternatives like targeted cupboard refinishing.
Types and Methods: HVLP vs. Airless vs. Aerosol
HVLP delivers precision and minimal overspray, airless excels at fast primer build and large panels, and aerosols suit tiny touch-ups only. Most professional cabinet work blends HVLP for topcoats with airless for select primers or larger flat surfaces.
Each system has a sweet spot. Matching the method to the stage (primer vs. finish) and the part (door vs. frame) is key.
| Method | Finish Quality | Overspray | Ideal Uses | Typical Nozzle/Tip |
|---|---|---|---|---|
| HVLP | Excellent control, fine atomization | Low | Topcoats, detailed rails/stiles, smaller parts | 1.3–1.4 mm needle/nozzle |
| Airless | Great build; can be harsher atomization | Medium–High | Primers, large flat surfaces, production runs | Fine-finish tips (e.g., 310–412) |
| Aerosol | Variable; not factory-grade | Low | Small touch-ups, hardware shadows | N/A |
For additional third‑party overviews of spray methods, you can review this spray painting explainer and a general cabinet door material guide for context. When you’re ready to choose a pro system, our spray painter for cabinets page outlines how we set up guns and tips for kitchen-grade finishes.
Step-by-Step: Spraying Cabinets Like a Pro
Successful cabinet spraying follows a strict sequence: map and remove parts, deep-clean and sand, prime with adhesion products, sand smooth, spray 2–3 topcoats, then cure before reassembly. Consistent gun setup, distance, and pass overlap are essential for a glassy, durable finish.
Use this field-tested process as your master checklist. It’s structured for in-booth door finishing and on-site box spraying.
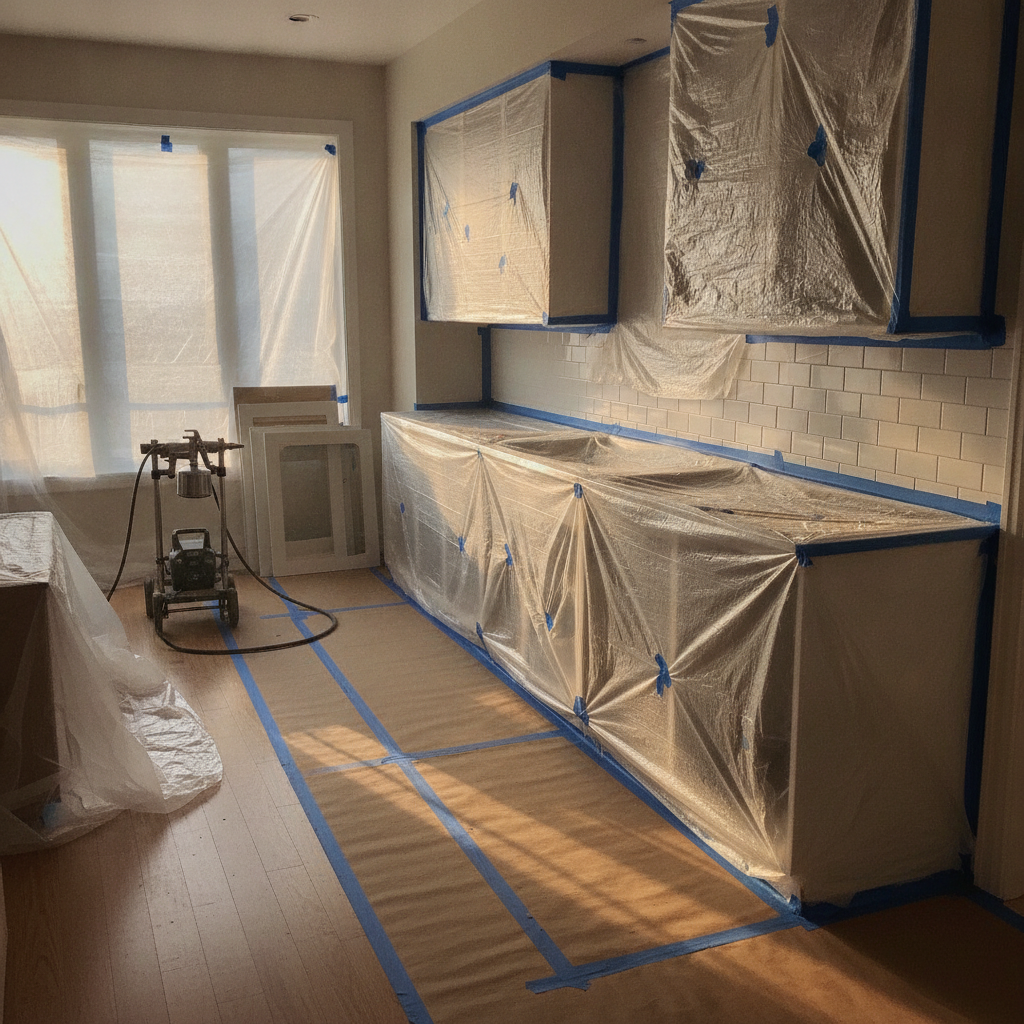
- Plan and protect: Photograph layouts; set up clean racks; use zip-top bags for hardware; protect floors and counters with paper and plastic.
- Mask and isolate: Create a plastic zip-wall; cover appliances; mask interiors as needed; set negative air flow with filtered exhaust.
- Clean and degloss: Two-stage degrease; rinse; scuff with 180–220 grit; vacuum and tack.
- Prime for adhesion: Apply 1–2 uniform coats; allow 30–60 minutes flash between; sand 320–400 for smoothness.
- Dial in your gun: Test patterns on sample boards; aim for 50% overlap and 6–8 inches distance; maintain a perpendicular pass.
- Spray faces first: Doors flat reduce sags; edges second; rotate on turntables for even coverage.
- Build topcoats: Two to three coats depending on color change; observe flash times; measure wet film if possible.
- Cure and handle: Airflow and warmth speed early set; handle gently with clean gloves; allow several days for full hardness.
- Reinstall and adjust: Re-hang doors; align gaps; add new bumpers; consider soft-close hinges.
- Final inspection: Check sheen uniformity under raking light; address touch-ups if needed.
For homeowners who prefer a managed service, our cabinet respraying service coordinates every stage and keeps your kitchen usable throughout.
Safety, Ventilation, and Setup
Safe cabinet spraying uses proper PPE, controlled airflow, and clean electrical setups. Negative air, filtration, and grounded equipment minimize overspray and dust. Keep ignition sources away, ventilate to the exterior, and allow adequate flash and cure times before heavy use.
Indoor projects rely on clean air movement and dust control. Good airflow improves consistency and shortens downtime between coats.
- PPE: Respirator with appropriate cartridges, protective eyewear, gloves, and coveralls.
- Air control: Exhaust to exterior with filtration; create negative pressure to protect adjacent rooms.
- Electrical: Use grounded cords; keep hoses and lines organized to avoid tripping hazards.
- Flash and cure: Respect labeled times; cooler, humid days extend intervals.
- Household coordination: Pets and kids should stay clear until overspray dissipates and surfaces set.
For a simple overview of spray-painting environments from a third party, review this how-to article. It’s a broad primer; we adapt methods for fine-finish, furniture-grade coatings in real GTA homes.
Troubleshooting: Common Spray-Finish Defects
Most cabinet spray defects trace back to contamination, gun setup, or environment. Address orange peel by thinning or adjusting pressure, fix fisheyes with deep cleaning and tack wipes, and prevent runs by reducing film build and maintaining steady gun distance.
Use this list to diagnose and correct issues quickly. Small tweaks produce outsized improvements in sheen and texture.
- Orange peel (pebbled texture): Slightly reduce viscosity, increase atomization, or raise gun distance to 7–8 inches; level between coats with 600–800 grit if needed.
- Fisheyes (craters): Caused by silicone, oils, or residue; re-clean aggressively; use anti-silicone additive only as a last resort.
- Runs/sags: Too much film in one pass; lighten trigger, move faster, or lay parts flat; carefully shave and sand cured runs.
- Dry spray (rough feel): Too far from surface or over-ventilated; close distance and slightly increase fluid.
- Adhesion failure: Inadequate sanding or wrong primer; return to bare substrate in affected zones and re-prime.
- Dust nibs: Improve filtration, tack more often, and wear low-lint clothing.
If a defect persists, we can evaluate a sample door and advise whether a targeted respray or localized repair makes sense.
Tools and Resources You’ll See Us Use
Professional cabinet spraying relies on calibrated spray guns, fine abrasives, bonding primers, durable topcoats, and clean airflow. Labeled hardware bags, door maps, and drying racks keep projects organized and speed up reassembly with perfect alignment.
The right tools make repeatable results possible. Here’s a non-exhaustive list we deploy in GTA kitchens.
- HVLP gun (1.3–1.4 mm) and/or fine-finish airless with 310–412 tips
- Air filtration, fans, and exhaust ducting for negative pressure
- Degreasers, mineral spirits substitutes, and lint-free wipes
- Sandpapers: 120–150 (prep), 180–220 (scuff), 320–400 (primer sand)
- Adhesion primers; furniture-grade waterborne or catalyzed topcoats
- Turntables, door racks, paint pyramids, and labeled hardware bags
- LED raking lights for sheen checks and defect detection
For a service-managed experience, explore our kitchen respraying complete guide that explains how we stage projects to protect adjacent rooms and maintain normal routines.
Case Studies and Real-World Examples
Real kitchens show the value of a controlled spray workflow: minimal downtime, uniform sheen, and durable edges. By staging doors in a booth and boxes on-site, we deliver consistent results while keeping Toronto-area homes functional during the project.
These brief scenarios reflect typical York and Toronto homes we serve.
- St. Clair West, York: Shaker maple doors with visible grain. We primed to seal grain, then sprayed two topcoats in a satin sheen. Doors cured off-site while boxes were masked in place for two afternoons.
- High Park North: Older oak kitchen needed texture control. Targeted grain-filling and extended primer leveling produced a smoother profile without hiding character.
- Midtown condo: MDF slab doors with minor edge swelling. Repairs, an adhesion primer, and careful edge passes restored crisp lines.
- Family home near Smythe Park: Busy kitchen required extra scheduling. We split work over three sessions to keep meal prep areas open.
For more examples of finishes and workflows, our cabinet respraying guide walks through common material choices and sheen decisions.
Maintenance and Care After Spraying
Protect a new spray finish by allowing full cure, using gentle cleaners, and adding bumpers and soft-close hardware. Avoid harsh scrubbing for the first week, and clean with microfiber and mild soap. Regular care preserves sheen and edge durability.
A sprayed finish is tough, but it benefits from thoughtful use during early cure.
- Early days: Treat surfaces gently; avoid aggressive cleaners or steam.
- Cleaning: Microfiber + mild dish soap; dry promptly to prevent water intrusion at edges.
- Hardware: Add felt bumpers and consider soft-close hinges to reduce impact over time.
- Heat and moisture: Use range hoods and allow steam to dissipate before opening nearby doors.
Questions about long-term upkeep? Our team can recommend a maintenance cadence based on your family’s cooking patterns.
Frequently Asked Questions
Homeowners ask about suitability, timing, and durability. In brief: most solid wood and MDF doors are great candidates; projects can be staged to keep kitchens usable; and a controlled spray process produces a durable, easy-to-clean finish that stands up to daily cooking and cleaning.
Is spraying cabinets better than brushing?
Spraying delivers a smoother, more uniform finish with fewer brush marks and faster production. It’s ideal for doors and panels where sheen consistency matters. Brushing can work for small touch-ups, but for a factory-like look, spraying is the preferred method.
How long does a spray-finished kitchen take?
Timelines vary by kitchen size and season. Many projects are staged so doors cure off-site while boxes are sprayed on-site over a few sessions. You’ll see drying time between coats and a cautious use period during early cure for best long-term durability.
Will spraying cabinets work on oak or laminate?
Yes, with the right prep and primers. Oak may show grain unless you choose extra filling. Many laminates accept adhesion primers. We test adhesion and adjust prep so the finish bonds well and looks consistent across different materials.
Do I need to leave the house while you spray?
Not usually. We create a contained work zone with negative air and filtration to manage overspray and odor. Families often stay home and use other rooms while we stage coats. We’ll advise you if a particular step requires extra caution.
Key Takeaways
Cabinet spraying modernizes kitchens quickly with minimal disruption. The best results come from disciplined prep, controlled application, and patient curing. When cabinets are structurally sound, spraying delivers a factory-like finish that’s durable, cleanable, and aligned with Toronto home styles.
- Spraying cabinets replaces brush texture with a factory-smooth look.
- HVLP topcoats and careful priming are a proven pairing.
- Staging doors off-site keeps your kitchen functional.
- Most solid wood and MDF doors respond well with proper prep.
- Early-care habits protect edges and preserve sheen.
Conclusion and Next Steps
If your cabinets are structurally sound, spraying is a smart way to refresh your kitchen or bath without replacing boxes. A professional workflow—prep, prime, fine-finish coats, and measured curing—delivers lasting beauty and daily practicality for York and Toronto homes.
Ready to explore options tailored to your layout, materials, and timing? Browse our cabinet respraying guide or start with a quick note on our respraying service page. We’ll map a plan that works around your routine.
Related Articles and Topics
Explore topics that pair well with cabinet spraying: material-specific prep, sheen selection for busy kitchens, and staged on-site masking. Together, they help you plan a smooth, low-disruption makeover that looks factory-new and fits real life in the GTA.
Popular follow-up reads include finish durability comparisons, edge-protection tips, and hardware upgrades that amplify your new finish without changing your cabinet boxes.
Get a free, no-pressure assessment: Share a few photos and your target finish. We’ll confirm if your cabinets are ideal for spraying and outline a clean, staged plan for your home.