
Toronto cabinet makeovers for older homes are expert-led upgrades that refinish, reface, or respray existing kitchen and bathroom cabinetry to restore beauty and function with minimal disruption. For York homeowners, this approach preserves layout, adds durable finishes, and delivers a faster transformation than full replacement—ideal when cabinets are structurally sound.
By Masoud Kakar • Last updated: 2026-07-02
Above-the-Fold Summary and TOC
This complete guide explains how to update older Toronto cabinets through refinishing, refacing, and respraying. You’ll learn when each method works, how pros stage projects in 5–7 phases, what to expect in York homes, and how to evaluate durability, ventilation, and finish quality—without a full renovation.
Many older Toronto kitchens have good bones but dated finishes. This article shows how Paint2decor INC transforms those spaces using proven, low-disruption methods we practice across the GTA.
- What is a cabinet makeover?
- Why it matters in older homes
- How the process works
- Methods and approaches
- Best practices (durability + safety)
- Tools and resources
- Case studies and examples
- Pricing factors (no numbers)
- FAQ
- Conclusion
What Is a Cabinet Makeover?
A cabinet makeover preserves your existing boxes while updating style and durability through refinishing, refacing, and respraying. It targets surfaces, hardware, and minor repairs so older Toronto kitchens gain a 2026 look in days, not months—especially effective when cabinet frames are solid and the layout still works.
At Paint2decor INC, a makeover typically means upgrading finish systems, door styles, and hardware without altering walls, plumbing, or electrical. We modernize in phases—assessing structure, prepping surfaces, spraying doors off-site, and finishing frames in-place—to maintain a livable home throughout.
- Refinishing: Clean, repair, sand, prime, and apply professional coatings to existing wood or MDF components.
- Refacing: Keep your cabinet boxes, but install new door/drawer fronts and apply new veneer or laminate to visible frames.
- Respraying: Use HVLP or air-assisted equipment to lay down even, factory-like coatings on doors and frames.
- Minor carpentry: Tweak hinges, adjust reveals, replace gaskets, and realign drawers to factory tolerances.
- Hardware refresh: Swap knobs, pulls, and soft-close hinges (often 110°–165° opening) to elevate daily use.
Because older Toronto homes vary—plaster walls, inset doors, face-frame joinery from the 1950s–1990s—we tailor the approach. In our experience, about 70–80% of dated kitchens we evaluate are excellent makeover candidates once we confirm frame integrity and hinge alignment.
Why Cabinet Makeovers Matter in Older Homes
Older Toronto and York homes often have solid wood frames that outlast finishes. Makeovers protect that value, improve function with soft-close hardware, and deliver modern color in a predictable timeline—typically days rather than months—while keeping kitchens usable for families.
Here’s the thing: the wood quality in many mid-century cabinets is excellent. You don’t need to demo sound maple or oak just to change color and style. A well-executed makeover enhances durability (two-component coatings), aligns with ventilation best practices, and fits heritage character.
- Preserves craftsmanship: Many 1960s–1990s frames use sturdy face-frame joinery that responds well to refinishing.
- Less disruption: Door removal and off-site spraying keep kitchens functional; on-site work zones are isolated with plastic sheeting and negative air.
- Modern performance: Durable coatings resist moisture and staining; upgraded drawer slides boost load capacity by 25–50 lbs compared to old runners.
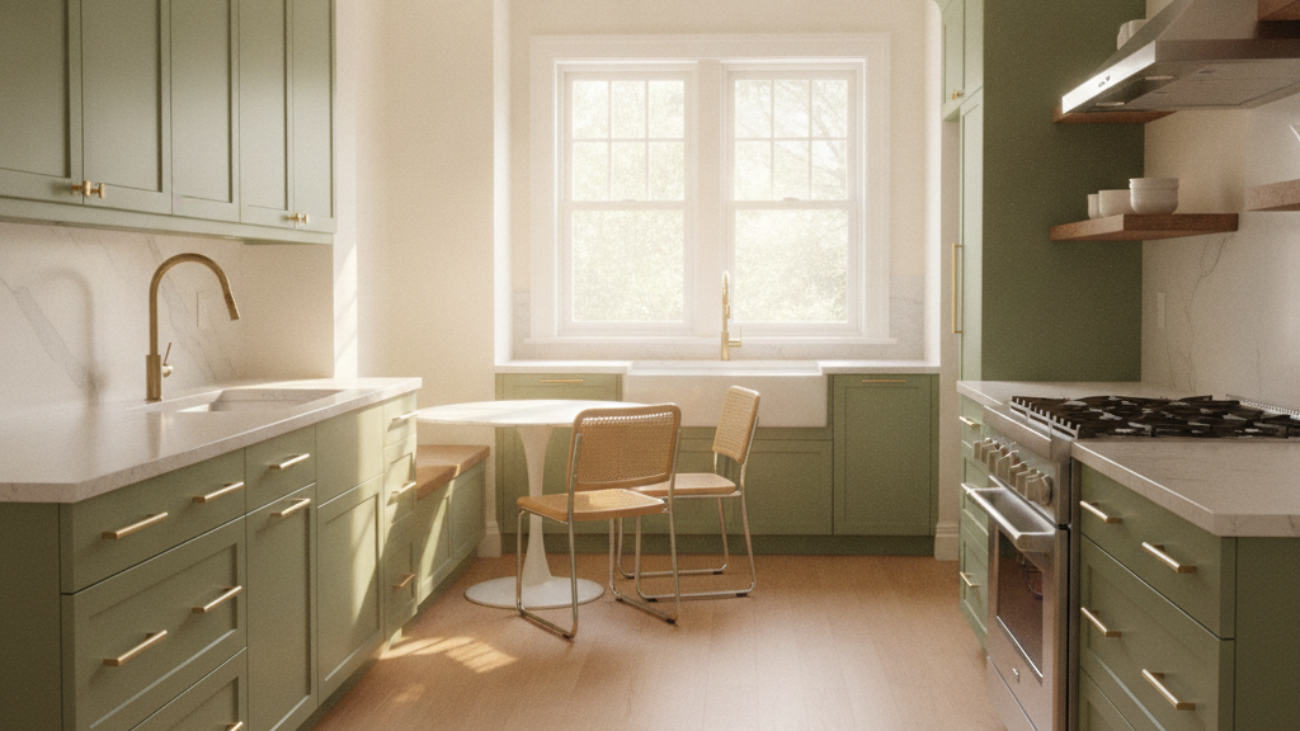
- Design alignment: Neutral palettes (warm whites, soft grays, eucalyptus greens) integrate with hardwood floors and trim common in York homes.
- Timeline clarity: Defined phases (1–7) with door transport and shop curing minimize household downtime.
Local considerations for York
- Schedule spraying when humidity sits near 40–50% indoors; York summers can spike above 65%, so we plan dehumidification to maintain smooth, dust-free cures.
- Plan site protection if you’re near Smythe Park—open windows invite pollen and fine debris in spring; our crews seal and filter air to protect fresh coats.
- If you’re close to the Jane St at St Clair Ave West transit hub, coordinate material drop-offs early morning to avoid congestion and keep project phases on time.
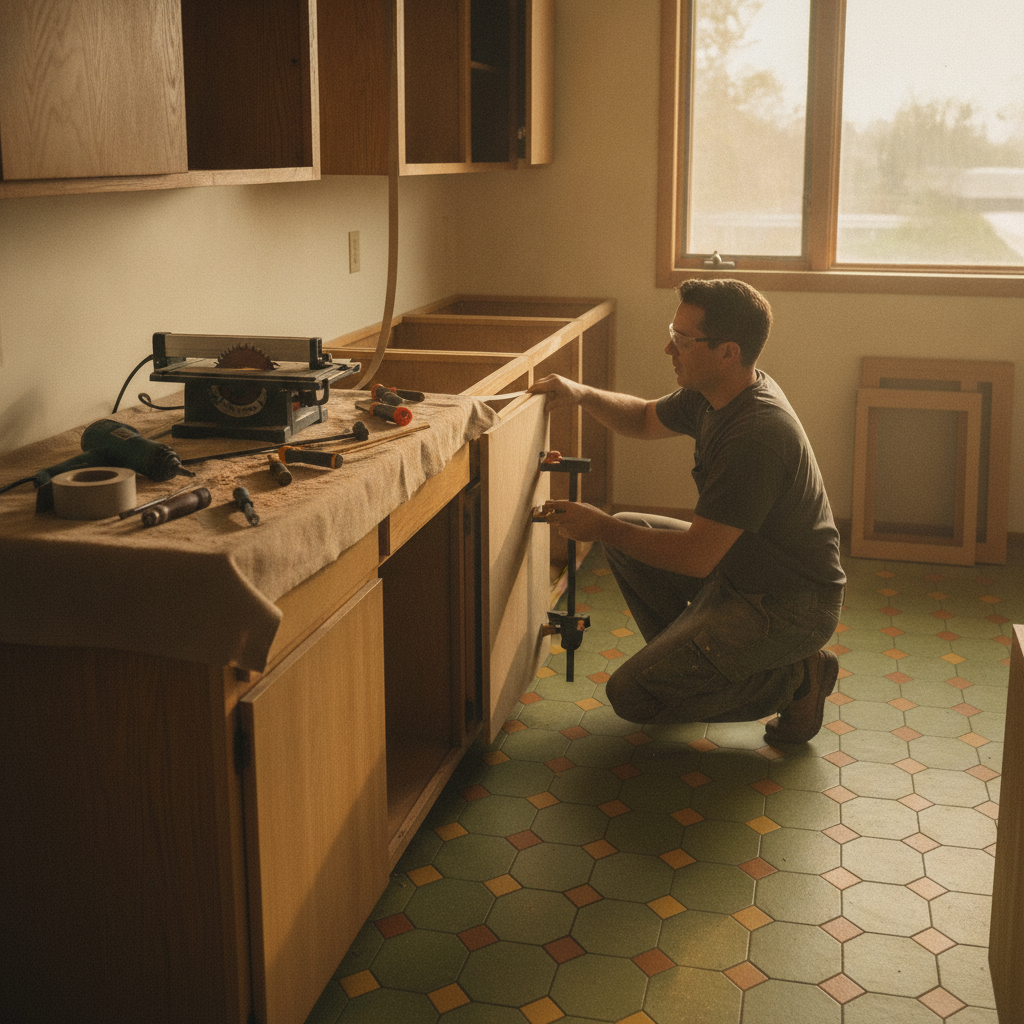
How the Process Works (Step-by-Step)
We execute cabinet makeovers in 5–7 phases: assessment, protection, removal, surface prep, spraying, reassembly, and final QA. Doors are labeled, transported, and finished in a controlled booth; frames are masked and sprayed in-place with ventilation and dust control for a factory-like result.
Below is our typical workflow for older Toronto kitchens we service from York to east-end neighborhoods. We keep families cooking by isolating zones and sequencing work so sinks, stoves, and fridges remain accessible.
- Assessment & planning (60–90 minutes)
- Check box integrity, measure reveals (typically 2–3 mm per side), and test hinge alignment across 10–20 doors.
- Identify substrate (maple, oak, MDF) and existing finish (lacquer, alkyd, acrylic).
- Document touch-ups and repair points; note silicone beads, oil contamination, and water-rings near sinks.
- Protection & setup (half day)
- Install zipper walls, floor protection, and masking; set negative air machines with HEPA filtration.
- Target 0.02–0.05 inches water column pressure differential to contain overspray and dust.
- Create a labeled grid for hardware, hinges, and bumpers in numbered bins.
- Removal & labeling (1–2 hours)
- Remove 20–40 doors and 8–20 drawer fronts; label with position codes (e.g., K1-L for Kitchen door 1, Left).
- Transport to our spray facility in protected racks to avoid edge dings.
- Surface prep (shop + site, 1–2 days)
- Degrease with solvent-compatible cleaners; rinse until water sheets evenly (surface tension cue).
- Mechanical scuff-sand to 220–320 grit; feather chips; fill divots with catalyzed filler; caulk seams sparingly.
- Prime with bonding/sealing primer; sand to 320–400 grit for a glass-smooth base.
- Spray coatings (shop + site, 1–2 days)
- Apply 2–3 color coats via HVLP; gun tips usually 1.3–1.4 mm; maintain 6–8 inches standoff for even fan.
- Target 2–3 mils dry film thickness; flash times 20–40 minutes between coats depending on chemistry and RH.
- Optional clear topcoat for stain-prone zones (coffee, tea, red sauces) or high-touch corners.
- Reassembly & hardware (half day)
- Install soft-close hinges and slides; verify 1–2 mm reveal consistency across doors.
- Replace bumpers; set pulls at 96–128 mm centers or as existing patterns dictate.
- Final QA & handover (60 minutes)
- Light inspection at 300–500 lux reveals minor nibs; we polish or spot-correct as needed.
- Share care guide (30-day cure caution, cleaning dos/don’ts, humidity targets of 40–50%).
Our approach keeps cooking zones usable. We stage sink access, maintain clear 36-inch pathways, and protect vent hoods so your kitchen stays functional during the makeover.
Types, Methods, and Approaches
Choose refinishing to keep your wood and change color, refacing to replace door styles while keeping boxes, and respraying to achieve a smooth, factory-like finish. Older Toronto cabinets usually suit at least one of these—often a hybrid—for the best blend of style, durability, and timeline.
Not every kitchen needs the same recipe. In York, we often combine methods: refinish solid-maple doors in good shape, reface a damaged island to shaker, then respray frames for a unified sheen. Here’s how the options compare.
| Method | Best For | Disruption | Finish Quality | Notes |
|---|---|---|---|---|
| Refinishing | Solid wood with worn topcoat; keep grain | Low–Medium | High with pro prep | Great for maple/oak; retains character |
| Refacing | Outdated style or damaged doors | Medium | Factory new | New fronts + veneer align style fast |
| Respraying | Uniform color change; like-new sheen | Low | Factory-like | Booth/controlled environment yields best results |
| Full replacement | Compromised boxes or layout change | High | Factory | Consider only if frames are failing |
- Door styles: Shaker remains popular in 2026; slab fronts suit mid-century; beadboard pairs with cottage trim.
- Sheens: Satin (20–35 GU) hides fingerprints; semi-gloss (35–55 GU) brightens darker rooms.
- Color families: Warm whites, “greige,” eucalyptus green, and inky blue accents hold steady across GTA projects.
- Hardware: 5-inch pulls on base cabinets improve grip; 3-inch handles on uppers keep proportions tidy.
If you’re debating options, our kitchen cabinets makeover overview and Toronto refinishing service page outline when we recommend each path.
Best Practices for Durability, Safety, and Finish Quality
Great cabinet makeovers balance surface science with site controls: thorough degreasing, 220–320 grit scuffing, bonding primer, pro-grade topcoats, and controlled curing at 40–50% RH. Add dust containment, negative air, and labeled hardware to ensure a clean, repeatable, factory-like result.
We’ve found that consistent prep beats any single product choice. Even minor residue—silicone spray, cooking oils—can cause fisheyes. We neutralize contaminants, then build coatings from a bonded primer to a hard-wearing topcoat.
- Prep standards
- Degrease until water sheets uniformly; it’s a simple pass/fail surface-tension test.
- Sand profiles lightly to 320 grit; flat fields to 220–320, edges by hand to avoid burn-through.
- Spot-fill, prime, then sand primer to 320–400 for that glass-smooth base.
- Spray controls
- HVLP guns with 1.3–1.4 mm tips provide even fans; 6–8 inches standoff controls orange peel.
- Crosshatch technique evens coverage on rails, stiles, and flat panels.
- Flash 20–40 minutes between coats; verify no tack before recoat.
- Site safety
- Isolate with zipper walls and HEPA filtration to protect IAQ.
- Vent to exterior when feasible; otherwise, use carbon filtration to manage odor.
- Keep ignition sources off in spray zones; observe manufacturer reentry times.
- Hardware upgrades
- Soft-close hinges prevent slams that chip finish; set opening angle to 110°–125° for most face-frames.
- Full-extension slides (18–22 inches) recover storage in deep drawers typical of mid-century builds.
Curious how this looks in practice? Explore our older kitchen refresh guide and cabinet refinishing guide for more detail on our field setup.

Tools and Resources (Homeowner + Pro)
Effective makeovers depend on clean prep, accurate labeling, and controlled spraying. Homeowners benefit from checklists and color boards; pros rely on HEPA filtration, HVLP guns, and drying racks. Together, these tools keep York projects organized, safe, and on schedule.
Whether we’re working in a 1940s York bungalow or a 1990s townhouse, the same fundamentals make the difference: precise tracking, dust control, and steady curing.
- Homeowner aids
- Finish samples: 8×10 boards in 2–3 sheens help decide under your kitchen lighting.
- Hardware templates: 3–4 hole spacings (96–160 mm) to visualize hand-feel and alignment.
- Care guide: 30-day gentle use; pH-neutral cleaners; microfiber, not abrasive pads.
- Pro equipment
- HVLP or AAA sprayers, 1.3–1.4 mm tips for topcoats; water separators and regulators at 25–35 PSI.
- HEPA air scrubbers maintaining negative pressure at 0.02–0.05 in. w.c.
- Drying racks spaced 6–8 inches to reduce edge contact and marring.
- Design references
- Door style matrices to compare shaker, slab, and beadboard against your trim and flooring.
- Color strategy boards pairing cabinet tones with backsplash and counter samples.
For a service-led walkthrough, our refinishing & painting service page outlines deliverables and how we stage work in occupied homes.
Case Studies and Examples (York + GTA)
In our York projects, we routinely refinish or reface sturdy frames from the 1960s–1990s. Results include smoother operation, consistent 1–2 mm reveals, and satin finishes that clean easily. Below are real-world scenarios showing how we tailor methods to older Toronto homes.
These condensed case notes reflect the variety we see each week. They’re representative of complete projects completed by a GTA-focused cabinet refinishing team.
- Mid-century maple rescue: Frames were rock solid; doors yellowed. We degreased, 320-sanded, primed, and resprayed satin white; added 110° soft-close hinges. Turnaround: under 7 phases.
- 1990s oak to shaker: Client wanted a clean grid. We refaced with shaker doors, veneered frames, and sprayed everything warm white; 96 mm pulls standardized.
- Heritage trim match: Inset doors with tight reveals; we removed 24 doors, used catalyzed filler for corner dings, and color-matched to original wainscoting.
- Compact condo galley: Limited ventilation options; we used carbon filtration and scheduled coats during lower humidity windows for consistent cures.
- Island upgrade: Base boxes were scarred. We refaced the island only and refinished perimeter cabinets for a cost-conscious hybrid.
- Two-tone refresh: Perimeter in soft gray (25–30 gloss units), island in eucalyptus green; unified with brushed-brass pulls at 128 mm centers.
- Drawer refunction: Swapped 20-year-old center-mount slides for full-extension units; net storage gained ~15–20% by access alone.
- Grease-heavy cook zone: Intensive degreasing and a sealing primer prevented fisheyes; we added a scrub-resistant topcoat near the range.
- Water-damaged sink base: Localized repair with new bottom panel; refinished doors to avoid full replacement.
- Trim integration: Added a light rail under uppers to hide LEDs; sprayed rails to match cabinet color for a built-in look.
- Bathroom vanity tie-in: Matched the kitchen satin finish on a nearby vanity for whole-home cohesion.
- Hardware correction: Repositioned misaligned pulls by filling and re-drilling; standardized to 5-inch pulls for ergonomic grip.
If you want a broader primer before diving in, take a look at these before-and-after renovation examples to visualize sequencing and finish transitions.
Pricing Factors (No Numbers)
Budget for cabinet makeovers is driven by scope: door count, damage repairs, finish system, and whether you refinish, reface, or combine methods. Timeline, access, and hardware upgrades also influence the investment—without needing a full renovation or layout change.
We never publish one-size-fits-all numbers because every older home is different. Instead, we map the variables that consistently shape project totals and timelines so you can plan confidently.
- Scope complexity: 20 vs 40+ doors; glass inserts; crown and light-rail details; island only vs full perimeter.
- Substrate + condition: Maple/oak vs MDF; water damage; silicone contamination; previous coating type.
- Method mix: Pure refinishing, refacing selective areas, or full respray for factory sheen.
- Hardware upgrades: Soft-close hinges and full-extension slides; new pulls/knobs and hole redrilling.
- Access + logistics: High-rises with elevators vs ground-level entries; staging space; daytime access windows.
- Finish system: Specific primers and topcoats; optional clear coats for stain-prone zones.
For a next step, skim our service overview in the Toronto refinishing page and the broader kitchen makeover overview to see how we right-size scope for York homes.
How to Choose Between Refinishing, Refacing, and Respraying
If frames are sturdy and you like the layout, start with refinishing or respraying. Choose refacing when door style must change or damage is widespread. Many older Toronto kitchens benefit from a hybrid—reface select zones and refinish the rest—to balance style, speed, and disruption.
You might be wondering, “What if my doors are warped?” We check flatness across several points. Minor cupping can be corrected; significant warping suggests new doors. Here’s a quick decision guide you can use today.
- Pick refinishing when:
- Grain is attractive and worth preserving; frames are true; joints are tight.
- Yellowed topcoat or color is the main complaint.
- Pick refacing when:
- You want a shaker or slab look; many doors are chipped or swollen.
- Face-frames are fine but panel profiles are outdated.
- Pick respraying when:
- You want a uniform, factory-like finish across doors and frames.
- Existing paint is stable after proper prep and bonding primer.
Still balancing options? Our concise explainer on kitchen cupboard refinishing outlines where refinishing truly shines in older cabinetry.
Planning and Design Tips That Respect Older Homes
Design around what’s working: keep cabinet boxes, modernize doors, and align color with floors and trim. Prioritize lighting, handle placement, and soft-close motion. In York homes, two-tone schemes and warm whites reduce visual weight and keep compact kitchens bright and timeless.
Good design is practical. We set handle centers at 96–128 mm for a comfortable grip, keep walkway clearances near 36 inches, and avoid cluttering tight galleys with heavy contrasts.
- Color strategy: Test 2–3 tones on boards; observe at 8 am, noon, and 8 pm under your lighting.
- Sheen choice: Satin hides touch marks; semi-gloss adds reflectance in darker rooms.
- Lighting: Add a light rail to mask LEDs; color-match to cabinets for a built-in look.
- Hardware layout: Maintain even lines; use jigs/templates for repeatability across 20–40 fronts.
- Functional gains: Full-extension slides reclaim back-of-drawer space that’s often unused.
Want more process context? Our cabinet refinishing guide expands these decisions with photos and step-by-step notes from GTA projects.
Indoor Air Quality, Ventilation, and Work-Zone Setup
A clean makeover requires dust control and air management: zipper walls, floor protection, HEPA filtration, and negative pressure. We vent where possible and watch humidity (target 40–50%) so coatings level and cure consistently—critical for older Toronto homes with drafty shells.
Here’s our typical setup in occupied homes to protect indoor air and finishes.
- Containment: Seal the kitchen with plastic, tape, and zipper entries; compress edges with bars to prevent leaks.
- Air handling: HEPA air scrubbers 24/7 during prep and spraying; carbon filters where exterior venting is limited.
- Moisture management: Dehumidifiers hold 40–50% RH; we monitor with hygrometers in two zones.
- Reentry timing: Observe coating guidelines; keep pets and kids out of zones until safe.
Good air control also reduces dust nibs so you get that smooth, even sheen across wide faces and tight profile corners.
Quick Comparison Table
Use this table to compare the three core makeover methods—refinishing, refacing, and respraying—so you can match goals to approach. It summarizes suitability for older homes, expected disruption, and key strengths without diving into pricing details.
| Approach | Older-Home Fit | Kitchen Access | Style Impact | Notes |
|---|---|---|---|---|
| Refinishing | Excellent for solid wood | Mostly usable | Color + sheen change | Keeps grain; durable modern coatings |
| Refacing | Great when doors are dated | Partially usable | Style reset (new fronts) | Fastest path to new look, same layout |
| Respraying | Excellent for stable paint | Mostly usable | Factory-like finish | Booth-sprayed doors + on-site frames |
If you’re still unsure, a side-by-side in our kitchen cabinets makeover overview shows how we tailor each method for York homes.
Frequently Asked Questions
These quick answers address the most common questions York homeowners ask about cabinet makeovers in older Toronto homes—from timing and durability to when replacement is the better path.
How long does a typical cabinet makeover take?
Most projects run across 5–7 phases over several days of active work. Doors are sprayed off-site while frames are prepped and finished on-site, so kitchens remain largely usable. Timelines vary with door count, repairs, and ventilation setup.
How durable are modern sprayed finishes?
Professional primer and topcoat systems create a hard, cleanable shell that resists stains and everyday abrasion. With proper prep and 2–3 coats, the finish holds up well to normal family use. Maintain 40–50% indoor humidity and clean with pH-neutral products.
When is full cabinet replacement a better idea?
If cabinet boxes are failing, the layout is changing, or water damage is extensive, replacement becomes the practical path. For structurally sound boxes, refinishing, refacing, or respraying usually deliver the look and performance you want with less disruption.
Can you match new doors to my existing boxes?
Yes. With refacing, we keep your cabinet boxes and install new doors and drawer fronts, then apply matching veneer or laminate to visible frames. After spraying in a controlled booth and on-site, the kitchen reads as a single, consistent system.
Will my kitchen be usable during the project?
Yes, we stage phases so sinks, fridges, and cooktops remain accessible. We isolate work zones with zipper walls and use air scrubbers to manage dust and odor. You’ll have clear pathways and a daily plan for access.
Conclusion and Next Steps
Cabinet makeovers refresh older Toronto homes by preserving strong boxes and upgrading finishes, doors, and hardware. With disciplined prep, controlled spraying, and smart design, York kitchens gain a modern, cohesive look in a predictable timeline—without the disruption of full replacement.
Key takeaways
- Solid frames from the 1960s–1990s are perfect candidates for refinishing, refacing, and respraying.
- Controlled prep (220–320 grit, bonded primer) and humidity (40–50% RH) drive finish quality.
- Hardware upgrades—soft-close hinges and full-extension slides—raise daily performance immediately.
- Hybrid approaches (reface islands, refinish perimeters) balance style, speed, and disruption.
Ready to plan your York project? Start with our Toronto refinishing page and skim the kitchen cabinets makeover overview. We’ll map your 5–7 project phases, confirm method mix, and schedule around your family’s routine.
Related Articles
Explore these in-depth resources from our library to go deeper on methods, finishes, and day-by-day staging for older Toronto kitchens and baths—tailored to York homeowners.
For a focused dive on surface science and day-by-day staging, read our field-tested cabinet refinishing guide. If you’re starting with a broad overview, the kitchen cabinets makeover overview summarizes decisions we help York clients make before we lift a sprayer.
Prefer a quick plan you can act on? In our experience, a 20–30 minute consult clarifies scope, finish system, and schedule windows. Explore our Toronto refinishing options to get started.