
Repainting kitchen cupboards is the process of cleaning, sanding, priming, and finishing cabinet doors and frames with durable coatings to refresh style and extend lifespan. Done correctly, most kitchens can be transformed in under two weeks. For York and Toronto homeowners near 2710 St Clair Ave W, Paint2decor INC delivers professional prep and spray finishes that outperform typical DIY results.
By Masoud Kakar — Paint2decor INC | Last updated: 2026-05-29
Quick Summary
Repainting kitchen cupboards revives cabinets without replacing them. The best outcomes come from meticulous prep, high-adhesion primers, and professional-grade waterborne finishes. This guide covers prerequisites, a step-by-step workflow, tool lists, troubleshooting, and local York/Toronto tips—plus when to choose refinishing or refacing with Paint2decor INC.
This complete guide explains what repainting involves, why it matters, and how pros in the GTA deliver lasting results. Use the outline below to jump to the section you need.
- What is repainting?
- Why it matters
- Prerequisites and prep
- Step-by-step process
- Types, paints, and methods
- Best practices
- Tools and resources
- Troubleshooting
- Case studies in York/Toronto
- FAQ
- Conclusion and next steps
Local considerations for York
- Plan spray days around humidity; Toronto summers can exceed 60% RH, which slows drying and raises orange-peel risk.
- Schedule travel and pickups around traffic at Jane St at St Clair Ave West; packing doors safely prevents edge dings.
- If you need a quiet staging area, nearby green spaces like Smythe Park help families manage noise while doors are sprayed off-site.
What Is Repainting Kitchen Cupboards?
Repainting kitchen cupboards is a surface-renewal process for cabinet boxes and doors using cleaning, sanding, bonding primer, and durable topcoats. It preserves the cabinet layout while delivering a fresh color and finish, often achieving a like-new look without a full renovation or cabinet replacement.
At its core, repainting targets the outer “skin” of your cabinets—doors, drawer fronts, face frames, and visible panels. The structure stays; the finish changes. For many Toronto homes, that’s the fastest path to a modern kitchen feel.
Scope and components
- Included: Doors, drawer fronts, frames, toe-kicks, and visible panels.
- Optional add-ons: New hinges/handles, soft-close hardware, minor repairs, caulking seams.
- Not included: Changing cabinet layout or replacing boxes (that’s refacing/rebuilding).
In our experience across the GTA, most repaint projects wrap in 5–10 working days once materials and scheduling are in place. Typical recoat windows run 30–60 minutes with modern waterborne finishes, while full cure can take 7–14 days depending on temperature and humidity.
Why Repainting Kitchen Cupboards Matters
Repainting kitchen cupboards refreshes style, protects wood, and reduces disruption compared to full renovation. With pro-grade primers and waterborne lacquers, finishes resist wear, oils, and stains, extending cabinet life. For York and Toronto homeowners, it’s a swift, value-forward upgrade that aligns with busy schedules.
Homeowners choose repainting for speed and impact. Swapping an outdated finish for a crisp, spray-applied coating transforms light, color, and perceived space—often in under two weeks on a standard kitchen. That’s a practical path when you’re balancing family routines, work, and renovation fatigue.
Benefits you’ll notice
- Style reset: Trending neutrals and soft colors can brighten kitchens by several perceived foot-candles, improving task visibility.
- Durability: Waterborne cabinet coatings harden rapidly; you can often rehang doors within 24–48 hours, with full cure in about a week.
- Less disruption: Boxes stay in place; appliances and countertops remain connected.
- Local fit: GTA homes vary—from York bungalows to downtown condos—repainting adapts to both without major demolition.
Not sure if repainting is right for your cabinets? Compare it with refinishing and refacing in our Toronto refinishing guide or explore makeover choices in our makeover overview.
Prerequisites and Preparation
Before repainting kitchen cupboards, confirm door material, finish condition, and workspace ventilation. Successful projects need clean, deglossed surfaces, labeled hardware, and dust control. Plan drying racks, set humidity below 60%, and stage a safe area for doors to cure without touching.
Good prep is non-negotiable. We assess substrate (oak, maple, MDF), existing coating (oil-based, catalyzed lacquer, or latex), and contamination (silicones, wax). Each factor affects adhesion, leveling, and stain-blocking.
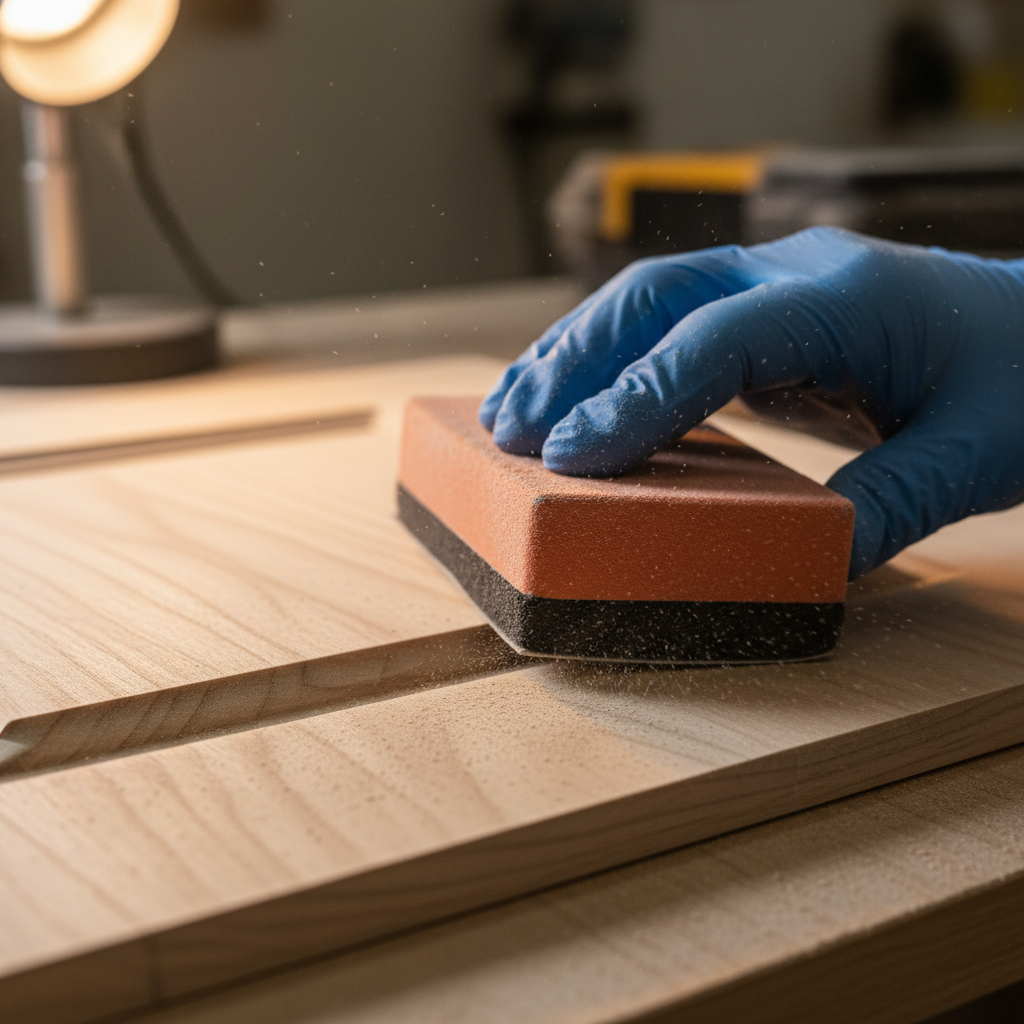
Checklist: room and surfaces
- Ventilation and safety: Cross-ventilate; use a respirator with P100/OV cartridges for spraying or solvent use.
- Labeling: Number doors and hinges; bag fasteners per cabinet for faster reassembly.
- Deglossing: Clean with a degreaser; scuff-sand glossy finishes with 180–220 grit for mechanical tooth.
- Repairs: Fill dings with catalyzed filler; sand flush and spot-prime.
- Dust control: Plastic off adjoining rooms; switch HVAC returns to avoid overspray cycling.
For spray finishing, we stage doors off-site or in a temporary booth. Humidity swings in Toronto summers can elongate dry times; aiming for 40–55% RH and 65–75°F keeps leveling predictable and reduces orange peel.
Step-by-Step: How Repainting Kitchen Cupboards Works
The repainting workflow follows a proven sequence: remove and label doors, clean and degloss, sand, prime with a bonding/stain-blocking system, caulk and fill, sand smooth, then spray or roll two finish coats. Cure before reassembly and adjust hinges for an even reveal.
Below is the professional sequence we use across York and the broader GTA for consistent results.
- Set up and label: Photograph reveals and hinge settings; label doors and drawers to keep orientation consistent.
- Clean and degloss: Remove oils with a kitchen-safe degreaser; rinse and dry before sanding.
- Sand for tooth: Abrade with 180–220 grit; profile edges lightly to avoid rounding detail.
- Dust removal: Vacuum, tack cloth, and compressed air; dust is the top cause of nibs and rough texture.
- Prime: Apply a high-adhesion bonding primer; add a shellac or tannin-blocking spot coat on oak/knots.
- Fill and caulk: Address nail holes, seams, and open grain; allow proper dry times.
- Sand smooth: Level primer with 240–320 grit for a glassy base.
- Finish coats: Spray or roll two coats of cabinet-rated waterborne lacquer or enamel with specified recoat windows (often 30–60 minutes).
- Cure and harden: Allow 24–48 hours before gentle handling; full cure typically reaches peak hardness by day 7–14.
- Rehang and adjust: Reinstall hardware; fine-tune soft-close hinges for 2–3 mm reveals.
Need a deeper breakdown? See this third-party how-to cabinet painting guide for another perspective on sequencing and materials.
Types of Paints, Primers, and Application Methods
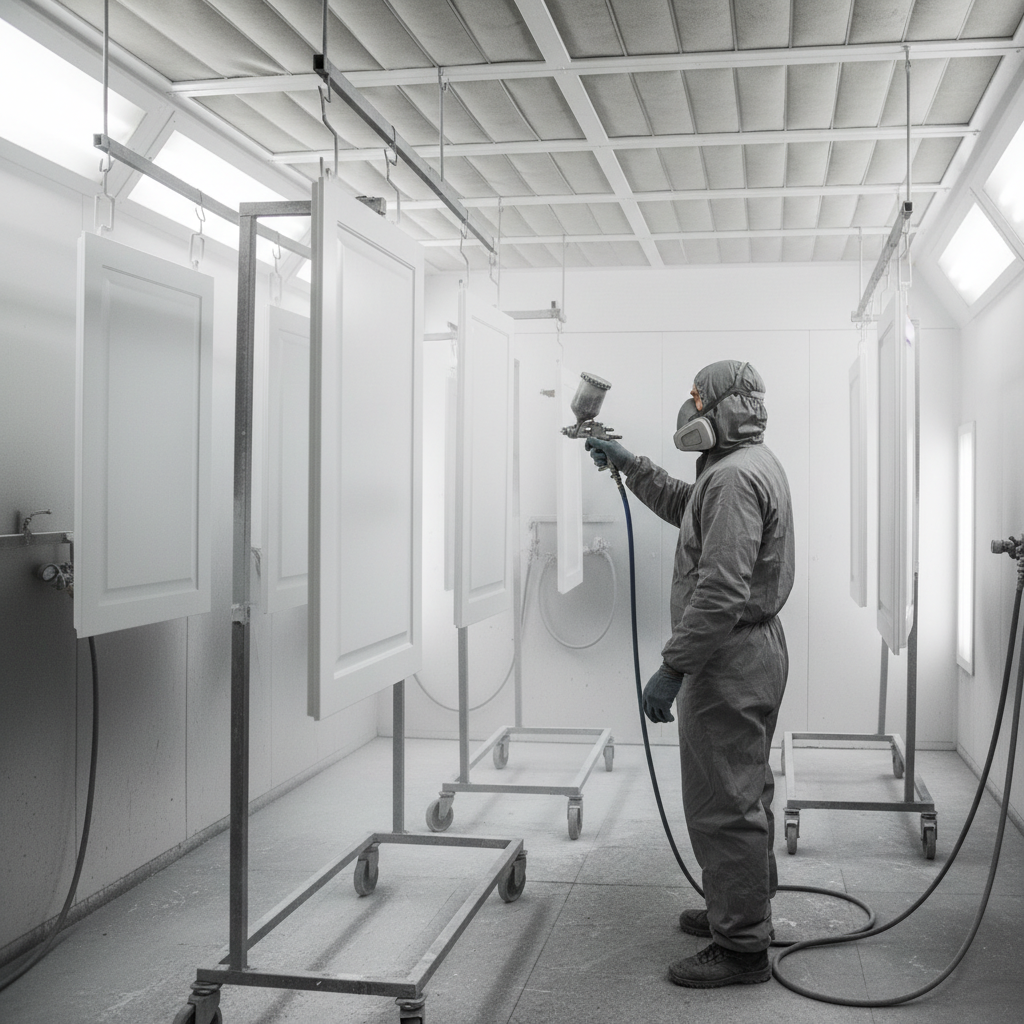
For kitchen cupboards, pro teams favor waterborne cabinet enamels and lacquers over wall paint. Pair a bonding/stain-blocking primer with two finish coats. Spraying delivers the smoothest finish; fine-finish rollers can work on-site where spraying isn’t feasible.
Choosing the right system starts with substrate and use patterns. Kitchens with heavy cooking benefit from higher-build, harder coatings to resist oils and frequent cleaning.
Primers
- Bonding primers: Improve adhesion to factory finishes and melamine.
- Stain-blocking primers: Control oak tannins and knot bleed; shellac-based spot coats are common for severe bleed-through.
- Sandability: Choose primers that powder when sanded; this yields a smoother topcoat.
Topcoats
- Waterborne lacquer/enamel: Fast recoat, low odor, high hardness; good for families staying in-home during projects.
- Sheen selection: Satin/matte hides minor texture; semi-gloss reflects more light but highlights defects.
- Color stability: Modern pigments hold up well; whites benefit from non-yellowing resins.
Application methods
- Spraying (HVLP/airless with fine-finish tips): Delivers the most uniform film and factory-like results.
- Rolling/brushing: Viable for boxes in tight condos; use 4–6 inch fine-finish rollers, then tip-off lightly.
- Hybrid approach: Spray doors off-site; roll frames on-site to minimize masking and overspray risk.
Comparison: spraying vs rolling
| Factor | Spraying | Rolling/Brushing |
|---|---|---|
| Finish quality | Factory-smooth; minimal texture | Slight orange peel/brush marks likely |
| Speed | Fast on doors; setup time for masking/booth | Slower overall; minimal setup |
| On-site feasibility | Best off-site or in ventilated booth | Best for condo boxes with tight rules |
| Disruption | Lower in-home time; off-site curing | More in-home time; less equipment |
Want to see our spray results? Explore our kitchen cabinet spraying page and compare finish textures to rolled examples in your home.
Best Practices from GTA Specialists
Pro cabinet painters in the GTA win on process control: aggressive cleaning, predictable humidity, sanding between coats, and thin, even applications. They document hinge settings, stage dust-free racks, and use cabinet-specific coatings to achieve a durable, factory-like finish.
Here’s what separates a polished outcome from a “good enough” paint job. We apply these practices daily across York and neighboring Toronto communities.
Process control essentials
- Thin coats build better: Multiple thin passes level smoother than heavy wets, reducing sags and orange peel.
- Grain management: On open-grain oak, fill or accept subtle texture; don’t oversand profiles and lose detail.
- Consistent climate: Keep RH 40–55% and temp 65–75°F for predictable leveling and cure.
- Tack and vacuum often: Dust nibs are the top reason for rework after primer and first coat.
- Hardware planning: Swap to soft-close hinges and updated pulls during rehang to modernize function.
We also recommend reviewing bigger makeover choices. For worn finishes, compare repainting versus full refinishing in our cabinet repainting explainer and browse options in our complete cabinet guide.
Tools and Resources You’ll Need
A solid repaint needs surface prep tools, a bonding primer, and cabinet-rated finishes. Add fine-finish rollers or a sprayer, respirator, sanding media (180–320 grit), degreaser, caulk, fillers, and labeled bags for hinges. Drying racks and clean drop cloths keep dust out and edges crisp.
We supply professional equipment on every project and tailor products to your cabinet substrate.
Core kit
- Degreaser and clean rags
- Sandpaper: 180, 220, 240/320 grit; sanding block and detail pads
- Bonding primer and stain blocker
- Cabinet-grade waterborne lacquer or enamel
- HVLP sprayer or fine-finish roller set (4–6 inch)
- Respirator (P100/OV), gloves, and eye protection
- Caulk, wood filler, putty knives
- Drying racks, painter’s pyramids, drop cloths, plastic sheeting
For a detailed third-party look at repaint variables, see this overview of cabinet repainting factors that influence scope and complexity.
Troubleshooting: Fixing Common Paint Problems
Most repaint failures trace back to prep or environment. Address peeling with deeper deglossing and a bonding primer; stop tannin bleed with shellac spot coats; and correct orange peel by thinning, adjusting tip size, and improving airflow. Always resolve root causes before recoating.
Even disciplined projects face hiccups. Here’s how we diagnose in the field and get finishes back on track fast.
Adhesion, bleed, and texture
- Peeling or easy scratch-off: Degrease again, sand thoroughly, and use a proven bonding primer; allow full dry and re-sand before topcoat.
- Tannin bleed-through: Spot with shellac primer over stained areas; allow complete dry, then re-prime with bonding primer for uniformity.
- Orange peel: Level with 320–400 grit between coats; thin within manufacturer limits; increase flow/level time and improve lighting to read the surface.
Defects and fixes
- Fisheyes/cratering: Caused by silicone or oil; deep clean with solvent-compatible cleaner and scuff before re-priming.
- Brush marks: Switch to high-quality synthetic brushes; tip off lightly and keep a wet edge; consider spraying doors off-site.
- Nibs and dust: Improve dust control; tack between coats; final sand/buff lightly to restore smoothness.
Choosing the right door construction matters, too. If you’re evaluating a door upgrade as part of your project, this primer on standard vs custom cabinet doors outlines core differences in materials and fit.
Case Studies and Real Examples in York/Toronto
In York and across Toronto, we routinely repaint kitchens in 5–10 working days. Typical projects involve 25–45 doors, waterborne enamel or lacquer, and a hybrid spray/roll approach. The biggest wins come from better lighting, updated hardware, and smooth, durable coatings that feel factory-new.
Here are quick project snapshots that mirror common GTA homes.
- York bungalow refresh: 32 doors, oak to satin white; shellac spot-priming stopped tannin bleed. Hardware swap to black pulls modernized the space.
- Condo kitchenette: 18 doors, MDF; rolled frames on-site, doors sprayed off-site to meet condo rules. Rehung within 48 hours.
- Family home near Smythe Park: 40 doors; added soft-close hinges during rehang. Kids back to routine two days after install.
- Toronto semi-detached: 28 doors; color shift from dark espresso to warm gray. Improved under-cabinet light reflectance noticeably.
- Maple door makeover: 36 doors; addressed minor edge chipping with catalyzed filler. Satin sheen hid small texture while looking premium.
- Refinishing crossover: Oak set needed grain filling and toner for uniformity—see our cupboard refinishing guide for when repainting becomes full refinishing.
- Spray-booth efficiency: 42 doors finished in batches for consistent film build, then transported back to York via labeled racks.
- Hardware and layout hold: Retained existing footprint; finish upgrade plus new pulls delivered a dramatic change without demolition.
Curious about broader makeover options? Review the choices in our kitchen cabinets makeover overview or the process primer in our repainting explainer.
Talk With a Cabinetry Refinishing Specialist
If you want a factory-smooth finish, schedule a quick consult. We’ll assess materials, workflow, and color options, then outline a plan that fits your kitchen and timeline in York or anywhere in Toronto.
Whether you prefer a subtle satin white or a bold two-tone scheme, we can help you decide between repainting, refinishing, and refacing—so you get the right result the first time. Reach us directly through the site to start planning.
Frequently Asked Questions
Homeowners ask about timelines, durability, grain visibility, and whether spraying or rolling is better. In brief: most projects finish within two weeks, waterborne cabinet coatings cure quickly, oak grain remains unless filled, and spraying gives the smoothest finish when feasible.
How long does repainting kitchen cupboards usually take?
Most kitchens we service in York/Toronto wrap in 5–10 working days. Doors and drawers are removed, prepped, and sprayed off-site while frames are finished in-home. You can typically use the kitchen between stages, and doors are rehung after initial cure.
Will I see oak grain after repainting?
Open-grain oak usually shows texture unless you fill it. We can minimize grain by spot-filling and applying build coats, but a perfectly flat look requires more prep. Many homeowners embrace a subtle texture in satin or matte sheens.
Is spraying better than rolling on frames?
Spraying delivers the most factory-like finish, especially on doors and drawer fronts. For frames in condos or tight spaces, fine-finish rolling and careful tip-off can look great. We often spray doors off-site and roll frames on-site for the best balance.
What primer works best on previously finished cabinets?
Use a high-adhesion bonding primer. On oak or areas with knots or stains, add a shellac-based spot coat to lock in tannins. After priming, sand to a powder with 240–320 grit before applying cabinet-rated waterborne enamel or lacquer.
Conclusion and Next Steps
Repainting kitchen cupboards delivers a fast, durable style upgrade without changing your layout. With pro prep, bonding primers, and waterborne topcoats, you’ll get a factory-smooth finish that stands up to daily use. Ready for help in York or Toronto? Book a quick consult today.
Here’s how to move forward with confidence in the GTA.
- Review options: Compare repainting, refinishing, and refacing in our repainting explainer.
- See process details: Walk through preparation steps in our prep overview.
- Explore finishes: Learn about spray finishes and textures on our spraying page.
Key takeaways
- Preparation, not paint alone, determines durability and smoothness.
- Bonding primers and controlled humidity are your adhesion insurance.
- Spraying doors off-site often yields the most consistent, factory-like result.
- Most kitchens complete in 5–10 working days with staged workflows.
{
“@context”: “https://schema.org”,
“@type”: “Article”,
“headline”: “Kitchen Cupboard Repaint: Avoid Big Reno Costs in 2026”,
“description”: “Repainting kitchen cupboards guide for York/Toronto: prerequisites, step-by-step, primers, spraying vs rolling, troubleshooting, and local tips from Paint2decor INC.”,
“author”: {
“@type”: “Person”,
“name”: “Masoud Kakar”,
“url”: “https://paint2decor.com/blogs”,
“jobTitle”: “Cabinetry Refinishing Specialist”,
“knowsAbout”: [“kitchen cabinet refinishing”,”cabinet refacing”,”kitchen cabinet painting”,”cabinet respraying”,”cabinet spray painting”]
},
“publisher”: {
“@type”: “Organization”,
“name”: “Paint2decor INC”,
“url”: “https://paint2decor.com/”,
“logo”: {
“@type”: “ImageObject”,
“url”: “https://paint2decor.com/wp-content/uploads/2022/03/website-1.png”,
“width”: 512,
“height”: 512
}
},
“datePublished”: “2026-05-29T08:00:00-04:00”,
“dateModified”: “2026-05-29T08:00:00-04:00”,
“mainEntityOfPage”: “https://paint2decor.com/blogs/”,
“image”: [
{
“@type”: “ImageObject”,
“url”: “https://res.cloudinary.com/dmboo1nu1/image/upload/v1780020438/ai-images/tngccofkeuxatewfsplu.png”,
“width”: 1200,
“height”: 630,
“caption”: “Modern kitchen overview showing cabinet doors on racks during repainting.”
},
{
“@type”: “ImageObject”,
“url”: “https://res.cloudinary.com/dmboo1nu1/image/upload/v1780020438/ai-images/tlwu3gccordvvbrgdlub.png”,
“width”: 1200,
“height”: 800,
“caption”: “Close-up sanding of a cabinet door with 220-grit before repainting kitchen cupboards in Toronto.”
},
{
“@type”: “ImageObject”,
“url”: “https://res.cloudinary.com/dmboo1nu1/image/upload/v1780020438/ai-images/fcl2vbbrdzkk0kdnvdtl.png”,
“width”: 1200,
“height”: 800,
“caption”: “HVLP spraying of kitchen cabinet doors in a professional booth for repainting kitchen cupboards.”
}
],
“keywords”: [“repainting kitchen cupboards”,”kitchen cabinet refinishing”,”Toronto cabinet painting”,”cabinet refacing”],
“speakable”: {
“@type”: “SpeakableSpecification”,
“cssSelector”: [“.featured-snippet-answer”, “.faq-answer”]
}
}
{
“@context”: “https://schema.org”,
“@type”: “ProfilePage”,
“mainEntity”: {
“@type”: “Person”,
“name”: “Masoud Kakar”,
“url”: “https://paint2decor.com/blogs”,
“description”: “GTA cabinetry refinishing specialist at Paint2decor INC, focusing on repainting, refinishing, refacing, and spray finishes for kitchens and bathrooms.”,
“knowsAbout”: [“kitchen cabinet refinishing”,”cabinet refacing”,”spray painting cabinets”]
}
}
{
“@context”: “https://schema.org”,
“@type”: “FAQPage”,
“mainEntity”: [
{
“@type”: “Question”,
“name”: “How long does repainting kitchen cupboards usually take?”,
“acceptedAnswer”: {“@type”: “Answer”, “text”: “Most kitchens in York/Toronto wrap in 5–10 working days. Doors and drawers are removed, prepped, and sprayed off-site while frames are finished in-home. You can typically use the kitchen between stages, and doors are rehung after initial cure.”}
},
{
“@type”: “Question”,
“name”: “Will I see oak grain after repainting?”,
“acceptedAnswer”: {“@type”: “Answer”, “text”: “Open-grain oak usually shows texture unless you fill it. We can minimize grain by spot-filling and applying build coats, but a perfectly flat look requires more prep. Many homeowners embrace a subtle texture in satin or matte sheens.”}
},
{
“@type”: “Question”,
“name”: “Is spraying better than rolling on frames?”,
“acceptedAnswer”: {“@type”: “Answer”, “text”: “Spraying delivers the most factory-like finish, especially on doors and drawer fronts. For frames in condos or tight spaces, fine-finish rolling and careful tip-off can look great. We often spray doors off-site and roll frames on-site for the best balance.”}
},
{
“@type”: “Question”,
“name”: “What primer works best on previously finished cabinets?”,
“acceptedAnswer”: {“@type”: “Answer”, “text”: “Use a high-adhesion bonding primer. On oak or areas with knots or stains, add a shellac-based spot coat to lock in tannins. After priming, sand to a powder with 240–320 grit before applying cabinet-rated waterborne enamel or lacquer.”}
}
]
}