
Cabinet refacing cost refers to the all-in investment drivers behind updating door and drawer fronts while keeping your existing cabinet boxes. At Paint2decor INC in York (2710 St Clair Ave W), we help Toronto homeowners control those drivers through smarter planning, durable materials, and an efficient process—so you get a fresh, modern kitchen without full replacement.
By Paint2decor INC • Last updated: June 11, 2026
Above-Fold Section
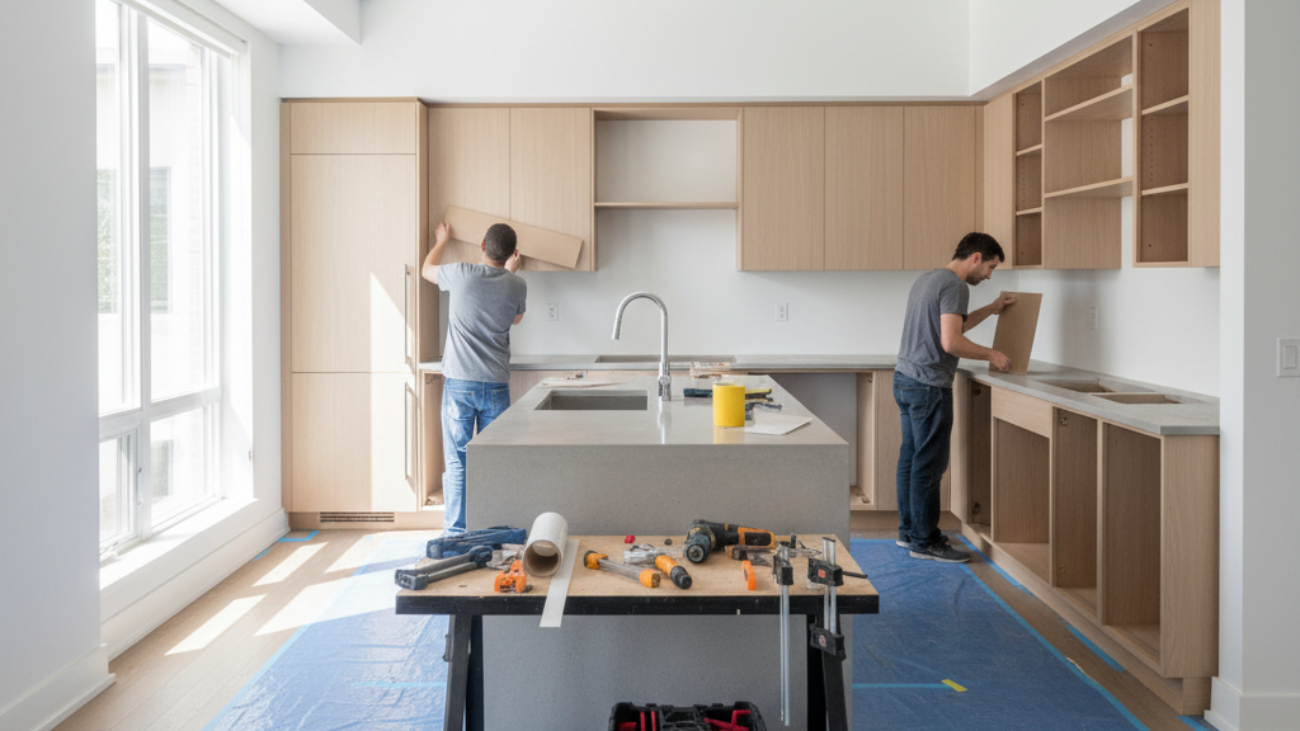
Cabinet refacing is the process of replacing doors and drawer fronts, adding new veneer or laminate to existing cabinet boxes, and updating hardware. It delivers a like-new look with far less disruption than replacement. The key to managing cabinet refacing cost is controlling material choices, scope, and workflow efficiency from day one.
You want a beautiful kitchen, less downtime, and a predictable plan. That’s exactly what refacing can deliver. Our team focuses on GTA homes, so we design the scope around real Toronto kitchens, humidity swings, and lifestyle needs.
Quick Summary
This guide explains what drives cabinet refacing cost, how refacing compares to refinishing and repainting, and what steps keep projects on schedule. You’ll learn proven ways to maximize durability and style in York and across Toronto—without the headaches of a full remodel.
- What you’ll learn: Scope planning, material options, timeline control, durability upgrades, and maintenance must-dos.
- Who it’s for: GTA homeowners comparing refacing vs. refinishing vs. repainting for a faster kitchen refresh.
- Outcome: A clear, step-by-step roadmap that helps you choose the best path and avoid common pitfalls.
Local considerations for York
- Schedule projects to avoid peak humidity weeks; stable indoor humidity supports strong veneer adhesion and smooth curing in Toronto-area homes.
- Weekday daytime access near Jane St at St Clair Ave West can speed material delivery and reduce site downtime during active busier hours.
- If you’re planning design selections, quick stops near Toronto Public Library – Daniel G. Hill Branch can help coordinate samples and neighborhood errands in one run.
What Is Cabinet Refacing (and the Cost Drivers)?
Cabinet refacing replaces doors and drawer fronts, applies new veneer or laminate to boxes, and updates hardware. The cost drivers are scope (how many pieces), materials (wood species, laminate type), door style complexity, finish method, and site logistics. Planning these early gives you predictable timelines and long-lasting results.
Refacing keeps your cabinet boxes while upgrading the visible surfaces. For many York and Toronto kitchens, that means modern doors, fresh end panels, and new hardware in days—not weeks. Typical mid-size layouts include a few dozen faces and panels; matching the door style and finish system to your daily use is essential.
- Scope: Door/drawer count, tall pantry units, island panels, valances, and trim.
- Materials: Real wood veneer vs. high-pressure laminate; painted vs. stained finishes.
- Door styles: Shaker, slab, raised panel, or contemporary profiles with edge detail.
- Finish system: Shop-finished doors for consistency; site finishing for boxes and panels.
- Hardware: Hinges (soft-close), pulls/knobs, and internal accessories if desired.
- Access & logistics: Clear paths for installers, protected floors, and organized staging.
Here’s the thing: when you control scope and select finishes that fit your lifestyle (kids, pets, cooking style), you protect your investment. We refine those choices with you—so your new look lasts.
Why Cabinet Refacing Matters for GTA Homes
Refacing matters because it refreshes kitchens faster and with less disruption than cabinet replacement. You keep the box layout you already like, reduce demolition waste, and still achieve a showroom look. It’s a smart path when boxes are structurally sound and the goal is a durable, stylish update.
In our experience serving Toronto homeowners, many kitchens have solid frames that don’t need rebuilding. Refacing leverages those sturdy boxes. You choose new fronts and finishes to match your style—white satin today, warm wood grain tomorrow—while minimizing downtime in a busy household.
- Less disruption: Minimal demolition; kitchen remains usable for most of the process.
- Design flexibility: Choose new door style, color, and updated hardware to modernize fast.
- Waste reduction: Fewer materials sent to landfill compared to full replacement.
- Predictable timeline: Work is sequenced and measured around your home’s schedule.
- Great for sturdy boxes: If your layout works, refacing maximizes value.
Many homeowners start by asking whether refacing will deliver “like-new.” The answer is yes when the plan, materials, and finish system are aligned—and that’s where a GTA-focused team makes a difference.
How Cabinet Refacing Works (Step-by-Step)
Cabinet refacing follows a measured sequence: assess boxes, remove doors/drawers, prep surfaces, apply veneer or laminate, install new doors and hardware, and perform finish touch-ups. When executed in order, most mid-size kitchens move from demo to final hardware in a matter of days with controlled mess.
Our workflow is built for occupied Toronto homes. We protect floors and counters, stage materials, and keep tools organized for clean handoffs between steps. A typical path looks like this:
- Assessment & measure: Confirm box condition, measure all faces, and finalize door style.
- Remove & label: Take down existing doors/drawers; label hardware locations for precision.
- Surface prep: Clean, sand/scuff where needed, and prime any paint-to-adhere zones.
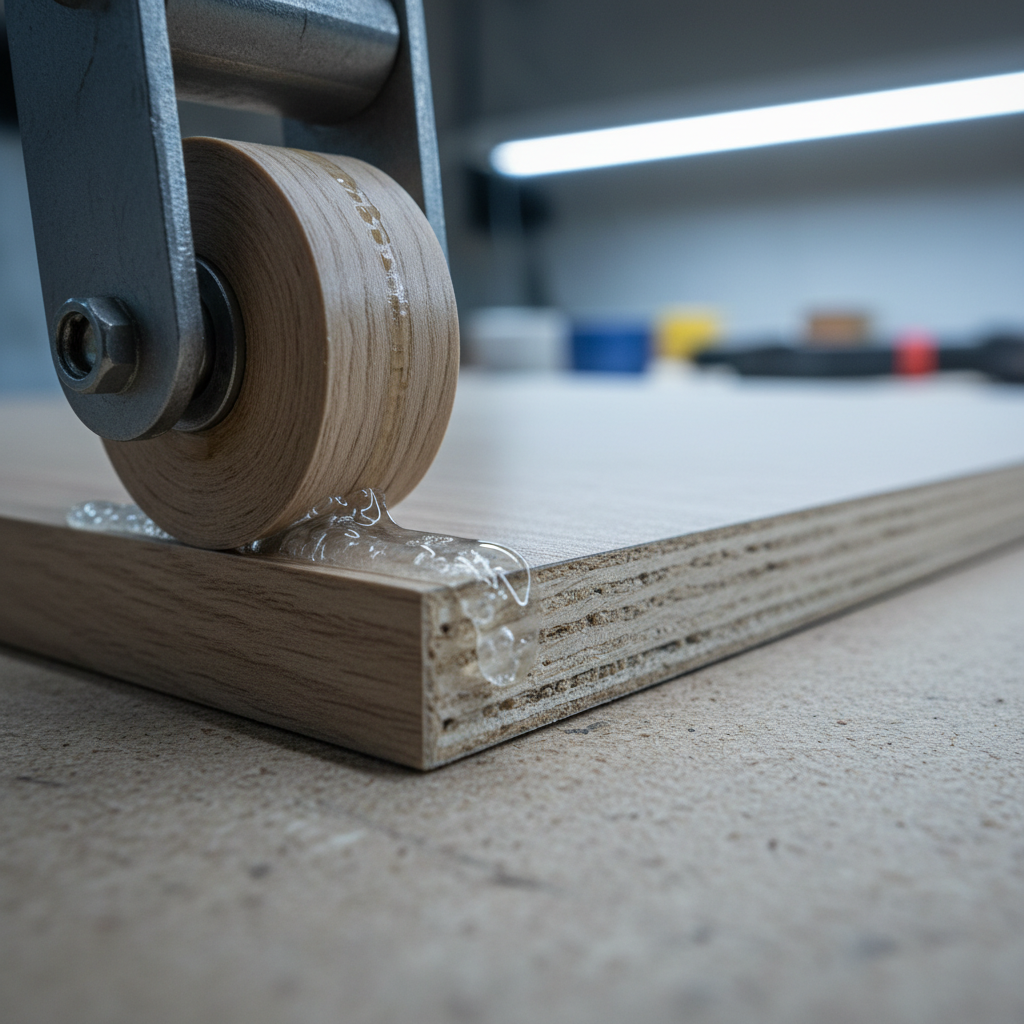
- Veneer/laminate application: Apply to face frames, exposed ends, and panels with clean seams.
- Door installation: Hang new doors and mount drawer fronts; align consistent reveals.
- Hardware: Install soft-close hinges and your selected pulls/knobs.
- Quality check: Adjust hinges, verify alignment, and complete finish touch-ups.
Process discipline is everything. Clean edges, tight seams, and proper cure times are the difference between a kitchen that looks great on day one and a kitchen that still looks great years later.
Types/Methods: Veneer, Laminate, and Painted Finishes
Refacing methods include real wood veneer, high-pressure laminate, and painted finishes. Veneer brings natural grain and stain options. Laminate offers consistent color and resilience. Painted systems unlock any color you love. Picking for your daily use and cleaning habits keeps your refacing investment looking new longer.
Wood veneer refacing
- Look & feel: Real wood grain with stain or clear finish for warmth.
- Use case: Great where you want natural character with modern lines.
- Care: Gentle cleaners; avoid abrasive pads to protect the finish.
High-pressure laminate (HPL)
- Look & feel: Ultra-consistent color, matte or textured options, strong wear resistance.
- Use case: Busy kitchens that need extra durability and easy cleanup.
- Care: Mild soap and water; soft cloths maintain surface integrity.
Painted finishes
- Look & feel: Any color, from soft whites to deep charcoal; pairs well with Shaker doors.
- Use case: Design-forward updates or matching existing trim colors.
- Care: Gentle wipe-downs and prompt spill cleanup protect sheen and edges.
At Paint2decor INC, we also help homeowners compare refacing to other approaches. For broader context, see our cabinet refacing guide and our kitchen cabinet refinishing guide for Toronto homes.
Comparison: Refacing vs. Refinishing vs. Repainting
Refacing changes the look with new doors and veneers; refinishing keeps doors but renews the finish; repainting updates color only. Choose refacing for a style reset, refinishing for stronger existing doors, and repainting for fast color updates. Your cabinet structure and design goals decide the best route.
| Approach | Main Change | Design Impact | Disruption | When It’s Ideal |
|---|---|---|---|---|
| Refacing | New doors/fronts + veneer | High (style & profile reset) | Moderate, kitchen usable most days | Boxes are solid; want a like-new look |
| Refinishing | Existing doors re-finished | Medium (color/sheens refreshed) | Low to moderate | Doors are quality wood; keep style |
| Repainting | Existing doors re-painted | Medium (color-forward) | Low | Quick palette change; budget-conscious |
Not sure which path fits? Our Toronto-focused comparison on cabinet refacing companies walks through pros and cons. You can also compare refacing contractors for the area on our Toronto contractors overview.
Best Practices to Save (Without Sacrificing Quality)
Smart planning saves money and time: confirm box integrity, standardize door sizes where possible, pick resilient finishes, and streamline hardware choices. These moves stabilize scheduling and reduce rework. When you invest in prep quality and install precision, the finish holds up—and your kitchen stays photo-ready longer.
- Lock scope early: Align door count, panel locations, and trim details before ordering.
- Choose resilient finishes: HPL for heavy use, premium paint for color flexibility.
- Standardize where you can: Consistent door sizes simplify production and installation.
- Prioritize high-touch zones: Islands and sink bases take daily wear; reinforce edges.
- Pre-stage hardware: Approve pulls/knobs in advance to avoid install delays.
- Protect the space: Floor coverings and dust control reduce cleanup time.
Want a deeper dive on planning for value? Explore our page on refacing kitchen cabinets and our related note on cabinet repainting considerations.
Tools/Resources for a Smooth Project
The best refacing projects use checklists, sample kits, and clear schedules. A shared spec sheet, signed door schedule, and hardware map cut down questions on install day. Aligning the site-readiness checklist with your calendar keeps the crew moving and your kitchen functional during the work.
- Door schedule: A one-page list of every door/drawer front by size and location.
- Finish spec: Color codes, sheen level, edge profiles, and grain direction callouts.
- Hardware map: Hole spacing, pull length, and centerlines marked per cabinet.
- Site readiness: Clear counters, empty sink fronts, pet plans, and parking info.
- Staging plan: Where doors/drawers rest safely during installation and cure.
For big-picture planning inspiration, some industry overviews discuss how refacing compares to full replacement or repainting strategies. See insights like this replacing vs. refacing comparison and a general kitchen renovation planning guide. For color-change projects, this repainting factors overview outlines finish considerations to discuss.
Case Studies: York and Toronto Scenarios
Real GTA kitchens benefit from refacing when boxes are sturdy and layouts still work. The biggest wins come from aligning door style, finish durability, and hardware early. These York and Toronto scenarios show how small choices—like edge reinforcement or hinge upgrades—extend finish life and daily satisfaction.
York semi-detached, family kitchen
- Challenge: Worn doors near sink and dishwasher; layout still perfect for family flow.
- Approach: Shaker doors in satin paint; HPL on exposed panels for extra durability.
- Smart save: Pre-approved pulls reduced install-day decisions; soft-close hinges quieted traffic.
Toronto condo, compact layout
- Challenge: Limited elevator windows and strict condo rules for work hours.
- Approach: Slab doors with textured laminate; minimal hardware for a clean line.
- Smart save: Tight staging plan in-suite; doors prepped offsite to reduce downtime.
GTA townhouse, open-concept main floor
- Challenge: Island scuffs from stools and kids’ activities.
- Approach: Veneer boxes with reinforced edge banding on island corners.
- Smart save: Early decision on counter overhang protected reveals and clearances.

These quick snapshots highlight a theme: refacing shines when structure is sound, design choices are locked early, and install days are protected from surprises.
Free Consultation: Plan Your York–Toronto Makeover
Book a free, no-pressure consultation to align scope, finishes, and schedule. We’ll confirm your cabinets are strong candidates for refacing and map a clean, efficient plan tailored to your home so you can modernize faster—without a full remodel.
Have 10 minutes? Share photos and a quick wish list. We’ll talk through door styles, finish options, and timeline planning and point you to samples that fit your space.
Start here: Explore our kitchen cabinet refacing in Toronto page or skim this overview of cabinet refinishing decisions if you’re leaning toward a color refresh.
Frequently Asked Questions
These short answers cover the most common refacing questions we hear in York and across Toronto. For deeper dives, browse our linked guides or request a quick consultation to review your specific cabinet layout and finish goals.
What makes a kitchen a good candidate for cabinet refacing?
Solid cabinet boxes, a layout you like, and hinges that can be upgraded are ideal. If the frames are square and sturdy, refacing swaps the visible parts—doors, drawer fronts, exposed panels—for a fresh look without rebuilding the whole kitchen.
How long does cabinet refacing usually take?
Most mid-size kitchens move from removal to reinstallation over several working days, with doors prepared offsite for quality control. You can typically keep using key zones—like the fridge and sink—throughout the project, which reduces disruption.
What’s the difference between refacing and refinishing?
Refacing replaces doors and drawer fronts and adds new veneers to visible cabinet surfaces. Refinishing keeps your existing doors but renews their finish. If you want a style reset, refacing fits; if your doors are solid and you like the profile, refinishing can be a great option.
Can I change hardware and hinges during refacing?
Yes. Most refacing plans include new soft-close hinges and updated pulls or knobs. Pre-selecting hole spacing and pull lengths streamlines installation and ensures consistent alignment across doors and drawers.
How do I keep the new finish looking great?
Use gentle cleaners, wipe spills promptly, and add felt pads where doors touch walls or appliances. Pay extra attention to high-use zones like the sink base and island corners; quick, regular upkeep extends finish life and keeps the kitchen photo-ready.
Conclusion and Next Steps
If your cabinet boxes are sound and your layout works, refacing delivers a like-new look fast. Align your scope, choose resilient finishes, and follow a clear install plan. That’s how York and Toronto homeowners modernize kitchens quickly—without the hassle of full replacement.
- Key Takeaways
- Refacing changes doors and visible surfaces while keeping solid boxes.
- Early decisions on scope, finish, and hardware cut delays.
- Durable materials and careful prep protect your investment.
- Action steps
- Gather 3–5 photos of your kitchen and list must-haves.
- Skim our refacing guide and refinishing overview.
- Book a quick call to discuss door styles, finishes, and schedule windows.