
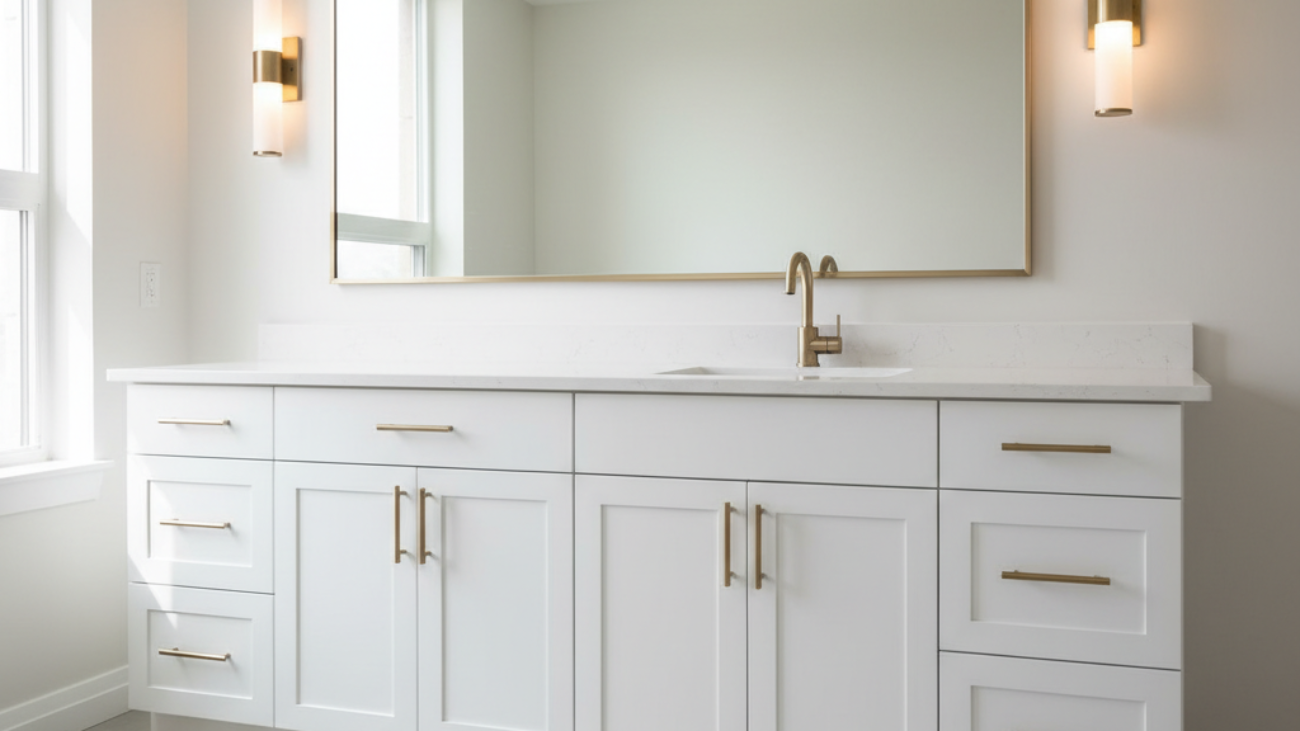
Bathroom cabinet repainting is the professional process of cleaning, sanding, priming, and coating existing vanities to change color and sheen. At Paint2decor INC in York (2710 St Clair Ave W), we refinish in days using spray-grade systems built for Toronto’s humidity. It’s ideal when your cabinets are structurally sound and you want a modern finish fast.
By Masoud Kakar • Last updated: 2026-05-30
Summary
This complete guide explains bathroom cabinet repainting from prep to cure. You’ll learn what it is, when it’s the right choice, the step-by-step workflow we use across Toronto, tools and materials, best practices, troubleshooting tips, and a quick comparison to refinishing and refacing. Use this as your roadmap to a durable, factory-style finish.
Use this at-a-glance overview to jump to what you need.
- What repainting is and when it beats refacing or replacing
- Why repainting matters for style, speed, and sustainability
- How repainting works in 10 clear steps
- Readiness checks to confirm your vanity is a candidate
- Methods and coatings: brush/roll vs spray, enamel types
- Tools and resources professionals rely on
- Best practices for long-lasting results
- Troubleshooting common issues and quick fixes
- Repaint vs refinish vs reface quick comparison table
- Toronto case examples from small baths to rentals
- Timeline and what to expect from start to reinstall
- FAQ and next steps
Local considerations for York
- Schedule paint days when indoor humidity is stable; bathrooms can spike after showers, so add ventilation during cure.
- Plan weekend work around condo rules if doors travel off-site; book elevator time early.
- Expect brief delays around Jane St at St Clair Ave West; create a clear staging area at home for doors and drawers.
What is bathroom cabinet repainting?
Bathroom cabinet repainting is the pro-grade cleaning, sanding, bonding priming, and topcoating of existing vanity doors, drawers, and frames to change color and sheen without replacing boxes. It preserves layout and structure, enables hardware updates, and delivers a smooth, factory-style finish when sprayed in a controlled environment.
In our work across the Toronto area, repainting typically includes two to three coats: one high-adhesion primer and two finish coats. Most waterborne enamels are ready to recoat in 2–4 hours and reach functional cure in 7–14 days. Door labeling, dust control, and climate management make the difference between a good and great finish.
If you want a deeper dive into surface science and coatings, see our practical primer in Bathroom Cabinet Refinishing: Refresh Your Space. While refinishing can reveal wood grain, repainting focuses on color-perfect, uniform films that resist moisture and daily cleaning.
Why repainting matters
Repainting delivers a dramatic style upgrade with minimal disruption. You keep solid cabinet boxes, skip demolition, and gain near-limitless color options. Turnaround is measured in days, not weeks, and modern waterborne enamels offer durable, scrub-friendly films suitable for high-humidity bathrooms.
Here’s why many York and Toronto homeowners choose repainting:
- Biggest visual change per day of work: A color shift (e.g., oak to satin white or deep navy) reframes tile, mirrors, and fixtures immediately.
- Less mess, less downtime: Doors and drawers leave the home, while face frames get finished in place behind clean masking and zip walls.
- Flexible hardware and hinge upgrades: We often add soft-close hinges or new pulls during reinstall, improving function as well as look.
- Moisture-ready coatings: Waterborne enamels form hard, low-odor films that tolerate regular wipe-downs and splashes when fully cured.
- Sustainable choice: Keeping existing boxes reduces landfill waste and avoids the embodied energy of new cabinetry.
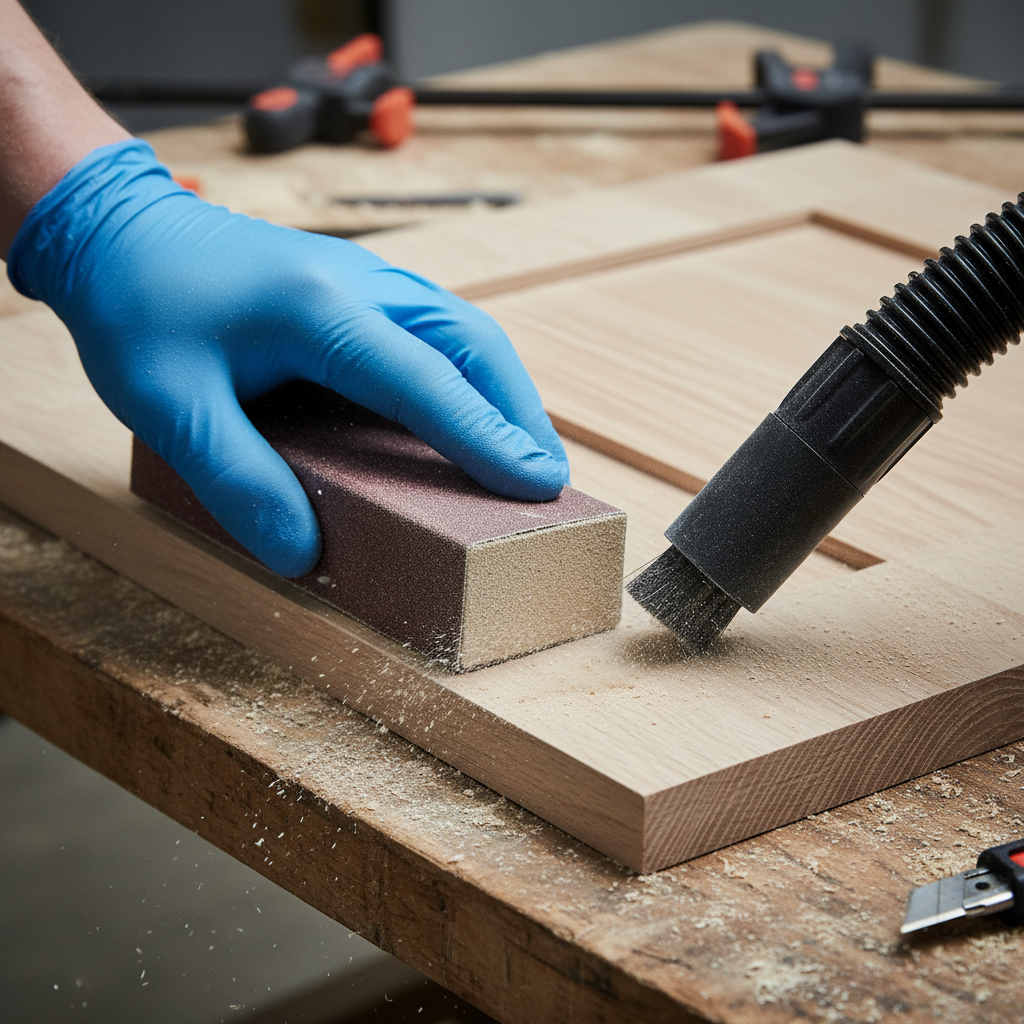
Most projects use 120–180 grit for initial scuff-sanding and 220 between coats for a refined surface. Edge adhesion improves further with feather-sanding and tack-wiping to remove fine dust that causes early chipping.
Local planning in York, Toronto
Plan bathroom cabinet repainting in York, Toronto by timing work around humidity, coordinating off-site spraying logistics, and managing access near Jane St at St Clair Ave West. Local scheduling and climate control help coatings level smoothly and cure on time in compact bathrooms.
Neighborhood homes vary from older bungalows to condos. That means different access paths, different ventilation options, and unique staging needs. We adjust masking, airflow, and cure plans accordingly so your vanity can return to service quickly without print-through or edge damage.
- Climate control: Aim for 65–75°F and 40–60% RH during coating and early cure. Small rooms heat up fast under lights—monitor with a simple hygrometer.
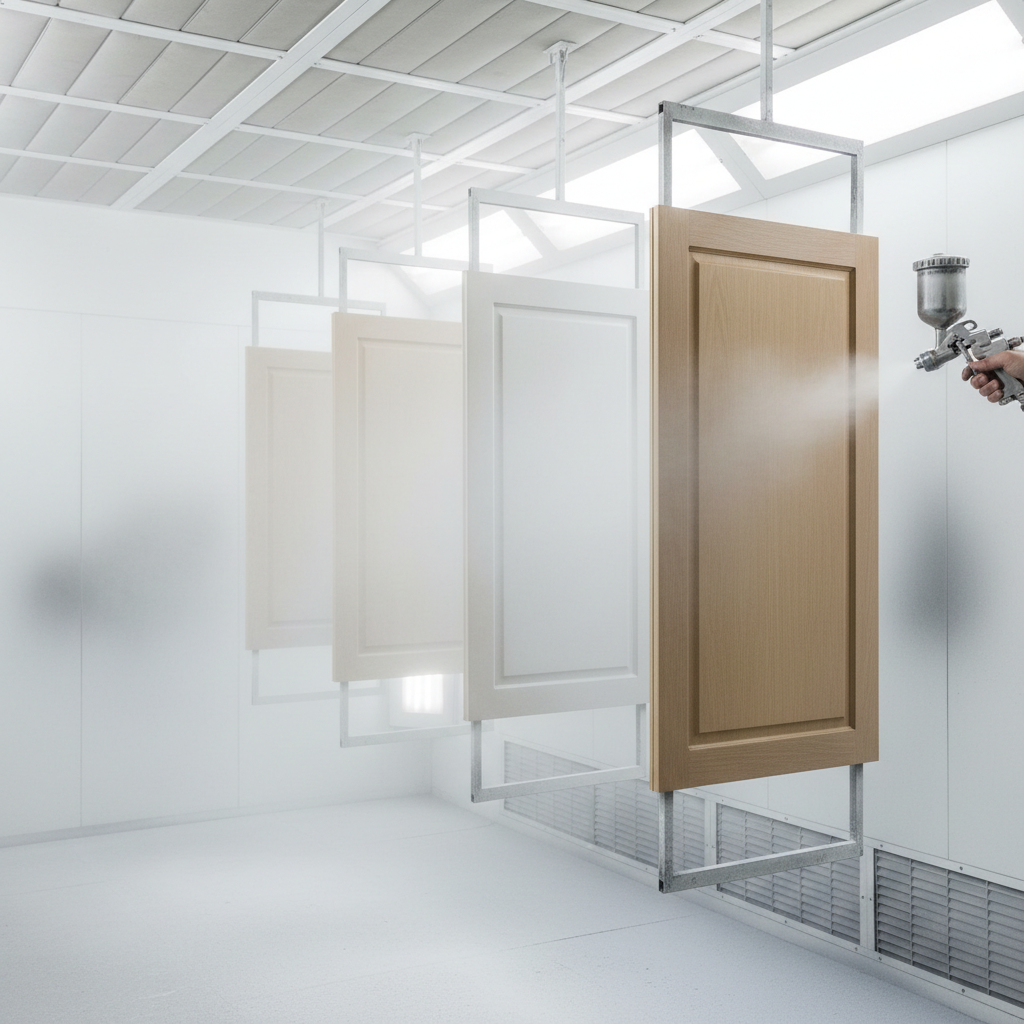
- Off-site spraying: Doors often travel to our controlled setup; typical batches hang in sets of 10–15 for even coverage and dust-free drying.
- Access routing: Tight stairwells or elevators require door blankets and corner guards to avoid dings that later telegraph through paint.
For color ideas that complement compact spaces, explore broader design inspiration like these 2026 vanity trend overviews. Use outside inspiration to narrow your palette, then we’ll translate it into a bathroom-ready coating system.
How bathroom cabinet repainting works (step-by-step)
The repainting process protects the room, removes doors, deep-cleans, scuff-sands, primes with a bonding system, and applies two sprayed enamel coats. Controlled climate and dust capture are essential. After staged curing, doors reinstall with updated hardware and bumpers for a quiet, durable result.
Our pro workflow emphasizes clean surfaces, dust control, and film build. These 10 steps mirror what we deliver across the GTA.
- Protect and prepare: Paper floors, mask countertops and walls, zip temporary barriers. Remove and label doors/drawers and bag hardware.
- Deep clean and degloss: Use a surfactant cleaner and gray scuff pad to cut soap film and residues that cause adhesion failure.
- Scuff-sand: 120–180 grit to dull the factory sheen. HEPA vacuum, then tack-wipe until cloth stays clean.
- Repair and fill: Spot-fill dings with fine wood filler or putty; sand smooth. Check edges where hands contact most.
- Prime for adhesion: Apply a bonding primer suited to wood, MDF, or laminate skins. Lightly sand with 220 after dry.
- Prime, then inspect: A second primer coat on slick substrates evens absorption and improves enamel leveling.
- Finish coats: Spray two coats of waterborne enamel. Typical HVLP setups run 1.3–1.5 mm tips for fine atomization.
- Control climate: Hold 65–75°F and 40–60% RH for smooth films. Gentle airflow speeds set without dusting the surface.
- Stage cure: Doors hang flat or vertical on clean racks. Handle carefully for 24–48 hours; full hardness builds over 1–2 weeks.
- Reinstall and upgrade: Align hinges, add bumpers, and fit new pulls. Final wipe-down and walkthrough complete the project.
Want prep tips you can reuse in the kitchen too? See our cabinet refinishing preparation guide for room protection, labeling, and dust control techniques that also apply in bathrooms.
Prerequisites: readiness checks before repainting
Confirm your vanity is a repaint candidate by verifying solid structure, stable doors, and non-swollen substrates. If the layout works and hinges align, repainting delivers a fast transformation. Address leaks first, then proceed with bonding primer and enamel designed for humid bathrooms.
- Sound boxes: Solid wood or quality plywood/MDF; no active water damage or swelling at toe-kicks and sink cutouts.
- Stable faces: Factory finishes scuff nicely; glossy laminates may need an extra primer coat for bite.
- Hardware alignment: Doors hang square, drawers slide true. Replace loose hinges to avoid future rub-through.
- Layout satisfaction: You’re keeping the footprint; repainting changes look, not box location or plumbing.
- Ventilation plan: Small baths trap moisture; a fan or cracked door helps films set during the first 24–48 hours.
Not sure whether repainting or a different path fits? Our quick explainer on kitchen cabinet repainting translates well to vanities and highlights when surface-only upgrades are the smartest move.
Types, methods, and coating approaches
You can brush/roll small vanities for minimal setup or spray doors for a factory-smooth film. Waterborne enamels dominate bathrooms thanks to low odor, fast recoat, and hard cures. Shop-sprayed, catalyzed finishes level fastest but require pro equipment and controlled booths.
Application choices
- Brush and roll: Best for tiny vanities or tight timelines. Use a fine foam or microfiber roller and a high-quality synthetic brush. Expect light orange peel; level with a second, slightly thinned coat.
- HVLP spray: Yields the smoothest film and consistent edges. Typical setups use 1.3–1.5 mm tips and moderate air pressure to avoid overspray in small rooms.
Coating chemistries
- Waterborne enamels/alkyd hybrids: Low odor, hard cure, easy cleanup, and strong adhesion over bonded primers. Recoat windows of 2–4 hours are common.
- Catalyzed shop finishes: Exceptional leveling and hardness; applied off-site in a spray booth and returned after initial cure.
Curious how pro spraying compares across rooms? Our professional cabinet painting guide covers surface prep and film control that also apply to bathrooms.
Tools and resources
Successful repainting pairs clean prep with the right tools: HEPA vacuums, sanding blocks (120/180/220), bonding primer, and waterborne enamel. Use masking films, painter’s tape, zip walls, and drying racks for dust control and safe curing. HVLP sprayers elevate finish quality on multi-door projects.
- Prep and safety: Respirator rated for paint mists, gloves, eye protection, and a simple hygrometer/thermometer.
- Abrasion: Sanding blocks or orbital sander with 120/180/220 grits; foam pads for edge control.
- Cleaning: Surfactant degreaser and gray scuff pads to break soap scum and residues.
- Coatings: High-adhesion primer and a bathroom-suitable waterborne enamel in satin or semi-gloss.
- Masking: Painter’s tape, masking film, rosin paper, and temporary zipper walls for clean on-site work.
- Application: Fine-finish roller/brush or HVLP sprayer (1.3–1.5 mm) with clean filters and moisture traps.
- Drying: Door racks or hangers spaced for airflow; silicone bumpers for quiet, chip-resistant closes.
If you’re choosing between repainting and deeper surface work, our complete cabinet painting guide helps align expectations for film build, sheen, and cleaning routines.
Best practices for durable results
Clean first, then sand. Use bonding primer on slick factory finishes, and control climate at 65–75°F with 40–60% RH. Sand between coats, handle edges gently during cure, and add soft-close hardware and bumpers to prevent early wear at high-contact points.
- Surface first: Most failures trace back to residue, not paint. Clean until a white cloth stays white before sanding.
- Edge discipline: Hands and towels hit door edges daily. Feather-sand, prime thoroughly, and avoid sharp corners that chip.
- Thin, even coats: Two finish coats build a smoother, tougher film than one heavy pass.
- Sheen selection: Satin balances cleanability and glare in small baths; semi-gloss maximizes scrubbability.
- Cure window: Light use at 24–48 hours; protect corners for 7–14 days until full hardness.
For broader project planning across rooms, explore our overview of kitchen cabinet makeovers and adapt scheduling logic to your vanity.
Troubleshooting: quick diagnostics and fixes
Sticky films, edge chipping, fisheyes, and brush marks point to climate, contamination, or technique. Increase airflow, feather-sand and spot-prime, block silicone with shellac, or switch to spray/finer rollers. Most issues resolve with targeted prep and controlled re-coating.
- Tacky finish after a day: RH too high or coats too heavy. Add airflow, dehumidify, and extend cure before handling.
- Peeling at handles/edges: Inadequate scuff or primer bite. Feather-sand, apply bonding or shellac spot-primer, and recoat.
- Brush/roller marks: Overworking paint. Use an extender compatible with your enamel or switch to HVLP for doors.
- Fisheyes/craters: Silicone or oil contamination. Deep clean, then seal with a shellac-based spot-primer.
- Yellowing over time: Common in oil-only systems with low light. Favor modern waterborne enamels for color stability.
Looking for style prompts as you plan the fix? This broad overview of painting cabinet steps can inspire palette and sheen choices while you troubleshoot.
Repaint vs refinish vs reface (quick comparison)
Repainting changes color and sheen with primer and enamel. Refinishing strips to bare wood for stain and clear coats. Refacing replaces doors and adds matching veneer. If boxes are solid and layout works, repainting offers the fastest visual upgrade with minimal disruption.
| Goal | Process | Look | Typical Timeline |
|---|---|---|---|
| Repaint | Clean, sand, bonding prime, 2 enamel coats | Full color change, smooth uniform finish | Days |
| Refinish | Strip to bare wood, stain, clear protective coats | Natural grain emphasis | Longer |
| Reface | New doors/drawers + veneer on boxes | New style and finish | Longer |
Case studies and examples from Toronto homes
Across Toronto, we repaint vanities in bungalows, condos, and rentals. Typical results include two sprayed enamel coats on doors off-site and one frame coat on-site, with new pulls and soft-close hinges. Color choices range from satin whites and greiges to deep navy or matte black for bold contrast.
- York bungalow: Oak vanity to satin white; two shop coats plus on-site frame coat. Brushed-brass pulls refreshed the whole bath.
- Midtown condo: Roll-and-tip method on a compact vanity; warm gray satin coordinated with tile. Zero spray setup needed.
- Etobicoke semi: Maple doors sprayed deep navy; leveled beautifully with a 1.3 mm tip. Soft-close hinges added.
- East Toronto duplex: Moisture blisters sealed with shellac spots; final enamel in eggshell for a softer glow.
- North York rental: High-adhesion primer over laminate faces; neutral greige chosen to stand up to regular turnover cleaning.
- Downtown loft: Matte black vanity with precise edge sanding to resist chips; bumpers installed to protect corners.
For whole-home planning, our guide to repainting kitchen cupboards shows how vanity timing can fit into a larger refresh.
Timeline and what to expect (no pricing)
Most vanities move from prep to reinstall in two to five working days, depending on door count, setup, and cure targets. Doors typically travel to a controlled spray space while frames are finished in place. Ventilation and humidity influence schedule more than room size.
Here’s the general cadence we follow:
- Day 1: Protect room, remove and label doors/drawers, deep clean, scuff-sand, and prime. Begin off-site door spraying.
- Day 2: Sand primer, apply finish coat one. Maintain 65–75°F and 40–60% RH; manage airflow for dust-free setting.
- Day 3: Second finish coat on doors; frame finishing on-site if not completed Day 2.
- Day 4–5: Reinstall doors/drawers, adjust hinges, fit new hardware, and complete punch list.
If you’re balancing a larger bathroom update, general remodel resources like this overview of bathroom upgrades can help you stage work so trades don’t overlap.
Frequently asked questions
Homeowners ask about cure time, thermofoil, color choices, and cleaning. Light use often resumes within 24–48 hours, while full hardness takes 7–14 days. Secure thermofoil can be painted with the right primers. Satin or semi-gloss sheens simplify cleaning in humid bathrooms.
How long before I can use my bathroom again?
Light use is common 24–48 hours after the final coat, with gentle handling at edges. Full hardness builds over the next 7–14 days, so avoid heavy cleaning or prolonged moisture on door edges during that window.
Can you paint thermofoil vanity doors?
Yes—if the foil is intact. If it’s peeling, we remove loose material, patch, spot-prime with a sealer, and then apply a bonding primer and enamel. Severely failing foil may require new doors rather than repainting.
What sheen works best in small bathrooms?
Satin is a sweet spot for most homes—it reflects light without highlighting imperfections. Semi-gloss is the most scrubbable, while eggshell offers a softer look with slightly less stain resistance.
How do you prevent chips at door edges?
Feather-sand edges, use a bonding primer, apply thin, even coats, and add silicone bumpers during reinstall. Avoid sharp corners and allow a full 7–14 days of cure before heavy contact or cleaning.
Conclusion and next steps
Bathroom cabinet repainting transforms a space quickly when boxes are sound and layout works. With clean prep, bonded primer, and waterborne enamel, you’ll get a smooth, durable finish that stands up to humidity. Plan climate control and gentle early use to protect edges while the film reaches full hardness.
Key takeaways
- Repainting changes color and sheen without replacing boxes—fast, clean, and flexible.
- Two enamel coats over bonding primer are the backbone of a durable, moisture-tolerant film.
- Climate (65–75°F, 40–60% RH) and dust control drive leveling and adhesion.
- Edges need extra care: feather-sand, prime thoroughly, add bumpers, and allow a 7–14 day cure.
Ready to plan your vanity refresh? We serve York and the Toronto area with pro-grade cabinet repainting, refinishing, and refacing. Explore our process across rooms in the professional cabinet painting guide, then contact Paint2decor INC to schedule a walkthrough.
Talk through your bathroom cabinet repainting plan. Share photos, preferred colors, and timeline. We’ll confirm readiness checks and outline the best coating system for your space in York/Toronto.
Request a callback or call +1 (416)-831-8489.