
Painting a laminate bathroom vanity is the process of deep cleaning, scuff-sanding, bonding-priming, and finishing laminate cabinet surfaces with durable enamel or urethane coatings. The right prep and primer create adhesion on slick laminate, while controlled spraying or rolling delivers a smooth, low-maintenance finish that refreshes York bathrooms without replacing the vanity.
By Masoud Kakar — Paint2decor INC
Last updated: 2026-06-23
Above-Fold Guide + Quick Navigation
Painting a laminate vanity succeeds when you pair meticulous surface prep with a true bonding primer and a hard-wearing topcoat. Use degreaser, a 220–320 grit scuff, a solvent-borne or acrylic bonding primer, and a cabinet-rated enamel. Control dust, humidity (40–60%), and dry times to achieve a furniture-grade finish.
This complete guide is written for York homeowners comparing a DIY refresh to pro refinishing. It explains what laminate vanity painting is, why it matters, how it works, best methods, and when to call Paint2decor INC for bathroom cabinet refinishing or cabinet respraying.
Summary
In short, success on laminate comes from chemistry and control: remove contaminants, create a micro-scratch profile, lock it in with a bonding primer, then apply thin, even coats of cabinet-grade enamel. Respect recoat windows (typically 1–4 hours) and allow 5–7 days before heavy use for a long-lasting finish.
Here’s the big idea: laminate is slick and non-porous, so you can’t treat it like raw wood. You need measurable steps—cleaning, sanding, priming, and curing—to convert a glossy, low-energy surface into a paint-ready one. We’ll show you the exact sequence that works in York bathrooms.
What Is Painting a Laminate Bathroom Vanity?
Painting a laminate bathroom vanity means preparing and coating a non-porous, plastic-like surface so paint adheres reliably. It requires degreasing, scuff-sanding to 220–320 grit, a specialty bonding primer, and durable cabinet enamel applied in thin coats, typically 2–3 finish coats over 1–2 primer coats.
Laminate is a fused melamine or plastic veneer over a substrate like particleboard or MDF. Its factory-slick face resists liquids and stains—which is great for bathrooms, but challenging for adhesion. That’s why success hinges on a primer designed to grab onto impervious surfaces and a finish engineered for cabinet wear.
- Surface profile: Aim for a uniform matte after scuff-sanding; shiny spots signal low adhesion risk areas.
- Film build: Keep coats thin—around 1.5–2.0 mils wet—to avoid sags; two to three finish coats usually cover.
- Cure timeline: Dry to touch in 30–90 minutes, handle in 6–8 hours, and full cure in 5–7 days is typical.
For York bathrooms, where humidity spikes during showers, a hard-cured enamel and proper caulking at splash zones can extend finish life by years.
Why Painting a Laminate Vanity Matters
Updating a laminate vanity with paint modernizes a bathroom quickly, avoids demolition, and reduces landfill waste. With the right system, you’ll get a durable, moisture-resistant surface that stands up to daily use and cleaning, making it a smart alternative to full replacement or a long remodel.
Most homeowners want a fresh look without weeks of disruption. Painting delivers a noticeable makeover in days, not months, and reduces material disposal. In our experience across the GTA, a properly prepped and primed vanity tolerates routine cleaning chemicals and humidity cycles far better than a simple “paint over” attempt.
- Speed: A single 36–48 hour window covers prep, prime, and finish in many small baths.
- Style: Matte, satin, and semi-gloss sheens pair with trending neutrals or bold accents.
- Sustainability: Extends cabinet life 5–10 years when maintained, cutting unnecessary replacement.
- Flexibility: Change hardware centers (e.g., 3 in. to 5 in.) to complete the update with minimal drilling.
If your laminate is swollen from leaks or delaminating at edges, paint won’t fix structural issues. That’s when our bathroom cabinet refinishing guide and expert assessment can help you weigh refacing versus refinishing.
How Painting a Laminate Vanity Works (Step-by-Step)
The workflow is: protect room surfaces, remove doors and hardware, deep-clean with a degreaser, scuff-sand to 220–320 grit, tack off dust, apply a bonding primer, sand between coats, then finish with 2–3 thin enamel coats. Control temperature (65–75°F) and humidity (40–60%) for best results.
Below is a professional sequence we use when assessing bathroom cabinet refinishing and cabinet respraying projects in York. Timing varies by product, airflow, and temperature—but the order holds.
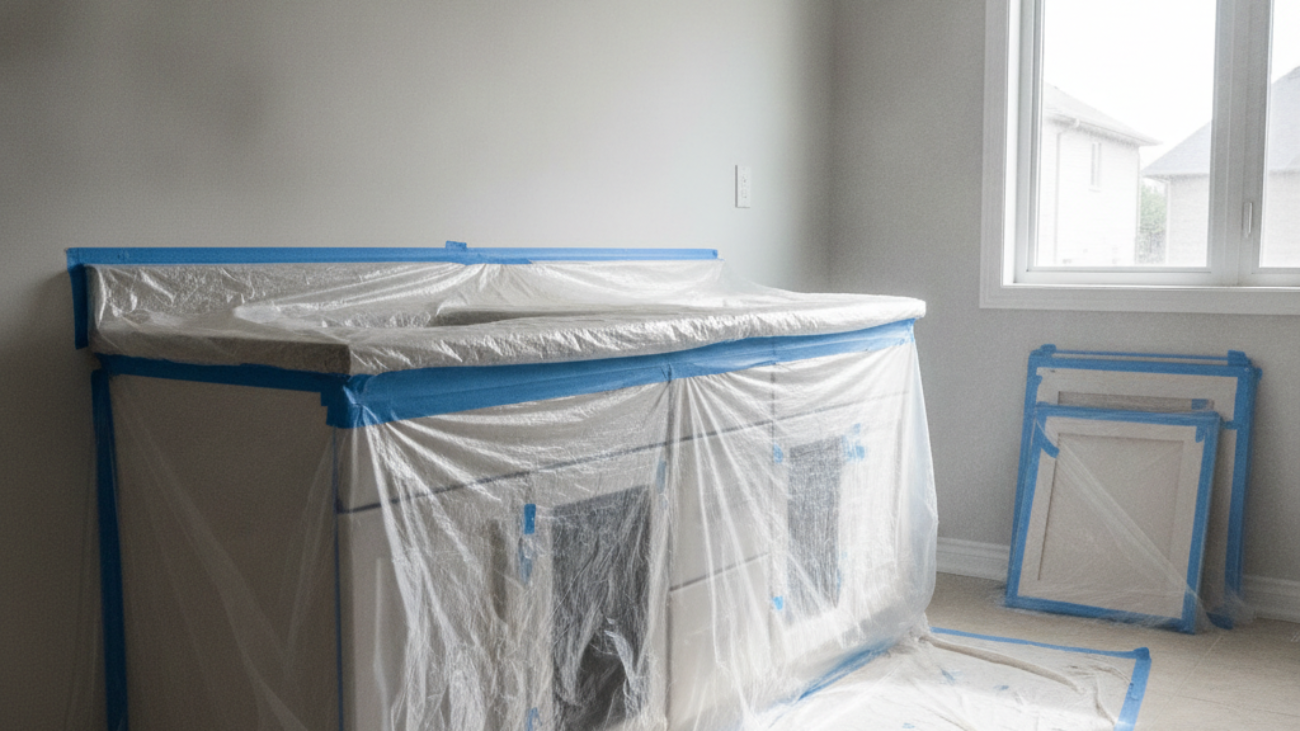
- Room protection (15–30 minutes): Mask floors, walls, and counters; set up plastic sheeting and a zipper door. Good containment cuts dust by 80–90%.
- Disassembly (20–45 minutes): Label doors and drawers, bag hardware, and remove hinges and pulls. Photograph hinge locations to speed reassembly.
- Degrease thoroughly (20–40 minutes): Use a cabinet-safe cleaner or TSP substitute. Wipe, rinse, and let dry. Oils and soap residue can reduce adhesion by 30% or more.
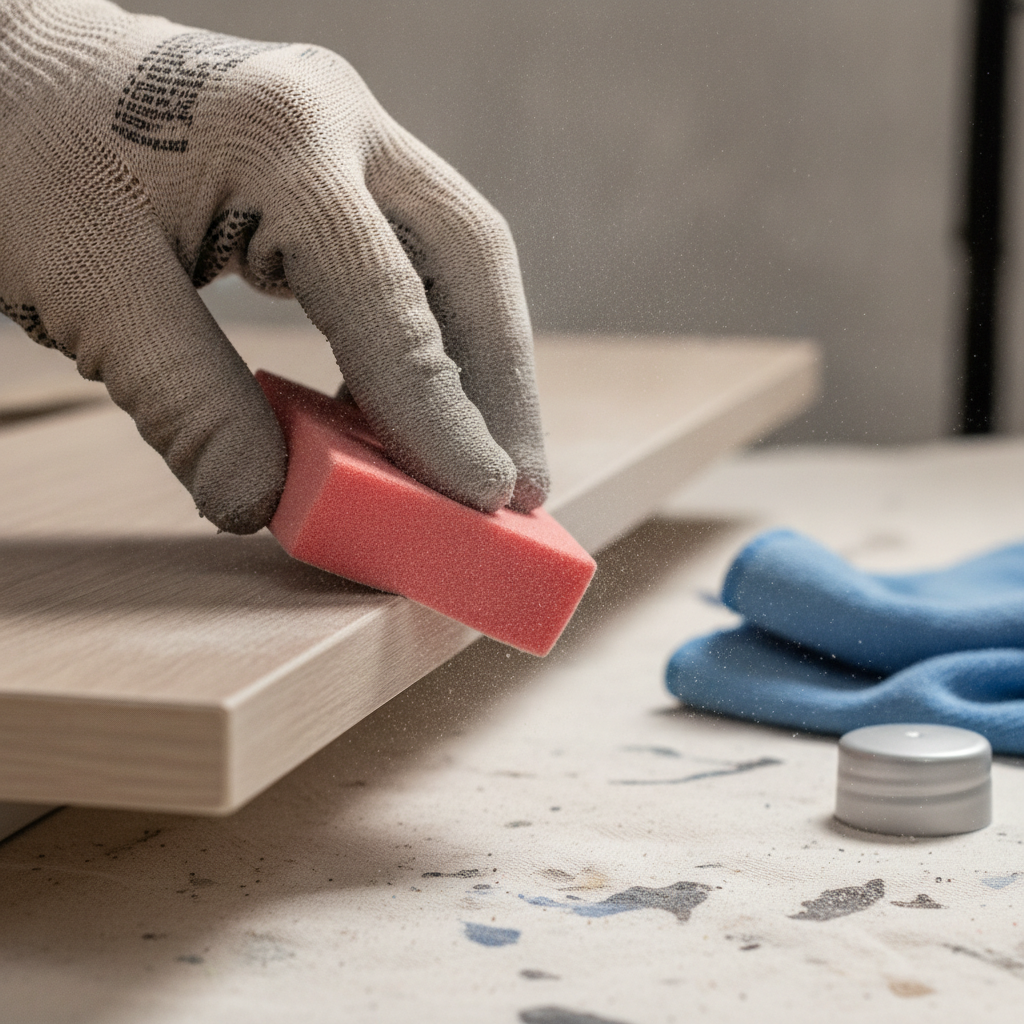
- Scuff-sand (30–60 minutes): Create a uniform matte with 220–320 grit. Edges and profiles need gentle passes—don’t burn through laminate.
- Dust control (10 minutes): Vacuum with a HEPA brush, then tack-cloth. Even 5–10 microns of dust can telegraph through finish coats.
- Bonding primer (1–2 coats): Roll with a high-density foam roller or spray for a factory look. Recoat in 1–4 hours, per label.
- Nib sand (10–15 minutes): Lightly sand primer with 320–400 grit to knock down raised fibers and dust nibs.
- Finish coats (2–3 coats): Use cabinet-rated enamel or urethane acrylic. Target 1.5–2.0 mils wet per coat, with 1–4 hour recoats.
- Cure and reassemble: Allow overnight before re-hanging; wait 5–7 days before heavy use. Add felt bumpers to reduce door impact.
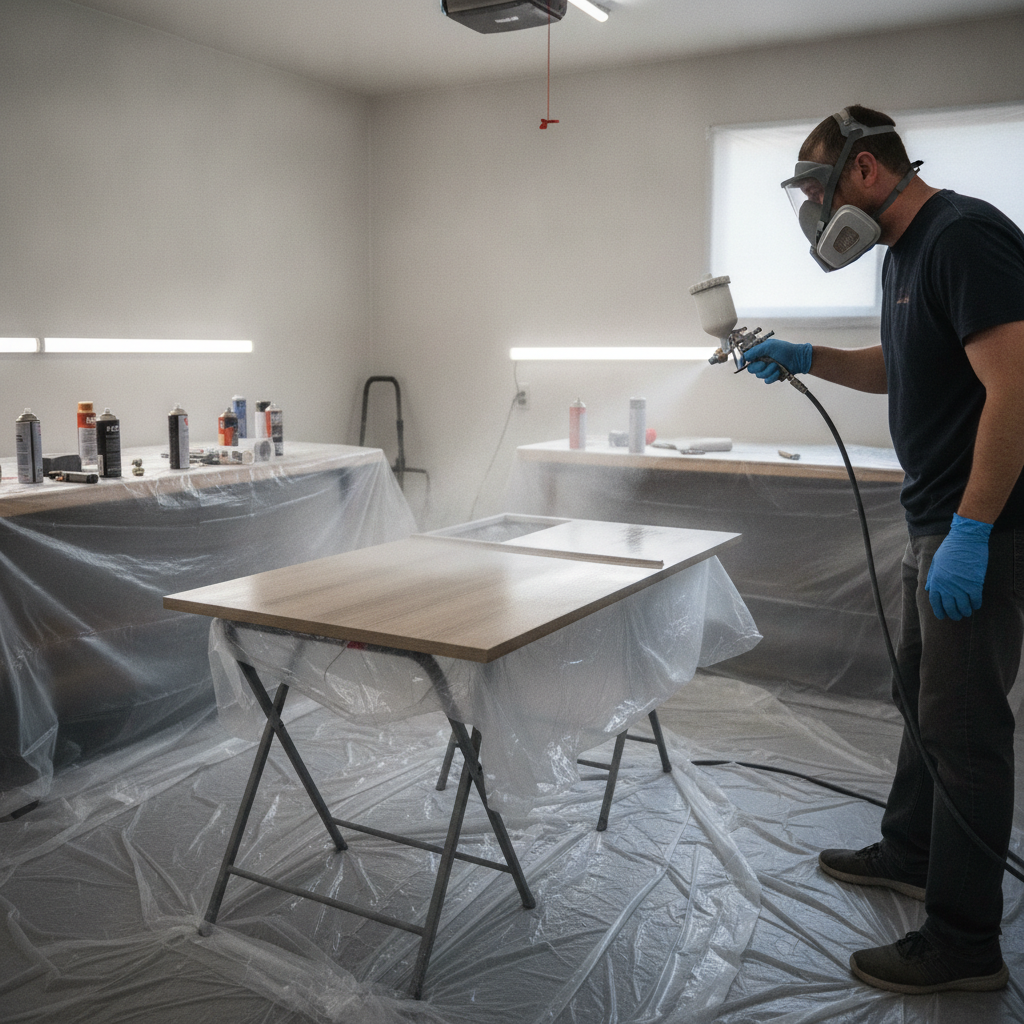
For spray applications, a small HVLP turbine or LVLP gun at 18–22 PSI (cap pressure varies by gun) can lay down an ultra-smooth finish. Rolling works too—use 4–6 in. foam rollers and feather edges to avoid lap lines.
Inspection and Decision Points
- Water damage: Puffy edges or substrate swelling suggest refacing or replacement for longevity.
- Peel test: After primer dries, do a small tape pull test; failure means more scuffing or a different primer system.
- Hardware upgrades: Fill old holes with a two-part filler; drill new centers after final cure to avoid chipping.
If you discover swollen toe kicks or cabinet sides, our team can advise whether redoing cabinets via refinishing is viable or if a targeted refacing panel will outperform a paint repair.
Types, Methods, and Approaches
You can brush/roll or spray a laminate vanity. Rolling with high-density foam is simpler and low-setup; spraying yields the smoothest factory-like finish. Pair methods with the right chemistry: an adhesion-promoting primer and a cabinet-rated, hard-curing enamel or urethane acrylic topcoat.
Every bathroom is different. Space constraints, ventilation, and design goals determine which techniques fit. Below we compare popular options, then match them with common York bathroom scenarios.
Application Methods Compared
| Method | Finish Smoothness | Setup Time | Learning Curve | Best For |
|---|---|---|---|---|
| Foam Roll + Tip-Off | Good (minor texture) | Low (10–20 min) | Low | Small vanities, tight rooms |
| HVLP/LVLP Spray | Excellent (factory-like) | Medium (30–60 min) | Medium | Shaker doors, large projects |
| Hybrid (Spray Doors, Roll Boxes) | Very good | Medium | Medium | Most DIY bathrooms |
Primer and Paint Choices
- Bonding primers: Acrylic bonding primers are low-odor and quick to recoat; solvent/alkyd bonds are extremely tenacious. Both can work on laminate when surfaces are degreased and scuffed to 220–320 grit.
- Cabinet enamels: Urethane-reinforced acrylics cure hard, resist moisture, and won’t yellow. Oil-modified alkyds level beautifully but may amber over time.
- Sheen selection: Satin hides minor texture; semi-gloss boosts reflectivity and cleans easily; matte looks modern but shows wear sooner.
Ventilation, PPE, and recoat windows matter. Always mind open time: most cabinet enamels want 1–4 hours between coats and a light 320–400 grit scuff if you exceed the recoat window.
Where Method Meets Reality
- Tight York condos: Roll frames in place and spray doors off-site for dust control.
- Family baths: Choose satin or semi-gloss for easier cleaning; allow a full 7-day cure before daily splashes.
- Quick turnovers: Two thin primer coats and two thin finish coats often achieve coverage; keep coat thickness consistent for even sheen.
For an in-depth refresh beyond paint—like replacing door styles—review our refinish bathroom vanity walkthrough and how it aligns with refacing or repainting paths.
Best Practices for York Homes
Treat the bathroom like a mini spray booth: isolate, ventilate, and monitor climate. Keep temperature near 70°F, humidity 40–60%, and dust near zero. Use thin coats, respect recoat windows, and let the finish cure 5–7 days before heavy use for maximum durability.
Humidity, ventilation, and handling are the three variables that make or break results in real bathrooms. Here are the pro moves we rely on when transforming vanities across the GTA.
- Climate control: Run exhaust fans and a box fan with a furnace filter. A 40–60% RH range reduces flashing and extends open time for leveling.
- Dust discipline: Vacuum, tack, and wait 10 minutes after stirring up air. Fine dust (5–10 microns) shows up as nibs in glossy sheens.
- Wet zones: Seal splash edges with paintable silicone after cure; re-caulk as needed yearly.
- Hardware last: Reinstall handles only after overnight cure; torque screws gently to avoid telegraphing stress into fresh film.
- Cleaning protocol: For the first 14 days, wipe with water-damp microfiber only; avoid harsh cleaners until full hardness develops.
Local considerations for York
- Plan prep on dry days and finish coats when the air is stable; bathrooms near Smythe Park can see higher evening humidity after rainfall.
- If you’re doing doors off-site, time trips around traffic near Jane St at St Clair Ave West so doors aren’t jostled before they’re handle-dry.
- For condo baths, confirm building ventilation rules and reserve elevators in advance for safe, dust-free door transport.
If you’d rather skip the mess, our crew handles full containment, spraying, and reassembly—see our overview on repainted bathroom cabinets for typical milestones.
Thinking about a pro finish? Paint2decor INC specializes in bathroom cabinet refinishing and cabinet respraying for York and the GTA. For a smooth, factory-like result, explore our bathroom cabinet refinishing guide and request a callback.
Tools and Resources
Gather a degreaser, 220–320 grit abrasives, HEPA vac, tack cloths, high-density foam rollers or a spray gun, bonding primer, cabinet enamel, respirator, and masking supplies. With everything staged, a small vanity often primes and paints in 36–48 hours including dry times.
Having the right setup accelerates quality. Kits below reflect the same bill of materials we prepare for bathroom cabinet refinishing projects.
Prep and Protection
- Cleaner/degreaser, rinse bucket, and microfiber cloths
- Masking plastic (0.31–0.4 mil), painter’s tape, floor paper
- HEPA shop vac with brush attachment; tack cloths
Abrasives and Fillers
- 220 and 320 grit sanding sponges; 400 grit for between coats
- Two-part filler for hardware hole moves; flexible putty knife
- Caulk (paintable silicone) for splash seams after cure
Application Gear
- High-density foam rollers (4–6 in.) and mini-frames
- HVLP or LVLP spray gun (if spraying) with proper filters
- Strainers and mixing sticks; wet film gauge (optional)
Coatings
- Bonding primer rated for laminate and glossy surfaces
- Cabinet enamel (urethane acrylic recommended for non-yellowing)
- Tint to desired color; satin or semi-gloss for easy cleaning
Safety and Ventilation
- N95 or half-face respirator with appropriate cartridges
- Nitrile gloves, safety glasses, and hearing protection (for sanders)
- Box fan with taped-on furnace filter for simple negative pressure
For additional background on laminate painting concepts and kitchen cabinet process overviews, see this general how-to guide and a short lamination painting overview. If you’re weighing broader remodel choices, compare cabinet replacement and updates in this remodel vs. replacement discussion.
Case Studies and Examples
Real-world results hinge on diagnosing the laminate, controlling climate, and choosing the right system. In York baths, we regularly convert outdated oak-look laminates to satin white or deep navy in 2–3 days, with full hardness and everyday cleaning readiness after a 5–7 day cure.
Here are condensed snapshots from our York and GTA projects. They show how decisions on primer, method, and cure windows translate to tangible outcomes you can expect at home.
York Powder Room, Single-Sink Laminate
- Scope: 2 doors, 1 drawer; faux-wood laminate to satin white.
- Method: Hybrid—rolled frame in place; sprayed doors off-site.
- Timing: 1 day prep/prime; 1 day finish. Handle-dry in 6–8 hours; full cure in 7 days.
- Outcome: Zero lap lines on frame; doors leveled to a near-factory look.
Family Bath, Double Vanity with Water-Splash Edges
- Scope: 4 doors, 4 drawers; existing delamination at sink cutouts.
- Method: Two-part filler, edge repairs; solvent-bonding primer; satin urethane acrylic topcoat.
- Timing: 2 primer coats (3 hours apart), 2 finish coats (2 hours apart).
- Outcome: Splash zones sealed after cure; cleaning routine established for first 14 days.
Rental Turnover, Tight Ventilation Window
- Scope: 3 doors, 2 drawers; color shift to warm gray.
- Method: Fast-dry acrylic bonding primer; rolling only; fans and furnace filter for airflow.
- Timing: 36 hours start-to-finish; hardware installed next morning.
- Outcome: Smooth rolled frames with minimal orange peel; doors re-hung carefully with felt bumpers.
If your vanity has deeper structural issues—or you want a different style profile—our team can advise on when cupboard refinishing or targeted refacing is the smarter long-term path.
Frequently Asked Questions
These are the top questions York homeowners ask about painting laminate vanities. Each answer is direct and based on practical jobsite experience so you can make confident choices and get a durable finish that stands up in a real bathroom.
Will paint stick to slick laminate?
Yes—if you degrease, scuff-sand to a uniform matte (220–320 grit), and use a true bonding primer. Without those steps, adhesion is weak and chips form quickly. With them, cabinet-grade enamels cure hard enough for daily cleaning.
Is rolling or spraying better for vanities?
Both work. Spraying delivers the smoothest factory look if you have ventilation and masking. Rolling with high-density foam is simpler and sets up faster in small baths. Many homeowners spray doors off-site and roll frames in place.
How long before I can use the bathroom?
Most systems are dry to touch within 30–90 minutes and handle-dry overnight. You can typically reassemble the next day. Avoid heavy splashes and aggressive cleaning for 5–7 days while the finish reaches full hardness.
When should I refinish or reface instead of painting?
If edges are swollen, doors are warped, or laminate is peeling, paint is a short-term fix. Consider professional refinishing, selective panel refacing, or new doors. Our York team can assess and recommend the most durable path.
Conclusion: Make Your Laminate Vanity Look New
If you control cleaning, scuffing, priming, and climate, painting a laminate vanity can deliver a durable, modern finish in days—not weeks. For a factory-smooth result without the learning curve, Paint2decor INC provides cabinet refinishing and respraying services across York and the GTA.
Here’s what to remember when you start your project.
Key Takeaways
- Adhesion is chemistry + scratch: degrease, 220–320 grit, bonding primer.
- Thin, even coats level better and cure harder than heavy passes.
- Target 65–75°F and 40–60% RH; allow 5–7 days for full hardness.
- Seal splash edges after cure; be gentle for the first 14 days.
- Spray doors off-site if space is tight; roll frames in place.
Ready to transform your bath? Explore our process for painting cabinets and compare it with our kitchen cabinet refinishing guide to see how “redoing cabinets” translates to bathrooms, too. Prefer a done-for-you finish? Book a friendly chat with Paint2decor INC in York today.