
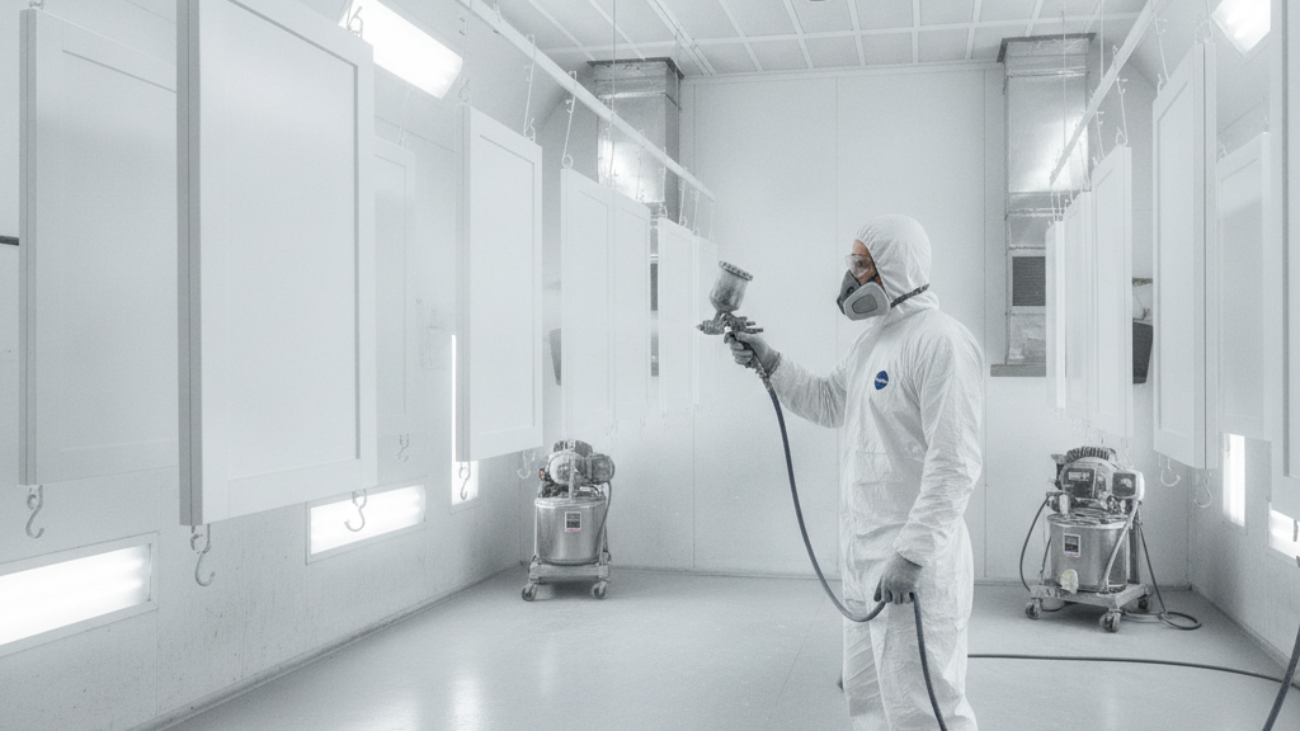
Spraying kitchen cabinet doors is the controlled application of paint with a spray gun to produce a factory-smooth, durable finish on existing doors and drawer fronts. In York and across Toronto, it renews kitchens without major demolition. Based at 2710 St Clair Ave W in York, Paint2decor INC specializes in cabinet respraying, refinishing, and refacing.
By Masoud Kakar — Paint2decor INC • Last updated: 2026-06-20
Quick Summary
Cabinet door spraying delivers a seamless, professional finish faster than brush-and-roll and with less disruption than full replacement. This guide explains prerequisites, prep, primers, HVLP settings, step-by-step technique, troubleshooting, and safety so York/Toronto homeowners can get consistent results—or confidently hire Paint2decor INC for a faster, warrantied makeover.
Here’s what you’ll learn in this complete guide:
- What spraying kitchen cabinet doors really involves—and why finish quality hinges on prep
- Local factors for York/Toronto homes: ventilation, weather, curing conditions, and timing
- Prerequisites to check before you unscrew a single hinge
- Step-by-step workflow we follow on professional GTA projects
- Tools, primers, and coatings that produce consistent, durable results
- How to avoid orange peel, fisheyes, drips, and adhesion problems
- When spraying beats rolling—and when refacing is the smarter move
For homeowners planning a kitchen refresh, our cabinet respraying service overview and this detailed tutorial pair perfectly. If you prefer a hands-off experience, our York-based team manages every detail, from cataloging doors to final reassembly.
What Is Spraying Kitchen Cabinet Doors?
Spraying cabinet doors is a finishing process that uses an HVLP or airless sprayer to atomize coatings into a fine mist, laying down thin, even coats. Done correctly, it achieves a uniform, brush-free look and improved durability, especially when paired with thorough cleaning, sanding, priming, and controlled curing conditions.
At its core, door spraying converts liquid coatings into a fine particle cloud that lands uniformly on wood, MDF, or laminate. Thin passes build film thickness without texture. Results depend on:
- Surface prep: Degreasing, sanding (120–320 grit), dust control, and repairs
- Primer compatibility: Bonding primers on slick or previously coated surfaces
- Sprayer setup: Tip size, pressure/airflow, fan pattern, and gun distance
- Environment: Temperature (65–80°F), humidity (40–60%), low dust/overspray
- Curing time: Allowing hardening between coats and before reassembly
When homeowners in Toronto compare redoing cabinets, spraying is the sweet spot between repainting with brushes and full refacing or replacement. Our team often couples spraying with minor carpentry fixes to maximize finish longevity.
For a deeper service view, see our kitchen cabinet respraying guide which outlines how we stage, mask, and rehang doors on GTA projects.
Why Spraying Matters for Toronto Homes
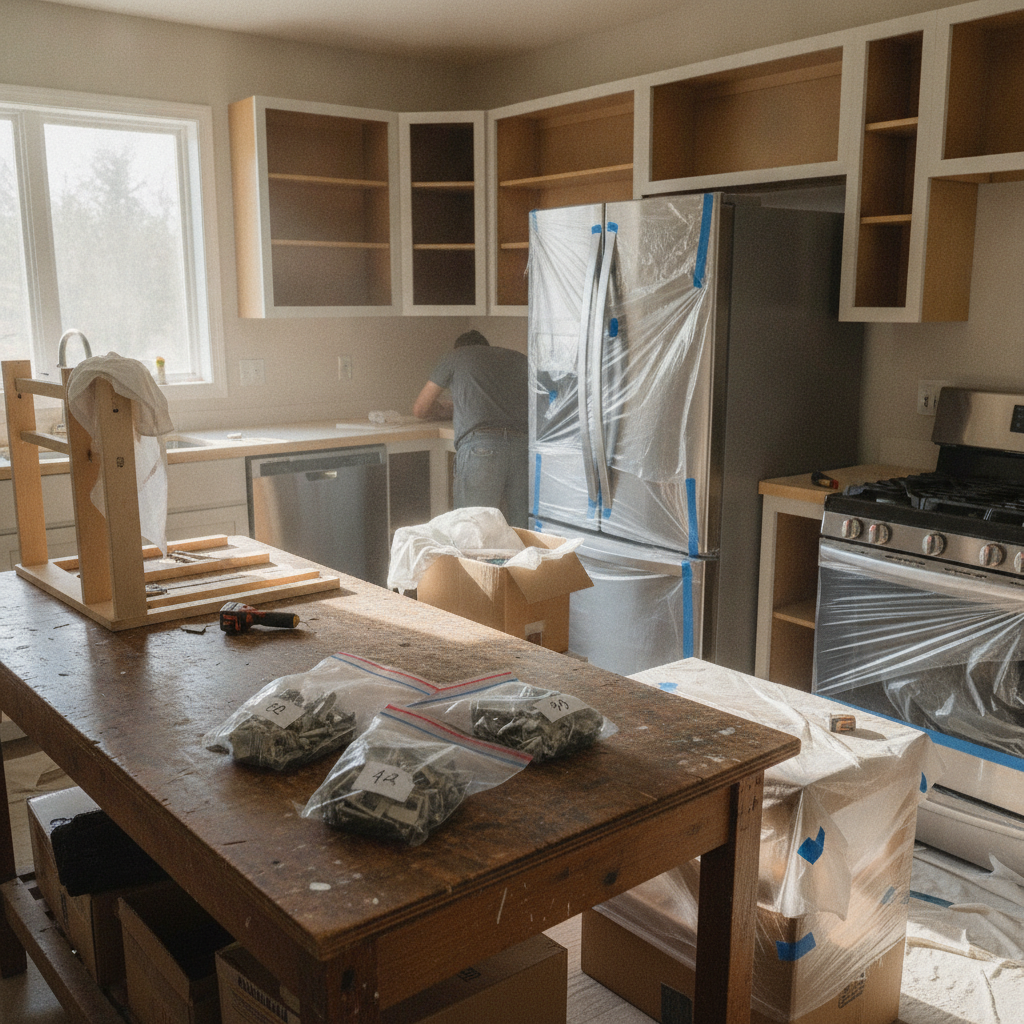
In York and the broader Toronto metro, spraying doors modernizes kitchens quickly while avoiding demolition waste. Local humidity swings and tight urban layouts reward controlled, off-site spraying, then on-site casing and box painting for minimal downtime and a consistent, furniture-grade finish.
Toronto kitchens face unique variables: multi-family buildings, tight hallways, winter cold snaps, and humid summers. These factors shape how we plan and sequence spraying:
- Climate window: We target 65–80°F rooms with 40–60% RH for leveling and cure.
- Staging logistics: Doors travel to our controlled spray area; boxes are masked on-site.
- Disruption: Typical cooking downtime is measured in days versus weeks.
When homeowners weigh spray vs. reface, we audit door material, joinery, and wear. If boxes are square and doors are sound, spraying is usually the fastest path to a like-new look. If doors are warped or the style is outdated, we may suggest pairing spraying with new shaker doors or full cabinet refacing options.
Local considerations for York
- Plan pickup or on-site masking around traffic near Jane St at St Clair Ave West to ease loading and minimize kitchen downtime.
- In humid Toronto summers, extend cure windows and use dehumidifiers so sprayed films harden as designed before reassembly.
- For families using nearby parks like Smythe Park, we can time door removal and reinstall around school breaks to reduce disruption.
Prerequisites Before You Start
Before spraying, confirm the doors’ material, stabilize the work area, and map your labeling system. A clean, ventilated space with dust control, proper PPE, and compatible primers prevents most failures. Document hinges, bag hardware, and test-spot your primer for reliable adhesion.
Run this preflight check so you don’t discover problems after the first coat:
- Identify substrates: Solid wood, veneer, MDF, thermofoil, or laminate behave differently.
- Clean thoroughly: Degrease with a kitchen-safe cleaner; rinse until water sheets.
- Label everything: Number doors/boxes; bag and tag hinges, screws, and bumpers.
- Ventilation plan: Set up exhaust, filters, and make-up air; avoid open flames.
- Primer test: Scuff-sand a hidden area; spot-prime and tape-test after dry.
- Masking strategy: Protect interiors, floors, and appliances with film and tape.
- Staging: Racks or pyramids prevent contact on freshly sprayed faces.
We log every piece before removal. That habit alone saves hours during reinstallation. For a broader planning lens when redoing cabinets, see our cabinet renovation guide.
How Spraying Works: Step-by-Step
Professional results come from a repeatable workflow: remove and label, deep-clean, sand, fill, prime, sand again, spray two to three thin color coats, cure, and reassemble. Control dust, temperature, and humidity at every stage to prevent texture, drips, or adhesion issues.
- Catalog and remove: Photograph layouts; number doors and drawers; bag hardware.
- Degrease: Use a dedicated cleaner. Rinse. Let dry fully.
- Sand: 120–150 grit for leveling; 220–320 grit for pre-prime smoothness.
- Repairs: Fill dings with wood filler; caulk hairline seams; let cure.
- Mask: Seal interiors, toe-kicks, and adjacent surfaces with film and paper.
- Prime: Bonding primer; two light coats with 30–45 minute flash between passes.
- Sand again: 320 grit or maroon pad; vacuum and tack.
- Topcoats: Two to three thin coats; maintain a wet edge and 50% overlap.
- Cure: Respect recoat and handle times; full cure commonly extends several days.
- Reassemble: Install doors and hardware; adjust reveals and soft-close hinges.
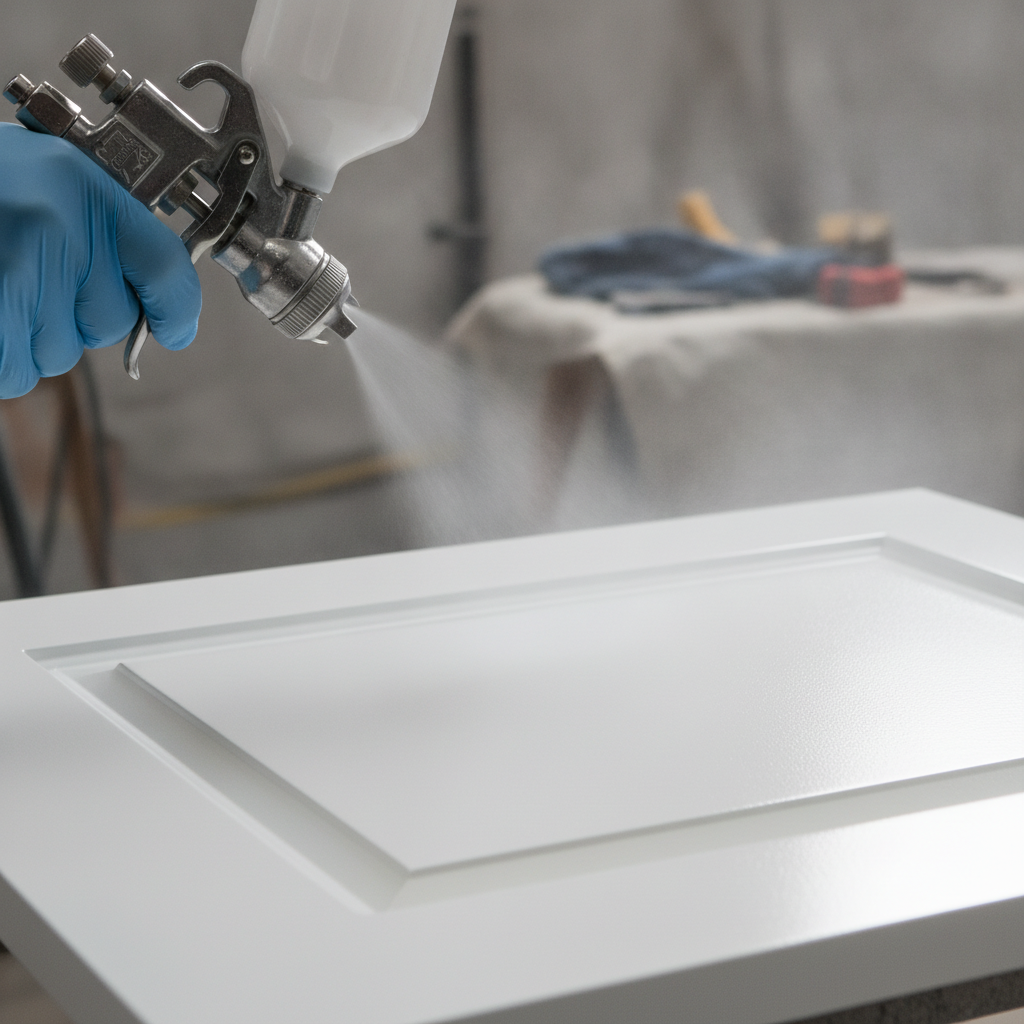
Technique matters. We hold the gun 6–8 inches off the surface, move at a steady pace, and keep the fan perpendicular to the work. Most orange peel comes from too-viscous paint, low atomization, or spraying in cool rooms. For a basic overview of spray technique, this intro to spray painting provides context.
Want the smoother, hands-off route? Our spraying process guide shows how Paint2decor INC sequences York/Toronto projects to minimize cooking downtime.
Types, Methods, and Approaches
Cabinet spraying typically uses HVLP turbines or compressor-driven HVLP, sometimes airless with a fine-finish tip. Waterborne enamels dominate for low odor and fast recoat, while solvent-borne systems remain for specific use cases. The best approach balances finish quality, cure speed, and on-site safety.
Sprayer categories
- HVLP turbine: Portable, consistent atomization; ideal for doors and trim.
- Compressor HVLP: Fine control via regulator; excellent for small parts.
- Airless (fine-finish): Fast coverage on boxes; use low pressure and fine tips.
Coating systems
- Waterborne enamels/urethane-modified: Low odor, rapid recoat (30–60 minutes), excellent hardness after cure.
- Solvent-borne lacquers: Rapid dry, professional-only ventilation protocols; used in controlled shops.
- Primers: Bonding primers for slick surfaces; stain-blockers where needed.
Setup essentials
- Viscosity and strain: Strain paint; adjust with manufacturer-approved reducer only.
- Tip/nozzle: Start around 1.3–1.5 mm for HVLP enamels; test and adjust.
- Fan and fluid: Set a cigar-shaped pattern, 50% overlap, gun 6–8 inches off.
- Environment: 65–80°F, 40–60% RH; filter intakes; vent overspray safely.
Choosing between systems isn’t about brand loyalty—it’s about substrate, schedule, and the homeowner’s tolerance for on-site work. Our Toronto refinishing guide explains how we pick the right combo for each project.
Best Practices for a Flawless Finish
Flawless cabinet finishes come from thin, controlled passes over flawless prep. Filter coatings, wipe with a tack cloth, keep the gun perpendicular, and resist flooding edges. Maintain stable temperature and humidity, and don’t rush cure windows—hardness and long-term durability depend on it.
- Two-hand control: Support the gun body to keep your wrist square and pattern even.
- Start off the edge: Trigger as you move, release off the far edge to avoid blobs.
- Thin coats win: Three thin coats beat two heavy passes—less texture and sag.
- Edge strategy: Light edge mist first, then fill panels—prevents runs on profiles.
- Lighting: Cross-light the surface to spot holidays, sags, and dust nibs.
- Between-coat sanding: 320–400 grit or pads; vacuum, then tack to remove fines.
- Handle timing: Use painter’s pyramids and allow safe-to-handle windows before flipping.
In our experience across dozens of GTA kitchens, patience on prep and cure delivers the longest-lasting results. Rushing one stage shows up as defects later.
Tools and Resources We Rely On
A reliable setup includes an HVLP sprayer with a fine nozzle, bonding primer, waterborne enamel, sanding blocks (120–400 grit), respirator, and proper masking materials. Sturdy racks, painter’s pyramids, and labeling supplies keep the job organized from removal to reinstall.
- HVLP kit: Gun with 1.3–1.5 mm nozzle, moisture filter, and flexible hose.
- Abrasives: 120/150 grit for leveling; 220–320 grit pre-prime; 320–400 grit between coats.
- Primers and topcoats: Shop-tested bonding primers; enamel with excellent block resistance.
- Dust control: Vacuum with HEPA bag, sticky mats, and clean-room habits.
- Safety: Eye protection, gloves, and a rated respirator.
- Organization: Blue tape, zip bags, labels, and a photo log for every hinge position.
For a homeowner-friendly walkthrough of cabinet painting fundamentals, see this process overview of painting cabinets. If you’d rather have pros handle staging and spraying, review our complete respraying guide for how we manage timelines.
Troubleshooting and Fixes
Most cabinet spray defects trace back to surface contamination, viscosity and pressure mismatches, or environment. Diagnose the symptom, then adjust: clean and sand for adhesion, thin or increase atomization for orange peel, and lighten passes for sags and runs.
Orange peel (pebbled texture)
- Causes: Thick material, low atomization, cool room, or holding gun too far.
- Fix: Warm room to ~70°F, slightly reduce per spec, increase atomization, move closer (6–8 inches), and apply thinner coats.
Fisheyes or craters
- Causes: Silicone, oil, or residue contamination.
- Fix: Stop, let dry, sand out, deep-degrease, then reprime the affected area.
Sags, curtains, or drips
- Causes: Heavy passes, slow movement, too close, or over-reduced paint.
- Fix: Lay doors flat, lighten trigger, speed up, and favor two thin coats.
Adhesion failures (peeling, easy scratch-off)
- Causes: Poor cleaning, glossy existing finish, wrong primer.
- Fix: Sand to a uniform scratch, switch to a bonding primer, and extend cure.
Dust nibs and debris
- Causes: Air leaks, dirty filters, or open doors/windows stirring dust.
- Fix: Vacuum the space, use sticky mats, and strain coatings before spraying.
If you’re stuck, our York crew can step in mid-project to correct issues and finish strong. Explore our cabinet door repainting guide for additional fixes and visuals.
Safety, Ventilation, and Clean-Up
Prioritize ventilation, PPE, and safe handling of coatings and reducers. Maintain cross-ventilation with filtered exhaust, wear a rated respirator and eye protection, and keep ignition sources away. Follow manufacturer guidance for disposal and curing before heavy use.
- Ventilation: Use filtered exhaust and seal off non-work areas.
- PPE: Respirator/cartridges rated for paint, safety glasses, and gloves.
- Fire safety: Eliminate open flames and pilot lights when spraying.
- Disposal: Handle rags and filters per label guidance; allow ample dry time.
New to spray safety? A general spray painting primer can help orient you to airflow, masks, and equipment basics before you begin.
Case Studies and Examples (York/Toronto)
Our GTA projects often pair door spraying with minor carpentry and box refinishing. Typical timelines run several days from removal to reinstall, with kitchens usable between phases. Here are condensed examples that mirror what most York homeowners experience.
York bungalow with oak doors
A family near St. Clair Ave W had dated honey-oak doors. We removed, labeled, and transported them to our spray area, filled open grain selectively, and sprayed a satin enamel. Boxes were masked and sprayed on-site. Turnaround: several days from removal to reinstall, with cooking resuming between phases.
Toronto condo galley kitchen
Limited space demanded tight logistics. We staggered pickup and return, sprayed doors off-site, and rolled low-odor coatings on the small cabinet boxes during the day. Evening reassembly restored functionality quickly.
Refinishing plus new shaker doors
Where doors were warped, we recommended new shaker fronts while spraying the boxes to match. This hybrid approach balanced budget, style, and speed—common when homeowners are redoing cabinets but want a fresh profile.
For broader planning ideas, see how we repaint kitchen cupboards without major renovation.
Spray vs. Roll/Brush vs. Reface
Spraying cabinet doors delivers the smoothest finish in the shortest active project time. Roll-and-brush remains viable for small touch-ups, while refacing is ideal when you want a new style or your doors are damaged. The choice depends on finish goals and door condition.
| Approach | Finish Quality | Project Disruption | Durability Potential | Best When |
|---|---|---|---|---|
| Spray (HVLP) | Factory-smooth, brush-free | Low (doors off-site; boxes masked) | High with correct prep/prime | Doors are sound; you want a like-new look fast |
| Roll/Brush | Good, but texture risk | Moderate (more on-site time) | Moderate; depends on technique | Small jobs or quick color tests |
| Refacing | New door style/skins | Moderate (carpentry + finish) | High (new materials) | Doors damaged or style change desired |
When to DIY vs. Call Paint2decor INC
DIY is reasonable if you can control dust, follow a labeling system, and keep conditions stable for cure. Call Paint2decor INC if you want shop-grade spraying, guaranteed adhesion, tight timelines, or help blending spraying with refacing or minor carpentry fixes.
- DIY-ready signs: You have space to stage, can maintain 65–80°F and 40–60% RH, and own/understand HVLP basics.
- Call us when: Doors are thermofoil/laminate, you see peeling or warping, or you need a fast, warrantied turnaround.
- Hybrid approach: We spray doors off-site and coach your on-site box prep to optimize time and results.
Curious about our end-to-end workflow? Start with the respraying service page—it shows how we plan, schedule, and protect your home in York and throughout Toronto.
Free Game Plan: Soft CTA
If you’re in York or Toronto, we’ll map a fast, low-disruption plan for your kitchen: pickup, shop spraying, on-site box finishing, and reinstall. You’ll see timelines and finish options before we start.
Want a pro-designed plan tailored to your kitchen? Review the complete respraying guide and then request a callback through any page. Our team at 2710 St Clair Ave W handles everything, from cataloging to final hinge tweaks.
Frequently Asked Questions
Homeowners ask about drying times, number of coats, and whether spraying works on laminate or MDF. In short: allow generous cure before heavy use, plan on two to three topcoats over primer, and use bonding systems for slick substrates. Labeling doors prevents reassembly headaches.
How many coats do sprayed cabinet doors need?
Most kitchens get two light primer coats and two to three thin topcoats. Thin, even passes level better and cure harder. Follow the product’s recoat window and lightly sand between coats for a flawless finish.
Can you spray laminate or thermofoil cabinet doors?
Yes, but only with meticulous cleaning, aggressive scuff-sanding, and a true bonding primer. We test a hidden area first, then proceed with thin coats. If laminate is failing or peeling, we often recommend new doors or a refacing path.
How long before I can use my kitchen again?
Most projects resume light use within days, with doors reinstalled after safe handling times. Full cure takes longer. We stage work to minimize downtime, often keeping appliances accessible during on-site masking and box finishing.
Is spraying better than brushing and rolling?
For a factory-smooth look, yes—spraying lays down thinner, more uniform films without brush texture. Rolling works for small areas, but larger kitchens benefit from professional spraying for consistency and speed.
Key Takeaways
Prep, primer choice, and environmental control decide your finish. Spraying beats rolling for uniformity and speed; refacing is best when doors are damaged or you want a different profile. In York/Toronto, shop-sprayed doors with on-site box finishing minimize disruption.
- Labeling and staging prevent reassembly delays and mistakes.
- Thin coats, correct atomization, and stable temps avoid texture and sags.
- Bonding primer is non-negotiable on slick or previously coated doors.
- Hybrid workflows keep kitchens usable during most of the project.
- When in doubt, our York/Toronto crew can assess doors and map the right path.
Conclusion: Your Next Best Step
Spraying kitchen cabinet doors gives you a modern, uniform finish without the chaos of a full renovation. If your doors are structurally sound, it’s likely the fastest, cleanest upgrade. For York and Toronto homes, Paint2decor INC coordinates every detail for a smooth start-to-finish experience.
Ready to see what’s possible? Browse our in-depth respraying guide and door repainting tips. When you’re set, we’ll plan pickup and spraying from our York base, then reassemble your refreshed kitchen with precise reveals.