Bathroom vanity refinishing is the professional prep, priming, and spray-finishing of an existing cabinet to restore durability and update style. At Paint2decor INC in York (2710 St Clair Ave W), we refinish bathroom vanities for Toronto homeowners who want a fresh, modern look without tearing out good cabinetry. It’s fast, durable, and mess-minimized.
By Paint2decor INC • Last updated: 2026-06-22
Above-Fold Summary & Table of Contents
Refinishing a bathroom vanity preserves your existing cabinet boxes while transforming the color and finish. This guide shows GTA homeowners how professional prep, spraying, and curing deliver a factory-smooth, moisture-resistant surface with minimal disruption. Use the checklist and step-by-step process to plan a confident makeover.
- What you’ll learn: definition, benefits vs. refacing/replacing, step-by-step workflow, tools and materials, finish options, curing timelines, and pro tips.
- Who this helps: Toronto and York homeowners comparing vanity refinishing to bigger renovations.
- How to use this guide: scan the quick steps, then deep-dive into best practices and local considerations.
- What is bathroom vanity refinishing?
- Why refinishing matters
- How the process works (step-by-step)
- Methods, materials, and finish options
- Best practices (expert tips)
- Tools and resources
- Case studies and local insights
- Local refinishing considerations in York and Toronto
- Frequently asked questions
- Conclusion and next steps
- Related reading
At a Glance
Bathroom vanity refinishing updates the color and protection of your existing cabinet with pro-grade prep, primers, and spray finishes. Expect scuff-sanding, cleaning, priming, and multiple topcoats. Typical recoat windows are 1–2 hours, and full cure often takes 7–14 days for maximum hardness.
- Refinishing vs. refacing: keep boxes/doors but change finish; refacing replaces door/drawer fronts.
- Durability: factory-like spray finishes resist moisture and daily cleaning when fully cured.
- Timeline: most vanities complete within several working days; curing continues after install.
- Finish choices: waterborne alkyds, 2K waterborne urethanes, and specialty sealers for high-humidity baths.
What Is Bathroom Vanity Refinishing?
Bathroom vanity refinishing is the process of cleaning, repairing, sanding, priming, and spray-painting an existing vanity to achieve a durable, moisture-resistant finish. It preserves sound cabinetry, modernizes color, and extends service life without demolition or plumbing changes.
Refinishing focuses on the surface system—what you see and touch. We prep substrates (wood, maple, MDF, laminate), then apply pro primers and topcoats designed for high-humidity spaces. The result is a factory-smooth finish that stands up to splashes, steam, and daily wipe-downs.
- Core steps: labeling hardware, repairs and caulking, scuff-sanding (80–120 grit initial; 220–320 between coats), cleaning/degreasing, bonding primer, spray topcoats, and cure.
- Where it shines: structurally sound vanities with dated stain or paint, water rings, minor chips, or yellowed clear coats.
- What it avoids: tile/floor disruption, countertop removal, and weeks of construction dust.
For deeper background and photos of similar projects, see our bathroom cabinet refinishing guide, which expands on finish systems we use for Toronto homes.
Why Refinishing Your Vanity Matters
Refinishing delivers a high-impact style upgrade with less disruption than replacement. You keep solid cabinet boxes, gain a factory-smooth spray finish, and avoid changes to plumbing or flooring. The result is a modern, wipeable surface designed for humidity and daily use.
- Less disruption: doors and drawers come to our spray area; your bath remains usable during most of the process.
- Moisture-ready systems: waterborne alkyd or urethane technologies offer hard films with lower odor during application.
- Color control: choose classic whites, deep charcoals, soft grays, or trend-forward greens—tone coordination makes small baths feel larger.
- Sustainable choice: you reuse what you have; fewer materials go to landfill.
If you’re comparing options, our cabinet refinishing guide explains when refinishing beats full replacement and how pro prep impacts finish longevity.
How Vanity Refinishing Works: Step-by-Step
The refinishing process includes inspection, labeling, cleaning, repairs, scuff-sanding, priming, and multiple spray topcoats. Expect recoat windows of 1–2 hours, light use after 24–48 hours, and full cure in 7–14 days, depending on product and humidity.
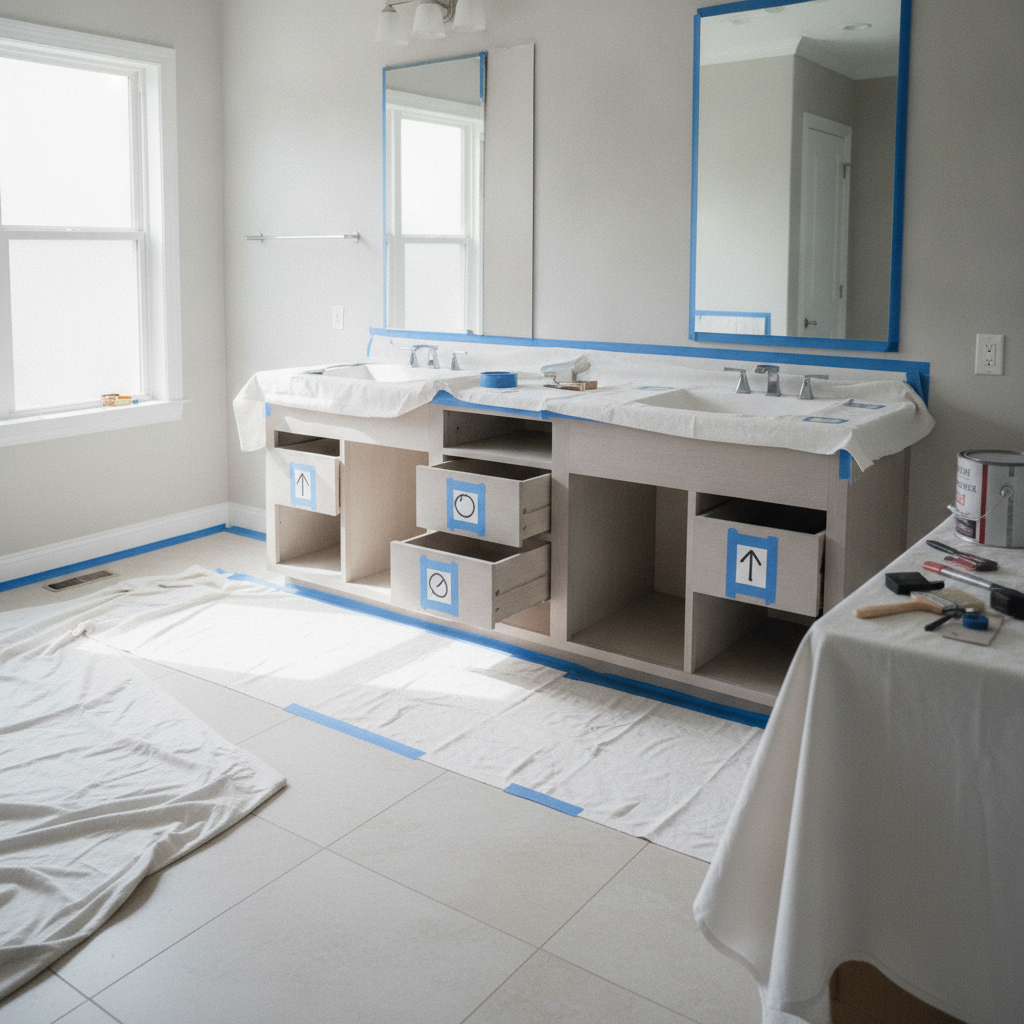
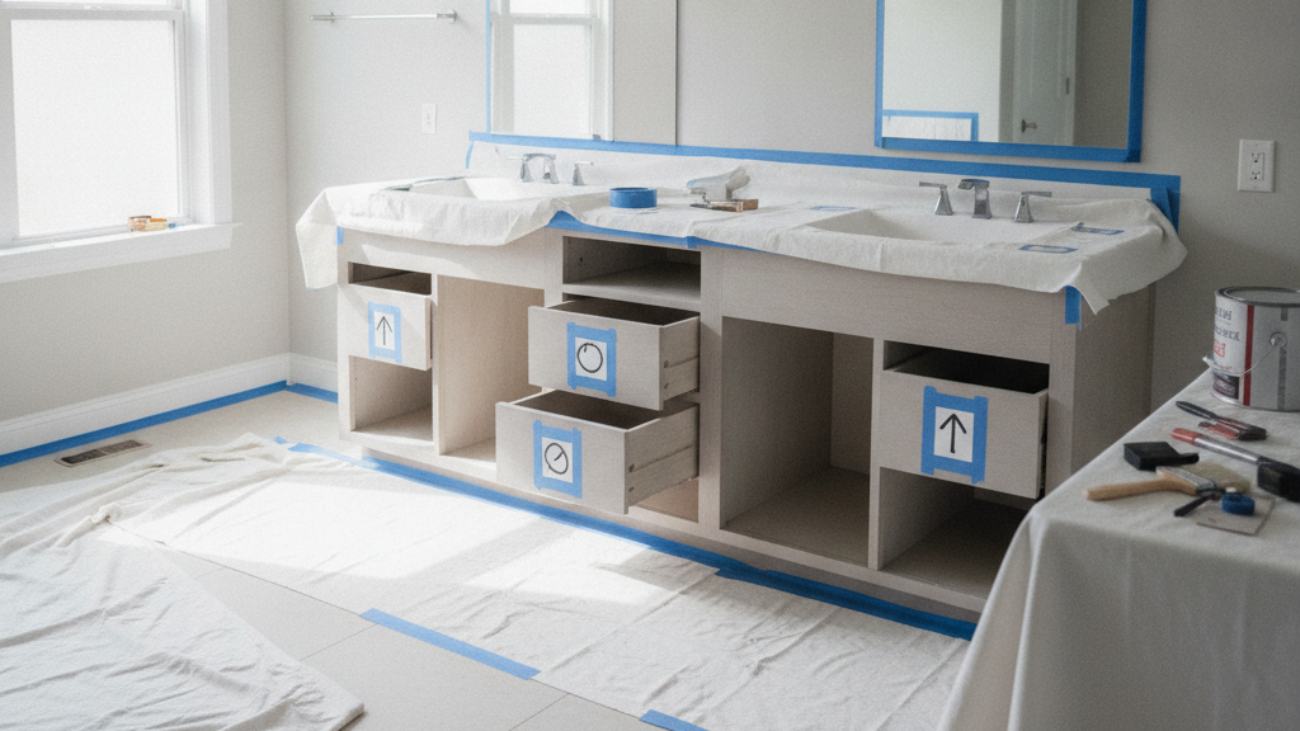
- Assess and protect: Inspect substrate, note swelling or delamination. Mask floors/walls, set drop cloths, and remove doors/drawers. Typical moisture targets for wood substrates are under 12%.
- Label and stage hardware: Bag hinges/handles by door number. This avoids misalignment later and speeds reassembly.
- Degloss and clean: Use a non-rinse deglosser; dwell times are commonly 5–10 minutes. Follow with a tack cloth to capture fine dust.
- Repairs: Fill nicks and seams; sand flush. Apply a thin, continuous caulk bead (about 1/8–1/4 inch) where stile-to-rail gaps collect moisture.
- Scuff-sand: 80–120 grit to abrade slick factory coatings; 220–320 between coats to level nibs and achieve a glass-like feel.
- Prime for adhesion: Bonding primers lock down old finishes and unify color. Many waterborne primers recoat within 1–2 hours at 70°F and 50% RH.
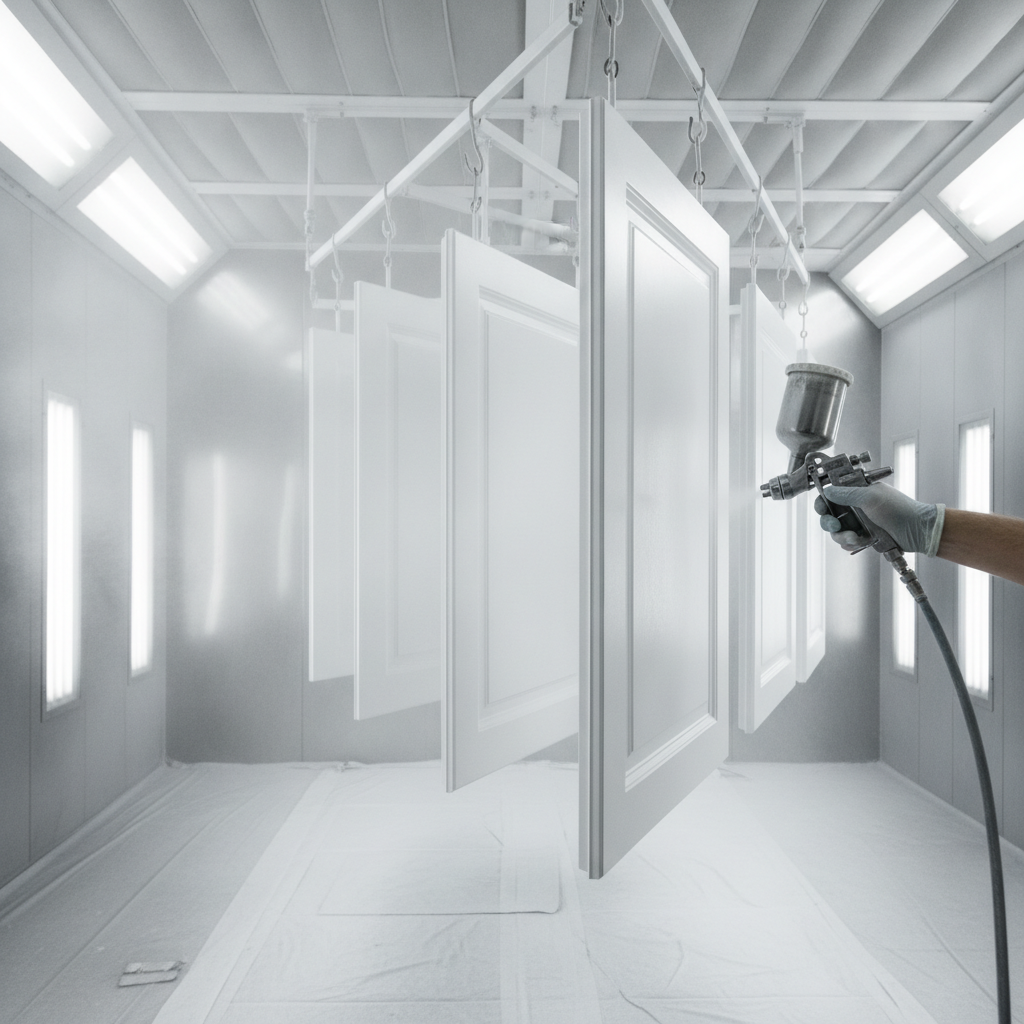
- Spray topcoats: HVLP setups deliver fine atomization; cap pressures often run in the 8–12 PSI range for smooth films.
- Final cure: Handles and light use resume within 24–48 hours; full chemical resistance develops in 7–14 days.
For a visual of surface prep, see the image below. You can also compare workflows in our Toronto-focused kitchen cabinet refinishing guide; the same principles apply to vanities.

Thinking about refinishing your vanity? Explore our step-by-step approach in the bathroom cabinet repainting overview, then reach out to plan a smooth, low-disruption makeover.
Types, Methods, and Finish Options
Refinishing methods include pro spray finishes for a factory look and controlled hand-brushing for touch-ups. Material choices range from bonding primers to waterborne alkyd or 2K urethane topcoats. Wood, MDF, and laminate each need tailored prep for best adhesion.
Application methods
- HVLP spraying: produces the smoothest, most uniform films on doors and drawer fronts. Overspray control, proper masking, and even passes ensure consistent sheen.
- Hand-brushing/rolling: suitable for on-site cabinet boxes or tight spaces. Use high-density foam rollers and fine brushes; tip-off to limit texture.
- Hybrid approach: spray the removable parts, brush/roll fixed boxes. This balances perfection on focal surfaces with efficient site work.
Material systems
- Bonding primers: essential for slick factory coatings; they improve adhesion and block minor staining. Many recoat in 1–2 hours at standard conditions.
- Waterborne alkyd enamels: alkyd-in-water technology with lower odor during application; hard-wearing once cured.
- 2K waterborne urethanes: two-component systems for maximum chemical and moisture resistance in steamy baths.
- Sealers and clear coats: optional, used to lock pigments or provide sheen control in high-use homes.
Substrate-specific prep
- Solid wood/maple: inspect for expansion joints and hairline cracks; flexible caulks reduce future movement lines.
- MDF: seal cut edges thoroughly; they absorb primer faster and can telegraph if under-sealed.
- Laminate/thermofoil: confirm adhesion with test patches; aggressive scuff-sanding and specialty primers help.
For style ideas while you plan function and durability, browse current bathroom vanity design trends. Use trend research to pick timeless colors you’ll enjoy beyond the next season.
Best Practices for a Long-Lasting Finish
The best results come from meticulous cleaning, controlled sanding, compatible primers and topcoats, and patient curing. Maintain 40–60% relative humidity and stable temperatures. Avoid harsh cleaners for two weeks after install while the film reaches full hardness.
Prep and environment
- Climate control: aim for about 70°F and 40–60% RH during application and early cure. Consistency reduces dry-time swings.
- Ventilation and capture: exhaust mist from the workspace and use fine filters for capture. Follow product SDS for PPE.
- Dust discipline: wipe with a tack cloth between coats; vacuum floors and keep traffic low to prevent nibs.
Safety and compliance
- Lead awareness for pre-1980s coatings: if you suspect legacy paint, pause and follow a certified protocol before sanding.
- Low-odor choices: waterborne technologies lower odor during application; still ventilate and let films cure undisturbed.
- Hardware handling: bag and label parts; torque screws to a consistent feel to avoid door sag after reassembly.
Need a refresher on the bigger kitchen picture? Our Toronto cabinet refinishing contractors guide explains shop vs. on-site spraying and how we minimize disruption in active homes.
Tools and Resources You’ll See Us Use
Professional refinishing uses clean-room habits and specialized tools: orbital sanders with dust extraction, HVLP sprayers, bonding primers, and high-performance topcoats. We stage doors on drying racks, monitor humidity, and log recoat windows for repeatable results.
- Sanding and surface control: orbital sander with HEPA extraction, sanding sponges (120–320 grit), tack cloths.
- Masking and protection: painter’s tape, lightweight plastic, drop cloths, and zipper-door dust barriers.
- Spray equipment: HVLP turbine or conversion gun, fine filters, viscosity cup to check reduction if allowed.
- Coatings: bonding primer, waterborne alkyd or 2K urethane, optional clear sealer for sheen tuning.
- Quality checks: wet-film gauge, LED raking light, and a simple mar test after 24–48 hours.
For plumbing-adjacent planning (sink removal, shut-offs, and sealants), skim these bathroom plumbing considerations while coordinating countertop and faucet timing.
Real-World Examples from Toronto Homes
Successful vanity refinishing pairs disciplined prep with the right coating system for the substrate. These Toronto-area examples show how color selection, moisture control, and shop spraying create a calm, durable finish—even in busy family bathrooms.
York maple vanity: yellowed to crisp white
- Challenge: ambered clear coat made the bath look dim.
- Approach: bond primer, waterborne alkyd enamel, satin sheen.
- Result: reflectance jumped, and with 4000–5000K LEDs, the room felt larger. Doors re-hung after 48 hours; full cure at day 10.
Toronto condo MDF vanity: humidity defense
- Challenge: swollen edges and soft factory paint on MDF.
- Approach: seal cut edges, block-stain primer, 2K waterborne urethane for max moisture resilience.
- Result: crisp lines and improved cleaning resistance after two weeks of cure.
Compact family bath near Smythe Park: storage first
- Challenge: scuffed drawers and sticky hardware in a high-use bath.
- Approach: hardware swap, glide tune-up, satin charcoal finish to hide fingerprints.
- Result: smoother daily use; parents reported easier wipe-downs by week two.
For makeover ideas beyond paint—hardware, mirrors, and lighting—our vanity makeover ideas page collects simple upgrades that complement a new finish.
Local Refinishing Considerations in York and Toronto
In York and the broader Toronto area, humidity swings and condo bylaws shape refinishing plans. Control moisture, coordinate elevator bookings when needed, and schedule during lower-traffic times. Neighborhood homes often benefit from satin sheens that balance brightness with easy cleaning.
Local considerations for York
- Plan staging with building access in mind; some York condos near the Toronto Public Library – Daniel G. Hill Branch require service windows for moves and deliveries.
- Seasonal humidity varies—winter air dries coatings faster; summer needs dehumidification to hold 40–60% RH.
- For detached homes around Smythe Park, we often set up a contained work zone and route airflow to minimize odor during application.
If you’re deciding between reface or refinish, read our balanced take in the Toronto contractors guide—the same decision points apply to bathroom cabinetry.
Refinish vs. Reface vs. Replace
Refinish is best when boxes and doors are sound but style is dated. Reface swaps fronts and veneer for a new look. Replace is reserved for structural failure or layout changes. All three can pair with new counters, sinks, and hardware.
| Approach | Typical Timeline | Disruption | Finish Look | When to Choose |
|---|---|---|---|---|
| Refinish | Several working days; 7–14 day cure | Low (bath often usable) | Factory-smooth spray | Boxes are sound; style/color outdated |
| Reface | About 1–2 weeks onsite + shop time | Moderate (new fronts/veneer) | New doors + finishes | Desire new door style without full demo |
| Replace | Multi-week with trades | High (plumbing, flooring, drywall) | Brand-new cabinetry | Structural issues or layout changes |
Exploring full cabinetry changes? Skim available custom vanities for inspiration while weighing whether your existing box structure is worth saving.
Frequently Asked Questions
Homeowners ask about durability, timelines, cleaning, and color. Refinishing timelines are days, not weeks; light use resumes in 24–48 hours, with full cure in 7–14 days. Choose satin or semi-gloss for wipeability in humid bathrooms.
How long should I wait before using drawers and doors?
Most projects allow gentle handling within 24–48 hours after final coat. The film continues to harden for 7–14 days, so avoid scrubbing cleaners and heavy impacts during that period. Normal cleaning resumes after the full cure window.
What finish sheen works best in bathrooms?
Satin and semi-gloss are bathroom favorites because they’re more wipeable and reflect light well. Matte can work in low-touch powder rooms, but higher sheens usually hide water spotting and fingerprints better in busy family baths.
Will refinishing hide wood grain on my maple vanity?
A solid-color finish mutes much of the grain, but pronounced pores may still show under raking light. Additional primer surfacer and sanding cycles help level texture. We’ll advise the right build to balance smoothness and schedule.
Do I need to remove the countertop or sink?
Often no. We mask in place and work around plumbing. If your sink or top is being replaced, we’ll sequence doors and boxes so both trades finish cleanly. Coordinate shut-offs and sealing with your countertop provider for best results.
Conclusion: Plan a Confident Vanity Makeover
Refinishing a bathroom vanity is a fast, low-disruption way to modernize your space. With disciplined prep, pro spray application, and proper cure, you’ll get a hard-wearing, easy-to-clean finish designed for humid bathrooms in the GTA.
Key takeaways
- Refinish when boxes are sound; save reface/replace for style or structure changes.
- Target 40–60% RH and steady temps for predictable drying and curing.
- Expect light use in 24–48 hours; plan full cleaning after 7–14 days.
- Choose satin or semi-gloss for family baths; match hardware to the new color.
Next steps
- Review our bathroom refinishing guide for system details and photos.
- Compare options in our cabinet refinishing guide and plan color, sheen, and hardware.
- Contact Paint2decor INC to discuss scheduling around your family’s routine in York and Toronto.
Related Reading in Our Kitchen & Bath Series
Explore deeper dives on cabinetry prep, pro spraying, and makeover planning across our Kitchen & Bath series. These resources help you compare approaches and set expectations before your project begins.
For a broader perspective on finishes that carry over to kitchens, see our Toronto kitchen cabinet refinishing guide. If you’re exploring alternatives, our contractors guide breaks down refinish vs. reface trade-offs in practical terms.