
Cabinet repainting cost is driven by scope, surface condition, prep standards, and finish quality. For a precise quote in York and across Toronto, Paint2decor INC evaluates your layout, materials, and goals at 2710 St Clair Ave W to propose the right refinishing or respraying plan—without the disruption of full replacement.
By Paint2decor INC • Last updated: May 8, 2026
At a Glance
A clear cabinet repainting quote starts with an on-site assessment, accurate door-and-drawer counts, and a durability-focused scope. Paint2decor INC documents surface condition, recommends pro-grade products, and outlines timeline, containment, and finish options so Toronto homeowners understand value before approving work.
Here’s what you’ll learn in this complete guide designed for Toronto and GTA homeowners comparing repainting, refinishing, respraying, and refacing.
- What “cabinet repainting cost” really includes (labor, prep, products, protection).
- How professional quotes are built and what affects timelines.
- Repainting vs. refacing vs. replacement: which fits your goals.
- Durability factors, finish choices, and maintenance expectations.
- York-specific tips to plan access, ventilation, and scheduling.
- A practical checklist to request an accurate, no-surprise quote.
What Is “Cabinet Repainting Cost”?
Cabinet repainting cost refers to the full scope required to prepare, prime, spray, and reassemble your existing cabinets to a durable, factory-style finish. It depends on counts, layout complexity, material condition, coating system, and site logistics, not just paint alone.
When people ask about cabinet repainting cost, they often picture a can of paint and a weekend. The reality: professional outcomes come from a process.
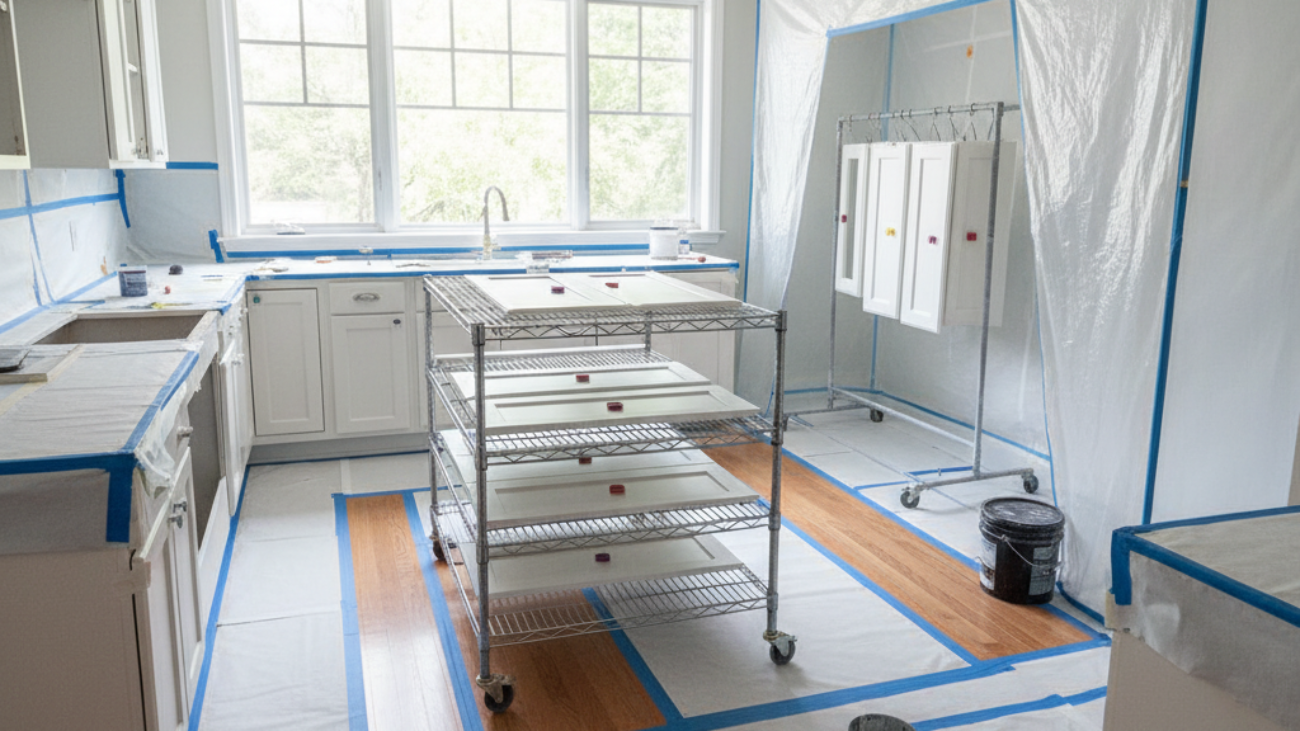
- Scope of work: door/drawer removal, labeling, hinge adjustments, masking, plastic sheeting, and floor protection.
- Surface readiness: degreasing, sanding, filling imperfections, caulking seams, bonding primer, and spray-grade topcoats.
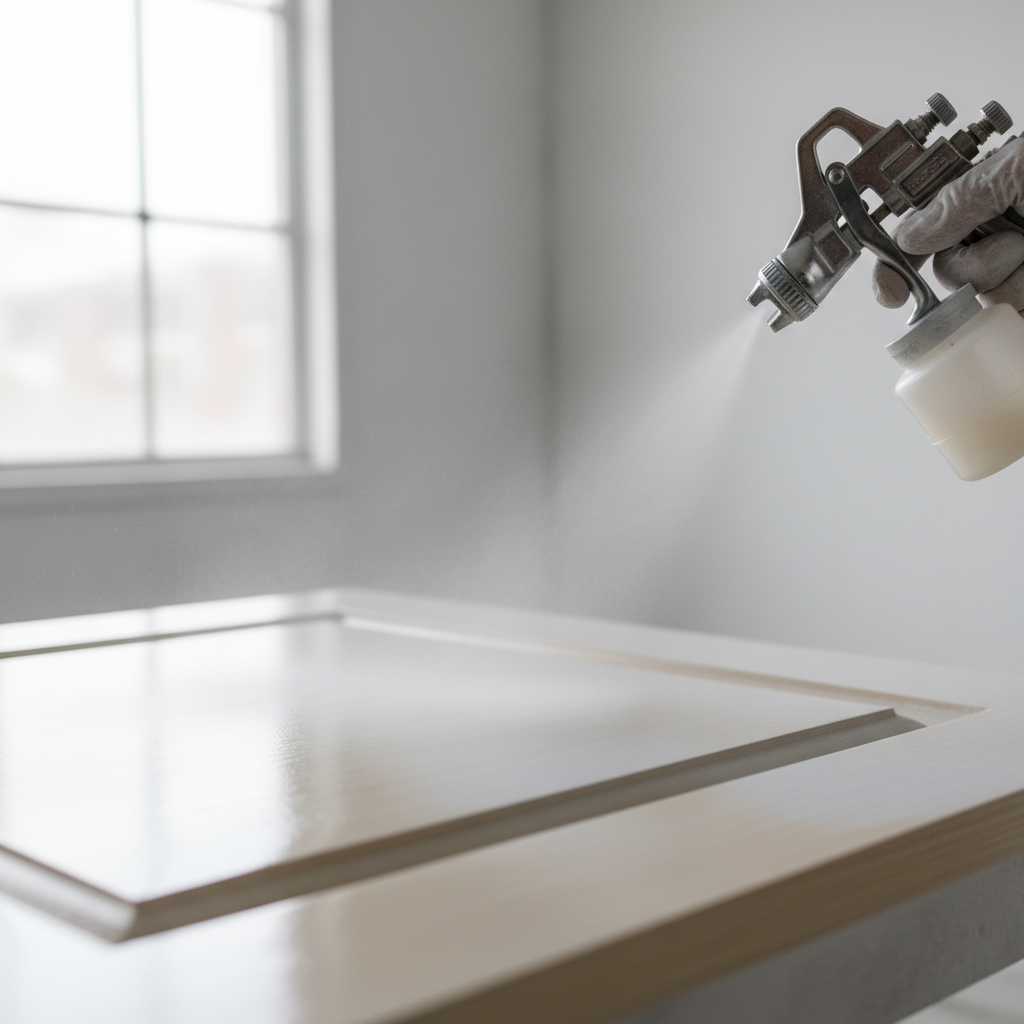
- Finish method: HVLP or air-assisted spraying for a fine, even coat that levels like a factory finish.
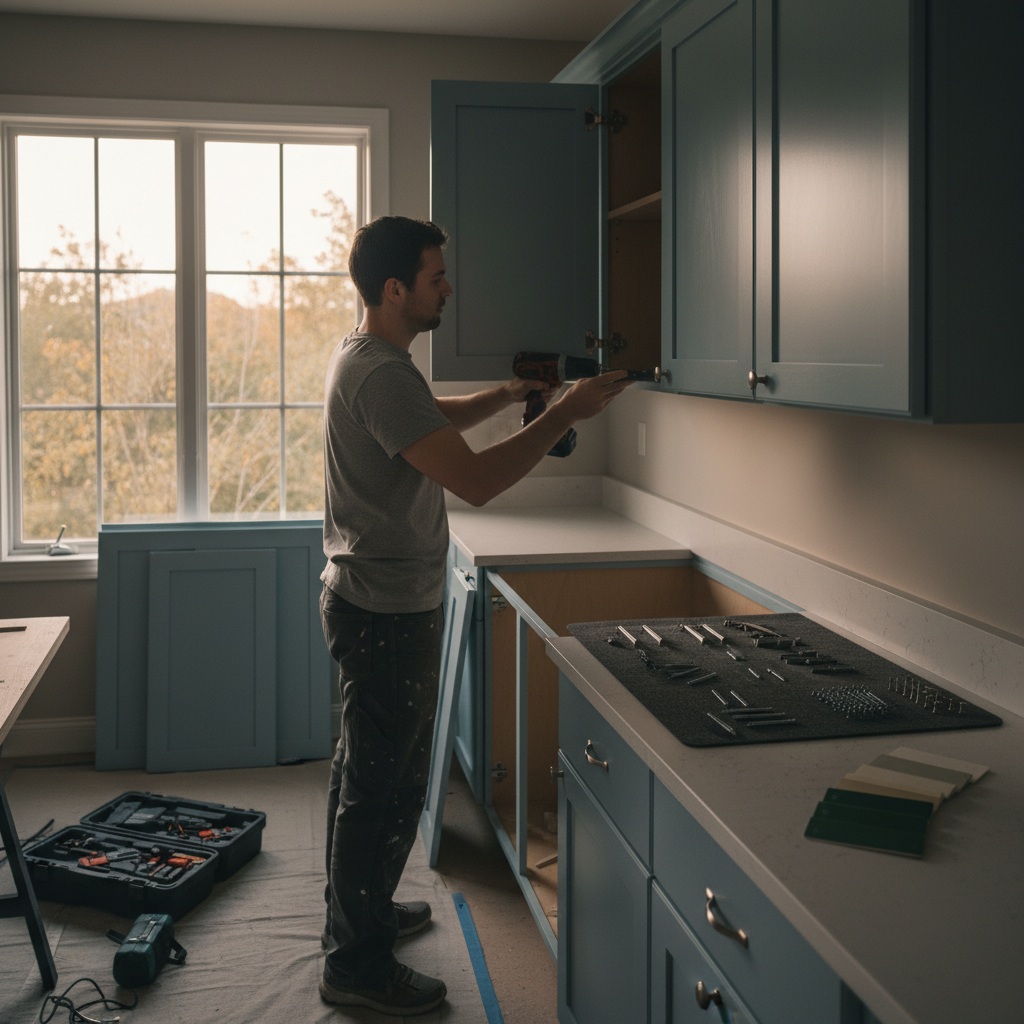
- Reassembly: hardware reinstallation, soft-close upgrades if requested, and final alignment for clean reveals.
- Quality controls: dust management, on- and off-site drying space, and curing time that respects product specs.
In our experience with Toronto homes, the finish you choose (matte, satin, or semi-gloss) and the cabinet material (oak, maple, MDF, thermofoil) both influence the approach. That’s why an in-home assessment is step one.
Why Cabinet Repainting Cost Matters in York/Toronto
In York and the broader Toronto area, repainting controls renovation disruption, supports resale appeal, and modernizes your kitchen for a fraction of replacement. Local site logistics, building access, and seasonal humidity shape the plan and timeline, making a tailored quote essential.
Neighborhoods like York combine older homes and newer builds. Each presents different cabinet materials and wear patterns. A quote that respects your home’s realities will set clear expectations.
- Renovation impact: Repainting avoids demo, keeps layout intact, and limits downtime compared to tear-out projects.
- Home style alignment: Color and sheen can match Toronto’s design trends while protecting wood character where desired.
- Logistics: High-rise elevators, parking, and condo rules can affect work hours and setup—details your quote should reflect.
- Seasonal planning: Winter cold and summer humidity influence on-site drying and ventilation. Build that into scheduling.
We’ve found that homeowners who understand these variables make faster, more confident decisions. A transparent scope beats guesswork every time.
Local considerations for York
- Plan access and staging near the Toronto Public Library – Daniel G. Hill Branch side streets if street parking around St Clair is tight.
- Schedule spray days to avoid extreme humidity swings; summers near Smythe Park can be humid, which affects curing windows.
- Condos and townhomes: reserve elevator time early and confirm any spray/containment guidelines with property management.
How a Professional Quote Works (Step-by-Step)
A solid repainting quote counts all doors/drawers, inspects materials, maps prep needs, and specifies a coating system. It details containment, timeline, and warranty terms. This clarity prevents scope drift and ensures a durable, consistent finish.
Here’s the step-by-step flow Paint2decor INC follows when you request a quote. It’s designed to eliminate surprises and align on finish quality from day one.
- Discovery call: discuss layout, goals, and must-have colors. We share finish guidance and rough timelines.
- On-site assessment: verify counts, look for wear, water marks, or peeling, and note access and masking needs.
- Finish consultation: discuss sheen, color, and grain masking strategy (especially important on open-grain oak).
- Scope and schedule: define prep, priming, spraying, drying/curing strategy, and reassembly sequence.
- Written proposal: provide a clear, itemized scope describing products, steps, safety measures, and warranty language.
- Project kickoff: door/drawer removal and labeling; set up a clean spray area and dust control; protect floors and counters.
- Quality checks: inspect leveling, adhesion, and color consistency before reinstalling and adjusting hardware.
Prefer reading more first? Explore our cabinet refinishing overview and how we approach surface preparation to make finishes last.
What Influences Cabinet Repainting Cost?
Cabinet repainting cost is shaped by counts, layout complexity, wood species, existing coatings, prep intensity, finish type, and site logistics. Transparent quotes connect each factor to scope so you see exactly what drives effort and timeline.
These are the real-world levers that move scope and schedule. Understanding them is the fastest path to a trustworthy quote.
- Door and drawer count: More pieces require more prep, spray passes, and reassembly time.
- Material and grain: Oak’s open grain may need filling for a glassy look; maple/MDF build smoother with fewer passes.
- Existing finish: Glossy or damaged coatings take extra bonding and feathering to achieve proper adhesion.
- Color shift: Going dark-to-light or bold-to-soft often adds primer/stain-blocking steps to avoid bleed-through.
- Hardware changes: New pulls or hinges add layout work; soft-close upgrades change re-drilling needs.
- Site conditions: Tight kitchens, condo rules, or limited ventilation affect setup and pace.
- Finish system: Sprayed lacquers or 2K systems level beautifully and cure harder than brush/roll house paint.
For background reading, this homeowner-oriented process overview explains common prep and process steps in plain language.
Repainting vs. Refacing vs. Replacing
Repainting refreshes existing doors and boxes with a new sprayed finish. Refacing swaps doors and applies new veneer to boxes. Replacing rebuilds everything. Your best option depends on door condition, style goals, and timeline tolerance.
Use this high-level comparison to align your goals with the right path. Then, we’ll tailor scope to your kitchen.
| Option | What Changes | Look/Style Impact | Disruption Level | Good Fit When… |
|---|---|---|---|---|
| Repainting/Respraying | New sprayed finish on existing doors/boxes | Color + sheen update; keeps current door style | Low | Cabinets are sound; you want color change fast |
| Refacing | New doors/drawers + veneer on boxes | Major style change (Shaker, slab, etc.) | Medium | Boxes are solid; you want a new door profile |
| Replacing | All-new boxes, doors, layout as needed | Complete redesign; new storage solutions | High | Boxes are failing or you’re reconfiguring layout |
Considering a door profile change? Explore our refacing service or stay with your existing style and upgrade the finish via professional cabinet painting.
Methods, Finishes, and Durability
Professional results come from controlled prep, bonding primers, and sprayed finishes that level and cure hard. Your durability depends on the coating system, film build, proper cure time, and how the kitchen is used day-to-day.
Not all paint is equal—and not all spraying is the same. Here’s what affects longevity.
- HVLP/Air-assisted spraying: Delivers a refined, even film with fewer brush marks and better leveling.
- Bonding primers: Purpose-built for slick cabinet finishes and stain blockers for tannins on certain woods.
- Film build: Multiple thin coats outperform one heavy pass; this improves chip resistance.
- Cure time: Dry-to-touch isn’t cured; follow reassembly and gentle-use guidance to protect the film.
- Hardware protection: Felt bumpers and hinge adjustments reduce edge wear over time.
Curious about DIY differences? This homeowner guide to painting kitchen cabinets shows why pro shops invest in spray systems, dedicated drying space, and dust control.
How to Request an Accurate Quote
An accurate quote starts with clear goals, exact counts, and photos of trouble spots. Share color targets, sheen, hardware changes, and timeline constraints. Expect a site visit to confirm scope and finalize a written plan.
Use this checklist when you contact our team so we can build a scope that reflects your kitchen and priorities.
- Count every door and drawer front; note any panels, crown, or open shelving.
- Photograph wear points: sink bases, trash pull-outs, corners, and island ends.
- Share color inspiration and sheen preferences (matte, satin, semi-gloss).
- Flag hardware swaps or hinge upgrades you’d like during reassembly.
- Tell us about access (condo, parking) and preferred dates.
- Ask about prep standards, dust control, and the coating system we’ll use.
Ready to start? Book a no-obligation consultation and we’ll confirm scope on site. For broader context, this short piece on repainting cost factors outlines what most homeowners weigh before choosing a path.
Best Practices for Toronto Homes
The best results in Toronto kitchens come from meticulous prep, professional containment, and a coating system matched to cabinet material and lifestyle. Clear communication around timeline, cure, and touch-up care keeps finishes looking new longer.
From bungalows to condos, the city’s housing styles reward careful planning. Here’s our field-tested guidance.
- Prep like it matters (because it does): Degrease thoroughly, scuff-sand evenly, and address open grain if a glassy look is the goal.
- Control the environment: Use dust barriers, proper ventilation, and temperature/humidity ranges recommended by the coating manufacturer.
- Choose sheen wisely: Satin hides minor wear better than high gloss in active family kitchens.
- Schedule smart: Plan around holidays and busy seasons; same-week reassembly is possible with the right system and cure windows.
- Protect edges: Add soft-close and felt bumpers; minor tweaks reduce long-term wear at high-touch points.
For more on our approach to durable outcomes, review our kitchen cabinet refinishing process and the benefits of professional respraying over brush-and-roll methods.
Tools and Resources (Homeowner-Friendly)
Great decisions come from clear information. Use checklists, color swatches, and door-count templates. Pair those with a professional assessment to confirm prep needs, finish system, and schedule details tailored to your home.
Here’s a simple toolkit you can use today.
- Door/Drawer counter: A printed grid or phone note to tally all pieces, including panels and trims.
- Photo log: Snap every bank of cabinets plus close-ups of wear; share with your estimator before the site visit.
- Color shortlist: Keep three favorites ready; having a top-three speeds sampling and scheduling.
- Access notes: Building rules, parking details, pets at home—anything that shapes setup.
- Care guide: Ask for finish-specific cleaning tips and recommended cure-period dos and don’ts.
If you prefer to talk it through, our team at 2710 St Clair Ave W can help you translate these notes into a tailored plan for your space.
Mini Case Studies (Toronto Kitchens)
Real Toronto kitchens show how scope shifts with cabinet material, grain, and layout. These snapshots explain why quotes differ and how the right method maintains both look and longevity.
These anonymized scenarios mirror common home types we see across the city.
Open-Grain Oak to Smooth Satin
- Home: York semi-detached; 24 doors, 9 drawers; golden oak.
- Goal: Modernize to satin warm white; minimize visible grain.
- Approach: Degrease, fill selective grain, bonding prime, spray topcoat; replace knobs with streamlined pulls.
- Outcome: Noticeably smoother texture; hardware lines modernized; same-week reassembly.
Maple Shaker Refresh
- Home: Midtown condo; 18 doors, 6 drawers; maple Shaker.
- Goal: Deeper color for contrast; maintain subtle wood character.
- Approach: Light scuff-sand, stain-blocking primer, satin charcoal spray finish; soft-close hinge upgrade.
- Outcome: Crisp reveals; quieter doors; finish resists fingerprints.
Thermofoil Triage
- Home: Etobicoke townhouse; peeling thermofoil on a few doors.
- Goal: Consistent look without replacing every box.
- Approach: Replace failed doors via refacing; respray remaining compatible pieces for color match.
- Outcome: Unified appearance; budget and timeline controlled without a full gut.
Frequently Asked Questions
Homeowners ask about timelines, durability, grain visibility, and how quotes are built. The short answers: timelines depend on scope, pro-grade systems last longer with proper care, and grain can be minimized with the right prep. Accurate counts and a site visit make quotes reliable.
How long does cabinet repainting usually take?
Most kitchens are completed within several working days, depending on door counts, prep needs, and drying windows. Doors and drawers are removed, finished in a controlled area, and reinstalled once cured enough for gentle use. Your written scope will outline the specific schedule for your home.
Will the grain on my oak cabinets still show after repainting?
Open-grain oak can show texture through paint unless grain is filled or minimized. We discuss your texture preference during assessment and can use targeted filling and leveling techniques to reduce visibility if a smoother, more modern look is the goal.
What makes a professional spray finish more durable?
Durability comes from bonding primers, thin even spray coats, correct film build, and proper cure time. Dust control and environmental ranges also matter. Together, these steps improve chip resistance and color consistency compared to brush-and-roll methods.
Can I change hardware during the repainting project?
Yes. We can fill and re-drill holes for new pulls or knobs and adjust hinges during reassembly. Share your hardware plans during quoting so layout changes are included in the scope and timeline.
How do I keep the finish looking new?
Use a soft microfiber cloth with mild soap and water, avoid harsh abrasives, and add felt bumpers to reduce edge contact. Follow cure guidance before heavy use. If a nick occurs, small touch-ups are straightforward and we can advise on the best method for your finish.
Key Takeaways and Next Steps
Cabinet repainting cost reflects prep, materials, and logistics—not just paint. Your fastest path to clarity is a documented, on-site assessment. With a tailored scope, timelines and outcomes stay predictable—and your kitchen looks fresh for years.
- Accurate counts and clear goals lead to precise quotes.
- Prep quality and coating systems drive durability.
- Repainting, refacing, and replacing serve different needs—choose by goals.
- Plan around access, ventilation, and seasonal humidity in Toronto.
Want a clear, written plan for your kitchen? Schedule your in-home consultation with Paint2decor INC in York and get your project moving with confidence.