

Behr Kitchen & Bath paint is a humidity- and mildew-resistant interior coating designed for steamy rooms with frequent cleaning. In York—right by 2710 St Clair Ave W—Paint2decor INC applies it on walls, trim, and previously painted cabinets after pro prep, creating a durable, wipeable finish that stands up to steam, splashes, and everyday wear.
By Paint2decor INC • Last updated: May 16, 2026
Quick Overview and Table of Contents
This complete guide explains what Behr Kitchen & Bath paint is, when to use it, and how Paint2decor INC preps, primes, sprays, and maintains walls, trim, and cabinets in humid spaces. You’ll see finish options, curing timelines, a step-by-step workflow, tools, and local York/Toronto tips to keep paint looking new.
Bathrooms and busy kitchens demand a coating that resists moisture, soap, and frequent wiping. Here’s how we evaluate Behr Kitchen & Bath for Toronto homes and how we apply it for long-lasting results.
- What Behr Kitchen & Bath paint is and how it works
- When it outperforms standard interior paint
- Finish selection for walls, trim, and cabinets
- Pro prep and priming workflow (with spray techniques)
- Curing, maintenance, and cleaning tips that protect your finish
- Local considerations for York and the Toronto climate
What Is Behr Kitchen & Bath Paint?
Behr Kitchen & Bath paint is a washable, mildew-resistant interior coating formulated for high-humidity spaces. It levels smoothly, resists water and frequent cleaning, and pairs well with stain-blocking primers on glossy or previously painted surfaces. The result is a durable film ideal for kitchens, bathrooms, and laundry rooms.
At its core, this system combines stain-blocking priming with a moisture-tolerant topcoat. That pairing helps fight common problems like bubbling, flash rust at nail heads, or surfactant leaching in damp rooms. It’s a sensible choice where steam and splashes are daily realities.
For homeowners comparing options, we often recommend a Kitchen & Bath system when the room sees weekly scrubbing, daily showers, or cooking vapors. The film’s abrasion resistance and sheen retention hold up better than standard living-room paints in the same conditions.
Why It Matters in Toronto Kitchens and Baths
Toronto-area kitchens and bathrooms face frequent humidity spikes and temperature swings. In York homes, a mildew-resistant, scrubbable coating reduces maintenance and helps finishes last. Behr Kitchen & Bath systems protect high-touch areas, keeping walls and cabinets looking sharp between seasonal humidity changes.
Humidity can push moisture into paint films, especially near showers, cooking zones, and dishwashers. Over time, that leads to peeling around caulk lines, dulling from harsh cleaners, or micro-cracking on cabinet edges. A moisture-tolerant coating slows that wear and keeps color uniform.
In our experience across Toronto, ventilated rooms with quality Kitchen & Bath coatings show fewer early touch-ups. Routine cleaning becomes simpler because stains release without scouring pads—key for busy households where surfaces get wiped every few days.
Local considerations for York
- Use the exhaust fan during showers and for 20 minutes after; add a door undercut for airflow. If you’re near the Toronto Public Library – Daniel G. Hill Branch, older homes often benefit from extra ventilation upgrades.
- Spring and fall are ideal painting seasons. Indoor humidity tends to stabilize, which supports even curing on walls and cabinets.
- Schedule cabinet spraying when the home is less active. Shorter, focused booth sessions minimize dust transfer from nearby spaces like mudrooms or laundry areas.
How Behr Kitchen & Bath Systems Work
The system pairs a stain-blocking, adhesion-promoting primer with a scrubbable Kitchen & Bath topcoat. Primer seals stains and grips glossy substrates; the topcoat forms a moisture-resistant, washable film. Together, they reduce peeling, improve sheen uniformity, and extend repaint cycles in humid rooms.
Here’s the practical chemistry: the primer creates a uniform, sealed surface so the topcoat can level and cure correctly. On cabinets and trim—especially previously lacquered doors—priming plus mechanical abrasion is essential for bond strength.
Typical timelines we see on site: 30–60 minutes to touch for many waterborne primers, 2–4 hours to recoat for topcoats, and 7–14 days to reach functional cure (always follow the label). Temperature around 60–80°F and indoor humidity below roughly 60% help films coalesce properly.
Finishes and Where to Use Them
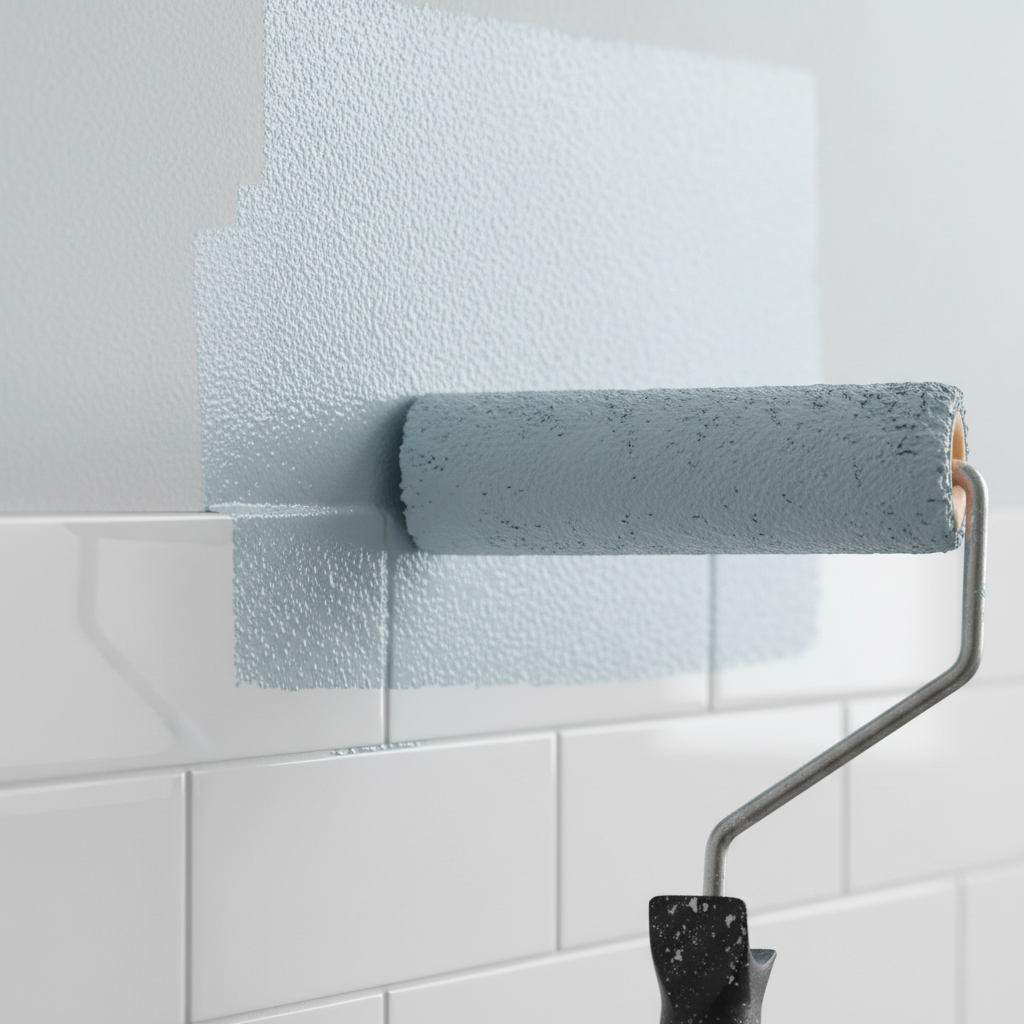
Choose satin or semi-gloss for bathrooms and high-use kitchens; eggshell can work on drier walls with good ventilation. Use semi-gloss on trim and doors for better scrubbing. On cabinets, a professionally sprayed satin or semi-gloss balances durability with a refined, low-glare look.
Finish matters as much as color. Higher sheen generally improves washability and moisture resistance but can reveal surface imperfections. We often level and sand walls to P200–P320 before applying a satin finish, then caulk gaps for a clean shadow line around casings.
- Walls (bathrooms/kitchens): Satin for wipeability; eggshell for well-ventilated areas.
- Trim and doors: Semi-gloss stands up to frequent cleaning and bumps.
- Cabinets: Sprayed satin or semi-gloss provides a furniture-grade look with practical durability.
- Ceilings: Flat/matte to hide flaws—avoid near shower spray zones.
Not sure what’s right? See how sheen choices play with cabinet tones in our cream cabinet finishes guide and how we modernize older doors in updating oak cabinets.
Best Practices for Prep and Primer
Great Kitchen & Bath results start with meticulous prep: degrease, sand for tooth, repair, prime to block stains and boost adhesion, then apply two smooth coats. On cabinets and trim, combine mechanical abrasion with a stain-blocking primer before spraying for a factory-grade finish.
Prep is where projects succeed. Kitchens collect atomized oils; bathrooms collect residue from soaps and aerosol products. Both contaminate paint films if not removed. We treat every surface like a substrate with a history—clean first, then sand, then repair.
- Degrease thoroughly: Use a quality cleaner; rinse until water sheets evenly (a fast test for residue removal).
- Scuff sand: P180–P220 on walls/trim; P220–P320 on cabinet doors and drawer fronts.
- Dust control: HEPA vacuum + tack cloth to avoid nibs in the film.
- Repairs: Fill, sand, and spot-prime; seal cut edges on cabinet doors to reduce moisture uptake.
- Prime: Use a stain-blocking, adhesion-promoting primer compatible with the topcoat and substrate.
- Apply topcoats: Two coats minimum; respect recoat windows for proper film build.
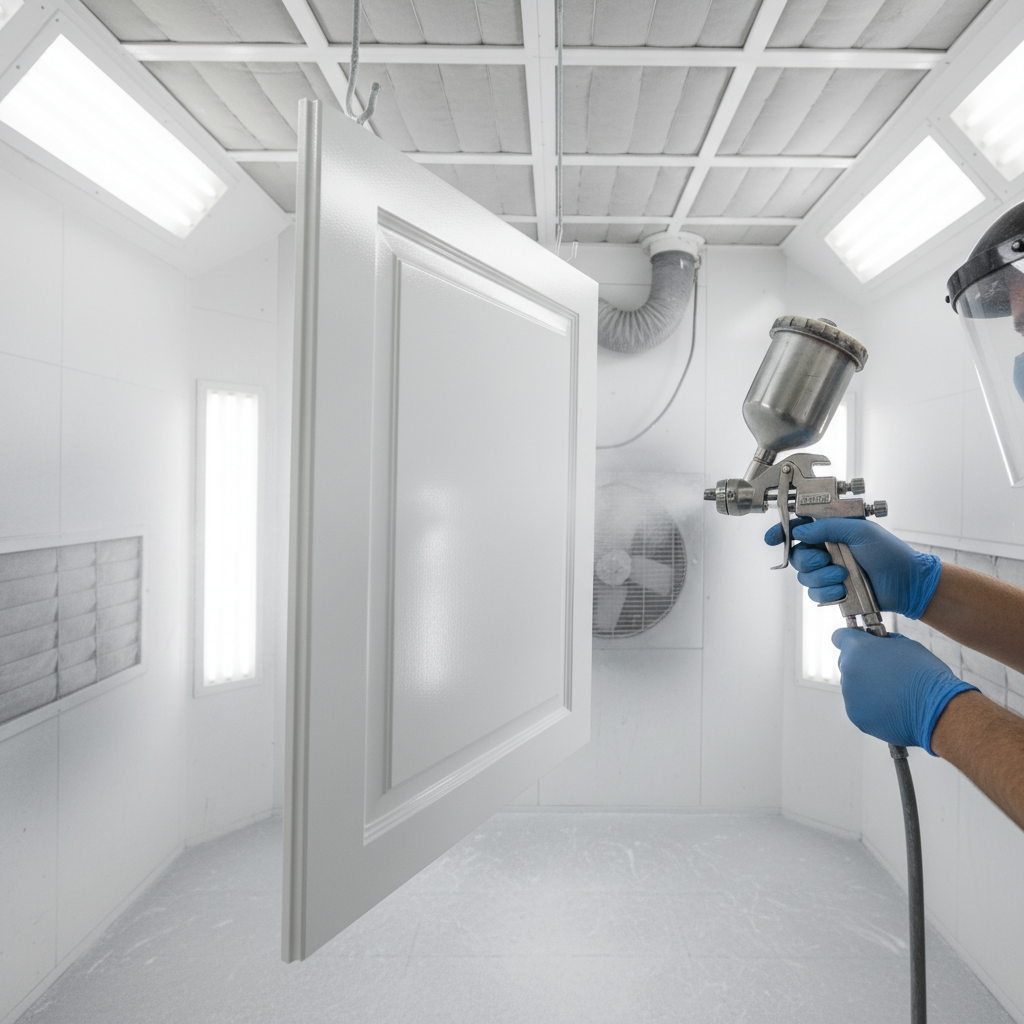
Step-by-Step: Cabinet and Bath Workflow
Our York workflow separates messy prep from clean finishing: remove doors/drawers, label hardware, degrease, sand, prime, and spray two topcoats in a controlled booth; then brush/roll walls and trim on-site. Proper cure (7–14 days) delivers a tough, washable finish.
Cabinets (professional respray)
- Protect floors/stone; create dust control zones; label all pieces.
- Degrease twice in cooking zones; rinse until water sheets uniformly.
- Sand doors/drawers P220–P320; scuff boxes in place; vacuum and tack.
- Prime with a stain-blocking, bonding primer; sand nibs after prime.
- Spray two topcoats with HVLP for an even, furniture-grade film.
- Allow parts to rest 24–48 hours before gentle handling; full cure in 7–14 days.
Thinking about spray work? Explore our cabinet spraying in Toronto and our respraying guide for a deeper look at booth setups, filtration, and dust control.
Bathrooms and kitchen walls
- Ventilate: run exhaust fans; target indoor humidity under 60% during curing.
- Clean with a degreaser; rinse well—detergent residue can cause paint issues.
- Repair/caulk; sand to P200–P320; spot-prime patched areas.
- Prime full walls in shower rooms for uniform sheen and stain resistance.
- Roll and tip two coats of Kitchen & Bath topcoat; wait 2–4 hours between coats.
Tools and Resources We Rely On
Successful Kitchen & Bath projects use pro-grade tools: HVLP sprayers for cabinets, low-shed rollers for walls, HEPA vacs, deglossers, caulks, and stain-blocking primers. Pair tools with controlled airflow, humidity targets under 60%, and clean zones to reduce dust and nibs.
- HVLP sprayer + booth: For smooth, even cabinet films with minimal overspray.
- Low-shed microfiber rollers: 6–9 inch for walls; 4–6 inch for trim and tight areas.
- Abrasives: P180–P320; foam pads for profiles; sanding blocks for edges.
- HEPA vacuum + air scrubber: Control dust before and during coating.
- Deglosser/degreaser: Improves mechanical adhesion and removes residues.
- Sealants/caulks: Flexible caulks maintain a neat line at joints.
For an end-to-end sense of our approach, see our professional kitchen cabinet painting overview.
Maintenance and Cleaning After Cure
After a 7–14 day cure, clean Kitchen & Bath coatings with mild soap and water. Avoid abrasive pads and harsh solvents. Wipe spills promptly, run exhaust fans during steamy use, and inspect caulk lines twice a year to keep moisture out of joints and edges.
Think of maintenance as light, frequent care: a soft microfiber cloth weekly on splash zones, and immediate wipe-downs after toothpaste, hair products, or cooking splatter. Gentle cleaners preserve sheen and color uniformity.
- Use fans during and 20 minutes after showers or heavy cooking.
- Spot-check under sinks and around dishwashers for drips that mark finishes.
- Refresh high-use edges (trash pull-outs, vanity corners) if you see wear.
A practical primer on ongoing cabinet care is echoed in a guide from Altima Kitchens, which underscores gentle cleaning to extend finish life.
Common Mistakes to Avoid
Most paint failures trace back to poor prep, rushing recoats, or skipping primer on glossy surfaces. Control humidity, respect dry times, degrease thoroughly, and always test adhesion before full production—especially on factory-finished cabinet doors.
- Skipping degrease: Kitchen aerosols leave invisible films that repel paint.
- Under-sanding: Without mechanical tooth, even good primers struggle.
- Ignoring humidity: High RH slows cure and can dull sheen.
- Heavy first coats: Leads to sags and longer cure times.
- No adhesion test: A small cross-hatch test can save a whole kitchen.
For a DIY perspective on cabinet prep, a how-to from Altima Kitchens highlights labeling, sanding, and priming steps that align with our pro workflow.
Comparison and Spec Table (At-a-Glance)
Use this quick table to match surfaces, recommended finishes, and prep notes. It helps you choose satin vs. semi-gloss and remember primer requirements for cabinets, walls, and trim in kitchens and baths.
| Surface | Recommended Finish | Primer | Key Prep Notes |
|---|---|---|---|
| Bathroom walls | Satin | Stain-blocking | Degrease, sand P200–P320, full prime in shower rooms |
| Kitchen walls | Satin/Eggshell* | Spot or full prime | Degrease near cooktops; repair and caulk |
| Trim/doors | Semi-gloss | Adhesion/stain-blocking | Scuff sand, wipe clean, caulk gaps |
| Cabinet doors/drawers | Satin/Semi-gloss (sprayed) | Adhesion + stain block | Degrease twice, sand P220–P320, test adhesion |
| Cabinet boxes | Satin/Semi-gloss | Adhesion primer | Mask interiors, light scuff, dust control |
*Eggshell on kitchen walls works in well-ventilated, lower-splash areas.
Case Examples from Toronto Homes
From York semis to downtown condos, we use Behr Kitchen & Bath systems to refresh humid spaces fast. Degrease, prime, spray, and cure deliver a durable film homeowners can wipe weekly. Two representative examples below show how finish and workflow change by space.
York family bath refresh
A tub/shower combo had surfactant streaks and dull edges near the vanity. We degreased, sanded to P320, full-primed, then rolled two satin topcoats. With the fan running during and after showers, the surface stayed uniform and easy to clean after cure.
Toronto maple kitchen—cabinet respray
Maple doors had a worn clearcoat near the range. We removed doors/drawers, booth-primed with a bonding, stain-blocking primer, then sprayed two satin topcoats. Boxes were scuff-sanded and brushed/rolled in place. The result matched a furniture-grade look with improved wipeability. Considering this approach? Read our professional kitchen cabinet painting overview.
When to Choose Behr Kitchen & Bath Over Standard Interior Paint
Pick Behr Kitchen & Bath when rooms see daily steam, frequent scrubbing, or cooking splatter. Its washable film and mildew resistance outperform standard interior paints in wet zones, reducing early touch-ups and keeping sheen consistent on high-contact areas.
- Small baths with long, hot showers (limited ventilation).
- Galley kitchens where walls are close to cooktops and sinks.
- Laundry rooms and mudrooms with constant wiping.
For cabinetry specifically, sprayed Kitchen & Bath topcoats on properly primed doors provide a practical, wipeable finish. To compare repainting with broader options, see our decision guide: kitchen cabinet painting in Toronto.
Frequently Asked Questions
These quick answers cover curing, ventilation, cabinets, and cleaning so your Kitchen & Bath finish performs as designed. Each tip reflects what we see across York and the wider Toronto area.
How long before I can shower after painting a bathroom?
Give paint several hours to dry before light use and keep the fan on. Avoid steamy showers for at least 24 hours, and allow 7–14 days for a full cure before heavy cleaning. Always follow the product label’s dry and recoat times.
Is Behr Kitchen & Bath paint good for cabinets?
Yes—with the right prep and a bonding, stain-blocking primer. We degrease, sand, prime, and spray two topcoats for a smooth, washable finish. Professional booth spraying helps achieve a factory-grade look on doors and drawers.
Which finish should I use on bathroom walls?
Satin is a reliable default for bathrooms because it balances washability and appearance. In very wet areas, pair satin with full-wall priming to improve sheen uniformity and stain resistance. Keep ventilation running to help the film cure.
How do I prevent mildew on painted surfaces?
Use a mildew-resistant coating, run exhaust fans during/after showers, and keep indoor humidity under roughly 60% during cure. Wipe condensation from walls and maintain caulk lines so moisture can’t sit in gaps or raw edges.
Can I clean Kitchen & Bath paint with bleach?
Skip harsh chemicals on fresh coatings. After full cure, use mild soap and water for routine cleaning. For stubborn spots, test a gentler cleaner in a hidden area first to avoid dulling the sheen.
Related Cabinet Topics You Might Explore
If you’re planning a kitchen or bath refresh, these cabinet-focused reads explain finishes, spraying, and makeover paths without full replacement. They help you align paint decisions with long-term cabinet goals—style, durability, and maintenance.
For makeover planning, see how we deliver smooth results in our professional cabinet painting overview. If spraying is on your list, our cabinet respraying guide and spraying in Toronto articles explain gear, booths, and dust control. To understand color interactions, explore cream cabinet finishes and upgrade paths in updating oak cabinets.
Key Takeaways and Next Steps
For humid kitchens and baths, Behr Kitchen & Bath systems—paired with pro prep and priming—deliver a washable, mildew-resistant film. Select satin or semi-gloss, control humidity, and allow a full cure. For cabinets, a sprayed finish adds durability and a furniture-grade look.
- Match finish to use: satin for walls, semi-gloss for trim, sprayed satin/semi-gloss for cabinets.
- Prep drives durability: degrease, sand, prime, then apply two even topcoats.
- Cure matters: protect the finish for 7–14 days before heavy cleaning.
- Ventilation and gentle cleaning extend the life of the coating.
Considering a kitchen or bath refresh? Book a friendly consultation with Paint2decor INC in York. We serve Toronto and the GTA with professional cabinet refinishing, refacing, and kitchen painting—done right the first time.
Have questions about your specific cabinets or bath walls? Reach out via our website—let’s map the best finish and schedule for your home.
For additional DIY context, the cabinet how-to from Altima Kitchens outlines labeling and sanding basics that mirror our professional approach. Local trade directories such as HouseUp also emphasize prep and ventilation for lasting results.