
Before after kitchen cabinet painting is the clear, side-by-side record of a repainting makeover that shows cabinets before prep and after the final cure. At Paint2decor INC in York (2710 St Clair Ave W), we use professional spray methods and durable finishes to turn dated kitchens into bright, modern spaces families love in the Toronto area.
By Paint2decor INC • Last updated: 2026-06-10
Start Here: Before & After Kitchen Cabinet Painting
A true before-and-after shows more than a new color. It reveals repaired dings, consistent sheen, crisp edges, and aligned hardware. In this guide, you’ll see how pros stage, spray, and cure cabinets so your “after” photo looks as flawless in person as it does on camera.
If you’re weighing repainting, refacing, or replacement, this complete guide explains what results to expect, how the process works, and how to plan a low-stress project in York and across Toronto.
- What “before vs after” really proves
- Pro spraying vs. brush-and-roller painting
- Step-by-step workflow and timelines
- Finish types, sheens, and 2026 color ideas
- Maintenance habits that protect the finish
Quick Summary
Great cabinet makeovers pair meticulous surface prep with a controlled spray finish. Expect careful labeling, dust-managed sanding, a bonding primer, and a furniture-grade topcoat. With smart staging, most kitchens remain usable while doors get sprayed off-site and boxes are finished in place.
In our experience, preparation delivers most of the outcome. We budget significant time for degreasing, sanding, and masking because a strong foundation supports a smooth, long-lasting topcoat that cleans easily and resists everyday wear.
What Is “Before & After” Kitchen Cabinet Painting?
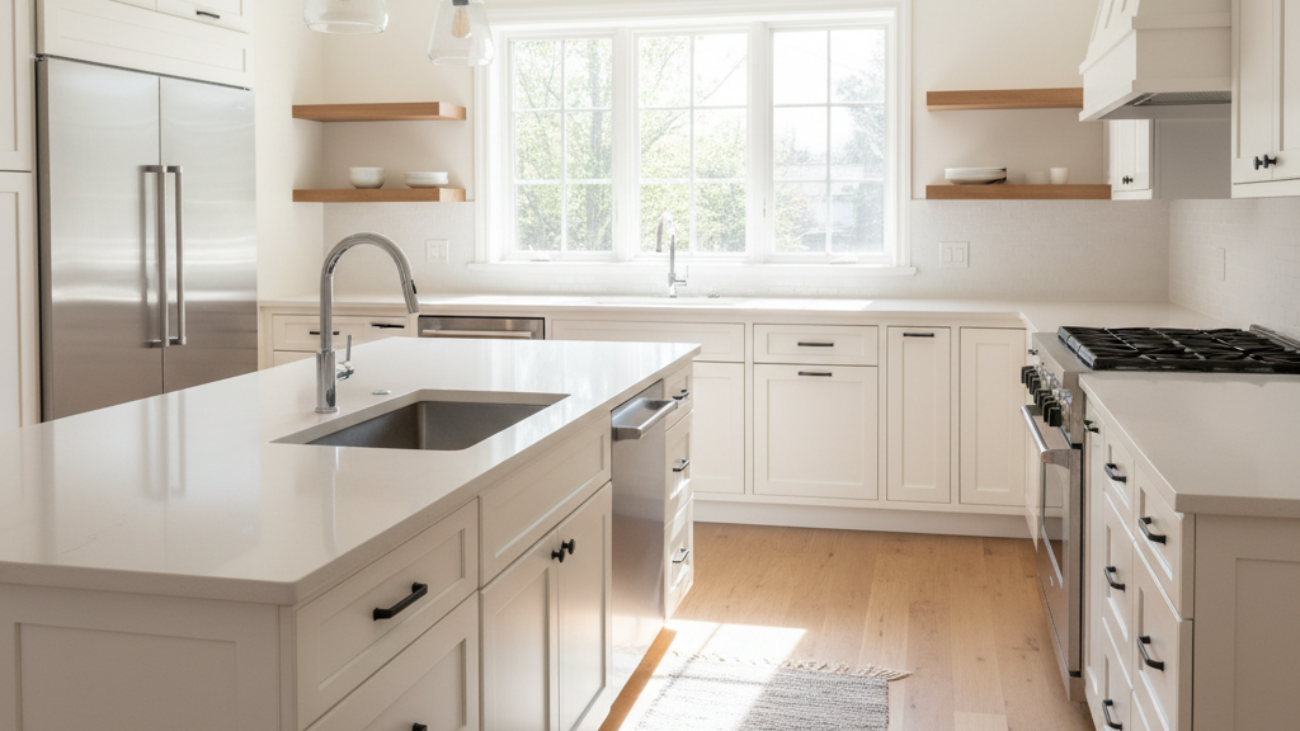
“Before & after” cabinet painting is a visual timeline of a professional repaint: surfaces photographed before prep and after full cure. These paired photos verify the quality of sanding, priming, spraying, and reassembly under the same angles and lighting conditions.
Photos make craftsmanship visible. You’ll notice uniform film build on edges, leveled grain where desired, consistent sheen from cabinet to cabinet, and hardware aligned to even reveals. Capturing the same view before and after removes guesswork—results are obvious.
At Paint2decor INC, we document each phase so homeowners can monitor progress, not just admire the reveal. This transparency builds confidence, especially when a kitchen stays active during the project.
Why It Matters in York/Toronto
York and the broader Toronto metro see seasonal humidity swings, variable light, and heavy cooking that can stress coatings. Solid before-and-after evidence proves a finisher can sand, prime, and spray for durability that holds up to daily life—not just day-one photos.
We plan around local realities. Winter air is dry indoors; summer brings humidity. Both affect wood movement and cure time. Open-concept homes mix daylight with warm LEDs, which can highlight sheen mismatches. And busy family kitchens produce oils and steam near ranges and dishwashers that demand serious degreasing and a cabinet-rated bonding primer.
How the Process Works: Step-by-Step
A disciplined workflow yields the smoothest “after”: catalog doors and hardware, deep-clean and sand, mask boxes, spray a bonding primer, spray two to three thin topcoats, then reassemble after appropriate cure. This sequence minimizes dust and maximizes adhesion and sheen consistency.
- Assessment (30–60 minutes): Identify wood species (oak, maple, MDF), prior coatings, repairs, and grain needs.
- Catalog: Label every door/drawer, bag hinges and screws, and map locations for perfect reassembly.
- Degrease: Clean with cabinet-safe degreasers; rinse and dry. High-touch zones may need 2 passes.
- Sand: Scuff-sand to degloss; fill dings; address oak grain with filler where a smoother look is desired.
- Mask: Protect counters, floors, and interiors; create crisp spray lines inside boxes.
- Prime: Apply a cabinet-rated bonding primer engineered for slick factory finishes.
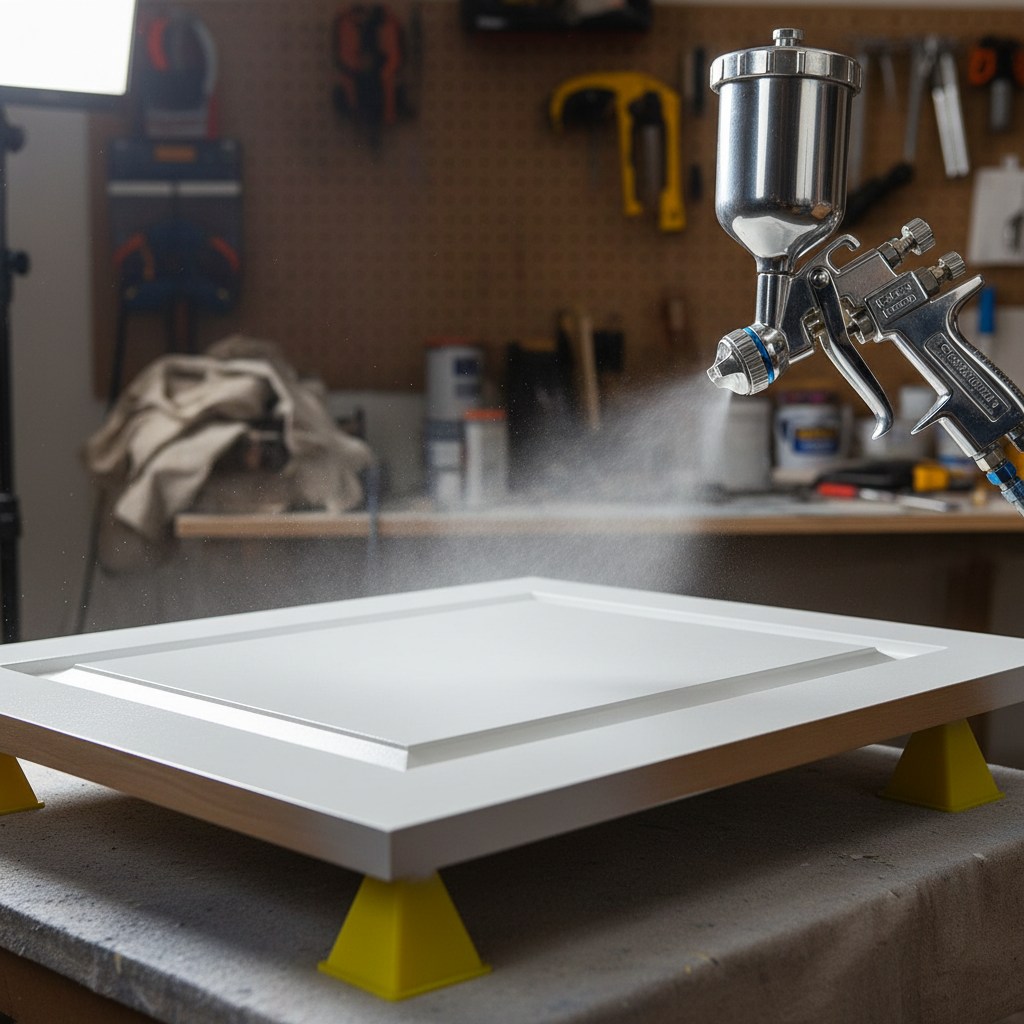
- Spray: HVLP equipment lays thin, even passes for uniform film build and sheen.
- Cure: Respect manufacturer cure windows before handling and reinstalling hardware.
- Reassemble: Align doors, set reveals, adjust soft-close hinges, and test function.
We keep communication clear, outline daily tasks up front, and maintain a tidy site so you can cook through most of the project with doors temporarily off-site.
For a deeper overview of pro workflows, see our professional cabinet painting guide. If you’re comparing outcomes, our kitchen cabinet painting service overview explains how our team stages, sprays, and reassembles efficiently.
Methods, Finishes, and Sheens
Spray application provides the most consistent cabinet finish. Pair a bonding primer with a waterborne lacquer or high-performance hybrid topcoat in a sheen that fits your space—matte through semi-gloss. The right system resists fingerprints, cleans easily, and keeps color true under mixed lighting.
We typically spray doors and drawer fronts off-site for dust control and finish boxes in place with controlled methods that match the sprayed look. Waterborne systems offer low odor and quick dry-to-touch intervals, which helps you get back to normal routines sooner while full cure develops.
Curious about spray specifics? Our kitchen cabinet respraying guide breaks down HVLP settings, fan patterns, and how thin-pass techniques achieve uniform sheen at edges and profiles.
Best Practices We Follow (and You Can Expect)
Great outcomes come from disciplined prep and cure: cabinet-safe degreasers, HEPA sanding, bonding primers, thin spray coats, and patient reassembly. Labeling parts and protecting edges during transport reduce the tiny dings that otherwise appear in “after” photos within days.
- Prep ratio: We allocate much of the schedule to cleaning, sanding, and repairs.
- Dust control: Extraction and plastic isolation zones protect adjacent rooms.
- Edge quality: Even film build at corners prevents early wear-throughs.
- Hardware: It’s efficient to upgrade pulls and hinges while doors are off.
- Cure discipline: We respect cure windows before reloading heavy items into cabinets.
Want a quick primer on options? Our kitchen cupboard refinishing explainer outlines how refinishing compares to larger renovations.
Tools & Resources That Matter
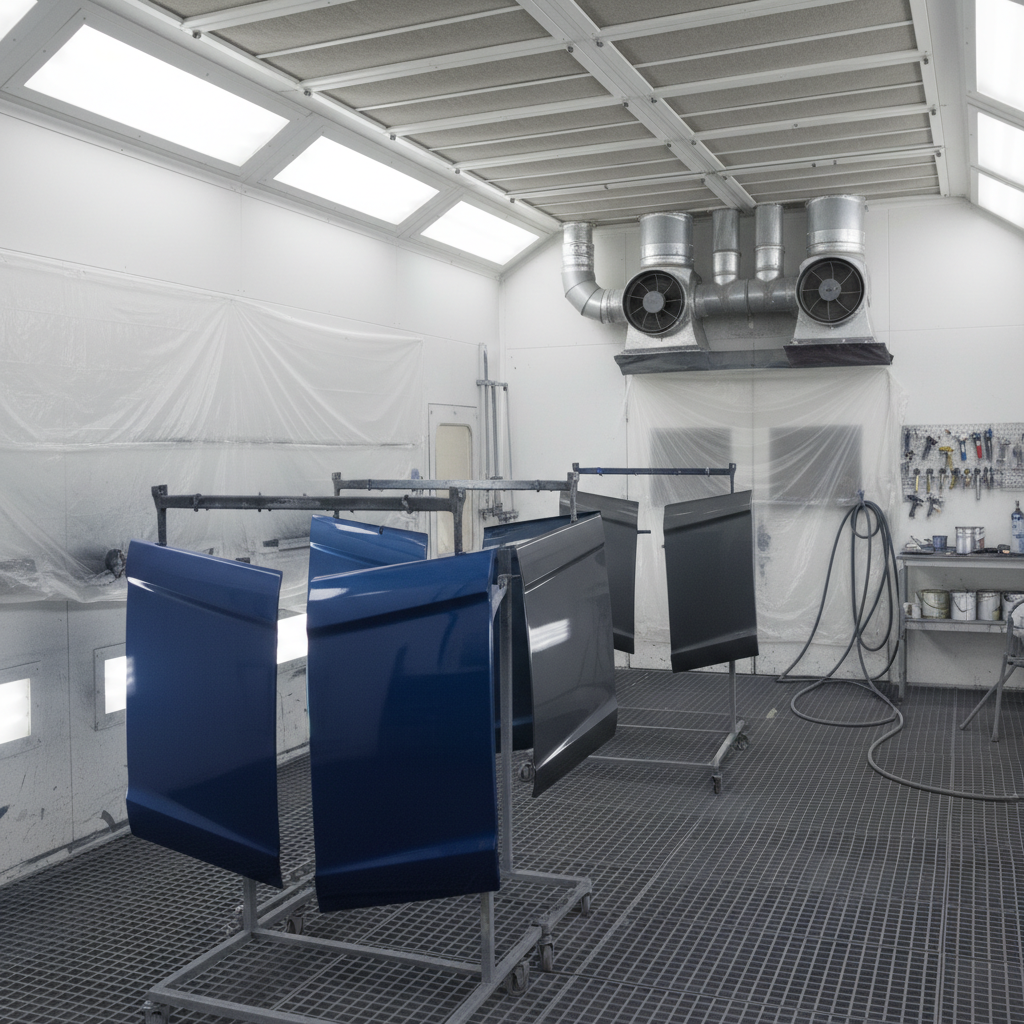
Professional shops rely on HVLP turbines, high-build primers, sanding systems with dust extraction, and controlled spray spaces. Homeowners benefit from checklists, in-home color samples, and clear daily timelines to keep the project smooth and predictable.
- HVLP gun with fine-finish needle sets for precise control
- HEPA dust extraction and sanding blocks in key grits (120–320)
- Bonding primer and furniture-grade waterborne topcoat
- Painter’s pyramids and drying racks for uniform edges
- Door labeling, hinge maps, and hardware templates
For homeowners considering what goes into a successful DIY approach, this general how to paint kitchen cabinets walkthrough highlights why controlled spraying and correct primers make all the difference when you want a professional “after.”
2026 Color and Style Trends for Toronto Homes
Toronto kitchens in 2026 favor soft whites, warm grays, and calming greens, with navy islands still popular. Two-tone schemes and satin sheens dominate because they balance elegance with easy upkeep under mixed natural and LED lighting common in open-plan homes.
We bring actual sprayed sample doors so you can see color and sheen in your own light. Two-tone layouts—lighter uppers and deeper lower cabinets—add contrast and help smaller rooms feel taller. Satin sheens hide minor texture while staying easy to wipe, a smart balance for family kitchens.
11 Before & After Kitchen Cabinet Painting Examples
From honey oak to modern satin, these scenarios show how pro spraying transforms Toronto-area kitchens. We highlight grain control, color selection, and hardware updates so you can picture your own outcome and plan confidently.
- York Townhouse: Honey-oak to satin white; black pulls; smoother edges and leveled grain at eye line.
- Toronto Condo: Espresso to warm gray; brighter feel under LED strips; satin reduces glare.
- Family Bungalow: Maple orange cast neutralized; soft white boxes with a navy island.
- Compact Rental: Laminate doors scuff-sanded and sprayed; wipeable, durable finish.
- Open-Plan Home: Two-tone uppers/lowers; hardware alignment tightens the look.
- Cook’s Kitchen: Bonding primer handles grease zones near the range and hood.
- Cottage-Style: Beadboard profiles leveled; smoother result without drips at grooves.
- Entertainer’s Space: Navy island adds depth; brushed brass hardware softens contrast.
- Light-Starved Room: High-reflectance white lifts natural light from a single window.
- Near Magwood Park: Grain-filled oak appears sleek and modern; satin hides minor texture.
- St. Clair West: Staged so cooking continued; doors sprayed off-site and boxes masked in place.
Explore more transformation thinking in our kitchen cabinets makeover overview, which connects color, hardware, and layout for cohesive results.
Pricing & Timelines: What Really Drives Them
While we don’t list prices, scope, current condition, and finish system drive timelines and investment. Door count, grain work, and cure windows add days. A clear schedule keeps kitchens functional while doors are sprayed off-site and boxes are prepped in place.
- Scope: Door and drawer quantity, islands, crown, valances, and panels.
- Condition: Grease load, prior coatings, and needed repairs or grain filling.
- Finish system: Primer and topcoat selection, and desired sheen.
- Logistics: Access, staging, and weather for on-site ventilation.
- Usability: Phasing that keeps meal prep possible most days.
For a general process overview from another perspective, this cabinet painting process overview outlines why surface prep and thin coats matter regardless of brand or city.
Working With a Local York/Toronto Specialist
A York-based team understands condo rules, parking near Jane St at St Clair Ave West, and humidity swings across Toronto. Local expertise streamlines staging, protects finishes during transport, and keeps communication fast when you’re juggling family schedules.
Local projects often move faster because we can pre-visit, color-test in your actual lighting, and coordinate hardware deliveries. Small touches—like labeled hinges and padded transport—protect edges so your “after” stays pristine. See how we plan projects in our painting your kitchen cabinets guide.
Local considerations for York
- Plan site access and parking near Jane St at St Clair Ave West if you’re in a mid-rise along St. Clair.
- Schedule spraying in drier weather windows when feasible to support consistent curing.
- If you’re near Magwood Park’s tree canopy, expect more airborne dust—strong masking helps.
Refinish vs. Reface vs. Replace
Refinishing repaints and renews your existing doors and boxes. Refacing swaps doors and adds new skins to boxes. Replacement rebuilds everything. For many Toronto kitchens with sound cabinets, refinishing or refacing achieves a like-new look with less disruption.
| Approach | What Changes | Disruption | Typical Use Case |
|---|---|---|---|
| Refinish (Repaint) | New primer/topcoat on current doors/boxes | Low | Good layout, solid boxes, color/style update |
| Reface | New doors + veneer/skins on boxes | Medium | Style upgrade when doors are dated/damaged |
| Replace | Entire cabinet system rebuilt | High | Layout change or failing boxes |
Because Paint2decor INC offers both refinishing and refacing, we can advise objectively based on your goals, layout, and cabinet construction. For construction specifics, this overview of standard vs. custom cabinet doors offers helpful context when you’re considering new doors.
Thinking about a refinish first? Our cabinet refinishing service breakdown explains when repainting is the best value and how we approach grain, repairs, and sheen selection.
Maintenance & Longevity
A quality finish is easy to live with: gentle cleaners, soft microfiber, and felt bumpers preserve sheen and edges. Most wear happens at high-touch zones and near dishwashers; simple habits and early touch-ups keep the “after” looking new for years.
- Wipe spills promptly; avoid harsh abrasives and scouring pads.
- Use felt pads where doors meet frames; adjust soft-close hinges as needed.
- Crack the dishwasher to vent steam after long sanitizing cycles.
- Touch up tiny nicks early to prevent bigger chips.
Want more ideas? Our service overview includes a care checklist we provide after every project.
DIY vs. Pro: How to Decide
DIY works for small bathrooms or single vanities with simple profiles. Whole-kitchen results are more reliable with a pro shop that controls dust, spray environment, and cure. If your goal is a camera-ready “after,” pro spraying and project management typically deliver more consistent results.
Ask yourself: Do you have a dust-free spray space, HVLP gear, bonding primers, and time for methodical labeling and reassembly? If not, collaboration saves weekends and reduces the risk of drips, orange peel, or adhesion failures that show up weeks later.
To understand the difference between brush-and-roller and HVLP spraying, our professional overview walks through tools, coatings, and what separates a furniture-grade finish from a quick paint job.
Common Mistakes to Avoid
Most early failures trace back to poor cleaning, inadequate scuff-sanding, or skipping a bonding primer. Thick coats to “save time” cause drips and slow cure. Rushing reassembly scuffs fresh edges, which show up instantly in your after photos.
- Inadequate degreasing near handles and ranges
- Skipping or rushing the bonding primer
- Heavy, uneven coats rather than thin passes
- No labeling system for doors and hinges
- Reassembling before the coating reaches handling hardness
Thinking About Your Own Reveal?
A 15–30 minute in-home assessment helps predict your “after.” We evaluate cabinet construction, surface condition, color options, and schedule—then provide a clear plan that keeps your kitchen usable while we spray off-site and finish boxes in place.
Curious where to start? Skim our refinishing service breakdown or get inspired by our makeover overview. When you’re ready, we’ll bring sample doors and sheen boards so you can choose confidently.
Key Takeaways
Before-and-after success depends on prep, correct primers, spray control, and patient cure. Local knowledge streamlines staging and protects finishes. With the right system, your “after” is durable, wipeable, and camera-ready for years.
- Prep and dust control drive durability and appearance.
- Waterborne systems balance low odor with strong performance.
- Two-tone palettes and satin sheens fit 2026 Toronto styles.
- Local specialists manage access, weather, and transport challenges.
Frequently Asked Questions
Homeowners ask about durability, timeline, and whether spraying works on oak, maple, or laminate. Short answer: yes—with proper primers, prep, and cure. These quick answers cover the most common questions we hear.
Will paint stick to factory-finished cabinets?
Yes—with thorough degreasing, scuff-sanding, and a cabinet-rated bonding primer. The primer creates a grip layer for the topcoat, which we spray in thin, even passes. Skipping any of those steps is why DIY jobs often chip or peel early.
How long before I can use my kitchen normally?
Most kitchens remain usable during on-site prep. After reassembly, surfaces are dry-to-touch quickly, but full hardness develops over the following days per the coating manufacturer. We’ll outline simple do’s and don’ts to protect edges during that window.
Can you spray laminate or thermofoil doors?
Laminate can be refinished with specialty primers and careful scuffing. Thermofoil that’s peeling often needs replacement or refacing. We assess door construction and recommend the best path—refinish, reface, or replace—based on longevity.
What about strong odors or indoor air quality?
We favor low-odor, waterborne finishes and control airflow during on-site work. Doors are sprayed in a dedicated space, reducing smells at home. Once cured, modern coatings are designed for durable, everyday use in kitchens and bathrooms.