
Restaining honey oak cabinets is the professional process of dulling or removing the old finish, correcting color with stain or toner, and sealing with a durable topcoat so the oak grain looks fresh and current. From our shop at 2710 St Clair Ave W in York, Paint2decor INC restores kitchens across Toronto with refinishing, refacing, and painting solutions.
By Masoud Kakar — Paint2decor INC
Last updated: 2026-05-12
Overview and Table of Contents
This complete guide explains what restaining honey oak cabinets involves, when to choose it over painting or refacing, and how pros in Toronto execute a durable, modern finish. Use the step-by-step workflow, color strategies, tools list, and local tips to plan a smooth, low-disruption cabinet refresh.
Use this outline to jump to what you need most.
- What is restaining honey oak cabinets?
- Why restaining matters in 2026
- How the professional process works (12 steps)
- Methods and color directions
- Best practices and mistakes to avoid
- Tools and resources
- GTA mini case studies
- FAQ
- Conclusion and key takeaways
What Is Restaining Honey Oak Cabinets?
Restaining honey oak cabinets means removing or deglossing the existing finish, adjusting tone with a stain, dye, or toner, and sealing with a protective topcoat. The goal is to modernize the orange-yellow cast while celebrating oak’s grain, delivering a durable, kitchen-ready surface.
At its core, restaining is a finish replacement—not a surface-level touch-up. You open the wood’s pores, introduce new color, then lock it in under a scratch- and moisture-resistant coating.
- Deglossing vs. stripping: Deglossers scuff clear coats quickly; full chemical stripping or sanding is better when the previous finish is failing.
- Why oak behaves differently: Oak has open pores that accept pigment readily. That makes color shifts (e.g., from yellow-orange to walnut) achievable with careful prep.
- Finish stack: Typical pro stack is: clean → sand → condition (as needed) → stain/toner → sealer → scuff → topcoats.
- Durability expectation: With pro prep and waterborne polyurethane, a well-used kitchen can enjoy years of service before a light refresh is needed.
In our experience with Toronto homes, sample boards are the fastest way to choose a direction. We produce three to five samples on your actual doors so you can evaluate undertone, sheen, and grain visibility under your lighting.
To see broader options beyond stain, you can compare outcomes in our kitchen cabinet refinishing guide and our cabinet painting contractors guide.
Why Restaining Matters in 2026
Restaining updates 1990s–2000s honey oak to today’s tones without replacing solid boxes. It preserves wood character, reduces disruption, and delivers a durable finish. For many Toronto kitchens, it’s the sweet spot between painting (full color change) and refacing (new doors/veneers).
Here’s the big picture many homeowners miss: restaining keeps the real-wood warmth that paint can hide, yet solves the orange cast that dates the space.
- Style relevance: Neutrals (greige, light walnut, driftwood gray) quiet the yellow while keeping texture. Two-tone stain/paint combos modernize fast.
- Disruption level: Door removal and off-site finishing keeps your kitchen usable. Typical dry-to-touch windows are 2–4 hours per coat, with full cure in about 21–30 days.
- Sustainability: Reuse existing doors and boxes, minimize landfill, and choose low-VOC waterborne topcoats for better indoor air quality.
- Maintenance: Stained oak hides small bumps and fingerprints better than high-chroma paints, especially at handles and edges.
When you’re unsure whether to restain, paint, reface, or replace, use the quick comparison below. Then skim our cabinet refacing overview for the new-doors route.
| Approach | Best for | Grain visibility | Typical timeline | Notes |
|---|---|---|---|---|
| Restain | Keeping real-wood character, reducing orange | Visible, adjustable | Several days to a couple of weeks, incl. cure | Great for solid oak with intact doors |
| Paint | Full color shift or hiding grain | Low to none (with filler) | About a week plus cure | Works for mixed substrates |
| Reface | New door style + veneer on boxes | Depends on chosen species | 1–2 weeks typical | Pairs well with hardware updates |
| Replace | Layout changes or damaged boxes | Chosen by material | Several weeks+ | Best when redesigning the kitchen |
If you’re remodeling door profiles later, explore how profiles drive style in this overview of modern CNC door profiles. It helps you plan a phased upgrade that still looks cohesive.
How the Professional Process Works (12 Steps)
A pro restain includes labeling, degreasing, sanding, targeted repairs, tone testing, controlled stain or toner application, and spray-applied waterborne topcoats. The sequence manages adhesion, color accuracy, and long-term wear so your oak looks updated and holds up to daily use.
We tailor steps to each kitchen, but our York/Toronto workflow follows this proven arc:
- Label and map: Number doors/drawers and note hinge orientation. Typical kitchens have 20–40 pieces.
- Hardware and hinge removal: Bag and tag fasteners. This prevents mix-ups that can skew alignment later.
- Degrease thoroughly: Kitchens collect aerosolized oils. We use a dedicated cleaner, then a clean water wipe. Residue reduces adhesion.
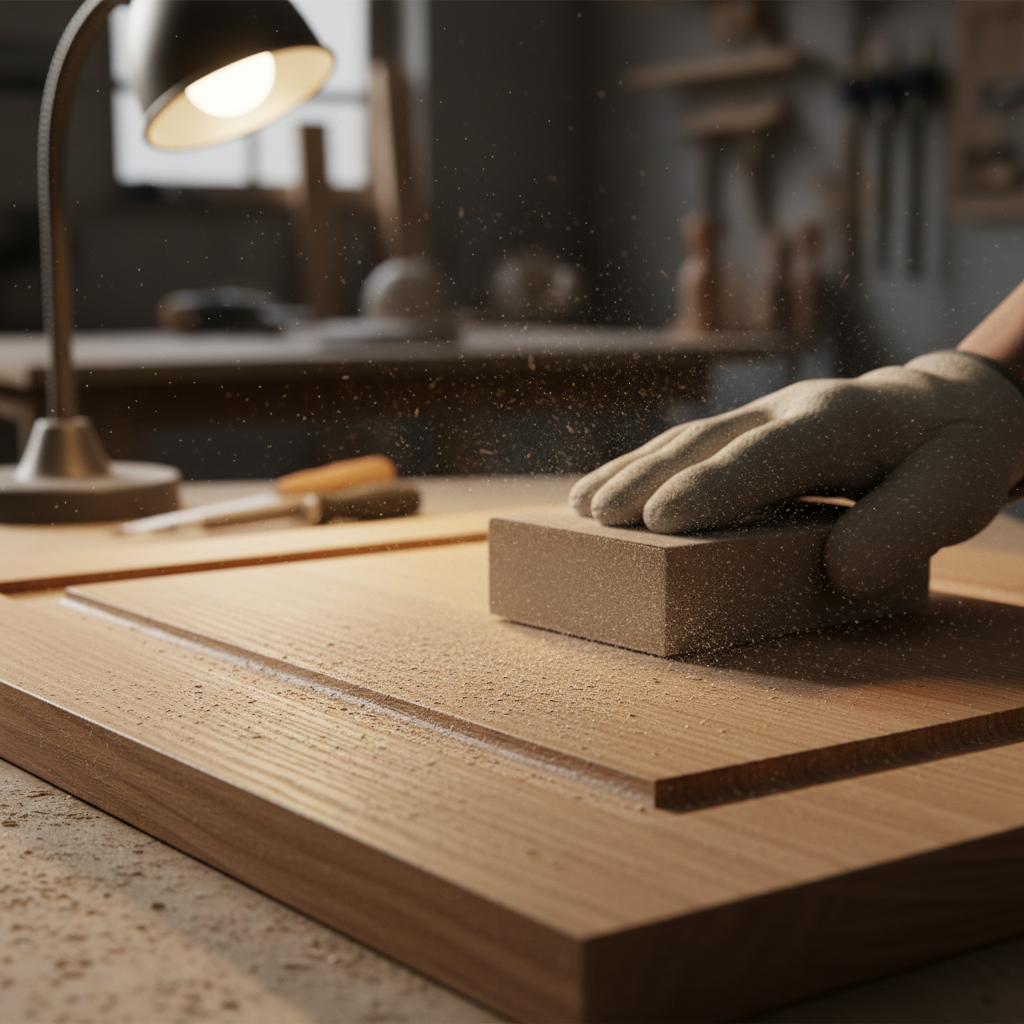
- Initial sanding: Open the surface with 120–150 grit. We sand with the grain to avoid cross-scratches that telegraph through stain.
- Repairs: Fill dings with stainable filler. Oak’s open grain hides fills better than closed-grain woods.
- Refine sanding: Step to 180–220 grit. Over-sanding can burnish pores and reduce color uptake, so we watch pressure.
- Conditioning (as needed): On blotchy areas, a pre-stain conditioner or dewaxed shellac washcoat evens absorption.
- Color tests: We create test swatches on a door back. Candidates often include warm walnut, neutral greige, and driftwood gray.
- Apply stain or toner: Wipe-on gel stain for control, or spray toner for subtle shifts. We work in thin, even films.
- Sealer coat: After color sets, a dedicated sealer locks pigment. Dry-to-sand windows are typically 1–2 hours in controlled shops.
- Scuff-sand: Light 320–400 grit for mechanical adhesion without cutting through.
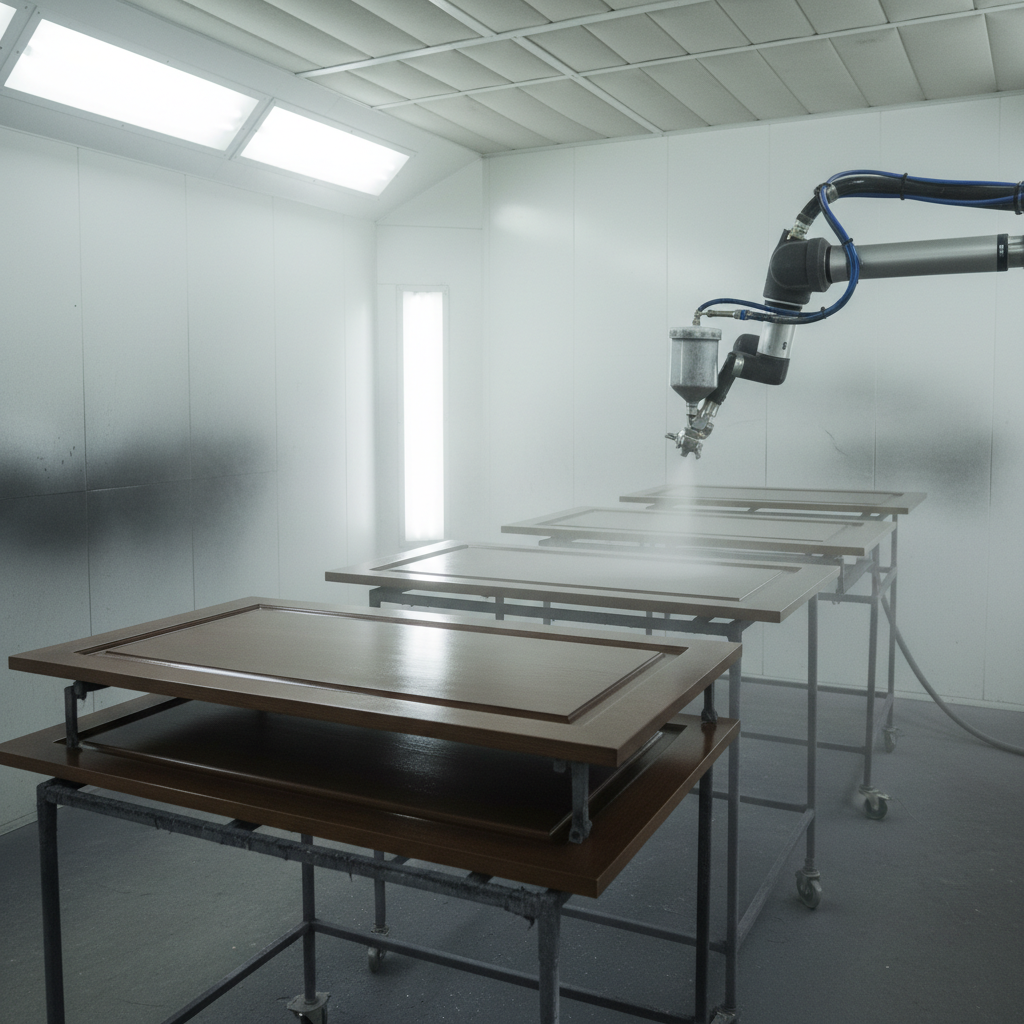
- Topcoats: Two to three coats of waterborne polyurethane or acrylic-urethane, aiming for 2–3 mils per coat.
Environmental control matters. We target relative humidity of roughly 40–55% and temperatures around 65–75°F for predictable drying. Ventilation and dust capture keep films clean and help finishes cure consistently across all pieces.
For a deeper look at prep, see our cabinet refinishing preparation checklist. If you’re considering paint for uppers and stain for lowers, our pro painting guide covers hybrid finishes that pair well with stained oak.
Methods and Color Directions
You can modernize honey oak with gel stains, spray toners, dyes, gray washes, or walnut glazes. The best method depends on how much grain you want to see and how far you’re shifting the undertone from yellow-orange to neutral or warm-brown.
We start with what you want to keep: grain, texture, and warmth. Then we choose a route that balances control and durability.
Common coloring routes
- Gel stain (wipe-on control): Great for strong shifts (e.g., honey to classic walnut) with fewer lap marks. Work time is generous; wipe excess within a few minutes.
- Spray toner (subtle correction): A translucent tinted coat that mutes orange without hiding texture. Perfect for “same, but calmer” results.
- Dye stain (deep saturation): Evens color into pores. Often sealed with a clear, then glazed for character.
- Gray-wash: Thin, cool glaze layered over sealed oak creates driftwood effects while keeping grain open.
- Two-tone hybrid: Stained lowers, painted uppers. This compresses visual weight and brightens work zones.
Grain and smoothness choices
- Keep the texture: Minimal filling preserves tactile oak while toning color. Edges stay crisp and forgiving.
- Fill for smooth: A pore filler or multiple sealer passes can flatten texture for a sleeker look before topcoat.
Need style inspiration for oak makeovers? This overview on making oak cabinets look modern shows how undertones and hardware collaborate to update the space.
When a client asks for “just a little less orange,” we often choose a neutralizing toner first. If the kitchen needs stronger contrast, we pivot to a richer gel stain and add a satin topcoat to control glare and fingerprints at high-touch zones.
Best Practices and Mistakes to Avoid
Flawless restains come from surgically clean prep, controlled films, and patient cure. Avoid rushed sanding, heavy coats, mixing incompatible products, and reinstalling doors before the finish hardens. These missteps cause adhesion issues, print-through marks, and premature edge wear.
Best practices from the field
- Degrease twice: Oils hide in profiles. A second pass with clean rags reduces fish-eye defects later.
- Sand with the grain: 120/150/180 or 150/180/220 is a reliable progression. Stop before burnishing pores.
- Control film build: Two to three thin topcoats beat one heavy coat for clarity and hardness.
- Dust management: Tack cloths and filtered air reduce nibs. Keep traffic away while curing.
- Sheen selection: Satin hides minor wear better than gloss in busy family kitchens.
- Labeling: Mark hinge positions. Accurate rehang saves 1–2 hours of alignment work in a typical kitchen.
Common mistakes to avoid
- Skipping sample boards: Light changes everything. Test under your actual LEDs and daylight.
- Mixing systems: Don’t trap oil stains under incompatible waterborne sealers without an appropriate barrier.
- Over-wiping gel stain: This can pull color from open pores and create stripey fields.
- Rushing reinstallation: Dry-to-touch isn’t cured. Allow several days before normal use; full hardness typically develops over a few weeks.
- Ignoring edges: Break sharp edges lightly so coatings wrap; sharp corners are wear points.
If you’re weighing paint instead, our professional painting guide shows how primers, fillers, and topcoats change grain visibility and maintenance. For a door-style change with new veneers, see our refacing contractor guide.
Tools and Resources
Successful restains require clean surface prep, controlled abrasives, predictable colorants, and durable, low-VOC topcoats. A basic pro kit includes degreasers, sanding blocks, 120–220 grits, wiping pads, HVLP sprayer, drying racks, filters, and respirators rated for finishing work.
Core prep kit
- Degreaser + clean water rinse: Removes kitchen films that interfere with adhesion.
- Abrasives: 120/150/180/220 grits; maroon/gray pads for scuffing profiles.
- Hand blocks + ROS: Blocks control edges; a random-orbit sander speeds flats.
- Tack cloths + vac: Capture dust before stain and between coats.
Color + coating system
- Gel stain or dye: Choose by desired color shift and control level.
- Toner: A sprayable tint in the sealer or intercoat to refine undertone.
- Waterborne polyurethane: Two to three coats for kitchen durability.
Application and safety
- HVLP sprayer: 1.3–1.5 mm tips for clears; keep passes overlapping by ~50%.
- Drying racks: Stable airflow shortens dust-set windows.
- Respirator and gloves: Use finishing-rated protection and proper ventilation.
Hardware refresh amplifies the transformation. If you’re choosing pulls and knobs, this hardware selection guide highlights practical sizing and spacing ideas you can adapt to stained oak.
If you prefer a “do-it-for-me” path with predictable timelines, our kitchen cabinet refinishing service handles everything—from sample boards to final rehang.
GTA Mini Case Studies
In Toronto-area kitchens, targeted color correction and pro topcoats consistently refresh honey oak. These snapshots show how small decisions—tone, sheen, and hardware—stack into a high-impact change without replacing functional boxes.
York family kitchen: from orange to warm walnut
- Starting point: 1990s honey oak, good door condition, builder pulls.
- Plan: Wipe-on gel stain to a classic walnut; satin waterborne topcoat.
- Result: Grain remains visible; orange cast neutralized. Matte-black bar pulls modernize quickly.
Etobicoke condo: driftwood gray wash
- Starting point: Honey oak doors with moderate wear; compact galley layout.
- Plan: Sealer + gray glaze wash, then clear topcoats for easy wipe-downs.
- Result: Airier feel, lighter visual weight; grain pattern keeps warmth.
Two-tone hybrid in the GTA
- Starting point: Open-plan main floor with lots of daylight.
- Plan: Stained lowers (neutral walnut), painted uppers (soft white) for balance.
- Result: Fresh contrast without replacing boxes; island becomes the feature.
Considering a phased approach? Our oak cabinet update tips outline ways to sequence stain, paint, and hardware changes for minimal downtime.
Local considerations for York
- Plan pickup/drop-off windows near Jane St at St Clair Ave West; it keeps door transport quick and predictable during busy hours.
- Toronto humidity swings affect dry times. Aim for work periods when indoor RH stays around 40–55% for steadier curing.
- For weekend projects, schedule park-and-carry time near Smythe Park traffic peaks to avoid delays when delivering doors to the shop.
Frequently Asked Questions
These concise answers address the most common homeowner questions about restaining honey oak. Each response focuses on durability, color control, and day-to-day practicality so you can decide confidently between restaining, painting, or refacing.
Will restaining hide the oak grain?
No. Restaining keeps the grain visible unless you intentionally fill pores or choose heavy-bodied finishes. If you want a smoother look, we can add filler or extra sealer coats before topcoats. If you love texture, we preserve it and simply shift the undertone.
How long before I can use my kitchen normally?
Most topcoats are dry to touch within hours and handle-ready in a couple of days. Full cure—when finishes reach maximum hardness—typically takes a few weeks. Use doors gently during this window, avoid harsh cleaners, and wipe spills promptly.
Is painting better than restaining for honey oak?
It depends on your goal. Paint delivers a uniform, grain-hiding color and suits mixed materials. Restaining modernizes tone while keeping wood character. If you want both, consider stained lowers with painted uppers for contrast and practical wear.
Can you restain oak veneer doors?
Yes, with care. Veneers are thin, so sanding must be light and even, often paired with a conditioner or toner-first approach. Testing on the back side prevents sanding through or creating uneven absorption lines.
What sheen should I choose for stained oak?
Satin is the most forgiving in busy kitchens. It hides minor wear and reduces glare while keeping color depth. Semi-gloss adds pop but shows more fingerprints. We bring sheen samples so you can see how each looks under your lighting.
Conclusion and Key Takeaways
Restaining honey oak cabinets modernizes color and preserves real-wood warmth. With disciplined prep, controlled color, and durable topcoats, you can refresh the whole kitchen without replacing boxes. If you prefer turnkey help, our York-based team manages the process end-to-end.
Key takeaways
- Restaining updates undertone while keeping oak’s texture visible.
- Controlled prep and thin, even films are the secret to durability.
- Sample boards under your lighting speed confident decisions.
- Pair stain with new hardware for an outsized style lift.
- Hybrid finishes (stained lowers, painted uppers) balance warmth and brightness.
Next steps
- Explore our refinishing service for start-to-finish help.
- Compare routes in our refacing overview and painting guide.
- Based in the Toronto area? Book a friendly assessment from our York team. We’ll bring samples and a plan that fits your timeline.
{
“@context”: “https://schema.org”,
“@type”: “Article”,
“headline”: “Honey Oak Cabinets: Make Them Look New in 2026”,
“description”: “A complete 2026 guide to restaining honey oak cabinets: definitions, pro workflow, color strategies, best practices, tools, GTA case studies, and York/Toronto tips by Paint2decor INC.”,
“datePublished”: “2026-05-12T08:00:00-04:00”,
“dateModified”: “2026-05-12T08:00:00-04:00”,
“author”: {
“@type”: “Person”,
“name”: “Masoud Kakar”,
“url”: “https://paint2decor.com/blogs”,
“jobTitle”: “Cabinet Refinishing Specialist”,
“knowsAbout”: [
“kitchen cabinet refinishing”,
“cabinet refacing”,
“cabinet painting”,
“restaining honey oak cabinets”
],
“sameAs”: []
},
“publisher”: {
“@type”: “Organization”,
“name”: “Paint2decor INC”,
“url”: “https://paint2decor.com/blogs”,
“logo”: {
“@type”: “ImageObject”,
“url”: “https://paint2decor.com/wp-content/uploads/2022/03/website-1.png”,
“width”: 512,
“height”: 512
}
},
“mainEntityOfPage”: “https://paint2decor.com/blogs”,
“keywords”: [
“restaining honey oak cabinets”,
“kitchen cabinet refinishing”,
“Toronto cabinet painting”,
“cabinet refacing”
],
“image”: [
{
“@type”: “ImageObject”,
“url”: “https://res.cloudinary.com/dmboo1nu1/image/upload/v1778897395/ai-images/d54a8wopeqszamhyy24r.png”,
“width”: 1200,
“height”: 630,
“caption”: “Wide shot of kitchen with honey oak cabinets being restained, doors removed and protected surfaces”
},
{
“@type”: “ImageObject”,
“url”: “https://res.cloudinary.com/dmboo1nu1/image/upload/v1778897394/ai-images/gimuh1eek03etcdvxg3n.png”,
“width”: 1200,
“height”: 800,
“caption”: “Close-up sanding along the grain to prepare oak pores for even stain uptake”
},
{
“@type”: “ImageObject”,
“url”: “https://res.cloudinary.com/dmboo1nu1/image/upload/v1778897394/ai-images/is5tgltu8jlqoqbfltlo.png”,
“width”: 1200,
“height”: 800,
“caption”: “Professional spray topcoat applied to restained oak cabinet doors on drying racks”
}
],
“speakable”: {
“@type”: “SpeakableSpecification”,
“cssSelector”: [
“.featured-snippet-answer”,
“.faq-answer”
]
}
}
{
“@context”: “https://schema.org”,
“@type”: “ProfilePage”,
“mainEntity”: {
“@type”: “Person”,
“name”: “Masoud Kakar”,
“url”: “https://paint2decor.com/blogs”,
“description”: “Cabinet Refinishing Specialist serving York and the Greater Toronto Area with refinishing, refacing, and painting expertise.”,
“knowsAbout”: [
“kitchen cabinet refinishing”,
“cabinet refacing”,
“cabinet painting”,
“restaining honey oak cabinets”
],
“sameAs”: []
}
}
{
“@context”: “https://schema.org”,
“@type”: “FAQPage”,
“mainEntity”: [
{
“@type”: “Question”,
“name”: “Will restaining hide the oak grain?”,
“acceptedAnswer”: {
“@type”: “Answer”,
“text”: “No. Restaining keeps the grain visible unless you intentionally fill pores or choose heavy-bodied finishes. If you want a smoother look, we can add filler or extra sealer coats before topcoats. If you love texture, we preserve it and simply shift the undertone.”
}
},
{
“@type”: “Question”,
“name”: “How long before I can use my kitchen normally?”,
“acceptedAnswer”: {
“@type”: “Answer”,
“text”: “Most topcoats are dry to touch within hours and handle-ready in a couple of days. Full cure—when finishes reach maximum hardness—typically takes a few weeks. Use doors gently during this window, avoid harsh cleaners, and wipe spills promptly.”
}
},
{
“@type”: “Question”,
“name”: “Is painting better than restaining for honey oak?”,
“acceptedAnswer”: {
“@type”: “Answer”,
“text”: “It depends on your goal. Paint delivers a uniform, grain-hiding color and suits mixed materials. Restaining modernizes tone while keeping wood character. If you want both, consider stained lowers with painted uppers for contrast and practical wear.”
}
},
{
“@type”: “Question”,
“name”: “Can you restain oak veneer doors?”,
“acceptedAnswer”: {
“@type”: “Answer”,
“text”: “Yes, with care. Veneers are thin, so sanding must be light and even, often paired with a conditioner or toner-first approach. Testing on the back side prevents sanding through or creating uneven absorption lines.”
}
},
{
“@type”: “Question”,
“name”: “What sheen should I choose for stained oak?”,
“acceptedAnswer”: {
“@type”: “Answer”,
“text”: “Satin is the most forgiving in busy kitchens. It hides minor wear and reduces glare while keeping color depth. Semi-gloss adds pop but shows more fingerprints. We bring sheen samples so you can see how each looks under your lighting.”
}
}
]
}