
Kitchen cupboard refinishing is the professional restoration of existing cabinet boxes and doors with new coatings, repairs, and finish upgrades. It preserves your layout while refreshing color, sheen, and durability. For York and the Toronto metro, Paint2decor INC at 2710 St Clair Ave W delivers refinishing that looks factory-new without a full renovation.
By Paint2decor INC • Last updated: 2026-05-25
At a Glance
Kitchen cupboard refinishing updates your existing cabinets by repairing, priming, and spraying professional-grade coatings. You keep your layout and boxes, change the color and sheen, and add durability. It’s a faster, cleaner path to a like-new kitchen—ideal for Toronto homeowners who want transformation without replacement.
This complete guide is written for Toronto and GTA homeowners comparing options and timelines. You’ll find clear definitions, step-by-step process detail, and practical checklists—plus when refinishing beats refacing or replacement.
- What kitchen cupboard refinishing includes—and what it doesn’t
- How the pro process works in 10 stages from prep to reassembly
- Finish systems: waterborne enamel, 2K polyurethane, and grain filling
- Refinish vs. reface vs. replace: a side-by-side comparison
- Best practices for durability, safety, and indoor air quality
- Local planning tips for York and greater Toronto
What Is Kitchen Cupboard Refinishing?
Kitchen cupboard refinishing restores your existing cabinets with repairs, professional primers, and sprayed topcoats. You keep the cabinet boxes and door styles, update the finish, and extend lifespan. It’s ideal when the layout works and the cabinet frames are structurally sound.
Refinishing focuses on renewing surfaces, not rebuilding them. The cabinet frames, doors, and drawers are cleaned, sanded, primed for adhesion, then sprayed with furniture-grade coatings. Hardware can be upgraded, and minor carpentry repairs are completed.
- Retain the layout: Doors, drawers, and boxes stay in place and on spec.
- Change the aesthetics: Color, sheen, and grain visibility can be transformed.
- Boost durability: Sprayed finishes resist wear better than brush-only paint.
- Minimize disruption: Work is staged so your kitchen isn’t down for long.
For a deeper primer on the topic, our team explains surface renewal, adhesion science, and coating choices in the Toronto-focused guide on kitchen cabinet refinishing.
Why Kitchen Cupboard Refinishing Matters for Toronto Homes
Refinishing delivers a like-new kitchen look while preserving boxes that are often in great shape. In York and across Toronto, many homes have quality frames; refinishing refreshes color and durability faster than replacement, with less waste and disruption.
In our experience serving York and the GTA, many homes have solid maple or oak frames that outlast their original finishes. When you like your layout and the cabinet structure is sound, refinishing can extend service life and modernize style without demolition.
- Less demolition: Keep flooring, backsplashes, and countertops intact.
- Faster timelines: Typical projects span several days in the home plus shop finishing time.
- Lower waste: Reuse well-built boxes instead of landfilling them.
- Design flexibility: Shift from honey oak to warm white, greige, navy, or two-tone looks.
If you’re exploring other upgrade paths too, see our hands-on overview of cabinet refacing and how it compares when doors or drawer fronts need a style change.
How Kitchen Cupboard Refinishing Works (Our 10-Stage Process)
A professional refinishing workflow removes doors, deep-cleans, sands, primes, sprays multiple topcoats, and reassembles with care. The best results come from controlled shop spraying for doors and meticulous on-site prep for frames.
At Paint2decor INC, we follow a consistent, quality-controlled workflow tailored to Toronto homes. Door and drawer fronts are finished in a spray environment; frames and panels are refinished on-site with precision masking to protect adjacent surfaces.
- Protection & labeling: Mask floors and counters; label doors and hardware for exact reassembly.
- Removal: Doors, drawers, and shelves come off; hinges and pulls are bagged.
- Degreasing: A thorough clean removes oils and residues that can cause adhesion failure.
- Mechanical prep: Sanding scuffs existing coatings; grain is managed for uniform texture.
- Repairs: Fill dings, tighten fasteners, and correct minor alignment.
- Adhesion primer: Bonding primer locks to old finishes and seals tannins.
- Intermediate sand: A fine sand level-sets the surface before color.
- Sprayed topcoats: Two to three coats deliver color, sheen, and durability.
- Cure window: Controlled dry time protects finish integrity.
- Reassembly & tune-up: Rehang, adjust, and install upgraded hardware as requested.
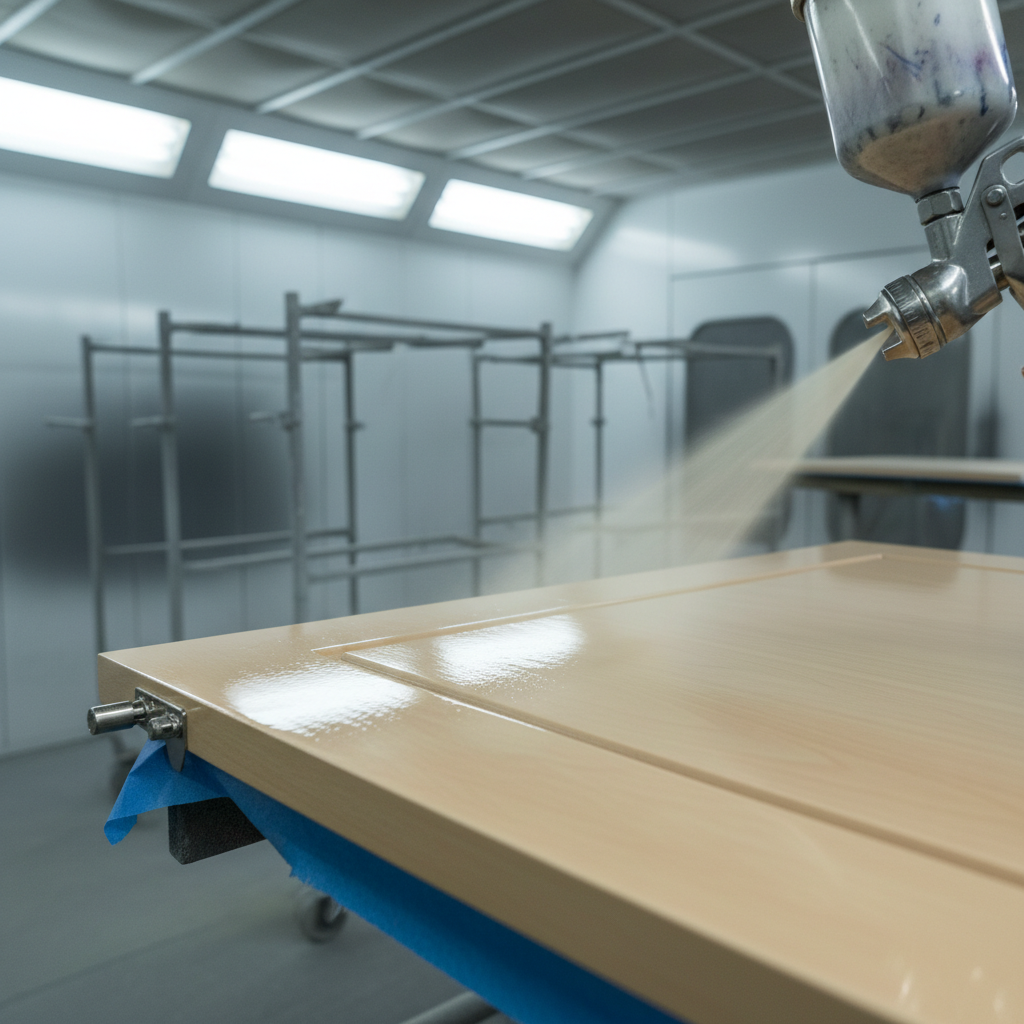
For a visual of the pro spraying stage, see the image below. Even, overlapping passes with an HVLP sprayer produce a consistent, brush-free finish.
Curious how this compares to a paint-only project? Our walkthrough of professional kitchen cabinet painting outlines where brushing and rolling can work, and where a spray system is superior.
Local considerations for York
- Plan door pickup and reinstallation around traffic on Jane St at St Clair Ave West to keep your kitchen accessible during working hours.
- Dry, mild weather helps ventilation during on-site frame work; spring and fall are popular windows in Toronto.
- If you work from home near Smythe Park, we’ll coordinate masking and noise windows so your day runs smoothly.
Methods and Finish Options: From Oak Grain to Factory-Smooth
Refinishing methods include deep-clean and scuff-sand with bonding primer, optional grain filling for oak, and sprayed topcoats in waterborne enamel or 2K polyurethane. You choose color and sheen, from matte to satin to semi-gloss.
Your finish system defines the look and longevity. We match coatings to your cabinet substrate—oak, maple, MDF, or thermofoil—so adhesion and appearance hold up under daily use.
- Waterborne enamel: Low-odor, durable, and kitchen-safe after full cure; great for families.
- 2K polyurethane: Two-component chemistry for exceptional hardness in high-traffic zones.
- Grain management: Oak can be filled to reduce texture or left to showcase character.
- Sheen choices: Matte hides fingerprints; satin balances cleanability with soft glow.
- Color planning: Warm whites, soft grays, navy islands, or natural wood accents.
If you’re updating a specific species, explore our practical notes on updating oak cabinets and how to control grain for a uniform, modern look.
Refinish vs. Reface vs. Replace: What’s Best When?
Refinish when boxes are sound and you want a color and sheen change. Reface when you also want a new door style. Replace when layout or boxes are failing. The right path depends on structure, design goals, and timeline.
Each path solves a different problem. Refinishing preserves boxes and door styles; refacing changes the door and drawer fronts; replacement reconfigures everything. Use the table below to pick the right fit for your kitchen goals.
| Criteria | Refinish | Reface | Replace |
|---|---|---|---|
| Keep existing layout | Yes | Yes | No (often reconfigured) |
| Change door style | No | Yes | Yes |
| Project disruption | Low | Medium | High |
| Waste generated | Low | Medium | High |
| When to choose | Sound boxes; want new color | Sound boxes; want new door style | Layout/boxes failing; full redesign |
For a step-by-step overview of the reface option, see our Toronto-focused cabinet refacing page and detailed refacing guide.
Best Practices for a Durable, Factory-Level Result
The best refinishing outcomes come from rigorous prep, a controlled spray environment, and disciplined cure times. Bonding primer, fine sanding between coats, and careful reassembly are non-negotiables for a factory-smooth, long-lasting finish.
Durability is earned in the prep. Our teams prioritize adhesion, cleanliness, and precise masking so topcoats can perform. Here’s what consistently yields furniture-grade results in Toronto homes.
- Adhesion-first mindset: Degreasing and scuff-sanding every surface, every time.
- Professional primers: Bonding/sealing primers to lock down old finishes and tannins.
- Spray technique: Even, overlapping passes; measured film build; minimal overspray.
- Between-coat refinement: Fine sanding levels texture and removes nibs.
- Hardware planning: New pulls and soft-close hinges modernize touch and feel.
- Ventilation & safety: Controlled airflow and respirator use protect your home and crew.
For a broader look at finishes as part of a makeover, explore our homeowner primer on kitchen cabinets makeovers and how color, lighting, and hardware choices work together.
Tools, Safety, and Helpful Resources
Refinishing relies on pro tools: HVLP or air-assisted sprayers, dust-extraction sanders, bonding primers, and catalyzed topcoats. Safety means respirators, eye and hearing protection, and jobsite ventilation. Aftercare includes gentle cleaners and felt pads.
Professional equipment and safe work practices reduce dust, overspray, and downtime while protecting indoor air quality. While we handle the heavy lifting, homeowners can support longevity with simple aftercare habits.
- Core tools: HVLP sprayer, fine-grit abrasives, shop racks, and clean space for curing.
- Safety gear: Proper masks or respirators, gloves, and eye protection during on-site work.
- Homeowner aftercare: Non-abrasive cleaners, avoid harsh chemicals, add felt pads under frequently moved items.
- Scheduling tips: Clear counters, empty drawers, and create a staging area before door pickup.
For DIY-curious readers, basic painting principles still apply. As noted in Altima Kitchens’ cabinet-painting guide, meticulous cleaning, sanding, and priming are the foundation of any lasting finish—brushed or sprayed.
Real Examples from Toronto Kitchens
Toronto homeowners often choose refinishing to modernize solid frames, especially classic oak and maple. Popular transformations include warm white Shaker doors, two-tone islands, and satin sheens that clean easily and photograph beautifully in natural light.
We’ve helped GTA families refresh loved kitchens while keeping layouts they rely on. These quick scenarios show how refinishing solves different problems without the disruption of full replacement.
- York family with honey oak: Grain-managed refinish to satin warm white; new hardware; island left in natural wood for contrast.
- Condo near transit: Quick-turn refinishing in a compact galley kitchen, coordinating with building quiet hours and ventilation needs.
- Busy household: Durable 2K polyurethane on lower doors for extra abrasion resistance; waterborne enamel up top to minimize odor.

Considering a style change too? Our kitchen cabinet refinishing service page explains how color strategy, sheen, and hardware upgrades deliver a cohesive, current look.
Planning Your Project: Timeline, Sequence, and Decisions
Plan your refinishing by confirming cabinet condition, choosing colors and sheen, scheduling door pickup, and coordinating on-site frame work. Clear counters, empty drawers, and plan a temporary coffee/snack station for a smoother few days.
Good planning reduces kitchen downtime. We align shop spraying and on-site work so reassembly is efficient, clean, and predictable.
- Decide finishes early: Bring a backsplash or counter sample to finalize colors.
- Hardware test fit: Verify hole spacing for new pulls before spraying doors.
- Family routine: Move essentials to a rolling cart and set up a mini prep area.
- Pet plan: Keep curious paws out of masked areas until reassembly.
If you’re deciding between solutions, our comparison of refacing paths in the cabinet refacing guide will help you evaluate door-style changes versus a color-led refresh.
Care and Maintenance After Refinishing
Use non-abrasive cleaners, avoid harsh chemicals, and add felt pads where doors and décor touch. Let fresh finishes cure fully before heavy use. With simple habits, a sprayed finish stays smooth and easy to clean for years.
Sprayed coatings strengthen as they cure. Treat the finish gently the first couple of weeks, then maintain with light, regular cleaning routines.
- Cleaning: Mild soap and water or a cabinet-safe cleaner; soft microfiber cloths.
- Heat and steam: Ventilate when cooking; avoid prolonged steam near doors.
- Hardware check: Retighten handles seasonally; add soft-close where practical.
- Touch-ups: Keep a labeled touch-up jar; test on an inside edge first.
For more long-term kitchen care ideas, see these cabinet maintenance tips that echo the basics we coach GTA homeowners to follow.
Frequently Asked Questions
Homeowners ask about timelines, color choices, wood species, and durability. The short version: if your boxes are sound and you like your layout, refinishing is often the fastest, cleanest path to a like-new kitchen look.
How long does kitchen cupboard refinishing take?
Timelines vary by kitchen size and finish system, but projects are typically staged to limit downtime. Doors and drawers are finished in the shop while frames are handled on-site, so your kitchen remains usable in between steps.
Can you refinish oak and reduce the visible grain?
Yes. We can fill and level open grain before priming to minimize texture, then spray topcoats for a modern, uniform look. Some homeowners choose to keep subtle grain for character; we’ll mock up both so you can compare.
What finish is most durable for a busy family kitchen?
Catalyzed systems like 2K polyurethane deliver exceptional hardness for high-traffic zones, while premium waterborne enamels balance durability with low odor. We’ll recommend a system based on your home’s traffic patterns and ventilation preferences.
When should I choose refacing instead of refinishing?
Choose refacing when you want a new door style or your current doors are damaged beyond repair. Your cabinet boxes remain, but doors and drawer fronts are replaced—often paired with a fresh finish on frames for a cohesive look.
Key Takeaways
Refinishing keeps your kitchen layout, upgrades finish durability, and transforms style with minimal disruption. It’s ideal when cabinet boxes are sound and you want a factory-smooth, color-led update that stands up to daily life.
- Keep what’s solid; renew what’s tired—frames, doors, and drawers.
- Choose coatings intentionally: waterborne enamel or 2K polyurethane.
- Plan logistics around Toronto life—traffic, ventilation, and schedules.
- Use gentle care post-project to protect your new finish.
- Compare paths with our refacing guide before you decide.
Conclusion: Ready for a Like-New Kitchen Without Replacement?
If your cabinet boxes are sound and your layout works, kitchen cupboard refinishing is the fastest, cleanest way to achieve a like-new look. You’ll get modern color, resilient coatings, and a calm, managed project experience.
When working with clients across York and the wider Toronto area, we’ve found the winning formula is simple: disciplined prep, pro spray systems, and clear communication. If you’re ready to refresh, start with our Toronto overview of kitchen cabinet refinishing and book a quick consult to discuss color, sheen, and scheduling.
Friendly next step: Want a factory-smooth finish and a calmer project? Explore our kitchen cabinet refinishing service to see how we stage work around real family life in Toronto.
If you’re still weighing options, it can help to see how door-style changes affect scope. As noted in Altima’s refacing vs. replacement overview, changing doors is a targeted way to refresh style without rebuilding your kitchen.
{
“@context”: “https://schema.org”,
“@type”: “Article”,
“headline”: “Kitchen Cupboard Refinishing: Cut Costs, Keep Style 2026”,
“author”: {
“@type”: “Person”,
“name”: “Masoud Kakar”,
“url”: “https://paint2decor.com/blogs”,
“jobTitle”: “Cabinetry Refinishing Specialist”,
“knowsAbout”: [“kitchen cupboard refinishing”, “cabinet refacing”, “cabinet spray painting”, “kitchen cabinet painting”, “Toronto kitchens”],
“sameAs”: [“https://paint2decor.com/blogs”]
},
“publisher”: {
“@type”: “Organization”,
“name”: “Paint2decor INC”,
“url”: “https://paint2decor.com/blogs”,
“logo”: {
“@type”: “ImageObject”,
“url”: “https://paint2decor.com/wp-content/uploads/2022/03/website-1.png”,
“width”: 600,
“height”: 60
}
},
“datePublished”: “2026-05-25”,
“dateModified”: “2026-05-25”,
“image”: [
{
“@type”: “ImageObject”,
“url”: “https://res.cloudinary.com/dmboo1nu1/image/upload/v1779674762/ai-images/bdc3eymq5qnxtxlokvrv.png”,
“width”: 1200,
“height”: 630,
“caption”: “Modern Toronto kitchen with freshly refinished shaker-style cupboard doors in warm white”
},
{
“@type”: “ImageObject”,
“url”: “https://res.cloudinary.com/dmboo1nu1/image/upload/v1779674761/ai-images/b042cnpevgvgca9emprp.png”,
“width”: 1200,
“height”: 800,
“caption”: “HVLP spraying a cabinet door in a professional spray booth during kitchen cupboard refinishing”
},
{
“@type”: “ImageObject”,
“url”: “https://res.cloudinary.com/dmboo1nu1/image/upload/v1779674762/ai-images/ug2ejlpx1jxq4orqkezr.png”,
“width”: 1200,
“height”: 800,
“caption”: “Technician sanding cabinet doors on drying racks in a workshop before refinishing”
}
],
“mainEntityOfPage”: “https://paint2decor.com/blogs”,
“keywords”: [“kitchen cupboard refinishing”, “cabinet refacing”, “Toronto cabinet painting”, “kitchen cabinet painting”, “GTA”],
“description”: “Kitchen cupboard refinishing in Toronto and the GTA—process, finishes, and pro tips. Learn how Paint2decor INC delivers durable, furniture-grade results.”,
“speakable”: {
“@type”: “SpeakableSpecification”,
“cssSelector”: [“.featured-snippet-answer”, “.faq-answer”]
}
}
{
“@context”: “https://schema.org”,
“@type”: “ProfilePage”,
“mainEntity”: {
“@type”: “Person”,
“name”: “Masoud Kakar”,
“url”: “https://paint2decor.com/blogs”,
“description”: “Cabinetry refinishing specialist serving York and the Greater Toronto Area, focused on professional spraying and durable finishes for kitchens and bathrooms.”,
“sameAs”: [“https://paint2decor.com/blogs”],
“knowsAbout”: [“kitchen cupboard refinishing”, “cabinet spray painting”, “cabinet refacing”, “kitchen cabinet respraying”]
}
}
{
“@context”: “https://schema.org”,
“@type”: “FAQPage”,
“mainEntity”: [
{
“@type”: “Question”,
“name”: “How long does kitchen cupboard refinishing take?”,
“acceptedAnswer”: {
“@type”: “Answer”,
“text”: “Timelines vary by kitchen size and finish system, but projects are typically staged to limit downtime. Doors and drawers are finished in the shop while frames are handled on-site, so your kitchen remains usable in between steps.”
}
},
{
“@type”: “Question”,
“name”: “Can you refinish oak and reduce the visible grain?”,
“acceptedAnswer”: {
“@type”: “Answer”,
“text”: “Yes. We can fill and level open grain before priming to minimize texture, then spray topcoats for a modern, uniform look. Some homeowners choose to keep subtle grain for character; we’ll mock up both so you can compare.”
}
},
{
“@type”: “Question”,
“name”: “What finish is most durable for a busy family kitchen?”,
“acceptedAnswer”: {
“@type”: “Answer”,
“text”: “Catalyzed systems like 2K polyurethane deliver exceptional hardness for high-traffic zones, while premium waterborne enamels balance durability with low odor. We’ll recommend a system based on your home’s traffic patterns and ventilation preferences.”
}
},
{
“@type”: “Question”,
“name”: “When should I choose refacing instead of refinishing?”,
“acceptedAnswer”: {
“@type”: “Answer”,
“text”: “Choose refacing when you want a new door style or your current doors are damaged beyond repair. Your cabinet boxes remain, but doors and drawer fronts are replaced—often paired with a fresh finish on frames for a cohesive look.”
}
}
]
}