
Spraying cabinet doors is the controlled application of paint or coating to detached or hanging doors using a spray gun for a smooth, factory-like finish. In York, Toronto, this method modernizes kitchens fast with durable, even color. For many GTA homeowners, it outperforms brushing and rolling when done by specialists like Paint2decor INC.
By Paint2decor INC • Last updated: 2026-05-17
Quick Summary and Table of Contents
Choose between flat or hanging spraying based on your space, gear, and timeline. Flat spraying maximizes control and minimizes runs; hanging speeds production and edges. This guide explains prerequisites, pro steps, troubleshooting, and coatings—plus when GTA homeowners should hire Paint2decor INC for consistent, long-lasting results.
Use this at-a-glance roadmap to plan your project, compare methods, and avoid preventable redo work.
- What Is Spraying Cabinet Doors?
- Why It Matters for Toronto Homes
- How Spraying Works
- Flat vs Hanging: Which to Choose?
- Prerequisites
- Step-by-Step: Flat Spraying
- Step-by-Step: Hanging Spraying
- Best Practices
- Tools and Resources
- Troubleshooting
- Mini Case Studies (York & Toronto)
- Frequently Asked Questions
- Conclusion and Next Steps
What Is Spraying Cabinet Doors?
Spraying cabinet doors uses a spray gun to apply thin, even coats that level out to a uniform film. Compared with brushing, it delivers fewer brush marks, faster coverage, and better edge-to-edge consistency. The method relies on proper prep, controlled atomization, and measured drying windows for durable kitchen-grade finishes.
In plain terms, spraying replaces hand-applied texture with a smooth, automotive-style look on your kitchen or bathroom doors.
Core concepts you’ll work with include:
- Atomization: Breaking liquid into fine droplets for an even film build (target 2–3 mils dry film thickness).
- Flash time: Short interval (typically 5–15 minutes) before a second pass to avoid sags and solvent trap.
- Cure vs. dry: Dry-to-touch can be 30–90 minutes; full cure often runs 7–14 days depending on coating type and conditions.
For homeowners exploring options beyond replacement, see our kitchen cabinet spraying in Toronto page for where spraying fits in the broader makeover landscape.
Why Cabinet Door Spraying Matters for Toronto Homes
Sprayed finishes refresh dated cabinets quickly, resist everyday wear, and add real-home value across York and the Toronto metro. The approach pairs well with waterborne technology, improves indoor air quality, and supports fast turnarounds when kitchens need to stay functional during the week.
Here’s the thing—Toronto kitchens see heavy use. Families cook nightly, humidity swings with seasons, and cabinets take bumps daily. A leveled spray film resists micro-scratches better than many rolled films, and consistent edges around stiles and rails reduce moisture wicking near the sink.
- Durability: A controlled 2–3 coat system with scuff-sand between coats (P320) mitigates premature wear in high-touch zones.
- Speed: Typical recoat-ready windows: 30–60 minutes for many waterborne alkyds at 65–75°F and under 60% RH.
- Look: Low to satin sheens hide fingerprints; higher sheens amplify light in smaller Toronto condos.
Curious how spraying compares with brushing and rolling in real projects? Our professional cabinet painting overview details finish-level differences GTA homeowners notice immediately.
How Spraying Works: From Prep to Cure
A pro spray finish follows a repeatable loop: label and remove doors, deep clean and degrease, sand and repair, prime, spray two or more topcoats, and allow staged cure. Controlled temperature, humidity, and airflow keep leveling predictable and reduce dust nibs.
At a high level, expect this sequence for kitchen or bath doors:
- Label and detach: Number every door and hinge cup. Bag hardware. Photograph layouts. This avoids mix-ups later.
- Decontaminate: Clean with a degreaser; rinse until water sheets. Oils left behind cause fish-eyes during topcoat.
- Mechanical key: Sand 120/180, then finish at 220 on maple or oak. Clean dust with a 125-micron filter bag and vacuum.
- Prime: Bonding primer for factory laminates; stain-blocking shellac or hybrid primer on oak to reduce bleed.
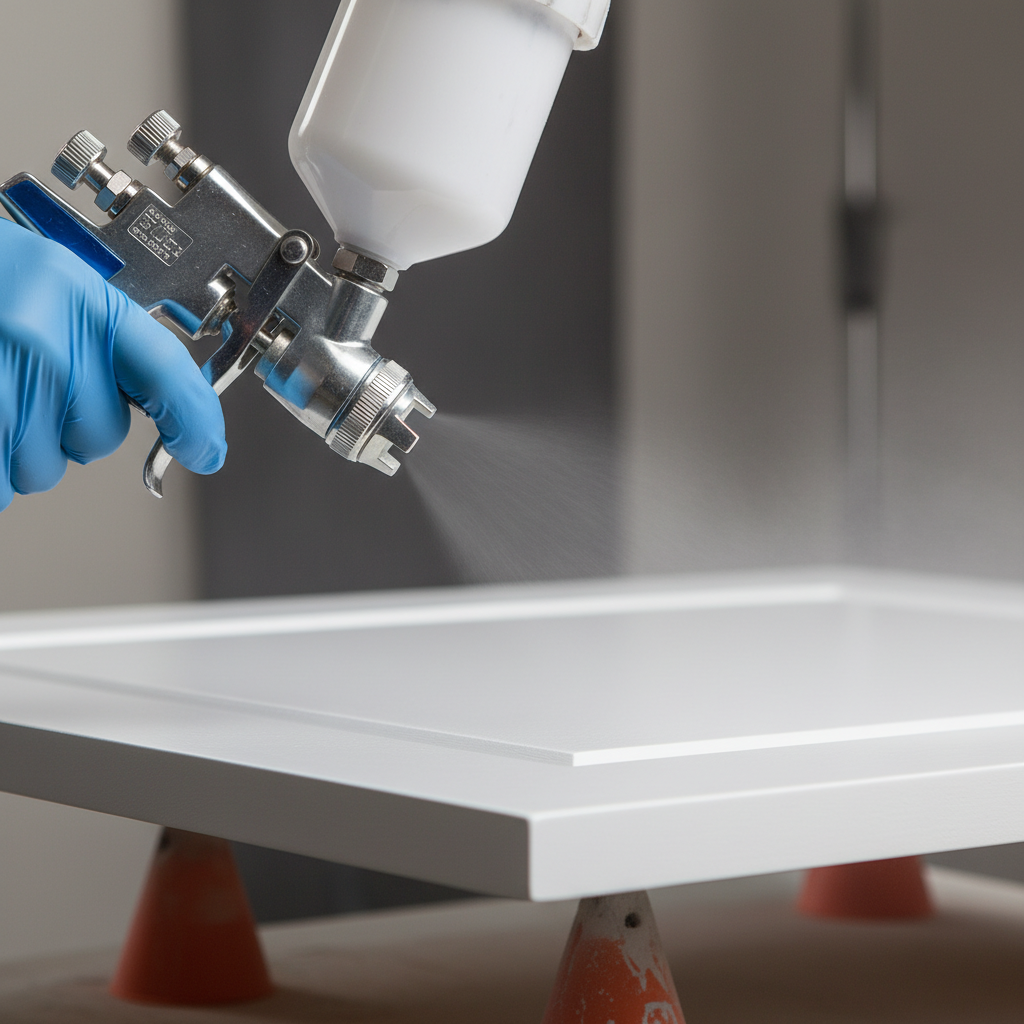
- Spray topcoats: 1–2 wet mils per pass with 50% overlap. Maintain 6–8 inches gun-to-surface distance at steady speed.
- Cure and handle: Stage on racks with adequate spacing; allow 24 hours before light handling, longer for full hardness.
To compare cabinet spraying to other makeover paths, check our complete respraying guide for the role of primers, film builds, and typical turnarounds.
Flat vs Hanging: Which Method Should You Choose?
Flat spraying minimizes runs and helps beginners nail smooth top surfaces; hanging accelerates throughput and speeds edge coverage. Pick flat if you’re new or want ultra-flat panels; pick hanging if you’ve got a dialed-in gun, adequate space, and a drying rack system.
Both methods can produce a premium finish. Your decision depends on space, gear, and comfort with gun control. Here’s a side-by-side.
| Criteria | Flat (Horizontal) | Hanging (Vertical) |
|---|---|---|
| Run Risk | Low due to gravity assist on leveling | Higher; requires tighter wet-mil control |
| Dust Nibs | Moderate; horizontal surfaces attract dust | Lower if booth airflow is well-managed |
| Edge Coverage | Requires deliberate edge passes | Natural; edges are fully exposed |
| Throughput | Slower; flip cycles add time | Faster; continuous pass to racks |
| Space Needs | Lower; table + pyramids is enough | Higher; hanging rails + drying area |
| Best For | Beginners, flat Shaker panels | Experienced sprayers, larger batches |
Tip: An HVLP with a 1.3–1.5 mm needle/nozzle excels for waterborne alkyds. Keep pressure in the 20–30 PSI range and maintain a 50% overlap pattern for consistent film build.
Considering professional help for a flawless, warrantied result? Our Toronto cabinet spraying service outlines how we set up rails, racks, and airflow to control temperature and RH.
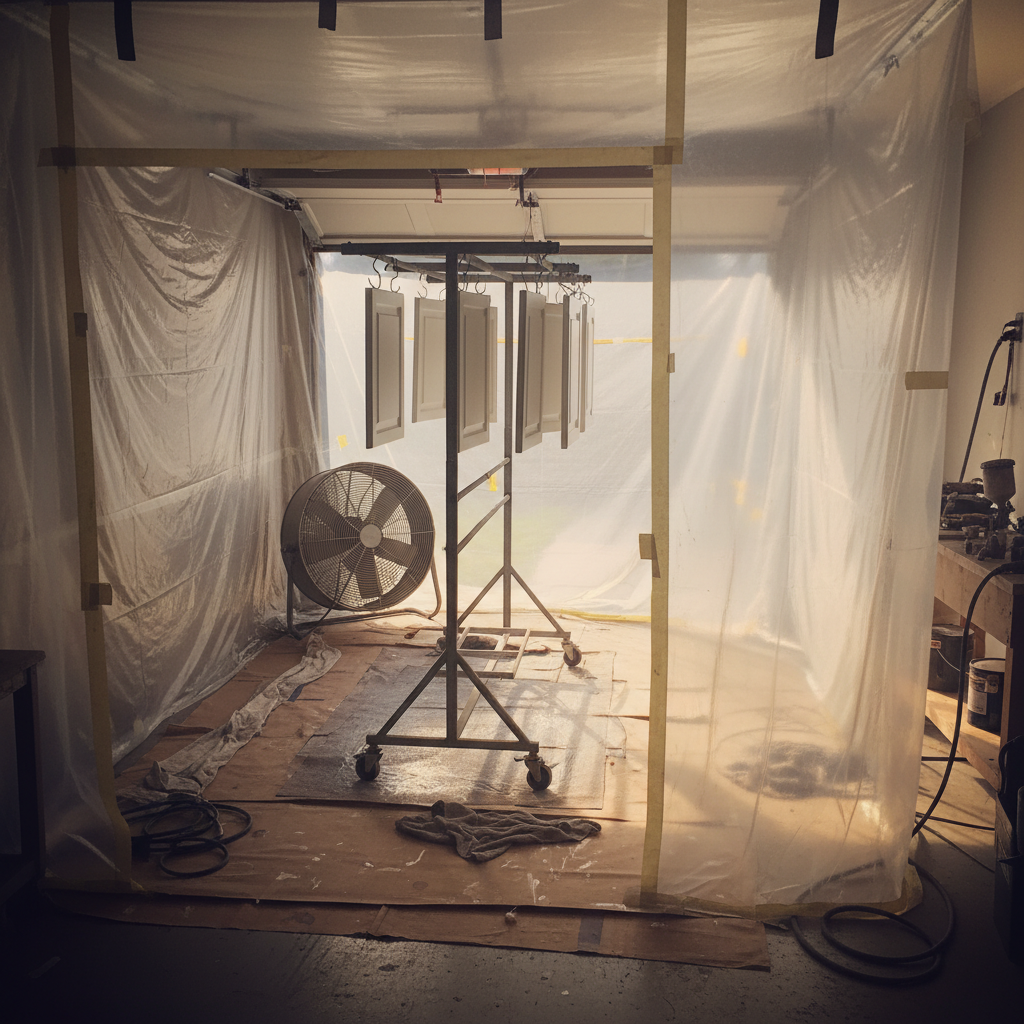
Prerequisites: Space, Safety, and Materials
Before spraying cabinet doors, secure a dust-controlled area, stable climate (60–80°F, under 60% RH), and proper PPE. Assemble degreasers, bonding primer, waterborne topcoat, P120–P320 abrasives, and 125-micron strainers. Set up rails or tables, masking, and exhaust for safe airflow.
Non-negotiables to line up in advance:
- Ventilation: Crossflow or downdraft. Position a box fan with MERV-rated filters for temporary setups.
- Surface prep: Degrease until water sheets, then scuff-sand. Residual oils cause fish-eyes and adhesion loss.
- Masking: Seal off kitchens with poly; pressure-fit zippers reduce dust migration to living spaces.
- PPE: NIOSH-approved respirator with organic vapor cartridges; gloves; eye protection.
- Lighting: 4000–5000K task lights reveal orange peel and holidays before they cure.
Local considerations for York
- Plan spray windows around humidity swings near Smythe Park; keep RH below 60% to avoid blushing in high-gloss coats.
- Winter projects in York run better with a preheated garage; target 65–75°F air and 60–70°F substrate before first coat.
- Protect foot traffic paths if family visits the Toronto Public Library – Daniel G. Hill Branch mid-day—fresh films mark under 24 hours.
For a deeper prep checklist we use in-house, see our cabinet refinishing preparation guide.
Step-by-Step: Flat Spraying Workflow
Flat spraying is ideal when you want ultra-smooth panels with minimal run risk. Work in thin passes, maintain a 50% overlap, and let panels level horizontally. Flip carefully after dry-to-touch and keep fingerprints off by staging on clean pyramids or pin stands.
- Set your table: Cover with Kraft paper; place painter’s pyramids 6–8 inches apart. This limits shadow lines on the back.
- Degrease and sand: Clean until water sheets; sand 120/180/220; vacuum thoroughly. Tack with lint-free cloths.
- Prime: Spray a bonding or stain-blocking primer. Aim for 1 wet mil per pass; flash 10–15 minutes between light coats.
- De-nib: After primer dries to sand, scuff P320. Wipe dust with a water-damp microfiber (wrung nearly dry).
- Topcoat 1: Lay a medium-wet coat. Keep 6–8 inches from the surface, 50% overlap, straight wrist, steady pace.
- Edges and rails: Pre-spray edges with a light pass to avoid dry edges on the face.
- Flash and inspect: At ~10 minutes, check for sags or misses. Correct now; don’t chase later after skin forms.
- Topcoat 2 (optional 3): Apply a second pass after 30–60 minutes, conditions permitting. Heavier-grain oak may benefit from a third coat.
- Cure: Stage on racks; allow 24 hours before gentle handling. Full cure typically reaches 7–14 days.
Planning a full-kitchen transformation? Our contractors’ painting guide explains how pros sequence doors, boxes, and trim to minimize downtime.
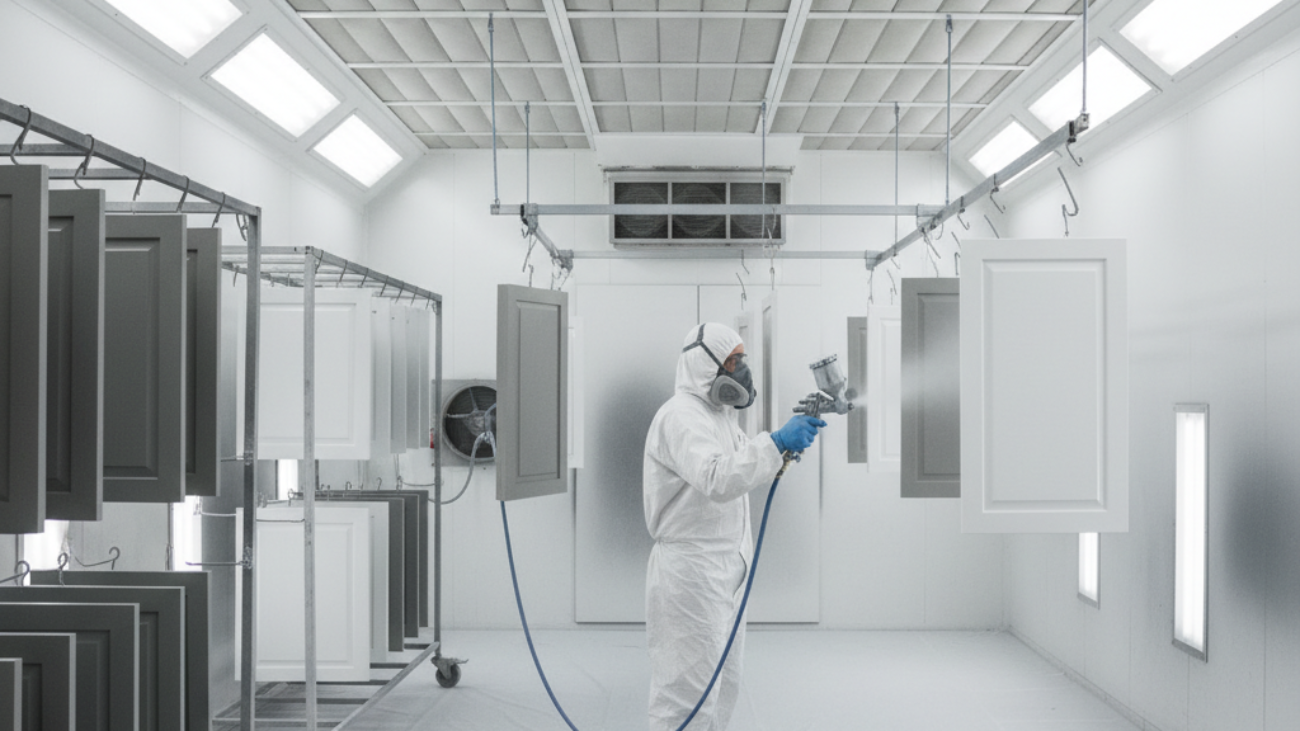
Step-by-Step: Hanging Spraying Workflow
Hanging speeds production with continuous passes and clean edge coverage. Use screw-in hooks or hinge-cup hangers, maintain gun distance, and rotate doors between coats. A rolling rack with 2–3 inches spacing keeps airflow moving and shortens drying cycles.
- Rig hangers: Use cup-mounted hooks or screw hooks in hinge holes. Balance weight so doors don’t spin mid-pass.
- Edge pass first: Light sweep around the perimeter, then spray the face with overlapping vertical passes.
- Rotate and rack: Move the door to a drying rail; keep 2–3 inches between doors for airflow.
- De-nib between coats: After 30–60 minutes, scuff lightly with P320. Wipe dust before the next coat.
- Final inspection: Backfill misses at hinge cups and edges. Avoid flooding inside profiles where sags start.
Need help setting up a safe, efficient spray area? Book a walkthrough via our professional kitchen cabinet painting page and ask about mobile rail systems we deploy in compact spaces.
Best Practices for Factory-Level Results
Consistency wins: control climate, filter coatings, and standardize gun setup. Target 20–30 PSI at the gun, 1.3–1.5 mm tips for waterborne alkyds, and 50% overlap. Keep RH under 60% and temperature 65–75°F during application to reduce orange peel and slow cure problems.
- Strain everything: Use 125-micron cones to remove skins; this cuts tip spitting and fisheyes.
- Gun motion: Start moving before you pull the trigger; release after passing the edge to avoid heavy lap lines.
- Sheen choice: Satin (30–40 GU) balances cleanability and glare in most kitchens.
- Profile strategy: Pre-spray inside profiles and corners with a lighter pass to avoid puddling.
- Box masking: Press-fit masking seals around openings to keep overspray off interiors.
If you’re comparing spray vs. replace, our cabinet refacing overview shows when swapping door styles makes more sense than repainting existing profiles.
Tools and Resources We Trust
The right kit prevents defects. An HVLP gun with 1.3–1.5 mm needle, quality compressor or turbine, painter’s pyramids, hanging rails, 125-micron strainers, and waterborne alkyd topcoat are core. Add bright task lights, vacuum with HEPA filters, and rolling racks for safe staging.
Core tools and materials to prepare:
- HVLP spray gun; 1.3–1.5 mm tip for waterborne finishes; 20–30 PSI at the gun.
- Bonding or hybrid primer, waterborne alkyd/urethane enamel topcoat.
- P120/P180/P220/P320 abrasives, sanding block, orbital sander with dust extraction.
- Painter’s pyramids or pin stands; screw hooks or cup hooks for hanging.
- Plastic sheeting, masking paper, MERV-rated filters, box fan for temp setups.
For an editorial overview of process considerations common to Canadian kitchens, this cabinet painting process overview covers planning steps and expectations. You can also explore kitchen hardware selection tips and modern door profile guides as you plan a cohesive makeover.
When you’re ready for a quote or a pro walkthrough, our spraying service page outlines scheduling and preparation.
Troubleshooting: Fixing Common Spray Issues
Most spray defects trace back to prep, viscosity, or climate. Runs mean you’re too wet; orange peel points to high viscosity or low atomization; fish-eyes signal contamination. De-nib, adjust gun settings, and recoat within the manufacturer’s recoat window for seamless fixes.
Common problems and proven fixes
- Runs or sags: Let cure until firm, then razor-scrape high spots and sand P600 before a light re-spray.
- Orange peel texture: Add small amounts of water/compatible reducer; increase atomization; move slightly slower to let the film level.
- Dry spray or rough feel: You’re too far from the surface or moving too fast. Decrease distance to 6–8 inches.
- Fish-eyes (craters): Caused by silicone or oil. Stop, deep clean, spot-prime, and recoat.
- Grain telegraphing on oak: Use a high-build primer; consider a pore-filler pass before topcoat for glassy results.
- Tannin bleed: Switch to a stain-blocking primer; lighten initial coats.
Keep a log of PSI, tip size, room/temp conditions (RH %, °F), and flash times. Small, consistent adjustments raise your yield of perfect doors from “most” to “nearly all.”
Mini Case Studies from York and Toronto Kitchens
Real homes prove the process. Across York and greater Toronto, we’ve converted dated oak and maple sets into smooth, durable, spray-finished kitchens. Standardized prep, controlled spray technique, and patient curing deliver repeatable results that still look fresh years later.
York semi-detached: oak to satin white
A family near St. Clair West wanted brighter light and easier cleaning. We degreased, pore-filled visible oak grain, primed with a hybrid system, and sprayed satin waterborne enamel. Doors staged on rolling racks cured 48 hours before rehang. The leveled satin sheen cut visible grain by an estimated 60–70%.
Toronto condo: flat-panel refresh
In a compact condo kitchen, hanging rails maximized throughput. We sprayed edges first, then faces, keeping 2–3 inches spacing on racks. Recoat windows ran ~45 minutes at 70°F and 50% RH. The result: a uniform semi-matte finish that reflected light without glare.
For similar upgrades, see how we treat classic materials in our oak cabinet update guide.
Free walkthrough: If you’re in Toronto or nearby, we can map an efficient spray setup for your home and timeline. Start here: request a spraying assessment.
Frequently Asked Questions
These quick answers cover the most common questions GTA homeowners ask about spraying cabinet doors—methods, timelines, durability, and when to call a specialist.
Is spraying cabinet doors better than brushing and rolling?
Spraying delivers a smoother, more uniform film with fewer marks, especially on large, flat doors. It also speeds edge coverage and can shorten project timelines. Brushing and rolling still work, but sprayed finishes typically look closer to factory coatings when prep and climate are controlled.
Should I spray doors flat or hanging?
Spray flat if you’re newer to HVLP or want maximum control against runs. Choose hanging when you need speed, great edge coverage, and have room for rails and racks. Both can achieve a premium finish with the right tip, viscosity, and overlap pattern.
How long before I can rehang cabinet doors?
Many waterborne enamels are recoat-ready in 30–60 minutes and can be handled lightly after 24 hours. For best durability, let doors cure several days before heavy use and avoid aggressive cleaning until full cure, often 7–14 days depending on conditions and the coating system.
What coatings work best for kitchens?
Hybrid waterborne alkyd or urethane-modified enamels balance hardness with low odor. Pair them with the right bonding or stain-blocking primer and proper scuff-sanding between coats. This system resists moisture, food oils, and frequent cleaning typical of busy Toronto kitchens.
Can I spray in my garage safely?
Yes, with containment and airflow. Use plastic sheeting to isolate the area, filtered fans for exhaust, and wear proper respirators. Maintain 65–75°F and RH under 60% to help leveling and drying. Keep ignition sources away and ensure you’re following local safety guidelines.
Conclusion and Next Steps
Flat or hanging both produce excellent results when prep, climate, and technique align. Choose flat for maximum control; choose hanging for speed and edges. If you want a warrantied, factory-like finish without the learning curve, schedule Paint2decor INC for your Toronto kitchen.
- Key Takeaways
- Flat = control; Hanging = speed. Both demand climate control and clean prep.
- Waterborne alkyd systems with proper primers deliver durable, low-odor results.
- Track PSI, tip size, RH, and flash times; small tweaks prevent major rework.
- Use P120–P320 sanding steps and de-nib between coats for a glassy film.
Ready to modernize your kitchen with a professional spray finish? Book a local assessment from our York base at 2710 St Clair Ave W—serving Toronto and the GTA.