
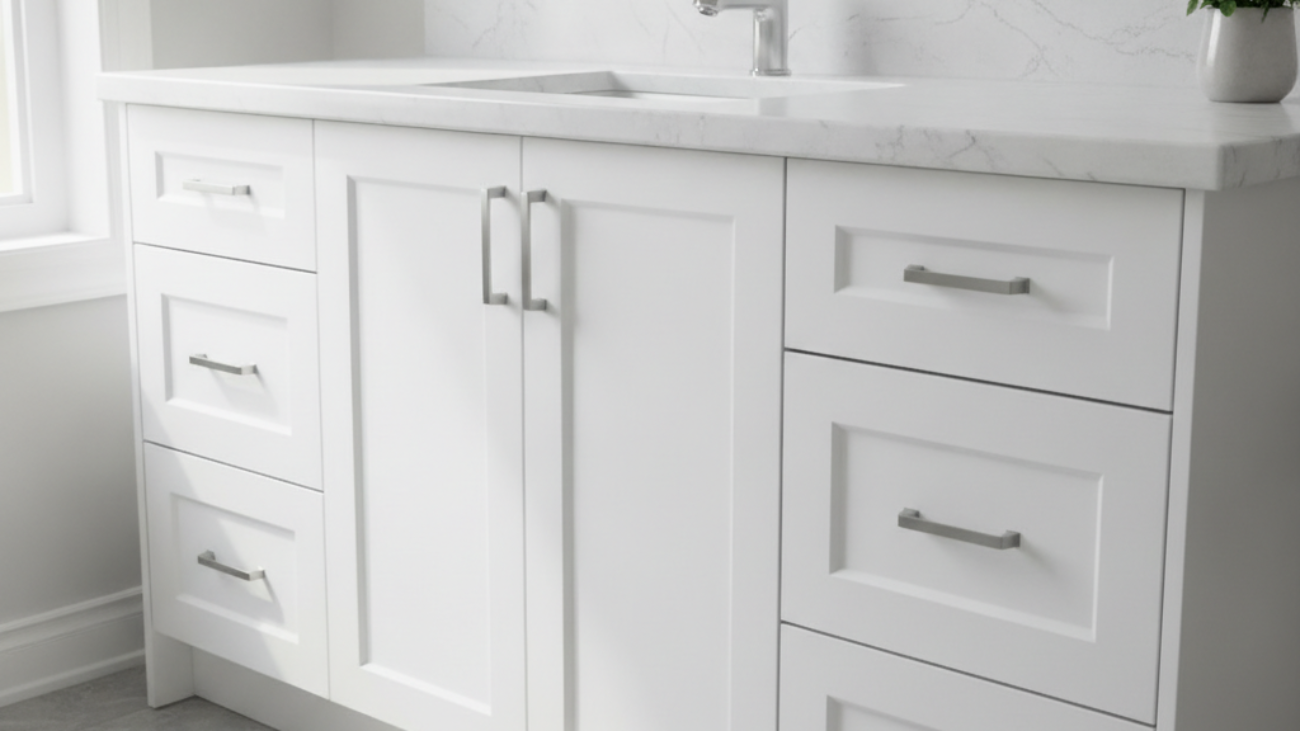
Toronto bathroom vanity painting cost factors include size, material, existing finish, prep complexity, hardware changes, finish system, and job access. In York, humidity control and building rules can add steps. Prioritizing surface prep and durable coatings keeps long-term value high while preventing rework and disruption.
By Paint2decor INC • Last updated: 2026-07-06
Quick Summary
Bathroom vanity painting refreshes cabinet surfaces with a durable coating after cleaning, repair, sanding, priming, and finishing. Results hinge on prep quality, materials, and environment. In Toronto, moisture and tight spaces shape workflow; choosing pro-grade products and methodical steps preserves finish longevity and minimizes future maintenance.
Paint2decor INC helps Toronto and York homeowners modernize bathrooms without replacement. This quick snapshot outlines what you’ll learn in this complete guide and how to use it for a smoother project from day one.
- Understand what bathroom vanity painting entails versus refinishing and refacing.
- See the real-world Toronto bathroom vanity painting cost factors that affect scope.
- Follow a step-by-step process with prep, primers, finishes, and curing windows.
- Compare methods in a handy table (refinish vs reface vs replace).
- Apply seven proven, low-effort ways to keep costs under control.
- Use local insights for York homes, including moisture and condo considerations.
What Is Bathroom Vanity Painting?
Bathroom vanity painting is a controlled refinishing process that cleans, repairs, sands, primes, and topcoats cabinet components to create a smooth, durable new finish. The aim is a factory-like look with pro-grade adhesion and moisture resistance—without replacing boxes, plumbing, or countertops.
In our experience across the GTA, the best results come from process discipline. Bathrooms compress the margin for error: tight rooms, frequent moisture, and daily wear. A repeatable approach keeps projects clean, predictable, and long-lasting.
- Scope: Doors, drawer fronts, face frames, exposed sides, and toe kicks.
- Prep tasks: Degrease, sand (often 120–220 grit sequences), repair dings, and spot-fill.
- Adhesion system: Bonding primer matched to the substrate (maple, oak, MDF, thermofoil).
- Finish options: Cabinet-grade enamel or 2K systems in satin, matte, or semi-gloss.
- Cure window: Tack-free in hours; functional use in days; full cure often 7–30 days.
For Toronto homeowners weighing alternatives, painting a sound vanity is typically more cost-effective than replacement and less invasive than refacing. It’s a smart middle path when the layout, boxes, and countertop still work well.
Why Vanity Painting Cost Factors Matter in Toronto
Understanding cost drivers helps you scope efficiently, plan around moisture and access constraints, and select durable finishes. Toronto bathrooms vary widely in size and substrate; aligning prep, products, and schedule to these conditions prevents callbacks and extends finish life.
Here’s why this matters. Bathrooms see steam, splashes, and constant touch. Toronto’s seasonal humidity swings challenge adhesion and cure times. Small York bathrooms can be tricky to ventilate during coating and drying, so staging and sequencing protect both results and household routines.
- Moisture exposure impacts primer choice, sheen selection, and cure timing.
- Substrate mix (solid wood, veneer, MDF, or thermofoil) dictates prep rigor.
- Room access and masking complexity add setup and protection steps.
- Finish durability correlates with film build, chemistry, and cure management.
- Coordination with tile, plumbing, and caulking avoids double work.
When we manage these details up front, homeowners get a smoother project and a finish that stands up to daily use—valuable in busy family baths and compact condo ensuites alike.
Toronto Bathroom Vanity Painting Cost Factors
Key cost factors include vanity size and part count, substrate condition, prep complexity, hardware changes, finish system, jobsite access, and scheduling. Clarifying these up front lets your contractor stage work efficiently and recommend coatings that balance durability, look, and maintenance.
Toronto bathroom vanity painting cost factors usually fall into seven buckets. Each one influences scope, timeline, and the level of protection your vanity needs to thrive in a damp environment.
- Size and part count: More doors, drawers, and panels mean more prep and coating passes.
- Material and condition: MDF vs. solid wood vs. veneer, plus dents, chips, and water damage.
- Existing finish: Factory lacquer, oil, polyurethane, or thermofoil affect adhesion prep.
- Hardware changes: New pulls/handles, hinge moves, and hole-filling add steps.
- Finish chemistry: Single-component enamels vs. hard-curing 2K systems for moisture defense.
- Access and masking: Tight rooms, countertop protection, and ventilation setup.
- Scheduling and dependencies: Tile, plumbing, and caulking order of operations.
Action step: Ask for a written scope that lists components, prep steps, primer type, finish system, film build, and cure guidance. That single page aligns expectations and protects your result.
How Bathroom Vanity Painting Works (Step-by-Step)
A professional workflow removes doors and hardware, degreases, sands, primes, and applies multiple controlled finish coats. Proper masking, ventilation, and cure windows ensure a smooth, resilient surface that resists moisture and daily wear in Toronto bathrooms.
- Assessment and labeling: Inventory parts; label doors/drawers; note substrate and damage.
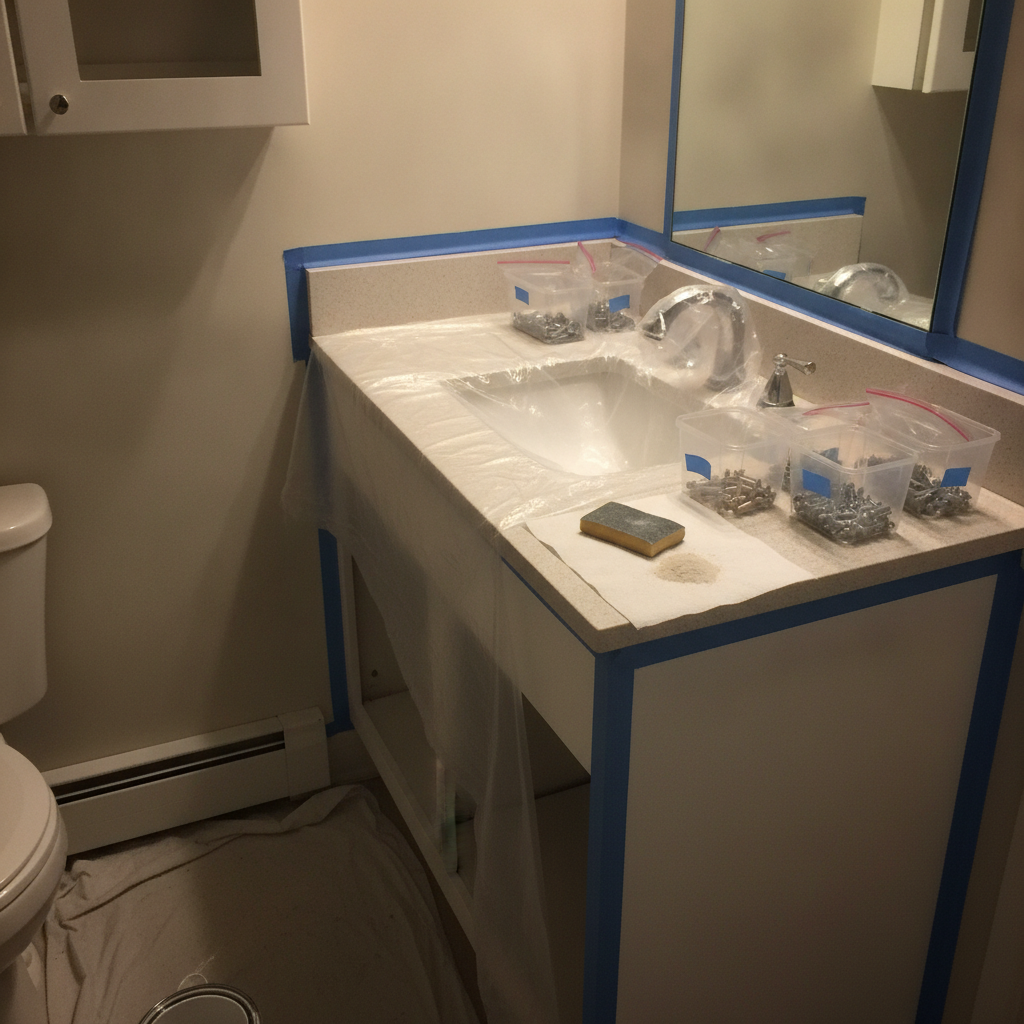
- Hardware removal: Bag and label hinges, screws, and pulls for clean reassembly.
- Degreasing: Remove soap film, hairspray, and residues for primer bite.
- Sanding: Typical 120–150 grit to knock down sheen; 180–220 grit to smooth repairs.
- Repairs: Fill dings; sand flush; spot-prime exposed areas.
- Masking: Protect countertop, walls, sink, and floor; isolate with plastic and tape.
- Priming: Use a bonding primer matched to the existing coating and substrate.
- Finish coats: Apply 2–3 controlled coats for uniform color and protection.
- Cure and reassembly: Allow staged cure; reinstall hardware; adjust doors.
Plan on ventilation support during coating and the first 24–48 hours of cure. Gentle use is fine after initial set; full hardness typically develops over several weeks.
Types of Paints and Finishes for Vanities
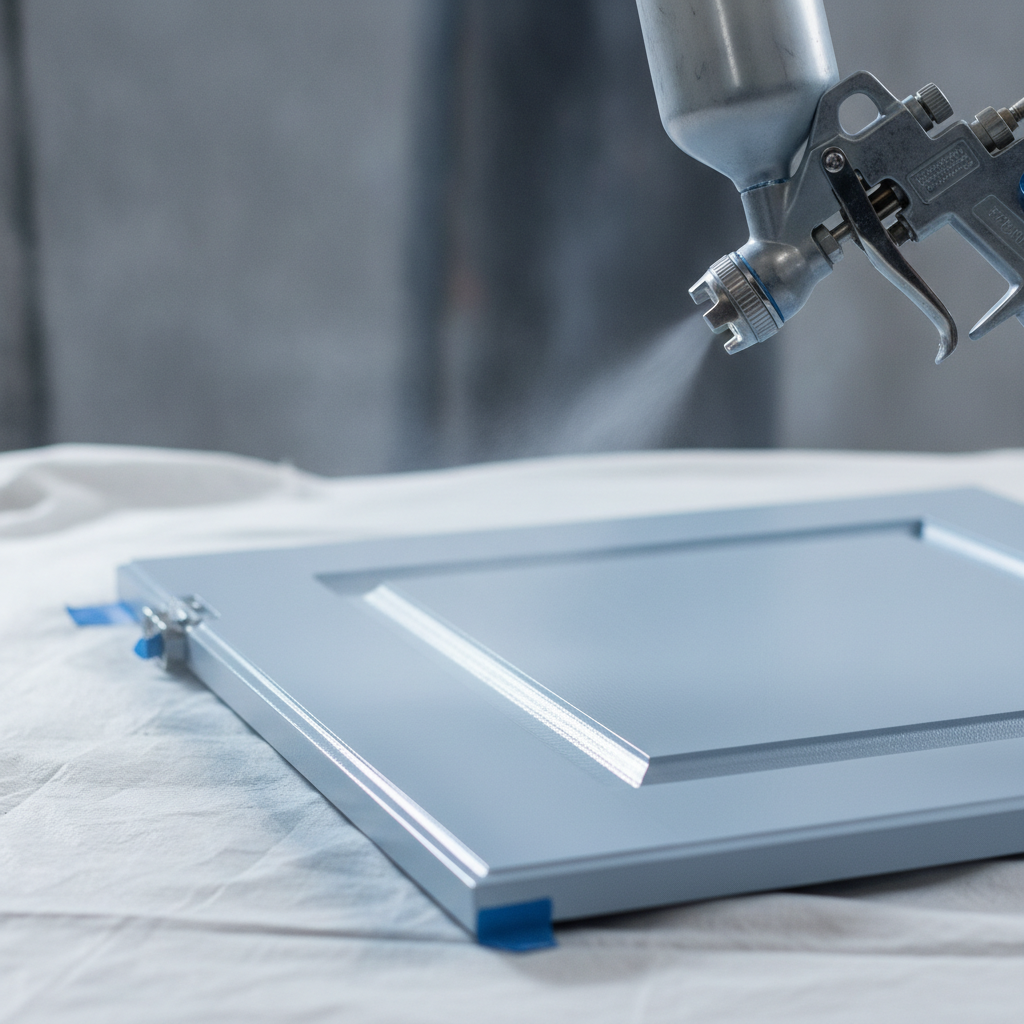
Cabinet-grade waterborne enamels and 2K catalyzed systems are common for bathroom vanities. Choose a satin or matte sheen for fingerprints and touch-ups; specify primers and film build appropriate for MDF, wood, or veneer to prevent swelling and edge telegraphing.
Finish chemistry matters in humid rooms. Not all “bathroom paints” are cabinet-ready; box-store wall paints scuff easily on doors and drawers. A dedicated cabinet system protects high-touch edges and resists cleaning.
- Waterborne enamel systems: Low odor, fast recoat, and durable once fully cured.
- 2K catalyzed systems: Hard-curing, excellent chemical and moisture resistance.
- Bonding primers: Essential over glossy lacquers, MDF edges, or thermofoil repairs.
- Sheens: Satin and matte hide minor wear; semi-gloss reflects more but shows flaws.
- Color: Light neutrals brighten small baths; deeper tones need disciplined prep.
Want a deeper dive into finish durability and project planning? See our bathroom cabinet refinishing guide for substrate-specific tips and sequencing.
The 7 Ways to Keep Costs Low (Without Cutting Corners)
Control vanity painting costs by narrowing scope, standardizing colors and hardware, improving access, choosing the right finish system, and coordinating trades. Smart prep and staging reduce hours while preserving durability and a factory-like look.
- Edit the scope: Paint only visible faces; skip backs unless they’re exposed.
- Standardize color: Choose an in-range neutral to simplify matching and touch-ups.
- Pre-select hardware: Keep hole spacing to avoid patching and re-drilling.
- Clear the room: Empty vanities and remove counter clutter for faster masking.
- Improve ventilation: A small fan and cracked window accelerate safe dry times.
- Bundle light repairs: Tackle minor caulking and edge fills during prep.
- Schedule smart: Sequence around tile and plumbing to avoid return visits.
We apply this playbook daily across Toronto. It keeps timelines tight and finish quality high—especially helpful for busy family bathrooms that can’t be down for long.
Free expert assessment: Thinking about painting your vanity in York? Share a few photos and the substrate info, and we’ll outline a right-sized scope, primer/finish pairing, and a clean installation plan.
Refinish vs. Reface vs. Replace (Comparison)
Refinishing (painting) updates color and protection on existing boxes and doors. Refacing swaps doors/veneers while keeping boxes. Replacement rebuilds everything. Choose based on box condition, layout needs, countertop plans, and desired finish complexity—without anchoring to price alone.
| Method | What Changes | Disruption | Timeline (typical) | Best For |
|---|---|---|---|---|
| Refinish (Paint) | Color/finish on existing components | Low | Several days including cure stage | Sound boxes, good layout |
| Reface | New doors/drawer fronts, applied panels | Medium | About 1–2 weeks including fabrication | Worn doors, keep footprint |
| Replace | New boxes, doors, and often tops | High | Multiple weeks including trades | Layout changes or damaged boxes |
For a deeper comparison tailored to bathrooms, start with our refinishing and scope overview and then skim our professional vs. DIY guide for workflow realities in small spaces.
Best Practices for Durability and Value
Durable vanity finishes start with clean substrates, controlled sanding, matched primers, and measured film build. Manage humidity under 50%, protect edges, and allow staged cure. These practices minimize touch-ups and extend service life in busy Toronto bathrooms.
- Moisture control: Use exhaust fans during showers and early cure; crack windows when safe.
- Edge discipline: MDF edges need extra sealing to avoid swelling and fuzzing.
- Hardware handling: Felt bumpers and soft-close hinges cut impact wear.
- Cleaning habits: Mild soap and water; avoid harsh solvents in the first month.
- Touch-up kit: Keep a labeled jar of finish for future nicks and scrapes.
We’ve found that a satin cabinet enamel with a compatible bonding primer gives a great balance of cleanability and subtle sheen for family bathrooms.
Tools, Materials, and Resources
Essential tools include degreasers, sanding blocks (120–220 grit), HEPA vacuuming, bonding primer, and cabinet-grade enamel. For sprayed finishes, an HVLP gun with a 1.3–1.5 mm tip delivers a smooth film; roll-and-tip workflows use fine microfiber rollers and quality brushes.
- Prep: Degreaser, scraper, filler, caulk, 120–220 grit papers, tack cloths.
- Protection: Masking paper/plastic, delicate-surface tape, drop cloths.
- Application: HVLP turbine or compressor rig; alternatively, 4–6 mm microfiber rollers and angled sash brush.
- Safety: Respirator for spraying, eye protection, and ventilation support.
For style planning, this 2026 vanity trends overview can spark color and hardware ideas for Toronto homes. When coordinating broader work, a general painting cost guide offers useful budgeting frameworks, though your scope will be unique.
Case Studies: York and Toronto Mini Projects
In compact Toronto bathrooms, results depend on sequencing, ventilation, and substrate-specific prep. These brief project snapshots show how aligning scope and materials delivers a factory-like look without removing boxes or tops.
York bungalow, maple vanity
- Challenge: Maple doors with worn clear-coat near the sink and dinged edges.
- Approach: Degrease, sand to 180–220, spot prime, bonding prime, and enamel in satin.
- Outcome: Smooth edges, consistent color, and easier cleaning around the faucet area.
Condo ensuite, MDF shaker
- Challenge: MDF edges telegraphing through old paint; low ventilation window.
- Approach: Edge sealing, bonding primer, thin controlled coats, and portable fan assist.
- Outcome: Even profiles and finger-print resistant satin sheen suitable for daily use.
Family bath, veneer slab fronts
- Challenge: Hair product overspray and soap film reducing adhesion.
- Approach: Intensive degrease, scuff-sand, stain-blocking spot prime, enamel topcoats.
- Outcome: Clean, uniform surface with improved resistance to routine wipe-downs.
Considering a full bathroom update? Coordinate vanity work with tile to avoid re-masking. This practical note from a tile installation planning guide reinforces sequencing first, budgeting second.
Planning and Local Insights for York
York bathrooms often run compact with limited windows. Plan for portable ventilation, considerate work hours, and neat staging. Pre-select colors and hardware, and clear pathways; these small steps reduce setup time and help achieve a cleaner finish in tight rooms.
Local considerations for York
- Use nearby outdoor space like Smythe Park for brief ventilation breaks during early cure when weather allows—helpful for homes with limited window airflow.
- Plan weekend work carefully if you’re near the Toronto Public Library – Daniel G. Hill Branch; traffic and parking patterns can shift local access windows.
- In small baths, stage parts and hardware in labeled containers; this speeds reassembly and reduces on-site clutter for York homes with narrow hallways.
For more on process planning, review our bathroom cabinet repainting overview and substrate-specific refinishing guide for Toronto.
Frequently Asked Questions
Homeowners often ask about timelines, durability, color changes, and coordination with other trades. These concise answers cover the essentials for planning a smooth York or Toronto bathroom vanity repaint without surprises or downtime.
How long does bathroom vanity painting take?
Most projects run several days from prep to finish, plus a staged cure. Doors and drawers can be reinstalled for gentle use within days, while full hardness typically develops over a few weeks depending on the finish system and home humidity.
Will paint stick to MDF or thermofoil vanities?
Yes—when the surface is properly prepped. MDF edges need sealing, and any failed thermofoil should be removed or repaired before priming. A compatible bonding primer followed by cabinet-grade enamel or a 2K system delivers durable adhesion.
What sheen works best in a family bathroom?
Satin is a popular sweet spot: it resists fingerprints, cleans easily, and looks soft in natural light. Matte hides minor imperfections but marks more easily, while semi-gloss pops details but can reveal surface flaws if prep is rushed.
Can I use the vanity during curing?
You can usually resume light use after initial set, but avoid heavy cleaning and impacts until the coating reaches full cure. Good ventilation and gentle handling in the first days help the finish harden evenly and last longer.
Key Takeaways
Define scope, match primers and finishes to your substrate, and manage humidity and ventilation. In Toronto bathrooms, tight spaces and moisture drive prep rigor; staging, hardware planning, and smart scheduling keep your project efficient and your finish durable.
- Toronto bathroom vanity painting cost factors revolve around size, substrate, prep, finish, access, and scheduling.
- Durability depends on clean surfaces, bonding primers, and controlled film build.
- Seven simple planning moves cut friction without sacrificing quality.
- Coordinate with tile and plumbing to avoid unnecessary return visits.
Conclusion and Next Steps
A great bathroom vanity repaint balances disciplined prep, substrate-matched primers, and finishes built for humidity. Clarify scope, set ventilation, and sequence with other trades to protect timelines. In York, small-room staging pays off in cleaner results and less downtime.
Ready to modernize your vanity with a factory-like finish? Explore our bathroom refinishing guide, then request a free assessment. We refinish, repaint, respray, and reface bathroom and kitchen cabinetry across Toronto and the GTA—award-recognized quality with local expertise.
Book a discovery session in York: Share photos, materials, and a preferred timeline. We’ll suggest a right-sized scope and a clean, low-disruption plan.