
Refacing kitchen cabinets cost factors center on scope, materials, and craftsmanship—not a fixed price tag. For York and Toronto homes, Paint2decor INC evaluates door count, layout complexity, and finish choices at 2710 St Clair Ave W to guide a smart, value-first plan. This guide explains what actually drives investment without listing prices.
By Paint2decor INC • Last updated: May 11, 2026
Above-Fold Section
Cabinet refacing replaces doors and drawer fronts while updating the cabinet face frames, leaving boxes in place. The biggest cost drivers are your kitchen’s size, door style and finish, hardware upgrades, and site prep. In Toronto homes, most projects follow a predictable workflow that controls disruption and maximizes visible impact.
Here’s the thing: most homeowners ask “What will it cost?” before asking “What will it change?” Refacing focuses your budget on what you see and touch every day. You get new doors, new drawer fronts, upgraded hinges, and a coordinated face—without tearing out sound cabinet boxes.
- What you’ll learn: factors that shape refacing value, how refacing compares to refinishing and replacement, and how timelines work in real Toronto kitchens.
- Who it’s for: York and GTA homeowners weighing a fast, low-disruption update versus a full gut renovation.
- Why Paint2decor: GTA cabinetry specialists focused on refinishing, refacing, painting, and respraying—recognized on HomeStars for quality and service.
Quick Summary
Refacing delivers a new-door look with existing boxes, emphasizing visible surfaces and hardware. Value depends on door count, layout, materials, and prep quality. For Toronto kitchens, it’s often faster than replacement and more transformative than repainting alone, especially when paired with durable spray finishes and soft-close hardware.
- Refacing = new doors + updated faces: Boxes stay; doors, drawer fronts, and trims change.
- Timelines: Typically completed in under two weeks in lived-in homes, with most off-site spray work staged for minimal downtime.
- Finish durability: Professional spray systems and proper prep outperform quick brush/roller jobs for daily use.
- Local specialists: Our Toronto refacing service prioritizes clean prep, precise spraying, and careful installation.
Local considerations for York
- Plan around building access and parking near Jane St at St Clair Ave West to streamline pick-up/drop-off of doors for off-site spraying.
- During winter, allow extra curing time for sprayed finishes when moving doors to and from workshops; temperature and humidity matter.
- Condos and tight-row homes in York benefit from dust-controlled on-site prep and consolidation of installation windows to limit elevator bookings.
What Is Cabinet Refacing?
Cabinet refacing is a makeover method that replaces doors and drawer fronts, updates hinges and hardware, and covers visible face frames to match—while the cabinet boxes remain. It delivers a “new kitchen door” aesthetic with less demolition, predictable timelines, and strong finish options when professionally sprayed.
Think of your cabinets in two layers: structure (the box) and skin (the surfaces you see). Refacing transforms the skin. That means:
- Replacement of touchpoints: New doors and drawer fronts in your chosen style (e.g., Shaker, slab, applied molding).
- Face frame updates: Matching veneer or paint on frames, end panels, and trims for a unified look.
- Hardware upgrades: Soft-close hinges, updated pulls/knobs, and alignment for smooth, consistent operation.
- Finish alignment: Professional spray-applied coatings create a continuous, durable surface tone across all components.
What refacing does not do: move plumbing, rewire, or reconfigure your layout. If you want to relocate appliances or extend cabinetry, that’s a different scope. But when boxes are solid and the layout works, refacing concentrates effort where it counts—on style, feel, and daily-use details.
Why Refacing Matters for York & Toronto Homes
In York and the wider Toronto market, refacing balances speed, disruption control, and design impact. When cabinet boxes are sound, changing doors, faces, and hardware modernizes the room faster than replacement and with a crisper transformation than repainting alone, especially with professional spray systems.
We’ve helped many families near Smythe Park refresh kitchens that still had sturdy maple or oak boxes. The common thread:
- Solid structure: If your boxes are plumb and secure, keep them. The “shell” does the heavy lifting.
- Style shift: Door style, rail widths, and edge profiles redefine the kitchen’s personality in one move.
- Daily-use gains: Soft-close hinges and better hardware spacing improve function every single day.
- Workflow fit: Off-site spraying reduces household downtime. On-site install windows are condensed and predictable.
Here’s why it matters: kitchens serve hard-working hours. A targeted update that respects your schedule and improves function—without a full teardown—protects your routine and updates resale appeal.
How Cabinet Refacing Works (Step-by-Step)
Refacing follows a defined sequence: evaluate boxes, select doors and finishes, remove and label, prepare frames, spray doors off-site, update hardware, and install. Staging off-site spray work keeps your kitchen usable while enabling a fine, durable finish on doors and drawer fronts.
- Assessment and planning: Confirm cabinet box integrity and layout; count doors/drawers and note accessories (panels, valances, toe-kicks).
- Style and finish selection: Choose door profile, edge details, sheen level, and color system to align with lighting and countertop tones.
- Removal and labeling: Doors/drawers are removed, cataloged, and transported for off-site prep and spraying.
- On-site frame prep: Clean, degloss, minor repairs, and precise masking to protect counters, floors, and appliances.
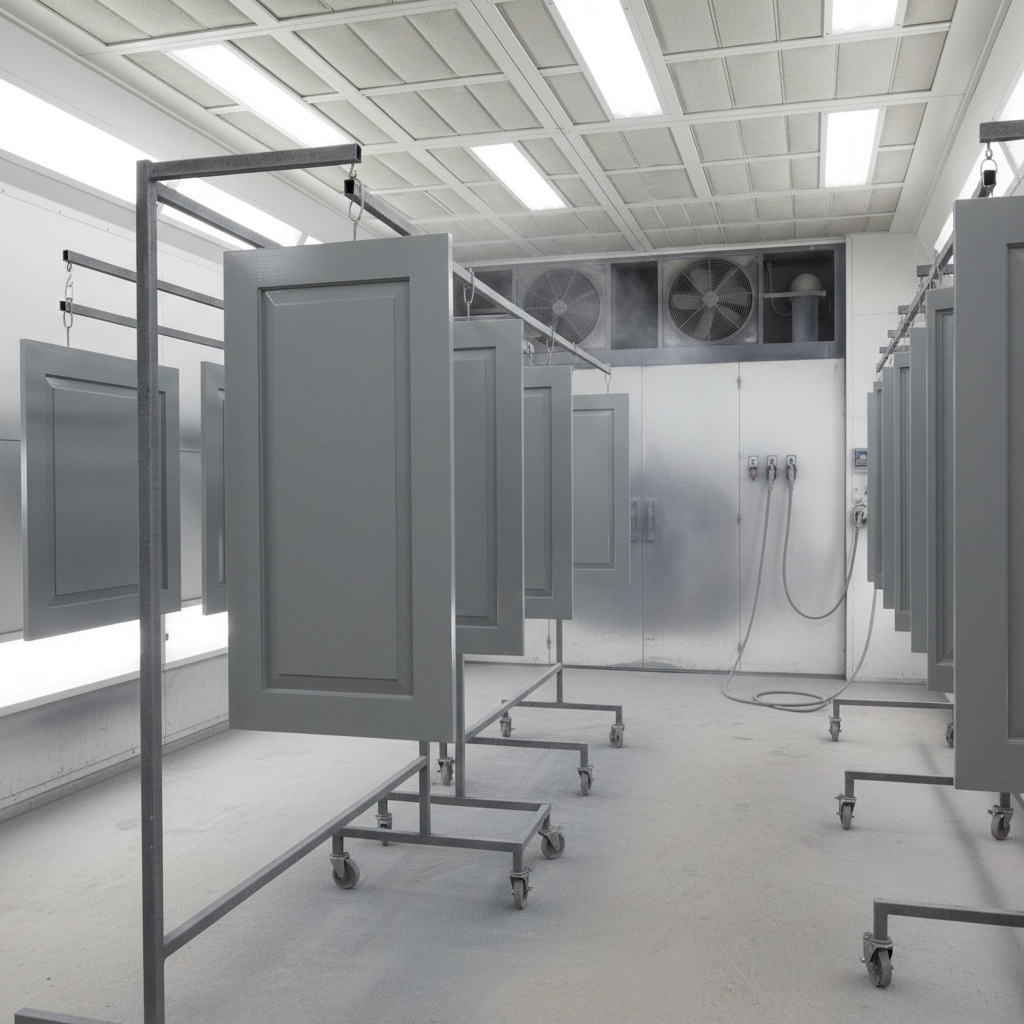
- Off-site spraying: Doors and drawer fronts receive the full coating system in a controlled environment for consistency.
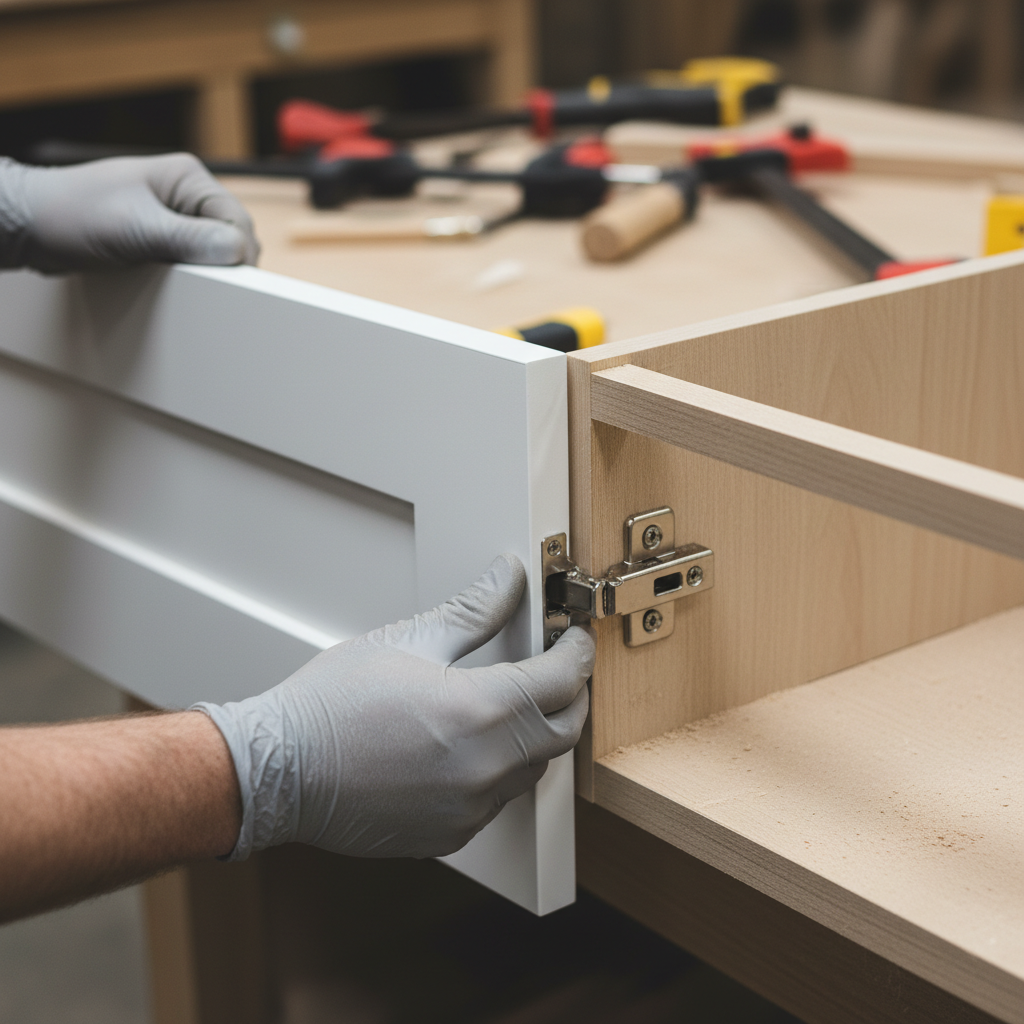
- Hardware upgrades: Soft-close hinges aligned to new doors; pulls/knobs centered and leveled to your grip style.
- Installation and alignment: Rehang, adjust reveals, and check swing, closures, and spacing across the entire run.
In our experience across Toronto projects, refacing work typically involves two focused on-site windows: one for frame prep and one for installation. The spray phase occurs off-site, which allows coatings to cure under stable conditions and reduces disruption at home.
For a deeper walkthrough of contractor coordination, see our refacing contractors guide. If you’re earlier in the decision tree and comparing surface updates, our professional cabinet painting overview explains where simple repainting can make sense.
Types & Methods: Doors, Veneers, and Finishes
Refacing choices span door styles (Shaker, slab, raised-panel), veneers or painted face frames, and finish systems. The right pairing depends on your lighting, countertop color, and how you cook and clean. Professional spray finishes, matched to door material, achieve the most uniform result.
Door and drawer front options
- Shaker: Versatile, modern-classic lines that pair with quartz and natural wood accents.
- Slab: Minimalist, easy-wipe surfaces ideal for streamlined condos and compact kitchens.
- Raised panel: Traditional depth; pairs well with crown and decorative end panels.
Face frames and panels
- Painted faces: Seamless when boxes are smooth and square; ideal with new painted doors.
- Veneered faces: Woodgrain options to coordinate with stained or specialty-finished doors.
- Trim integration: Light rails, valances, toe-kicks, and filler pieces complete the visual continuity.
Finish systems and sheen
- Spray-applied coatings: Consistent film build and smoothness compared to brush/roller approaches.
- Sheen selection: Satin or matte helps conceal micro-scuffs; higher sheen highlights profiles and light bounce.
- Color strategy: Test chips in daylight and under task lighting; neutrals shift warmth with bulb temperature.
Curious about repainting-only projects? Our refinishing guide for Toronto describes when repainting alone is appropriate and where refacing adds more design leverage.
Refacing vs. Refinishing vs. Replacement (Comparison)
Refacing changes doors and faces for a fast, high-visibility transformation. Refinishing repaints existing doors for a lighter lift. Replacement rebuilds from scratch to reconfigure layout. Your choice depends on box condition, design goals, and how much you want to change accessories and storage.
| Approach | What Changes | Best When | Timeline | Disruption Level |
|---|---|---|---|---|
| Refacing | New doors/drawers, updated face frames, hardware | Boxes are sound; want fresh style and function | Typically under two weeks with off-site spraying | Low to moderate; kitchen remains largely usable |
| Refinishing | Existing doors/frames cleaned, prepped, repainted | Doors are in good shape; design shift is color-based | Often completed in several working days | Low; limited removal and masking |
| Replacement | All-new boxes, doors, layout, and accessories | Boxes are failing or a new layout is required | Multi-week to multi-month depending on scope | High; demolition and rebuild phases |
If you’re leaning toward a full-door change with dependable timelines, start at our cabinet refacing page. If you’re still comparing providers, our notes on refacing companies near me can help you evaluate fit and process.
Best Practices That Protect Your Investment
Strong refacing outcomes come from disciplined prep, controlled spraying, and careful installation. Prioritize box integrity checks, dust control, accurate labeling, durable coatings, and soft-close hardware alignment. Small details—like consistent reveals and hardware placement—elevate both look and daily function.
- Inspect the boxes: Confirm plumb, square, and secure attachments before committing to surface upgrades.
- Document and label: Photograph hinge positions and label every door/drawer to speed precise reassembly.
- Control the dust: Use containment and extraction to protect adjoining rooms during on-site frame prep.
- Use tested coating systems: Professional spray products and measured cure windows improve durability.
- Upgrade the touchpoints: Soft-close hinges and well-chosen pulls enhance perceived quality immediately.
- Check clearances: Verify swing paths, appliance handles, and wall intersections before final drilling.
Want a deeper dive into where painting alone fits? We outline decision points in our kitchen cabinet painting guide. For a price-factor checklist without numbers, bookmark our cabinet refacing price factors.
Tools & Resources for Smarter Decisions
A smooth refacing project uses clear scope documents, finish samples under your lighting, and a simple punch-list. Align expectations early, batch decisions, and stage off-site spraying to reduce downtime. Use a one-page brief to keep measurements, hardware choices, and schedule milestones visible.
- One-page scope sheet: Door style, color, sheen, hardware centers, hinge type, accessory list.
- Lighting check: Review samples in daylight and evening to confirm color shifts.
- Kitchen access plan: Coordinate elevator times and parking windows for pick-ups and installs in York.
- Maintenance primer: Gentle cleaners and microfiber keep sprayed finishes looking new.
For broader background on paint process steps in Canada, see this process overview article. And if you’re considering a layout rework instead, independent installation walkthroughs can help clarify what full replacement involves.
Mini Case Notes from Toronto Kitchens
Toronto homeowners choose refacing when boxes are solid and a style reset is the goal. With off-site spraying and soft-close hardware, we’ve modernized busy family kitchens and compact condos on predictable schedules, all while keeping cooking areas accessible during most of the project.
- York bungalow refresh: Sturdy oak boxes near Smythe Park, new Shaker doors in satin white, painted face frames, and streamlined bar pulls. Two on-site windows; family cooked at home between them.
- Condo near transit: Compact galley kitchen toward Jane St at St Clair Ave West. Slab doors in a warm gray, careful hardware centering for narrow drawers, and coordinated end panels for a built-in feel.
- Family home west of downtown: Mixed door sizes and a challenging corner. We mapped hinge patterns, standardized reveals, and upgraded to soft-close—immediate improvements to sound and motion.
When boxes are square and secure, refacing puts most of the project energy into doors, finishes, and touchpoints. That’s where the daily value lives.
Frequently Asked Questions (FAQ)
Homeowners ask about timing, durability, layout changes, and cleaning. Refacing focuses on visible components and hardware while keeping boxes. Projects are staged to limit downtime, and sprayed finishes hold up well when cleaned with gentle products.
How long does cabinet refacing usually take?
Most Toronto refacing projects are planned in two on-site windows: one for frame prep and one for installation. Off-site spraying and curing happen between those visits, which keeps your kitchen usable for everyday tasks during the project.
Can I change the style without replacing cabinet boxes?
Yes. Refacing swaps doors and drawer fronts and updates visible faces to match. You can shift from raised panel to Shaker or slab, add soft-close hinges, and select new pulls or knobs—all while keeping existing boxes when they’re in good condition.
Is repainting enough, or should I reface?
If you like your current door style and condition, repainting can refresh color with less work. If you want a different profile, crisper lines, or upgraded hinges and hardware, refacing gives a more transformative result by changing the doors and updating faces.
Will refacing fix crooked doors and noisy hinges?
Refacing includes new doors and hinge alignment. Soft-close hardware and careful adjustments produce cleaner reveals and smoother motion. If cabinet boxes are out of square, minor shimming and adjustments help, but severely warped boxes may need larger repairs.
Conclusion & Next Steps
Refacing focuses your budget on new doors, updated faces, and hardware—where you see and feel the difference. With off-site spraying and disciplined prep, Toronto homeowners get a fast, clean transformation when cabinet boxes are sound. The next step is a scoped assessment, not a price guess.
- Key takeaways:
- Refacing = new doors and coordinated faces with existing boxes.
- Timelines rely on off-site spraying plus two on-site windows.
- Durability tracks to prep quality and controlled finishing.
- Door style and hardware choices drive the design shift.
- Action steps:
- List your doors/drawers and note any damaged spots.
- Collect two or three door style inspirations with colors that suit your lighting.
- Schedule a no-pressure assessment with our York team.
Ready to see options at your place in York? Book a convenient time and we’ll bring samples, review your layout, and map a clean path forward.
For independent perspectives while you compare approaches, industry comparison insights on refacing versus replacing can help frame expectations. If you’re exploring broader renovation steps, this remodel planning guide outlines scope sequencing that often intersects with cabinetry decisions.
{
“@context”: “https://schema.org”,
“@type”: “Article”,
“headline”: “Cabinet Refacing Cost: Is It Worth It in 2026?”,
“description”: “Understand refacing kitchen cabinets cost factors and value in Toronto with Paint2decor INC. Learn methods, materials, timelines, and how to choose quality—no pricing.”,
“datePublished”: “2026-05-11T08:00:00-04:00”,
“dateModified”: “2026-05-11T08:00:00-04:00”,
“author”: {
“@type”: “Person”,
“name”: “Paint2decor INC”,
“url”: “https://paint2decor.com/blogs”,
“jobTitle”: “Cabinetry Refinishing Specialists”,
“knowsAbout”: [
“cabinet refacing”,
“kitchen cabinet refinishing”,
“cabinet spray painting”,
“kitchen cabinet respraying”,
“Toronto cabinet painting”
]
},
“publisher”: {
“@type”: “Organization”,
“name”: “Paint2decor INC”,
“url”: “https://paint2decor.com”,
“logo”: {
“@type”: “ImageObject”,
“url”: “https://paint2decor.com/wp-content/uploads/2022/03/website-1.png”,
“width”: 512,
“height”: 512
}
},
“image”: [
{
“@type”: “ImageObject”,
“url”: “https://res.cloudinary.com/dmboo1nu1/image/upload/v1778897381/ai-images/uuajdymirce21f4shuth.png”,
“width”: 1200,
“height”: 630,
“caption”: “Modern Toronto kitchen after cabinet refacing with new doors and coordinated finishes”
},
{
“@type”: “ImageObject”,
“url”: “https://res.cloudinary.com/dmboo1nu1/image/upload/v1778897382/ai-images/fwunw6xsh6fgtjsuhiwe.png”,
“width”: 1200,
“height”: 800,
“caption”: “Close-up of Shaker door alignment and soft-close hinge during refacing”
},
{
“@type”: “ImageObject”,
“url”: “https://res.cloudinary.com/dmboo1nu1/image/upload/v1778897382/ai-images/g0wck2ounuzzxwpiwwnu.png”,
“width”: 1200,
“height”: 800,
“caption”: “Spray booth with cabinet doors curing to a satin finish”
}
],
“speakable”: {
“@type”: “SpeakableSpecification”,
“cssSelector”: [
“.featured-snippet-answer”,
“.faq-answer”
]
},
“mainEntityOfPage”: “https://paint2decor.com/blogs/refacing-kitchen-cabinets-cost”,
“keywords”: [
“refacing kitchen cabinets cost”,
“cabinet refacing”,
“kitchen cabinet refinishing”,
“Toronto cabinet painting”,
“cabinet spray painting”
]
}
{
“@context”: “https://schema.org”,
“@type”: “ProfilePage”,
“mainEntity”: {
“@type”: “Person”,
“name”: “Paint2decor INC”,
“url”: “https://paint2decor.com/blogs”,
“description”: “GTA cabinetry refinishing and refacing specialists providing refinishing, painting, and respraying for kitchens and bathrooms.”,
“knowsAbout”: [
“cabinet refacing”,
“kitchen cabinet painting”,
“bathroom cabinet refinishing”
]
}
}
{
“@context”: “https://schema.org”,
“@type”: “FAQPage”,
“mainEntity”: [
{
“@type”: “Question”,
“name”: “How long does cabinet refacing usually take?”,
“acceptedAnswer”: {
“@type”: “Answer”,
“text”: “Most Toronto refacing projects are planned in two on-site windows: one for frame prep and one for installation. Off-site spraying and curing happen between those visits, which keeps your kitchen usable for everyday tasks during the project.”
}
},
{
“@type”: “Question”,
“name”: “Can I change the style without replacing cabinet boxes?”,
“acceptedAnswer”: {
“@type”: “Answer”,
“text”: “Yes. Refacing swaps doors and drawer fronts and updates visible faces to match. You can shift from raised panel to Shaker or slab, add soft-close hinges, and select new pulls or knobs—all while keeping existing boxes when they’re in good condition.”
}
},
{
“@type”: “Question”,
“name”: “Is repainting enough, or should I reface?”,
“acceptedAnswer”: {
“@type”: “Answer”,
“text”: “If you like your current door style and condition, repainting can refresh color with less work. If you want a different profile, crisper lines, or upgraded hinges and hardware, refacing gives a more transformative result by changing the doors and updating faces.”
}
},
{
“@type”: “Question”,
“name”: “Will refacing fix crooked doors and noisy hinges?”,
“acceptedAnswer”: {
“@type”: “Answer”,
“text”: “Refacing includes new doors and hinge alignment. Soft-close hardware and careful adjustments produce cleaner reveals and smoother motion. If cabinet boxes are out of square, minor shimming and adjustments help, but severely warped boxes may need larger repairs.”
}
}
]
}