
A kitchen cabinets makeover is a targeted refresh of your existing doors, drawers, and boxes using refinishing, refacing, painting, or respraying. At 2710 St Clair Ave W in York (Toronto), Paint2decor INC delivers these services so homeowners get a modern look without a full renovation. This guide explains options, steps, and best practices.
By Paint2decor INC • Last updated: 2026-05-19
Quick Summary
A kitchen cabinets makeover updates the look and durability of your existing cabinetry through refinishing, refacing, painting, or respraying. It reuses your boxes, modernizes door styles and colors, and upgrades durability topcoats. The result: a fresh, cohesive kitchen in days, not months, with less disruption and waste.
Here’s what you’ll learn and use right away:
- The differences between refinishing, refacing, painting, and respraying
- Which approach fits your cabinets, timeline, and lifestyle
- Exact steps pros follow so you can evaluate quality
- Durable coating choices, ventilation, curing, and care
- York- and Toronto-specific scheduling and home-prep tips
- Decision help: use our comparison table to choose your path
- Action plan: a day-by-day process checklist you can follow
- Quality signals: what to look for in a pro finisher
- Safety: odor control, low-VOC options, and clean work zones
What Is a Kitchen Cabinets Makeover?
A kitchen cabinets makeover is the professional renewal of cabinet surfaces and faces without replacing the full boxes. It combines prep, repair, and high-performance coatings—or new doors and veneers—to deliver a like-new look. The focus is speed, cleanliness, and durability while retaining your functional layout.
In practice, a makeover focuses on what you see and touch most—doors, drawers, end panels, and trim—while keeping your cabinet boxes in place. This reduces demolition, protects flooring, and limits downtime. Many York and Toronto homes can transform in under two weeks, including off-site curing for sprayed components.
Core approaches defined
- Refinishing (painting or respraying): Clean, degloss, repair, prime, and apply pro-grade enamel or polyurethane by spray for a factory-like finish.
- Refacing: Keep boxes, replace doors/drawer fronts, and cover face frames/sides with matching veneer; optionally add new soft-close hardware.
- Selective upgrades: New pulls, crown, light valances, or glass inserts to elevate style and function.
Typical kitchens have 25–40 doors and drawers. That scale makes reuse smart: less material handling, faster timelines, and fewer surprises behind walls. The visual payoff is immediate because fronts control most of what the eye reads in a kitchen.
Why a Makeover Matters in 2026
A 2026-ready makeover modernizes color, sheen, and hardware while improving coating performance. With today’s low-odor, fast-curing enamels and efficient spray systems, most kitchens see 3–7 days of on-site activity plus off-site finishing—minimizing disruption and keeping daily life on track.
The reality is simple: kitchen cabinets anchor your home’s style. Updating them shifts the entire room—even if countertops and floors stay. In our experience across Toronto homes, changes in white balance, contrast lines, and hardware geometry make a room feel brighter by day and calmer at night.
- Speed and predictability: Common timelines include 1 day of in-home prep, 2–4 days of staged spraying and curing, and half a day for reinstallation.
- Cleaner air and lower odor: Modern low-VOC systems paired with masking, zipper walls, and exhaust filtration keep odors controlled.
- Stronger films: 2K enamels and catalyzed topcoats resist scratching and household cleaners better than consumer paints.
Homeowners also want sustainability. Reusing boxes reduces waste and trucking. Spray-applied finishes achieve coverage with fewer coats, and precise fan patterns reduce overspray—meaning less material used overall.
How a Pro Makeover Works (Step-by-Step)
A professional kitchen cabinets makeover follows a controlled workflow: protect, label, remove, prep, prime, spray, cure, and reinstall. Expect surface cleaning, repairs, bonding primers, two to three sprayed coats, and staged curing at stable temperature and humidity—then precise reassembly and final touch-ups.
- Site protection and labeling (Half day): Mask floors and counters, set zipper walls, label doors and hinges.
- Removal (Half day): Doors and drawers head to the shop; boxes stay. Hardware bagged and cataloged.
- Prep and repairs (1 day): Clean, sand, fill dings, caulk seams. Gloss is knocked down to improve adhesion.
- Prime (Same day): Bonding primer seals tannins on oak and grips slick factory finishes.
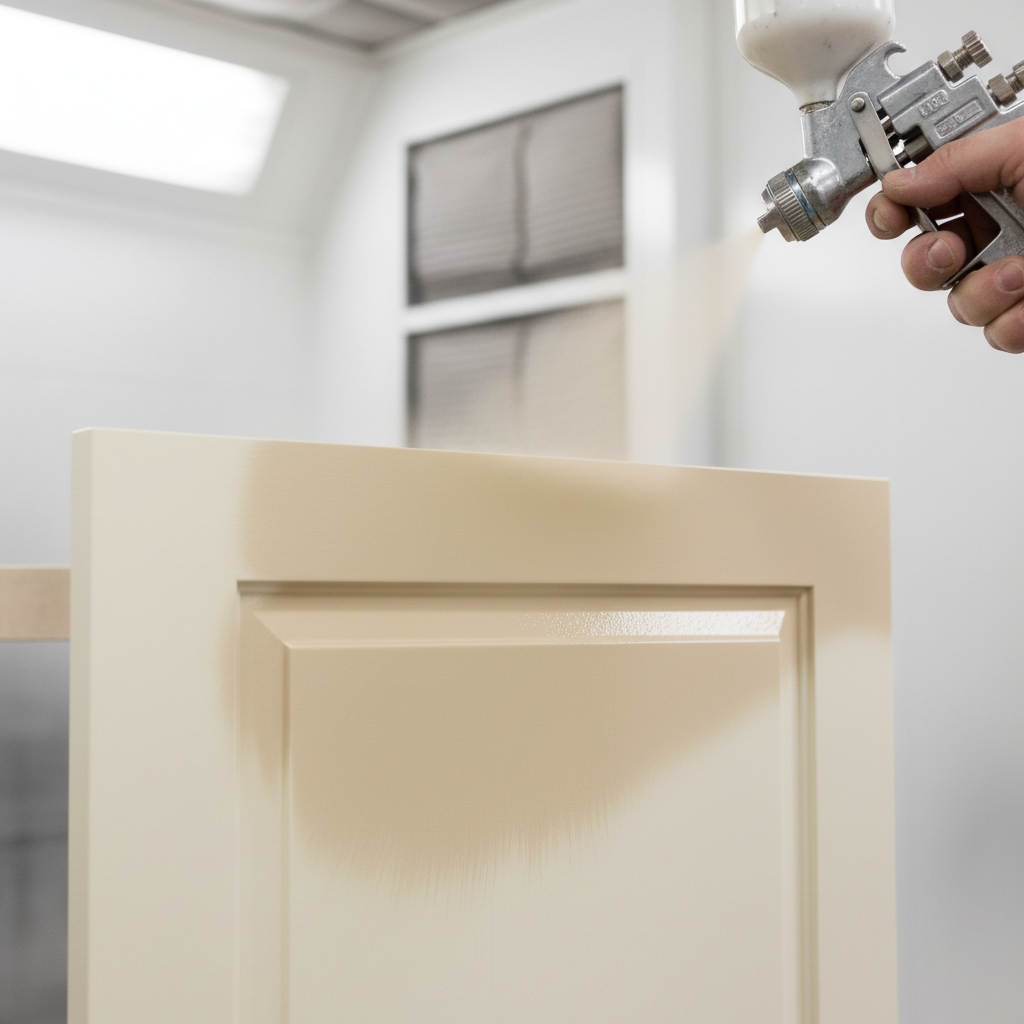
- Spray finish (1–2 days): HVLP or air-assisted airless lays an even film. Two to three coats build durability.
- Cure and harden (24–72 hours): Stable 65–75°F and 40–60% RH support proper crosslinking.
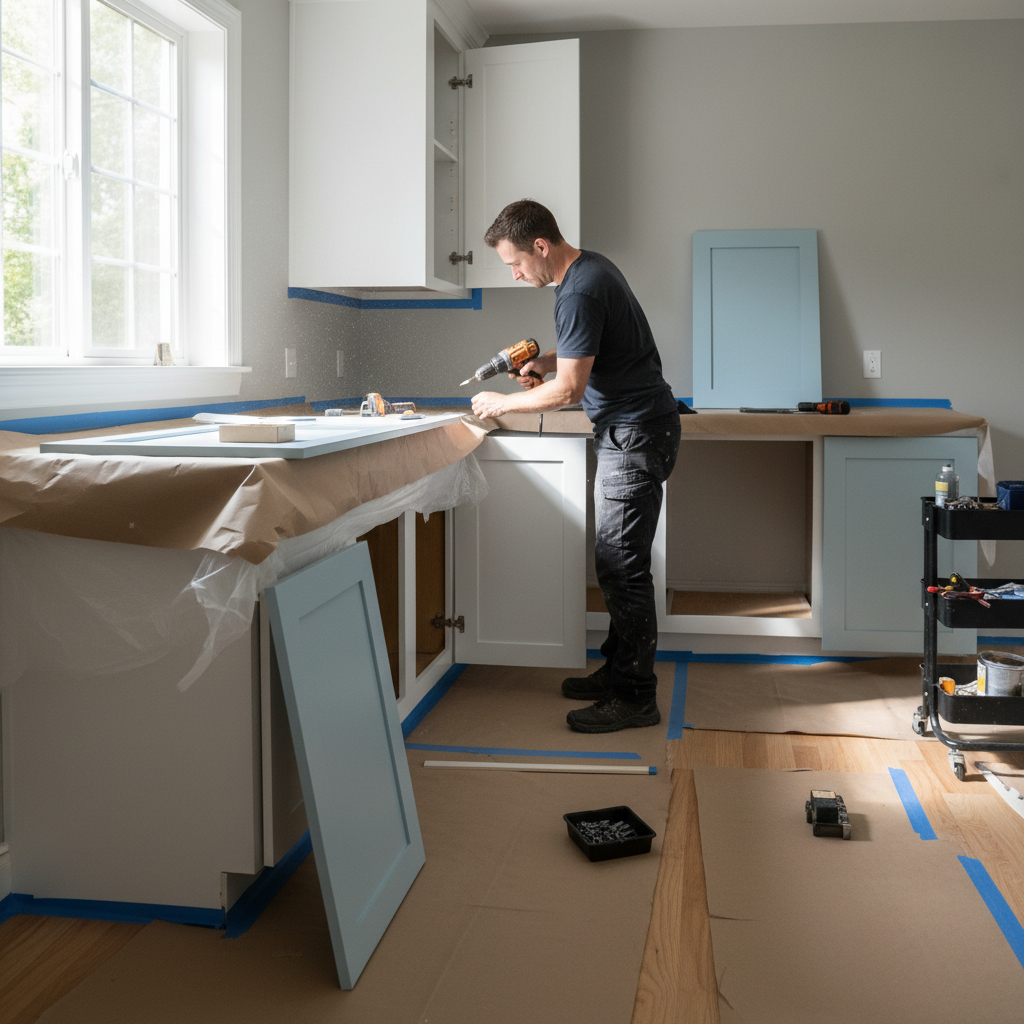
- Reinstall and align (Half day): Hang, level, and gap doors; install hardware; perform final QA.
Want a deeper look at spray work? See our respraying guide and our professional cabinet painting overview for finish details and sheen selection.
Local considerations for York
- Plan spray days around humidity swings; summer storms near Smythe Park can spike RH, so pros schedule coatings for stable windows.
- Winter projects dry faster indoors; keep rooms at 65–75°F to support curing and minimize odor when windows are closed.
- Parking and access near Toronto Public Library – Daniel G. Hill Branch can be busy; coordinate door pickup/drop-off windows to avoid delays.
Types of Makeovers: Refinishing, Refacing, Painting, Respraying
Choose among four paths: refinishing (paint/spray existing doors), refacing (new doors plus veneers), painting (often brush/roll on-site), and respraying (shop-finished doors for a factory look). The best choice depends on cabinet condition, door style goals, and how fast you need the kitchen back.
Refinishing (spray painting existing doors)
- Best for: Sound boxes and doors; style boosted by color and hardware.
- Finish: Pro enamel, satin/semi-gloss; sprayed for uniform texture.
- Timeline: Often 3–7 on-site days plus shop curing.
- Learn more: Our kitchen cabinet refinishing service.
Refacing (new doors + veneers)
- Best for: Wanting a door-style change (e.g., slab to shaker) without box replacement.
- Finish: New factory-finished doors; frames veneered to match.
- Timeline: Shop fabrication plus a shorter in-home install window.
- Explore: Our cabinet refacing guide.
Painting (on-site brush/roll)
- Best for: Small layouts, partial updates, or budget-first refreshes.
- Finish: Quality varies by method; spraying usually beats brush texture.
- Timeline: Fastest setup, but may require more touch-ups over time.
- Compare: See our Toronto cabinet painting overview.
Respraying (shop-finished)
- Best for: Consistent, factory-like finish and odor control.
- Finish: Controlled booth conditions produce ultra-smooth films.
- Timeline: Most time off-site; on-site work is short and tidy.
- Dive deeper: Kitchen cabinet respraying.
Refinish vs Reface vs Paint vs Respray (At a Glance)
Refinishing reuses existing doors with sprayed enamel; refacing swaps doors and adds matching veneers; on-site painting is fast but less uniform; respraying delivers a booth-quality finish. Your decision hinges on door condition, style goals, and tolerance for on-site work time.
| Approach | What Changes | Finish Quality | Typical Timeline | Ideal When |
|---|---|---|---|---|
| Refinishing | Color and sheen on existing doors/boxes | High (sprayed enamel/polyurethane) | 3–7 on-site days + curing | Doors are structurally sound |
| Refacing | New doors, veneered frames/sides | Factory-grade new fronts | Shop time + short install | Need a new door style |
| Painting | Brush/roll, minimal shop work | Varies; texture risk | Fast setup | Small, quick refresh |
| Respraying | Off-site booth finish | Factory-like smoothness | Mostly off-site time | Odor control, top smoothness |
Not sure which direction to take? Many Toronto homeowners start with refinishing near me research, then move to refacing when a door-style change is the priority.
Best Practices for Durable, Beautiful Finishes
Great results come from controlled prep, the right primers, pro spraying, and patient curing. Label hardware, sand thoroughly, spot prime stain-prone woods, and keep temperature and humidity stable. Two to three sprayed coats, light inter-coat sanding, and a gentle 7–10 day cure deliver lasting performance.
Prep and protection
- Clean first: Degrease using cabinet-safe cleaners; oils block adhesion.
- Sand smart: Scuff to dull the sheen; avoid cutting through veneers.
- Mask tight: Plastic walls and floor protection prevent dust transfer.
Coatings that last
- Bonding primer: Key for slick factory finishes and stain-heavy oak.
- Professional enamel: Sprayed urethane or acrylic-alkyd blends level well and resist yellowing.
- Light sand between coats: 220–320 grit knocks down nibs for a glassy final coat.
Environment control
- Temperature: 65–75°F supports flow and curing; avoid cold drafts.
- Humidity: 40–60% RH helps prevent blushing and slow dry.
- Ventilation: Exhaust filtration and make-up air reduce odor.
For a practical walk-through of spray-specific technique, review our complete respraying guide and compare sheen options in our professional cabinet painting article.
Thinking about a kitchen cabinets makeover? We help York and Toronto homeowners choose the right path—refinishing, refacing, or respraying—and handle the details with minimal disruption. Book a friendly consultation to review finishes and timelines.
Tools and Resources We Rely On
Professional results come from pro tools and disciplined process: HVLP or air-assisted airless sprayers, quality abrasives, bonding primers, catalyzed enamels, dust control, and labeled hardware bags. A simple homeowner prep checklist speeds day one and protects your routine.
Professional kit
- Spray systems: HVLP or air-assisted airless for fine atomization and even films.
- Surface prep: Degreasers, denatured-alcohol wipes, sanding sponges (120–320 grit).
- Primers and topcoats: Bonding primers; sprayed enamel or polyurethane topcoats.
- Controls: Zip walls, exhaust fans with filters, and tack cloths for dust control.
Homeowner prep checklist
- Empty or group items in the first few cabinets we’ll start on; keep daily-use items handy.
- Clear countertops, pets’ zones, and walking paths for the crew’s setup.
- Confirm color and sheen samples under your kitchen’s natural and evening light.
For a broad process overview that aligns with these steps, review this helpful how-to painting guide and a practical set of cabinet maintenance tips for life after your makeover.
Style Choices and Color Trends That Work
Two-tone palettes, soft whites, and earthy greens remain strong, while warm wood accents balance modern lines. Satin sheen hides minor wear, and updated hardware in matte black or champagne bronze refreshes sightlines. Test samples in morning and evening light for accurate color reads.
- Two-tone strategy: Lighter uppers, deeper lowers create visual stability.
- Oak refresh: Grain-filling or strategic priming softens heavy graining before topcoat. See updating oak cabinets.
- Hardware geometry: Bar pulls elongate; knobs compress; mix for balance.
- Glass accents: Mullion doors at focal points add depth and reflection.
In our Toronto projects, satin finishes strike the best balance between cleanability and glare control. If you host often, consider semi-gloss on trash and sink-base doors where wipe-downs are frequent.
How to Choose the Right Approach for Your Kitchen
Match the method to your goals: refinish if doors are sound and you want a color change; reface if you want a new door style; respray if you prefer a booth-quality finish with tight odor control. Assess wood species, door condition, and timeline first.
- Door condition: Splits, delamination, or swelling may push you toward refacing.
- Style goal: Want shaker or slab? Refacing is the direct route.
- Odor sensitivity: Respraying off-site keeps most finishing out of your home.
- Timeline: Hosting soon? Refinishing can fit into a single week’s rhythm.
Still unsure? Compare finish expectations in our respraying overview and scan the steps in our refinishing service page.
Real Examples from Toronto Homes
Here are three makeover scenarios we see often: color-only refinishing on sound maple, door-style change via refacing, and a booth-finished respray for ultra-smooth texture. Each fits a different goal—speed, style change, or top-tier finish—and all keep boxes in place.
Maple to modern satin
- Starting point: Honey-maple doors, solid boxes, dated hardware.
- Plan: Spray prime and enamel in satin; add matte black pulls.
- Result: Brighter mornings, calmer evening reflectance; 7–10 day gentle cure before heavy use.
Oak reface to shaker
- Starting point: Raised-panel oak with strong grain pattern.
- Plan: New shaker doors, veneered frames, factory finish to match.
- Result: Style reset without moving plumbing or electrical.
Respray for ultra-smooth
- Starting point: Flat doors with wear near sink base.
- Plan: Off-site booth respray; new soft-close hinges.
- Result: Factory-like smoothness, quiet hardware, crisp alignment gaps.
You can explore process nuance in our complete respraying guide before deciding.
FAQ: Kitchen Cabinets Makeover
These are the questions Toronto-area homeowners ask most about kitchen cabinets makeovers—timelines, durability, prep, and method selection. Use these answers to plan your schedule and set finish expectations before work begins.
How long does a typical kitchen cabinets makeover take?
Most projects span 3–7 on-site days plus off-site finishing and curing. Doors are labeled, removed, and sprayed in a controlled shop while boxes are prepped and coated in your home. Reinstallation and alignment usually take a half day.
Will a sprayed finish chip or yellow over time?
Professional enamels harden to a durable film and resist common cleaners. Satin and semi-gloss sheens hide minor wear and make wipe-downs easy. Gentle care during the first 7–10 days of cure helps the finish reach full strength.
Do I need to empty all my cabinets?
We recommend clearing the first areas we’ll start on and any cabinets scheduled for on-site coating. Items in other boxes can often stay put during door removal and off-site spraying. Your crew will share a simple day-by-day plan.
How do I decide between refinishing, refacing, and respraying?
If doors are structurally sound and you mainly want a color change, refinishing is efficient. If you want a new door style, refacing is direct. Prefer a factory-like texture and minimal in-home odor? Respraying concentrates finishing off-site.
Can you refinish oak or maple cabinets?
Yes. Oak benefits from grain management and stain-blocking primers; maple typically needs thorough scuff-sanding and bonding primer. Both species respond well to sprayed enamel topcoats when properly prepped.
Conclusion and Next Steps
A kitchen cabinets makeover modernizes your space quickly by reusing the structure you already own. Decide based on door condition and style goals, then demand pro prep, sprayed topcoats, and controlled curing. With a disciplined plan, you can transform your Toronto kitchen in days—not months.
Key takeaways
- Makeovers focus on doors, drawers, and visible panels—fast impact with less disruption.
- Refinish for color, reface for style change, respray for factory-like texture.
- Pro prep, priming, and curing are non-negotiable for durability.
- Stable 65–75°F and 40–60% RH support smooth, strong films.
Action steps
- Walk your kitchen and note door condition, style goals, and any repairs.
- Review our refacing guide and respraying overview.
- Browse our refinishing service and cabinet painting pages for finish ideas.
- Book a friendly consultation in York or Toronto to align timelines and samples.
If you’re in York or anywhere across Toronto, we’d be happy to visit, confirm scope, and schedule a smooth, tidy makeover that fits your routine.
{
“@context”: “https://schema.org”,
“@type”: “Article”,
“headline”: “Kitchen Cabinets: Save Big and Refresh Your Home in 2026”,
“description”: “A complete, local guide to a kitchen cabinets makeover in York and Toronto—what it is, why it matters in 2026, step-by-step process, refinishing vs refacing vs respraying, tools, best practices, and FAQs.”,
“author”: {
“@type”: “Person”,
“name”: “Masoud Kakar”,
“url”: “https://paint2decor.com/blogs”,
“jobTitle”: “Kitchen Cabinet Refinishing Specialist”,
“knowsAbout”: [
“kitchen cabinet refinishing”,
“cabinet refacing”,
“cabinet spray painting”,
“kitchen makeover”
]
},
“publisher”: {
“@type”: “Organization”,
“name”: “Paint2decor INC”,
“url”: “https://paint2decor.com/blogs”,
“logo”: {
“@type”: “ImageObject”,
“url”: “https://paint2decor.com/wp-content/uploads/2022/03/website-1.png”,
“width”: 512,
“height”: 512
}
},
“datePublished”: “2026-05-19”,
“dateModified”: “2026-05-19”,
“image”: [
{
“@type”: “ImageObject”,
“url”: “https://res.cloudinary.com/dmboo1nu1/image/upload/v1779157217/ai-images/q1zalxnb4nhevw3zwk6a.png”,
“width”: 1200,
“height”: 630,
“caption”: “Modern two-tone shaker kitchen after a cabinet makeover in Toronto”
},
{
“@type”: “ImageObject”,
“url”: “https://res.cloudinary.com/dmboo1nu1/image/upload/v1779157217/ai-images/qukjiyugjvdnw3qz1fgm.png”,
“width”: 1200,
“height”: 630,
“caption”: “HVLP spray painting of a shaker cabinet door during refinishing”
},
{
“@type”: “ImageObject”,
“url”: “https://res.cloudinary.com/dmboo1nu1/image/upload/v1779157216/ai-images/p3ojqfrmdztftplsrqgy.png”,
“width”: 1200,
“height”: 630,
“caption”: “Technician reinstalling freshly painted cabinet doors in a York home”
}
],
“mainEntityOfPage”: “https://paint2decor.com/blogs”,
“keywords”: [
“kitchen cabinets makeover”,
“kitchen cabinet refinishing”,
“cabinet refacing”,
“kitchen cabinet painting”,
“Toronto cabinet painting”,
“York kitchen makeover”
],
“speakable”: {
“@type”: “SpeakableSpecification”,
“cssSelector”: [“.featured-snippet-answer”, “.faq-answer”]
}
}
{
“@context”: “https://schema.org”,
“@type”: “ProfilePage”,
“mainEntity”: {
“@type”: “Person”,
“name”: “Masoud Kakar”,
“description”: “Toronto-area cabinetry refinishing specialist at Paint2decor INC, focused on refinishing, refacing, and respraying for kitchen and bathroom cabinets.”,
“url”: “https://paint2decor.com/blogs”,
“knowsAbout”: [“cabinet refinishing”, “cabinet refacing”, “cabinet spray painting”]
}
}
{
“@context”: “https://schema.org”,
“@type”: “FAQPage”,
“mainEntity”: [
{
“@type”: “Question”,
“name”: “How long does a typical kitchen cabinets makeover take?”,
“acceptedAnswer”: {“@type”: “Answer”, “text”: “Most projects span 3–7 on-site days plus off-site finishing and curing. Doors are labeled, removed, and sprayed in a controlled shop while boxes are prepped and coated in your home. Reinstallation and alignment usually take a half day.”}
},
{
“@type”: “Question”,
“name”: “Will a sprayed finish chip or yellow over time?”,
“acceptedAnswer”: {“@type”: “Answer”, “text”: “Professional enamels harden to a durable film and resist common cleaners. Satin and semi-gloss sheens hide minor wear and make wipe-downs easy. Gentle care during the first 7–10 days of cure helps the finish reach full strength.”}
},
{
“@type”: “Question”,
“name”: “Do I need to empty all my cabinets?”,
“acceptedAnswer”: {“@type”: “Answer”, “text”: “We recommend clearing the first areas we’ll start on and any cabinets scheduled for on-site coating. Items in other boxes can often stay put during door removal and off-site spraying. Your crew will share a simple day-by-day plan.”}
},
{
“@type”: “Question”,
“name”: “How do I decide between refinishing, refacing, and respraying?”,
“acceptedAnswer”: {“@type”: “Answer”, “text”: “If doors are structurally sound and you mainly want a color change, refinishing is efficient. If you want a new door style, refacing is direct. Prefer a factory-like texture and minimal in-home odor? Respraying concentrates finishing off-site.”}
},
{
“@type”: “Question”,
“name”: “Can you refinish oak or maple cabinets?”,
“acceptedAnswer”: {“@type”: “Answer”, “text”: “Yes. Oak benefits from grain management and stain-blocking primers; maple typically needs thorough scuff-sanding and bonding primer. Both species respond well to sprayed enamel topcoats when properly prepped.”}
}
]
}