
Kitchen respraying is the professional spray-finishing of existing cabinet boxes and doors to deliver a like-new factory look without replacing cabinetry. From our shop near 2710 St Clair Ave W in York, we help Toronto homeowners upgrade finishes fast with minimal disruption. It’s a durable, color-accurate alternative to refacing or full replacement.
By Paint2decor INC • Last updated: June 3, 2026
Quick Summary
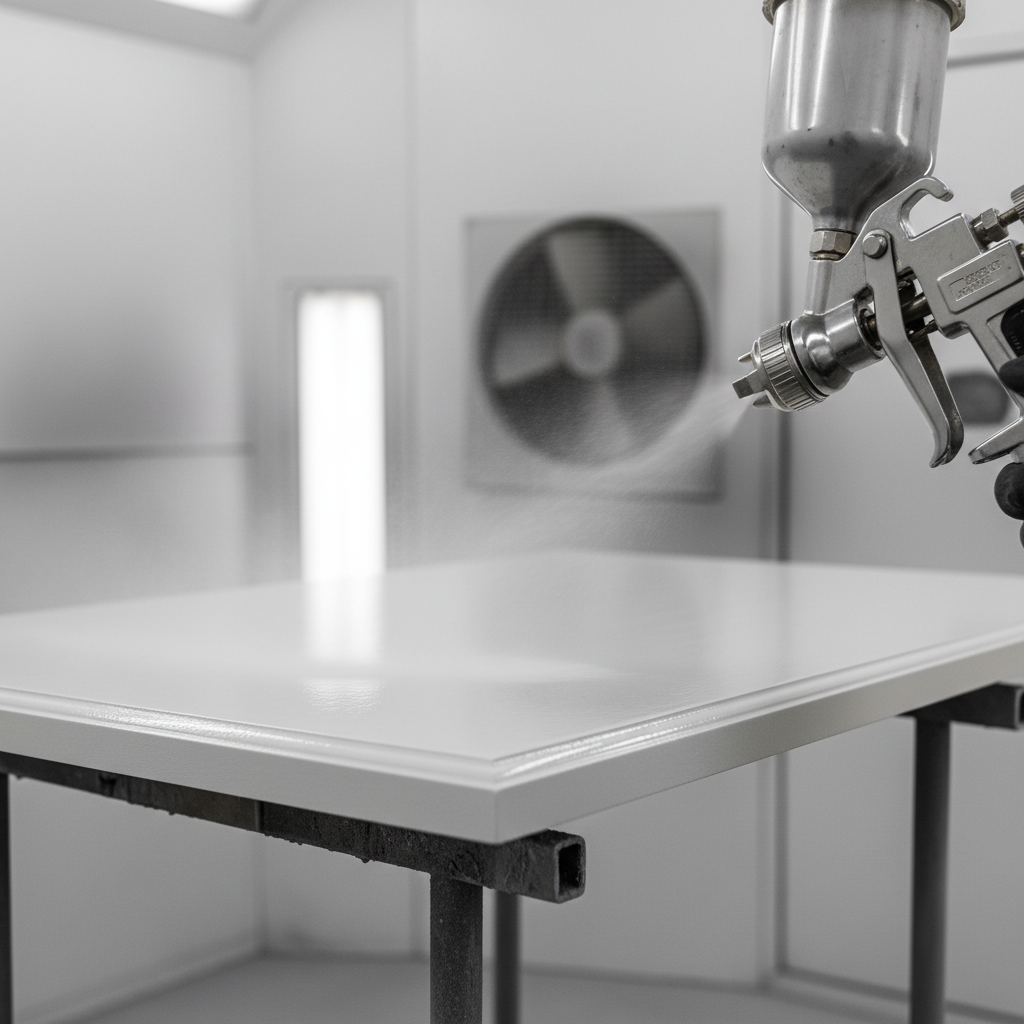
Kitchen respraying updates cabinet finishes using HVLP spray equipment, pro-grade coatings, and controlled curing. Expect precise prep, 2–3 sprayed coats, and a durable, uniform sheen. Compared with replacing cabinets, respraying shortens timelines to days, limits waste, and keeps your existing layout while delivering a modern, factory-style finish.
Use this guide to decide if kitchen respraying fits your goals, timeline, and home in Toronto. We cover what it is, why it matters, how it works, finish options, durability, maintenance, and how our team at Paint2decor INC manages projects from York across the GTA.
- Understand what professional cabinet respraying involves
- See how it compares to refacing and replacing
- Review prep, spraying, curing, and reassembly steps
- Explore finish types, durability, and maintenance
- Plan a smooth project in York and the wider Toronto area
What Is Kitchen Respraying?
Kitchen respraying is the controlled spray-application of new coatings to existing cabinet doors, drawers, and boxes. Technicians remove doors, repair and sand surfaces, spray 2–3 coats with HVLP equipment, and cure the finish. The result is a uniform, factory-style look without altering your cabinet layout or storage.
Respraying focuses on finish renewal. Your boxes, doors, and functional hardware typically stay, while color and sheen change dramatically. Most projects include door/drawer removal, labeling, degreasing, sanding (often 180–320 grit), priming, and multilayer topcoats. Cure windows can range from 24 hours for handling to 7–30 days for full hardness, depending on chemistry.
Why homeowners choose it
- Speed: Typical on-site work wraps in 2–4 days, with shop work running in parallel.
- Consistency: Spraying lays down even films and crisp edges compared with many brush/roll applications.
- Less disruption: You keep your layout and most hardware; your kitchen stays functional for much of the project.
- Sustainability: Reuse solid cabinet bodies; reduce landfill waste from tear-outs.
In our experience with Toronto kitchens, respraying best suits cabinets with sound structure, intact doors, and minimal water damage. If doors are severely warped or boxes are failing, refacing or replacement may be smarter. We confirm this during our initial site review.
Why Kitchen Respraying Matters for Toronto Homes
Kitchen respraying modernizes style, extends cabinet life, and limits renovation downtime. Toronto homeowners get updated color, higher resale appeal, and lower waste. Because boxes remain, projects move faster and cleaner, often finishing in days instead of weeks while delivering a durable factory-style appearance.
Cabinet finish drives perceived kitchen age. A smooth, color-true film can make 10–15-year-old boxes look brand-new. Film thickness, adhesion, and crosslinking determine durability; well-built sprayed systems resist everyday abrasion, staining, and cleaning better than many DIY roll-on paints. Transfer-efficient HVLP systems frequently exceed 60 percent material-to-surface delivery, reducing overspray and mess.
- Resale signals: Fresh, neutral finishes help buyers visualize their lifestyle. In open-concept Toronto homes, cabinets dominate the sightline.
- Timeline control: With door removal done day one, spraying and curing proceed in stages. Reassembly typically occurs within a week.
- Allergy and odor planning: Modern low-VOC options reduce odor impact; ventilation and filtration manage particulates during on-site work.
If you’re weighing finish-focused updates, compare process depth and outcomes in our cabinet refinishing guide. For a spraying-first path, our kitchen cabinet respraying service page outlines what to expect from prep through reassembly.
Planning a Kitchen Respray in York and Toronto
Plan a kitchen respray in York by scheduling during a low-traffic week, clearing 6–8 feet around boxes, and confirming ventilation routes. Toronto homes benefit from seasonal planning, humidity control (40–60%), and dedicated drying racks. Local access from York enables faster pick-up/drop-off of doors and panels.
Neighborhood logistics matter. We stage door removal and transport from York to our spray environment, then return doors for clean reassembly. Containment, filtration, and predictable curing keep daily life moving. Seasonal humidity adjustments—dehumidifiers in summer, slightly warmer set points in winter—help films level and set with fewer defects.
Local considerations for York
- Plan parking and access near Jane St at St Clair Ave West bus corridors so door pickup and drop-off stay on time.
- Summer humidity in Toronto can hover above 60%; aim for 40–55% indoors to help sprayed coats level and cure evenly.
- If you’re sensitive to odors, choose low-VOC systems and schedule ventilation away from living zones; quick walks near Smythe Park can help air out the home after day one.
How Kitchen Respraying Works (Step-by-Step)
Professional kitchen respraying follows a controlled workflow: assess, label and remove doors, degrease, sand, prime, spray 2–3 topcoats, cure under stable temperature and humidity, and reassemble with careful alignment. Each step protects adhesion and finish quality while minimizing household disruption.
- Assessment and color selection: Confirm cabinet condition and choose a color/sheen. Many Toronto projects favor satin or matte for low-glare elegance.
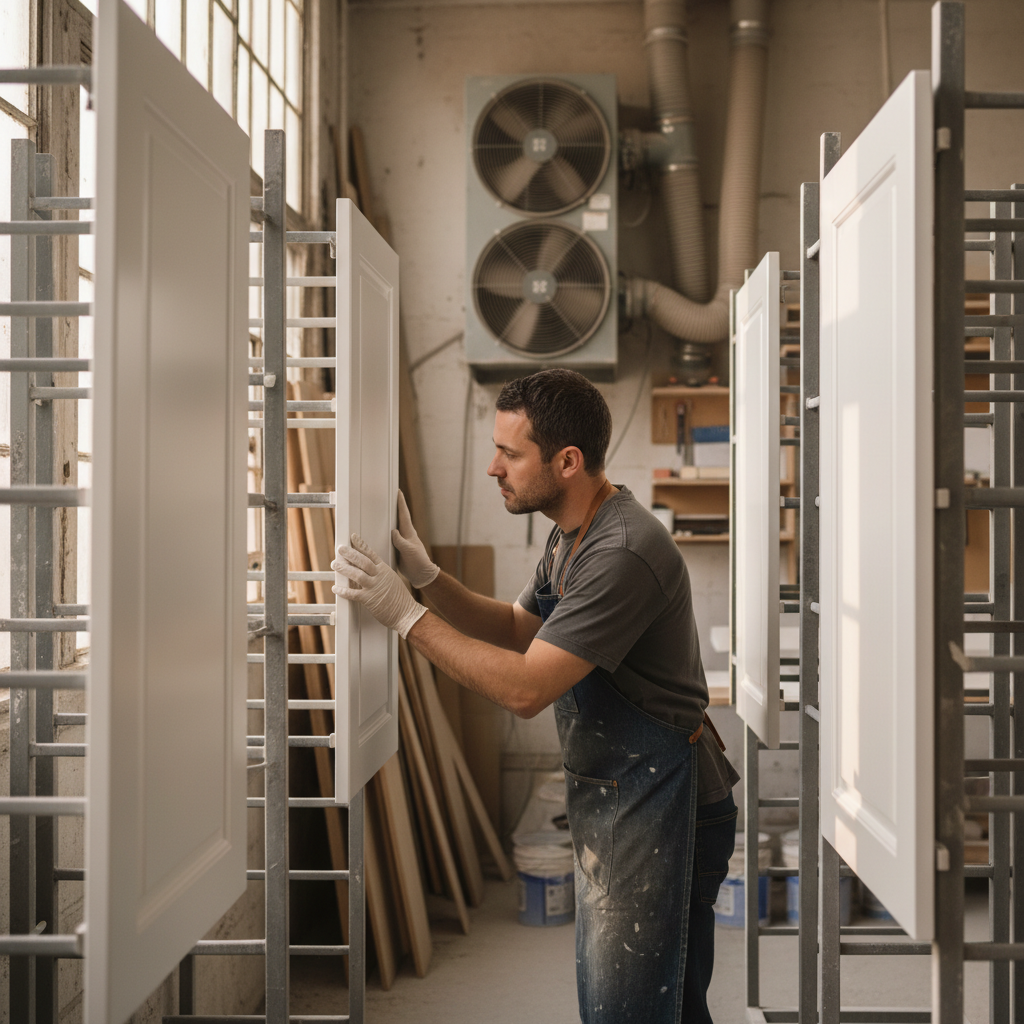
- Labeling and removal: Doors/drawers are labeled for exact reinstallation; hinges and hardware are bagged.
- Degreasing: Kitchens accumulate aerosolized oils. A dedicated degreaser plus a water rinse lifts residues that can block adhesion.
- Sanding and repairs: Typical scuff-sanding starts at 180–220 grit; edge repairs and filler cure times (often 20–60 minutes) ensure a flat substrate.
- Masking and containment: Floors, counters, and appliances are protected; zipper walls and filtration manage air quality.
- Priming: Bonding primer ties the system together; tinted primers can help with deep color changes.
- Spraying topcoats: HVLP guns atomize coatings into 2–3 even coats. Wet-edge management and 10–20 minute flash times reduce lap marks.
- Curing: Handle times can be a few hours; full cure can extend to 7–30 days depending on chemistry and conditions (65–75°F, 40–60% RH).
- Reassembly and QC: Doors return to their labeled positions; final alignment and bumpers help achieve quiet, even closes.
For a fast visual of the journey from bare door to final film, see our step-by-step respraying guide. If you’re interested in spraying specifically within city limits, review cabinet spraying in Toronto for common neighborhood logistics.
Respraying vs. Refacing vs. Replacing
Choose respraying to refresh color and sheen on sound cabinets quickly. Pick refacing when doors are dated or damaged but boxes are solid. Opt for full replacement only when layout, storage, or structural integrity must change. Each path balances timeline, waste, disruption, and design flexibility.
The best option depends on cabinet condition and goals. If your boxes are square and your doors are worth keeping, kitchen respraying delivers the most rapid visual impact. When profiles, species, or door styles feel beyond saving, refacing swaps doors and skins while preserving layout. Replacement tackles fundamental layout or damage issues.
| Path | Scope | Typical Timeline | Disruption Level | Materials Reused | Finish Consistency |
|---|---|---|---|---|---|
| Respraying | Recoat doors/boxes | Days (shop + on-site) | Low | Most boxes/doors | Factory-style film |
| Refacing | New doors + skins | Days to a week+ | Medium | Boxes reused | New doors, matched skins |
| Replacing | New boxes/doors | Weeks+ | High | Minimal | Manufacturer finish |
If you’re not sure which route fits, our respraying overview and professional cabinet painting resources break down when spraying or painting wins—and when it’s time to change doors entirely.
Finish Options and Durability
Kitchen respraying supports a wide color range and multiple sheens (matte to semi-gloss). Durability follows coating chemistry, film build, and cure. With proper prep and 2–3 coats, sprayed films resist everyday cleaning and abrasion, offering years of service on structurally sound cabinets.
Finish choices balance look and cleanability. Satin remains Toronto’s crowd-pleaser for its calm sheen and easy wipe-down. Matte diffuses light but may show oils sooner; semi-gloss brightens smaller kitchens and resists moisture. Film performance improves with uniform thickness—targeting consistent mil build across doors and frames boosts scratch and stain resistance.
- Sheen strategy: Matte (low glare), satin (balanced), semi-gloss (more reflective, great in compact spaces).
- Color planning: Off-whites and soft grays maintain resale appeal; dramatic navy/green islands add contrast without shrinking space.
- Film care: Avoid harsh scrub pads; use soft cloths and pH-neutral cleaners to maintain clarity and sheen.
Toronto families often ask how a sprayed finish compares to brush-and-roll paint. Sprayed films typically land smoother, with fewer brush marks and more uniform edges. That factory-style clarity is what many homeowners want—especially in open kitchens connected to living areas.
Best Practices for a Flawless Finish
A flawless respray depends on clean substrates, controlled environment (65–75°F, 40–60% RH), fine sanding between coats, and patient cure windows. Professional HVLP technique, filtered intake air, and dust-free staging reduce nibs and orange peel, delivering consistent sheen and edge coverage.
Prep and environment
- Degrease twice: Kitchens collect aerosols; a two-pass degrease significantly improves adhesion.
- Scuff-sand smart: Common sequences are 180→220→320 grit; edges get a lighter touch to avoid profiles rounding.
- Air quality: Use filtered intake and exhaust; capture overspray to protect adjacent rooms.
- Humidity and temp: Keep 40–60% RH and 65–75°F for leveling and cure stability.
Spray technique
- Consistent overlap: 50% pass overlap helps maintain even film thickness.
- Gun distance: Often 6–8 inches from surface; adjust by viscosity and tip.
- Flash times: Respect 10–20 minute flashes before recoating; avoid trapping solvents.
- Edge-first approach: Spray edges first, then broad faces to maintain a wet edge.
Quality control
- Tack-cloth between coats: Removes dust nibs before the next layer.
- Raking light check: Low-angle light reveals sags or dry spray before cure.
- Touch-up kit: Keep a labeled touch-up jar for micro-fixes after reassembly.
We practice these controls on every project we handle from York throughout the GTA, aligning with our respraying service process so outcomes stay predictable.
Tools and Resources We Trust
Professional kitchen respraying relies on HVLP sprayers, fine abrasives (180–320 grit), bonding primers, durable cabinet-grade topcoats, clean-room style masking, and stable drying racks. The right tools ensure adhesion, leveling, and sheen consistency while keeping your home protected throughout the process.
- HVLP spray system: Prioritizes transfer efficiency and control; reduces overspray in lived-in spaces.
- Abrasives and fillers: 180–320 grit progression plus cabinet-grade fillers for seams and dings.
- Primers/topcoats: Bonding primers and durable, washable topcoats tuned for kitchens.
- Containment: Zipper walls, floor protection, and targeted ventilation keep dust out of living zones.
- Drying racks: Vertical racks speed handling while protecting fresh films from contact.
For a homeowner perspective on broader paint updates, this overview of interior painting services outlines room-prep principles that also apply to kitchens. For inspiration on general kitchen makeovers, see this before-and-after gallery. And for DIY painters exploring technique, this kitchen cabinet painting walk-through covers common steps and pitfalls.
Maintenance and Longevity
Maintain a sprayed kitchen by gentle cleaning, protecting high-wear zones, and letting the finish fully cure before heavy use. With normal care, professionally sprayed films can serve for years, resisting common stains and abrasion while keeping color and sheen stable in everyday cooking environments.
- Cure patience: Treat cabinets gently for the first 7–14 days; full hardness often lands by 30 days.
- Cleaning: Use soft cloths and mild soap; avoid ammonia or abrasive pads.
- Hot zones: Add discreet heat shields near ovens and dishwashers if steam or radiant heat is intense.
- Hardware help: Soft-close hinges and bumpers minimize impact marks on frames.
We provide a simple aftercare sheet at handoff so your refreshed finish stays crisp. If scuffs appear, a quick touch-up with stored paint (labeled by door location) handles hairline marks without a full respray.
Mini Case Studies from Toronto Homes
Real-world results show where kitchen respraying excels: sound cabinets, dated colors, and tight timelines. By controlling prep and spray variables, Toronto homeowners achieve consistent, modern finishes that align with open-concept spaces—often within a single workweek from removal to reassembly.
York bungalow refresh
- Challenge: Solid maple doors, heavy yellowing, open plan into living room.
- Approach: Degrease + 220/320 grit scuff, bonding primer, two topcoats satin off-white.
- Outcome: Light bounce improved; living area felt larger. Reassembly day included hinge tuning for quieter closes.
Downtown condo with limited space
- Challenge: Minimal staging room; concerns about overspray.
- Approach: Off-site door spraying; on-site boxes masked with zipper walls and filtered exhaust.
- Outcome: Uniform semi-gloss amplified natural light; kitchen remained partially usable between coats.
Family home near parks
- Challenge: Busy kitchen with toddler traffic.
- Approach: Scheduled door removal for early morning, used low-odor systems; provided temporary drawer bins.
- Outcome: Satin gray finish resisted fingerprints; daily routines continued with minimal interruption.
Want more process detail before you decide? Our respraying guide expands each step with photos and checklists to help you plan confidently.
How to Choose a Respraying Partner
Select a respraying partner by evaluating surface-prep standards, spray environment, coating systems, door labeling and reassembly discipline, and documented aftercare. Ask for recent projects, timelines, and a clear scope covering containment, ventilation, and cleanliness throughout your home.
- Process transparency: Look for written steps from degrease to cure; vague scopes risk shortcuts.
- Finish samples: View sheen and color chips under your lighting; judge smoothness by raking light.
- Local proof: Awards and reviews in Toronto signal consistent outcomes and service.
- Safety and care: Confirm masking, filtration, and daily cleanup routines.
We’re proud of our GTA focus and recognition, with HomeStars Best of Awards in 2020 and 2021. Explore our service overview to see how we keep projects organized, respectful, and on schedule.
Frequently Asked Questions
These quick answers address the most common questions Toronto homeowners ask about kitchen respraying—timelines, cabinet condition, odor, and daily-life disruption. If you don’t see your scenario here, contact our York-based team for a tailored recommendation.
What cabinets are good candidates for kitchen respraying?
Sound boxes and doors with minor wear are ideal. We look for stable frames, minimal water damage, and solid hinge attachment. If doors are severely warped or boxes are failing, we’ll recommend refacing or replacement instead of spraying.
How long will the sprayed finish last?
With proper prep and normal care, a professionally sprayed finish serves for years. Durability depends on film build, cure, and daily habits. Gentle cleaning, door bumpers, and soft-close hardware help maintain the factory-style look.
Will my kitchen be out of use during the project?
We stage the work to minimize downtime. You’ll have limited access during on-site spraying hours, but most families can still use small appliances between coats. Door and drawer removal happens first, with reassembly typically within a week.
Does kitchen respraying have strong odors?
Low-odor and low-VOC options are available. We add targeted ventilation and filtration to move air out of living zones. Any light smell dissipates faster with open windows and maintained airflow during the first 24–48 hours.
How is respraying different from cabinet painting?
Both change color and sheen. Spraying focuses on atomized application for a factory-style surface with minimal texture. Brush-and-roll painting can look excellent too, but sprayed films usually have more uniform edges and fewer visible strokes.
Key Takeaways
Kitchen respraying renews cabinet finishes fast while preserving your layout. Success hinges on prep quality, controlled environment, and patient curing. For sound cabinets needing a style refresh—not a layout change—respraying is the most efficient path to a modern, factory-style look in Toronto homes.
- Respraying modernizes color and sheen on structurally sound cabinets.
- Controlled prep, HVLP technique, and cure windows drive durability.
- Timelines are measured in days, keeping daily life moving.
- Finish options span matte to semi-gloss with broad color choice.
- Local planning from York streamlines pickup, spraying, and reassembly.
Next Steps
Ready to evaluate your kitchen? Start with a quick cabinet condition check, choose a shortlist of colors, and schedule a walkthrough. We’ll confirm candidate suitability, outline timeline, and map out containment so your routine in Toronto stays on track from day one.
- Skim our respraying guide for a deeper step-by-step.
- Browse finishes and note 2–3 preferred sheens for test samples.
- Contact our York team to plan staging, ventilation, and reassembly.