
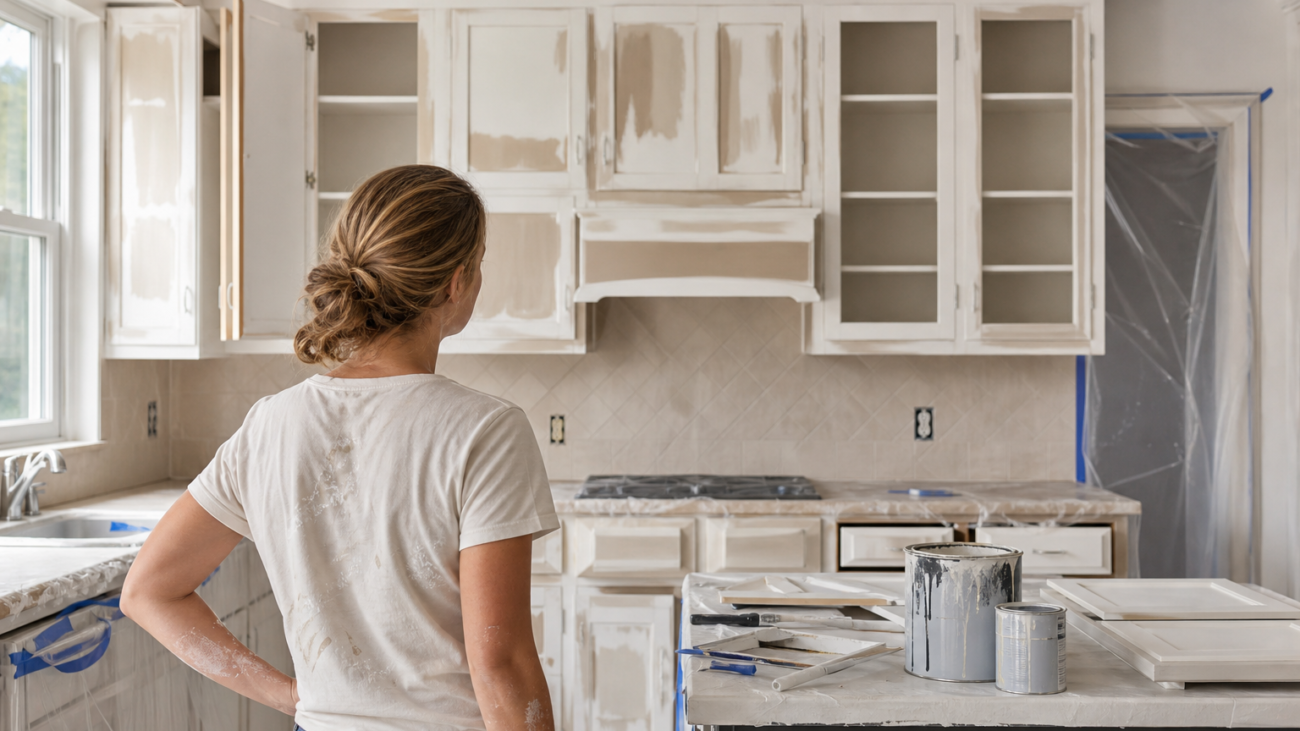

Which Kitchen Cabinet Painting Mistakes Cause the Most Trouble?
Introduction: what this checklist gives Toronto and GTA homeowners
If you are planning a kitchen cabinet refresh, this article lists exactly seven mistakes and contractor red flags to watch for. Each numbered item explains why it matters, how to spot the problem, a practical fix or mitigation, and a short decision question to help you choose DIY versus hiring a specialist. When you are ready to compare professionals, Paint2decor INC offers free quotes for Greater Toronto Area projects and local guidance on refinishing, refacing, spraying, and cabinet painting.
The seven mistakes and red flags

-
1. Skipping proper surface prep and deglossing
Why it matters: Paint sticks to a clean, slightly abraded surface. Grease, wax, old finish sheen, and household grime block adhesion. When preparation is skipped the paint may peel, chip, or show bubbling within months rather than years.
How to spot it: Run your palm across the door face. If it feels slick or if a household cleaner leaves a rainbow or film, the surface needs deglossing. Small adhesion tests in hidden corners will show lifting if prep was inadequate.
Quick fix and mitigation: Clean with a trisodium phosphate substitute or a dedicated degreaser, degloss with a liquid deglosser or light sanding, then wipe with a tack cloth. Follow manufacturer instructions for primer after prep. Canadian trade advice stresses that patience in prep reduces rework and failures, so plan for this step as part of the job schedule (Kitchen & Bath) and professionals recommend the same approach (Imagine Painting).
Decision question: Can you commit the time and attention to thorough cleaning, deglossing, and sanding, or should you hire a pro who guarantees prep as part of the service?
-
2. Using the wrong primer or paint for cabinet surfaces
Why it matters: Cabinets are made from many substrates, including solid wood, MDF, laminate, thermofoil, and painted surfaces. Using an ordinary wall paint or the wrong primer leads to poor adhesion, visible defects, and a short service life.
How to spot it: Ask about the substrate before work begins. If a contractor or DIY plan does not identify the material, or if product labels are not shown, that is a red flag. Visible signs of product mismatch include patchy coverage, cracking at edges, and poor water resistance.
Quick fix and mitigation: Match primer chemistry to the substrate. Bonding or adhesion primers are common for smooth laminates and thermofoil. Alkyd-modified primers or specialist cabinet primers perform well on wood and previously painted doors. Choose a cabinet-grade topcoat with good hardness and washability. Trade sources recommend considering product families and finishes rather than one-size-fits-all kits (Spray Kitchen Cabinets) and selecting durable cabinet paints based on substrate and use (The Spruce).
Decision question: Do you know your cabinet substrate and have product choices verified, or do you need an expert to specify primer and topcoat for long term performance?
-
3. Choosing brushes and rollers when a sprayed finish is needed
Why it matters: Brushing and rolling leave texture, visible strokes, and tiny bubbles that are obvious on flat cabinet door faces. Spraying produces the smooth, factory-style finish most homeowners expect, especially on shaker and slab doors.
How to spot it: Look at photos of previous jobs. If a contractor only shows brush or roller work, expect a textured look on large flat areas. For DIY projects, small samples of brushed paint will reveal the eventual surface texture.
Quick fix and mitigation: If spraying is not possible, use fine foam rollers and a high-quality brush for edges, then sand between coats with very fine grit and apply a thin final coat. However, when finish smoothness is a priority professionals advise spraying for a near factory result (Shelly’s Kitchens) and industry guides note that spraying typically yields a more professional appearance for cabinets (The Spruce).
Decision question: Is a flawless, sprayed finish a top priority for you, or can you accept the subtle texture of brush and roller work?
-
4. Rushing drying and cure times
Why it matters: Paint that is set but not fully cured will scuff, dent, and pick up marks in daily use. Early rehanging, heavy use, or exposing doors to moisture speeds failure. Proper staged drying and cure are essential for longevity.
How to spot it: If a project timeline promises same-day use of cabinets without mention of staged cure, ask for details. Signs of inadequate cure are tacky surfaces, fingerprints, and a soft finish when you press gently with a fingernail.
Quick fix and mitigation: Plan work in stages. Allow the manufacturer cure windows between primer, intermediate coats, and final topcoat. In busy households use temporary alternatives such as moving daily items to a cart. Professional workshops and controlled spray booths let teams control temperature and humidity to speed safe curing while maintaining quality (Kitchen & Bath) and contractor guidance highlights staged cure as a cause of avoidable failures (Imagine Painting).
Decision question: Can you keep the kitchen out of heavy use long enough for full cure, or would a contractor with controlled curing methods and a warranty be a better choice?
-
5. Painting over damaged doors and failing to repair hardware
Why it matters: Dents, loose joints, warped doors, and bad hinges do not disappear under paint. If mechanical issues are not fixed first, the finished cabinet will look and perform poorly. Paint highlights alignment problems and will crack where movement occurs.
How to spot it: Inspect doors for soft spots, missing fill, loose screws, and sagging. Check operation. If doors close unevenly or rub the frame, those issues must be repaired before finishing.
Quick fix and mitigation: Use wood filler for small gouges, reglue loose frames, replace rotten substrate sections, and swap out old hinges for properly adjusted hardware. Major warping or structural damage may mean refacing or replacement of parts. This Old House outlines common repairs to perform prior to painting so the new finish lasts (This Old House).
Decision question: Are the repairs straightforward and within your skill set, or do you need a cabinet service that includes repair and realignment?
-
6. Hiring on price alone or ignoring contractor red flags
Why it matters: A low bid can mean missing steps, poor products, or no warranty. Long term costs from rework, peeling, or damaged doors exceed short term savings. Selecting a contractor on trust, documented scope, and evidence of past results lowers risk.
How to spot it: Warning signs include no written scope, no before and after photos of similar cabinet jobs, missing proof of insurance, unrealistic turnaround promises, and refusal to supply references. Contractors who cannot explain products or refuse to show previous respraying work are also red flags.
Quick fix and mitigation: Use a vetting checklist. Ask for a written scope that lists prep steps, primer and topcoat brands, application method, cure expectations, warranty, and proof of insurance. Ask to see gallery photos of finished cabinet respraying projects. Industry articles emphasize checking references and job photos when comparing bids (Spray Kitchen Cabinets) and Canadian renovation experts recommend the same due diligence (Kitchen & Bath).
Decision question: Does the contractor give a clear written scope, show cabinet respray examples, and answer product questions, or should you shortlist other firms before committing?
-
7. Ignoring finish maintenance and realistic expectations
Why it matters: Painted cabinets are durable but not indestructible. Daily use, harsh cleaners, steamy conditions, and abrasive pads will wear finishes. Knowing how to care for a painted surface prevents premature loss of appearance.
How to spot it: If your plan does not include a maintenance policy or aftercare instructions from the painter, request them. Homeowners often discover problems after the work is done because they were not told which cleaners, temperatures, or actions to avoid.
Quick fix and mitigation: Follow a simple do and do not list. Do wipe spills quickly, use non abrasive cleaners, and avoid strong solvents. Do test new cleaners in an inconspicuous area. Do tighten hinges and adjust doors periodically. Do avoid steam heavy cooking next to fresh finishes until fully cured. Sources that cover cabinet care and realistic expectations can help you plan for longevity (Shelly’s Kitchens) and practical maintenance tips are listed by a range of how to guides (Family Handyman) and The Spruce (The Spruce).
Decision question: Are you prepared to follow care steps and accept normal wear, or do you need a tougher professional coating and a contractor warranty?
Local next steps, common objections, and a brief decision checklist

How to move forward in the GTA: weigh risk, time, finish quality, and budget. Common homeowner objections include cost, disruption, and fumes. Rebuttals include the lower cost of refinishing versus replacement, phased project timing, and the availability of low VOC products and workshop spraying that keeps fumes out of the home.
- Quick checklist when getting quotes: written scope, substrate identification, primer and topcoat brands, application method, cure schedule, warranty details, insurance proof, and before and after photos.
- Common objections and answers: worried about smell? Ask for booth spraying off site. Concerned about time? Request a staged timeline that fits your routine. On price? Compare detailed scopes not bottom line alone.
- Next step: request a free, no obligation quote from a local cabinetry refinishing specialist who can inspect your cabinets and recommend refinishing options.
When you are ready for a local assessment, Paint2decor INC serves Toronto and the broader GTA and provides free quotes for cabinet refinishing, refacing, respraying, and cabinet painting. Their blog and service pages explain the process and show examples of local work (Paint2decor INC blogs).
Frequently asked questions
Should I paint my cabinets myself or hire a professional in Toronto?
If your cabinets are in good structural condition and you can commit to thorough prep, correct primers, spraying or careful coating, and staged cure times, a skilled DIYer can succeed. Hire a professional when substrate identification, repairs, or a sprayed, factory finish are priorities. Use the vetting checklist above when comparing local contractors.
What type of primer and paint work best for laminate and thermofoil doors?
Laminate and thermofoil need strong adhesion primers or bonding primers designed for smooth, non porous surfaces. After a bonding primer, a cabinet grade topcoat with good hardness and washability is recommended. Confirm product choices with the painter or supplier before work starts.
How long should cabinets cure before normal use and how can I speed safe curing?
Cure times vary by product, temperature, and humidity. Most systems require several days to a week for safe use and up to several weeks for full hardness. Speeding cure without sacrificing quality requires controlled temperature and humidity, and professionals with booths or workshop finishing can accelerate cure safely.
What questions should I ask a contractor before accepting a cabinet painting quote?
Ask for the written scope, prep steps, substrate identification, primer and topcoat brands, application method, estimated cure timeline, warranty terms, proof of insurance, and before and after photos of similar cabinet projects.
Will repainting my cabinets change their resale value in the GTA?
Repainting or refinishing can improve the visual appeal and perceived condition of a kitchen, which often helps resale. The impact depends on finish quality, color choices that match the local market, and whether the underlying cabinetry is solid and well maintained.
Ready to avoid these mistakes?
If you want a local inspection and a free quote from an experienced GTA cabinetry refinishing specialist, contact Paint2decor INC to schedule an assessment and get a detailed scope for your cabinet refresh.