
Painting IKEA cabinets is the professional prep-and-coat process that bonds durable primers and finishes to IKEA’s laminate, melamine, or thermofoil doors for a factory-smooth look. From our York location at 2710 St Clair Ave W in Toronto, Paint2decor INC helps homeowners choose smart DIY steps or pro respraying for lasting results.
By Paint2decor INC • Last updated: 2026-05-17
Love your IKEA layout but not the finish? You’re not alone. With the right prep, you can refresh those SEKTION, BODBYN, or AXSTAD fronts and enjoy a smooth, modern finish that stands up to daily life.
- What painting IKEA cabinets really involves (materials and science)
- Which doors paint well—and which don’t
- Step-by-step setup, priming, and finishing (DIY vs. pro)
- Best practices we use in Toronto homes for durable results
- When to switch to refacing or pro respraying
Quick Summary
To paint IKEA cabinets well, clean and degrease, scuff sand, then use a high-adhesion bonding primer and a quality enamel or 2K finish. Control dust, temperature (60–77°F), and humidity (40–60%). Many DIYers roll frames and hire pros to spray doors for a flawless, durable look.
Here’s the high-level playbook we use across Toronto kitchens—optimized for IKEA’s common door materials and hardware systems.
- Clean with a strong degreaser; rinse twice; dry at least 1 hour.
- Scuff sand with 220-grit; fine-sand between coats with 320–400-grit.
- Bonding primer: 1–2 coats; allow 1–2 hours between coats per label.
- Finish: cabinet-grade enamel or professional 2K system; 2–3 light coats.
- Dry to touch: ~30–60 minutes; handle carefully for 24 hours; cure 7–14 days.
What is painting IKEA cabinets?
Painting IKEA cabinets is the surface-prep and coating system that makes slick IKEA laminates accept paint and achieve a factory-like finish. It combines aggressive cleaning, controlled scuff sanding, high-adhesion primer, and cabinet-grade topcoats applied under dust- and climate-controlled conditions.
IKEA doors and panels are often melamine or thermofoil over MDF. These low-porosity skins resist typical paints. That’s why adhesion hinges on the trio of chemistry (bonding primers), micro-abrasion (proper grits), and environment (temperature and humidity control).
- Surface energy matters: Melamine and thermofoil are slick. A bonding primer raises surface energy so topcoats grab.
- Measured abrasion: 220-grit creates micro-scratches without telegraphing swirl marks through the finish.
- Coating build: 2–3 thin coats level better than one heavy coat and lower the risk of sags.
- Cure windows: Many cabinet enamels reach handling strength in 24 hours and full cure in 7–14 days.
In our experience prepping Toronto kitchens, skipping any one of those steps is what causes most failures—usually chipping at high-touch points like pulls within weeks.
Why painting IKEA cabinets matters in York and Toronto
In York and the broader Toronto climate, kitchens see heavy use, indoor humidity swings, and wintertime ventilation limits. Durable cabinet coatings reduce touch-up cycles, resist moisture, and extend the life of existing IKEA systems without changing your layout or hardware.
Homeowners weigh refresh options fast: repaint frames and doors, pro respray only the doors, or pivot to refacing. We help you choose the right path for your space and timeline.
- Seasonal reality: Winter keeps windows closed; volatile organic compounds (VOCs) linger. Low-VOC products and pro ventilation keep indoor air quality steadier.
- Moisture peaks: Cooking and dishwashers spike humidity near 60% in active kitchens—coating selection and cure time matter more.
- Layout lock-in: With SEKTION boxes set, finishing the doors is the fastest route to a visual upgrade while protecting the box integrity.
Considering a higher-end sprayed finish? See our Toronto-focused overview of kitchen cabinet spraying for how we stage, ventilate, and cure finishes in local homes.
How the process works (step-by-step)
The process is clean-remove-label, degrease-rinse, scuff sand, spot-fill, mask, prime, sand smooth, then finish with 2–3 light coats. Maintain 60–77°F and 40–60% RH. Let doors cure at least 7 days before reinstalling bumpers and hardware.
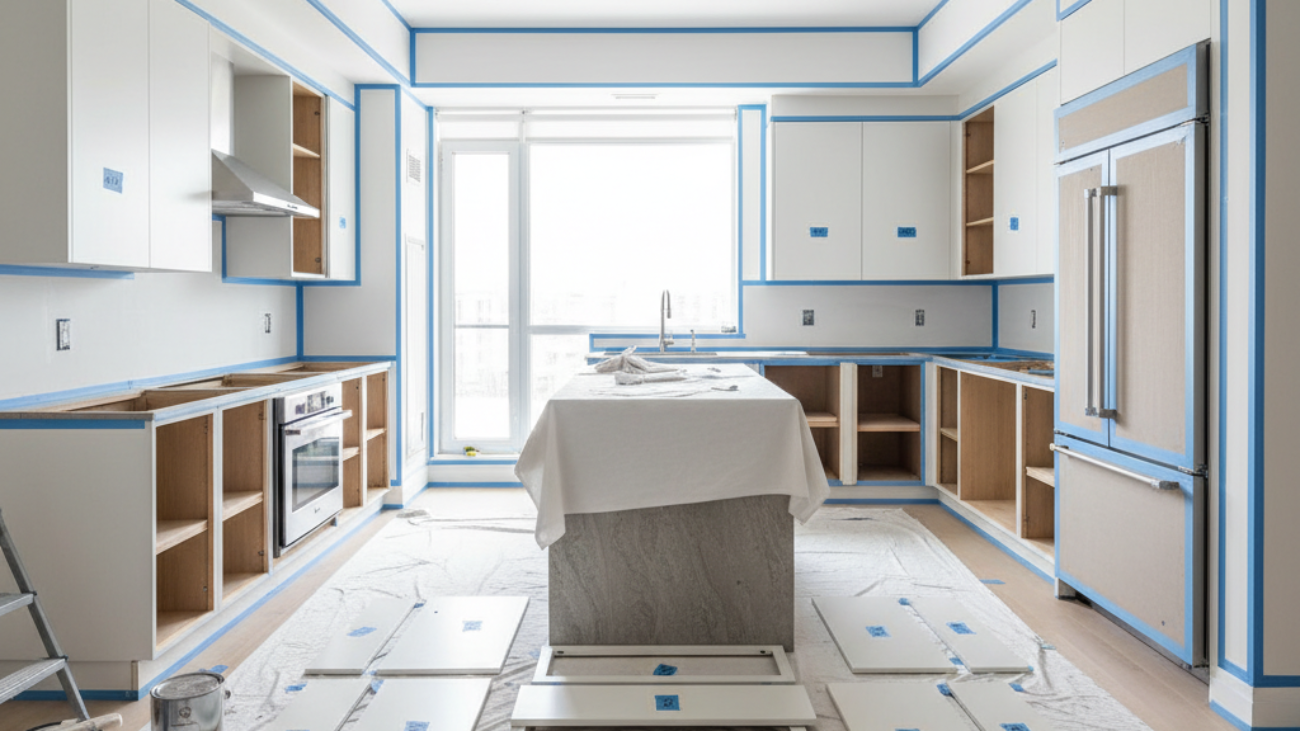
Set up and catalog
- Photograph cabinet runs; number doors and hinges with painter’s tape on the hinge edge.
- Remove doors and hardware; bag screws by location; store hinges in labeled bins.
- Set up a clean staging area with racks; aim for 2–3 feet of airflow around each door.
Degrease and rinse
- Use a kitchen-safe degreaser; scrub around pulls and near the range where aerosols collect.
- Rinse twice with clean water. Trapped detergent films cause primer fisheyes.
- Dry for 60 minutes; verify no moisture remains in hinge cups or edges.
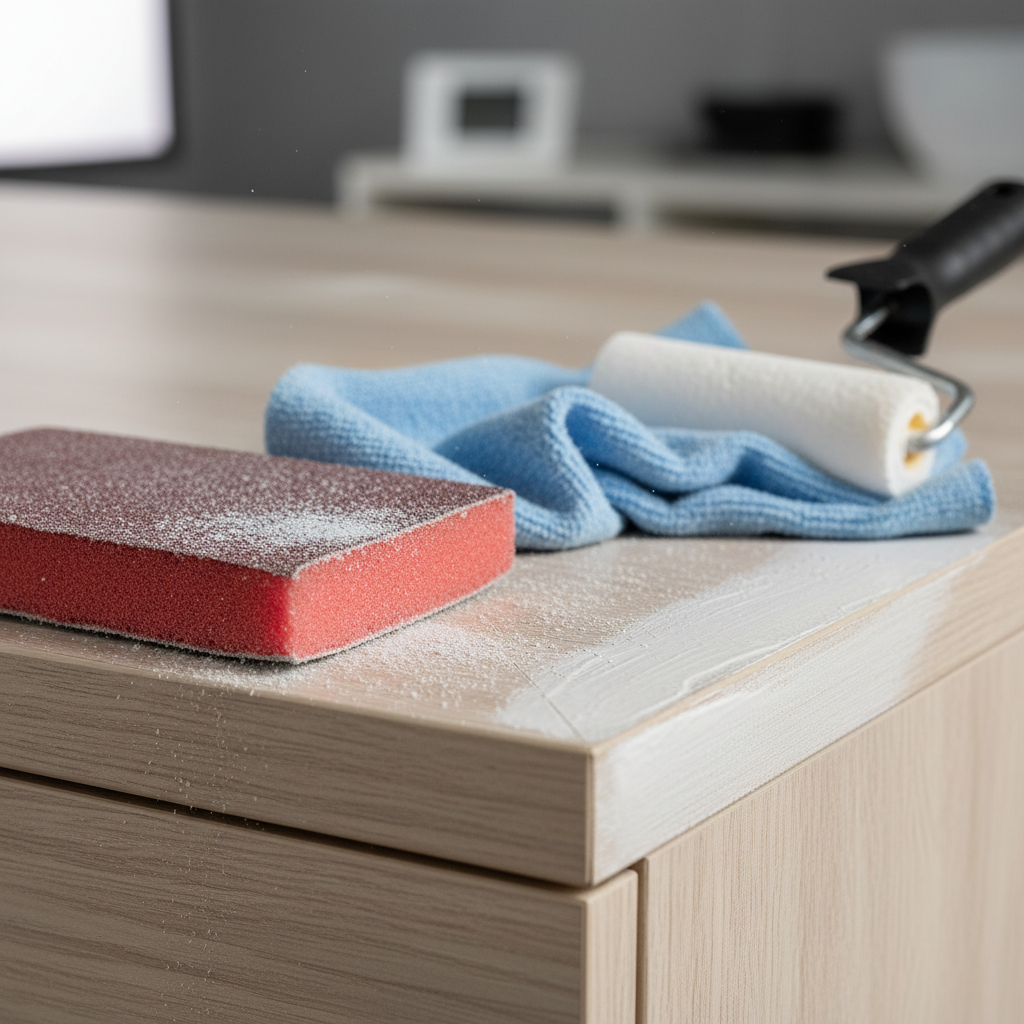
Sand and repair
- Scuff sand laminates with 220-grit. For existing paint, step through 180 → 220 → 320.
- Feather chips with a sanding block; fill dings with a non-shrinking filler; sand flush at 320-grit.
- Vacuum, then tack cloth; any dust nibs telegraph under high-sheen finishes.
Prime for adhesion
- Use a bonding primer designed for slick surfaces; roll thin with a high-density foam roller.
- Let dry 60–120 minutes per label; sand lightly with 320-grit for tooth between coats.
- Inspect at a raking light angle; correct holidays before you topcoat.
Finish coats
- Apply 2–3 light coats of cabinet enamel or a professional 2K system.
- Maintain wet edges; level sags immediately; tip off with a brush only if rolling.
- Target dust-free in 30–45 minutes per coat under stable conditions.
Reassembly and cure
- Reinstall doors after 24 hours of cure for light handling; adjust hinges for reveals of 2–3 mm.
- Add felt bumpers; wait 7–14 days before aggressive cleaning.
- Use gentle cleaners; avoid ammonia for the first month.
If you prefer a flawless sprayed look, many homeowners roll frames and hire our team to spray doors and drawer fronts. Learn what to expect in our professional cabinet painting guide.
Types, materials, and application methods
Identify your IKEA door material first—melamine, thermofoil, or painted MDF—then match application method: high-density foam rollers for frames, HVLP spraying for doors, and bonding primers for laminates. Choose satin or semi-gloss for durability and easy cleaning in active kitchens.
Common IKEA door skins
- Melamine/laminate: Low-porosity, needs aggressive cleaning and bonding primer. Great candidates once prepped.
- Thermofoil (vinyl wrap): Heat-formed film over MDF. If peeling or bubbled, painting over the failure won’t last—consider new doors or refacing.
- Painted MDF: Usually sands and repaints well; watch for fiber-raising on edges—seal with primer.
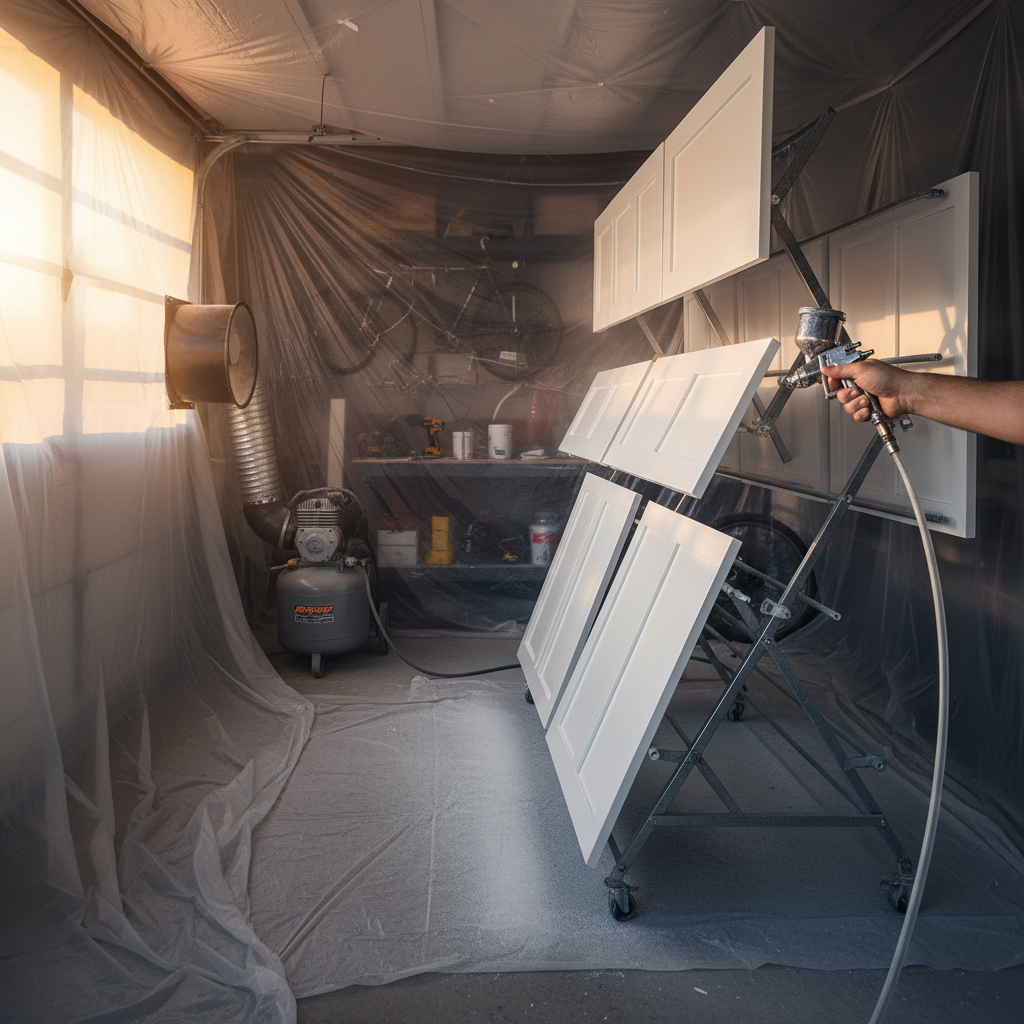
Application choices
- HVLP spray: Factory-smooth results, fine atomization, minimal orange peel. Typical 1.3–1.4 mm tip for enamels.
- High-density foam roller: Excellent for frames; low stipple after leveling; pair with quality enamel.
- Brush-only: Works in a pinch but risks brush marks. If brushing, condition paint and lay off lightly.
Sheen and color
- Satin: The sweet spot for most kitchens—hides minor texture and cleans easily.
- Semi-gloss: Harder film and brighter look; shows prep flaws more readily.
- Color picks: Toronto trends still favor soft whites, warm grays, and smoky greens; deep navy on islands adds contrast.
Curious whether respraying beats rolling for your layout? Our cabinet respraying guide explains finish levels, staging, and cure windows we use in the GTA.
Best practices we follow for IKEA cabinet painting
Win the job in prep: remove contamination, scuff uniformly, and use a dedicated bonding primer. Spray doors in a controlled zone, roll frames in place, and respect cure times. Protect edges and high-touch zones during reassembly to avoid early chips.
- Temperature and RH: Keep 60–77°F and 40–60% relative humidity for predictable leveling and cure.
- Dust control: Plastic off appliances; use air scrubbers; always tack before each coat.
- Edge protection: Lightly round sharp edges (1–2 passes of 320-grit). Coatings fail first on knife edges.
- Hinge reveal checks: Photograph reveals before demo; aim for even 2–3 mm after rehang.
- Hardware upgrades: Consider new pulls; hole spacing templates maintain alignment within 1–2 mm.
When clients want a seamless “new door” look or when thermofoil is failing, we often recommend refacing. See how we approach that in our cabinet refacing overview.
Tools and resources (DIY and pro)
You’ll need a degreaser, 180–400-grit abrasives, bonding primer, cabinet-grade enamel or 2K finish, foam rollers, quality brushes, masking supplies, and drying racks. Pros add HVLP sprayers, air scrubbers, and temperature/RH monitors to control finish quality.
Essential checklist
- Degreaser and two clean rinse buckets
- Sandpapers: 180, 220, 320, 400 grits; sanding block or orbital with interface pad
- Bonding primer compatible with laminates
- Cabinet enamel or 2K polyurethane/acrylic system
- High-density foam rollers; fine sash brush for tipping
- Masking paper/plastic; painter’s tape; labeling system
- Drying racks with 2–3 inch clearance for airflow
- Optional: HVLP turbine gun; HEPA air scrubber; hygrometer/thermometer
For deeper background on paint prep and cabinet substrates, you may find these practical primers helpful: a step-by-step on how to paint kitchen cabinets, a material explainer comparing melamine vs. plywood, and a planning overview of painting kitchen cabinets in Canada.
Prefer to hand off the finish-critical steps? Start with our Toronto primer on professional kitchen cabinet painting to see process controls we use daily.
Case studies and local tips
Toronto homeowners most often mix DIY and pro steps: they remove, label, and clean doors; we spray doors off-site for a glassy finish while frames get rolled in place. This hybrid approach shortens downtime and keeps quality high on the most visible surfaces.
Mini case: York townhouse near Smythe Park
- Profile: 12-door IKEA SEKTION kitchen with flat-panel melamine fronts.
- DIY: Homeowner degreased twice, scuff sanded, and masked appliances.
- Pro: We HVLP-sprayed doors in a controlled bay; frames were rolled satin.
- Result: Satin white with new 160 mm pulls; full rehang after 36 hours; gentle use for 10 days.
Mini case: Bloor West condo, compact galley
- Profile: 9 doors, thermofoil fronts with minor edge lift near the dishwasher.
- Assessment: Peeling foil signaled substrate failure. Painting over would not last.
- Solution: Switched to new shaker doors via refacing; frames color-matched.
- Outcome: Faster turnaround with durable edges and upgraded soft-close hinges.
Local considerations for York
- Plan staging near ventilation. Homes close to the Toronto Public Library – Daniel G. Hill Branch often have compact utility rooms—use a garage bay or balcony airflow when safe.
- Cold snaps push indoor RH below 30%. Add a portable humidifier during cure to avoid overly fast drying and embrittlement.
- Weekends fill fast for condo service windows. Book your elevator early; we sequence spraying to your building’s quiet hours.
Need help judging whether your IKEA doors are paint-ready? Our team can assess laminate integrity and plan a finish stack that fits your timeline. Explore our Toronto spraying approach for details.
Refinish vs. Reface vs. Replace (for IKEA kitchens)
Refinishing is fastest when door skins are sound. Refacing is best when thermofoil fails or you want a new profile. Replacement is for damaged boxes or major layout changes. IKEA’s modular system makes refinishing and refacing efficient without moving plumbing or electrical.
| Path | When it fits | Finish quality | Disruption | Notes |
|---|---|---|---|---|
| Refinish (paint) | Sound laminate or painted MDF; minor dings | High with spraying; medium with roll/brush | Low–moderate | Keep layout; fast visual reset; cure 7–14 days |
| Reface (new doors) | Thermofoil peeling; profile change desired | Factory-new door faces | Moderate | Upgrade profile/hinges; color-match frames |
| Replace | Box damage; layout change; water issues | Factory-new everything | High | Involves trades; longer timeline |
If you’re leaning toward new faces, our cabinet refacing overview walks through door options, hinge upgrades, and color matching strategies.
Want a pro eye on your IKEA doors? We can confirm material type, test adhesion, and plan a finish schedule that fits your home’s conditions. Toronto homeowners often combine DIY prep with our pro spraying for doors. Explore professional cabinet painting to see our process.
Frequently Asked Questions
Most IKEA cabinets paint well if the laminate is sound. Thermofoil that’s peeling should be refaced instead. Expect 7–14 days to reach full cure; handle gently during the first week and avoid harsh cleaners until the finish hardens.
Can you paint IKEA thermofoil doors?
If thermofoil is intact, you can scuff, prime, and paint, but adhesion risk remains at heat-prone edges. If foil is peeling or bubbled, painting over it won’t last—switch to refacing with new doors for reliable durability.
What primer should I use on IKEA laminate?
Use a high-adhesion bonding primer rated for slick surfaces like laminate or melamine. Apply two thin coats, sanding lightly with 320-grit between coats. This raises surface energy and gives cabinet enamel a reliable grip.
Is spraying better than rolling for IKEA doors?
Spraying creates the smoothest, most uniform finish, especially on flat IKEA slabs. Rolling frames in place and spraying doors off-site is a popular hybrid. If you only roll, use high-density foam rollers and ultra-thin coats to limit texture.
How long before I can use the kitchen normally?
Most cabinet enamels are dry to touch in 30–60 minutes and handle-ready in about 24 hours. Plan on gentle use for 7–14 days while the coating cures to full hardness. Add felt bumpers and avoid ammonia-based cleaners early on.
When should I choose refacing instead of painting?
Choose refacing when thermofoil is peeling, the profile is dated, or edges are damaged. New doors transform the look and fix substrate issues. Frames can be color-matched so everything appears factory-new.
Key takeaways
Prep and adhesion control make or break IKEA cabinet painting. Use bonding primers, thin coats, and stable climate. Spray doors when possible, and choose refacing if thermofoil is failing. Handle gently for the first 7–14 days to protect the new finish.
- Painting IKEA cabinets hinges on clean → scuff → prime → finish.
- Thermofoil failures call for refacing rather than repainting.
- Hybrid approach: roll frames, spray doors for the best look.
- Target 60–77°F and 40–60% RH for predictable curing.
- Let coatings reach full cure before aggressive cleaning.
Conclusion
To refresh IKEA kitchens fast, stabilize the surface, use the right primer, and apply thin, even coats in a controlled environment. If the door skin is failing, refacing wins. When quality matters, pro spraying delivers a consistent, factory-style finish that holds up.
Ready to see what’s possible in your Toronto home? Explore our step-by-step professional cabinet painting process, or compare finish-level options in our cabinet respraying guide. If your doors are past saving, learn how new faces change the game in our refacing overview. Book a quick chat—we’re nearby in York and ready to help.