
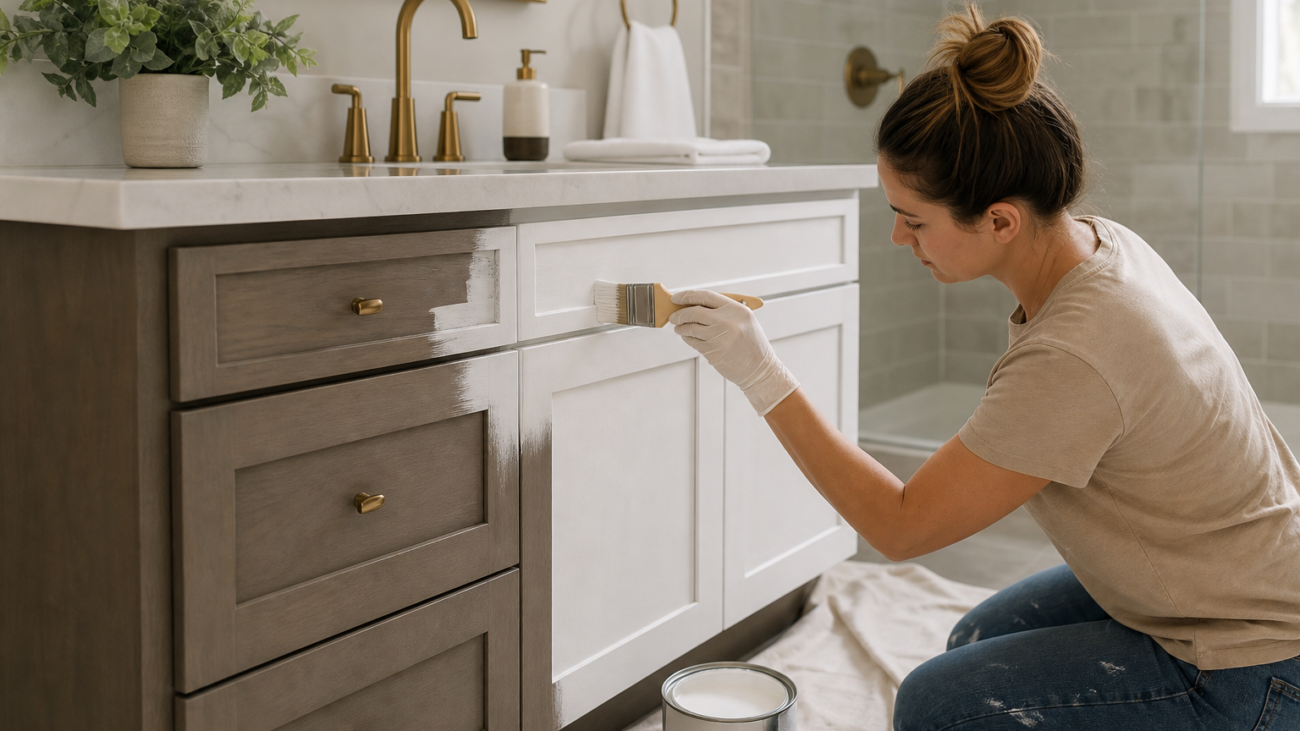

Bathroom Vanity Painting Techniques: A Step-by-Step Approach
Painting a bathroom vanity can update a room without replacing the entire cabinet. It also gives you more flexibility when choosing a colour and sheen, as noted in this bathroom vanity cabinet tutorial. The result depends less on rushing through the painting itself and more on controlling the steps before and after it.
Use the sequence below as a project framework. The stop points matter: do not continue until the surface is clean, sound, and ready for the next stage. Because vanity materials, existing coatings, and paint products vary, read the product label and follow its preparation, application, ventilation, and cleanup instructions. Stop if you find active water damage, swollen material, loose panels, mould, or a coating that is lifting beyond a small repair area.
Step 1: Inspect and plan the vanity
Begin by looking closely at every surface you intend to paint. Check the doors, drawer fronts, side panels, face frame, and any exposed end panels. Note chips, dents, cracks, peeling finish, swollen edges, loose hardware, and areas where water may have reached the cabinet. A painted surface cannot correct a structural or moisture problem underneath it.
Decide whether you are painting only the cabinet exterior or also the doors, drawers, and hardware. Removing doors and drawer fronts usually makes it easier to reach edges and keep the work organized, but label each piece so it can return to its original position. Photograph hinge placement before removal if the hardware is complicated.
- Choose a work area where removed parts can remain undisturbed.
- Protect the floor, countertop, sink, walls, and nearby fixtures.
- Keep the bathroom usable only if the work area can remain protected and undisturbed.
Stop point: Do not buy paint or begin sanding until you have identified the existing surface and any repairs it needs. If the vanity is damaged by moisture or the coating is failing extensively, pause the project and obtain an assessment rather than sealing the problem under new paint.
Step 2: Remove hardware and protect surrounding surfaces
Remove knobs, pulls, hinges, and other hardware where practical. Place screws and parts in labelled containers. Painting around installed hardware can leave uneven edges and may make later adjustments difficult. If a component cannot be removed, mask it carefully and keep paint away from moving parts.
Mask the countertop, backsplash, sink, wall, floor, and plumbing fixtures. Use drop cloths or other floor protection that will not shift easily. Pay particular attention to the narrow area where the vanity meets the countertop. The Valspar bathroom vanity painting instructions specifically recommend taping off countertops and cutting in around kitchen and bathroom cabinets.
Open a window or otherwise provide the ventilation called for on the product label. Keep children and pets away from the work area, and use the protective equipment specified by the products you select. Do not spray or use solvent-based materials in an enclosed space unless the label specifically permits the conditions and you can meet its ventilation requirements.
Stop point: Check the masking from standing height and close up. If any section of countertop, wall, floor, or fixture remains exposed, correct it before opening the paint. Do not rely on a cloth or paper towel as your only protection against spills.
Step 3: Clean and repair the surface
Remove dust, soap residue, grease, hair products, and other bathroom residue before sanding. Work methodically across the vanity, including corners, profiles, door edges, drawer fronts, and the underside of projecting edges. Cleaning is complete only when the surface is free of visible residue and feels consistent rather than slick or sticky.
Use a cleaning method compatible with the vanity material and the coating you plan to apply. Do not soak wood-based panels or allow water to collect around joints, sink plumbing, or damaged edges. Wipe away cleaning residue and allow the surface to become suitable for the next step according to the product instructions.
Fill suitable dents or small surface defects with a compatible repair product, then allow the repair to dry as directed. Sand the repaired area until it transitions smoothly into the surrounding surface. Remove loose caulk or failing sealant only where it interferes with the finish, and do not caulk over active leaks or swollen material.
Stop point: Shine a light across the surface and run your hand over it. Stop if you still feel grease, loose coating, raised filler, dampness, or an edge caused by peeling paint. Resolve the issue before continuing; otherwise, the defect may remain visible after painting.
Step 4: Sand lightly and remove dust

Sanding should prepare the existing surface rather than remove unnecessary material. The aim is to reduce gloss, smooth repaired areas, and soften sharp transitions at chips or peeling edges. Use an approach appropriate to the vanity’s material and existing finish, and avoid rounding profiles or sanding through thin veneers.
For a useful baseline, the Valspar instructions say to wipe away dust or debris, gently sand to help paint adhere, and then wipe the surface again after sanding. Apply that sequence carefully: sand evenly, inspect the result, and remove all sanding dust from the vanity and surrounding work area before coating.
Use a clean method for dust removal that will not leave fibres, residue, or moisture on the surface. Inspect grooves and hinge recesses, where dust can collect. If you are using a product system that specifies a particular abrasive, cleaning agent, or surface profile, follow that system rather than substituting a different preparation method.
Step 5: Test the coating system
Before committing to the visible face of the vanity, test the selected primer and paint—or the manufacturer’s specified coating system—on an inconspicuous area or a removable piece. This lets you check colour, sheen, tool marks, coverage, and compatibility under the actual surface conditions.
Do not treat a small test as proof of long-term performance. It can reveal immediate problems such as poor wetting, unexpected colour, wrinkling, softening, or an unsuitable appearance. Record the product names and the order in which they were applied. If the label requires a primer, bonding layer, or specific topcoat, do not omit it simply because the first coat appears to cover.
Decide whether a brush, small roller, or spray method is appropriate for your setup. A brush may help with narrow profiles and corners, while a roller can be useful on broad flat areas. Spraying requires control of overspray, ventilation, masking, and equipment cleaning. Choose the method you can use consistently and safely rather than the one that sounds fastest.
Stop point: Do not proceed if the test area reacts with the existing coating, remains unsuitable after the label’s stated process, or does not produce an appearance you accept. Change the system or seek advice before coating the main surfaces.
Step 6: Apply the coating with controlled technique
Start with the least visible or most easily corrected pieces, such as the back edge of a door or a removable drawer front. Work in a logical order and keep a wet edge where the product instructions allow. Apply thin, even coats rather than trying to achieve the final appearance in one heavy pass.
Control the amount of product on the tool. Excess paint can collect in corners, profiles, screw holes, and lower edges. Before the coating begins to set, inspect for runs, drips, ridges, and trapped debris, correcting them only in the manner recommended for the product. Avoid repeatedly brushing an area once it begins to lose its workable surface.
Paint edges deliberately. Coat the front, sides, and edges of doors and drawers according to the planned layout, placing each piece so it will not touch a protected surface or collect dust. For the fixed cabinet, work around profiles and corners first, then address larger flat areas. Keep paint away from hinge cups, drawer slides, plumbing connections, and surfaces that must move against one another.
Allow each coat to dry or cure for the period and conditions specified on the label. Do not judge readiness only by whether the surface feels dry to a fingertip. Temperature, humidity, coating type, and film thickness can affect the product’s instructions, so use the label as the controlling source.
Stop point: Stop immediately if you see sagging, bubbling, wrinkling, unexpected softening, or a reaction with the old finish. Do not bury the problem under another coat. Let the area remain undisturbed as directed, document what was used, and determine whether removal or a different system is necessary.
Step 7: Inspect, correct, and reassemble

Once the final coat has reached the product’s stated readiness, inspect the vanity under ordinary bathroom lighting and from several angles. Look for missed edges, uneven coverage, visible dust, runs, rough repairs, and paint on masking lines. Small imperfections are easier to address before hardware and doors are reinstalled.
Correct only defects that the product instructions allow you to correct. A light touch-up may be suitable for a small missed area, but a ridge, sag, or contamination may require the affected section to be prepared again. Avoid aggressive sanding or spot coating that creates a visible difference in texture or sheen.
Remove masking carefully so you do not pull a fresh edge. Reinstall hinges, pulls, and drawer components without scraping the newly coated surfaces. Adjust doors and drawers gently, and check that they open without rubbing. Keep the vanity from heavy use until the coating label indicates that normal use is appropriate.
Stop point: If doors bind, hardware will not sit correctly, or the coating marks easily, stop using the vanity and follow the product’s additional drying or correction instructions. Do not force components into place or assume an apparent problem will disappear without checking the coating guidance.
Know when to pause the project
Bathroom vanity painting techniques work best when the cabinet is a suitable candidate and the existing surface can be prepared without hiding serious damage. Pause the project if the vanity has active leaks, swollen substrate, extensive peeling, mould, loose construction, or an unknown coating that reacts during testing. Painting is a finish change, not a substitute for repairing the source of damage.
Frequently asked questions
What is the most important bathroom vanity painting technique?
Thorough surface preparation is the most important part of the sequence. Clean the vanity, repair suitable defects, sand as directed, remove dust, and test the coating system before painting the visible surfaces. Skipping preparation can leave residue, loose coating, or surface transitions beneath the new finish.
Should the bathroom vanity doors be removed before painting?
Removing doors and drawer fronts can make their edges and profiles easier to reach and helps keep hardware free of paint. Label each piece and its hardware so reassembly is straightforward. If removal is not practical, mask carefully and protect moving parts, hinges, and drawer slides from coating.
Can you paint over a damaged bathroom vanity?
You can address suitable minor surface defects before painting, but paint should not be used to conceal active leaks, swollen material, mould, loose construction, or extensive coating failure. Stop, correct the underlying condition, and reassess whether the vanity is ready for a new finish.
How do you avoid paint on the countertop and sink?
Mask the countertop and protect the sink, backsplash, walls, floor, and nearby fixtures before painting. Press masking edges down carefully, keep the tool under control near the boundary, and inspect the protection before each coating stage. Remove masking according to the product’s readiness instructions.